
Soldering – Tips and Tricks
The following tutorial was first published in Military Miniatures in Review, Issue 57. I hope that you find it helpful in your work.
Us and Them
When it comes to using photo etch even a quick survey of the landscape indicates that there seems to be distinct camps among modelers. For some, working with photo etch is the scourge of the modeling world, while others seem to embrace the delicate brass bits. Most, however, seem to fall somewhere in between the extremes; a sort of reluctant acceptance that at some point you will be using brass on your own kit. In my case, although I could see the potential of using the brass accessories, I was in the camp of reluctant user. I could not seem to get over some of the technical hurdles.
 My first experiences using photo etch were quite timid, limited to with a few small items such as clasps, brackets, miscellaneous screens, or small box. Over time the bending and folding became easier for me and I could feel my confidence slowly increasing. Soon, without hesitancy I was able to make simple folds and bends and even glue together a few minor photo etch assemblies. As I progressed, moving onto more complex items, I quickly came to realize that relying on CA glue to hold together even the smallest photo etch parts had its limitations. These shortcomings would certainly make it more difficult or even prohibit me from taking my work to the next level and tackling some of the more complex projects available to modelers. It became apparent that if I was to truly embrace and integrate the potentials of photo etch into my projects I would need to learn how to come to grips with the soldering iron. Can you sense my apprehension? In my mind soldering photo etch was certainly the most advanced technique reserved only for the selected few who had traveled to the Crossroads.
As with most of my modeling I learned through trial and error; working with photo etch and the use of soldering being no exception. There is a variety of quality soldering products available to the modeler, some with a few more features than others but they all share the same principal which is to provide sufficient heat in order to melt the solder resulting in a strong, durable join between two brass pieces. My tools are simple and basic: An inexpensive 40wattt iron, solder, flux, pliers, tweezers, single edge razor blades, sand paper, steel wool, and Small Shop folding tool.
Just the Facts…
Before we get to the discussion lets review some of the terms and techniques that are used when soldering:
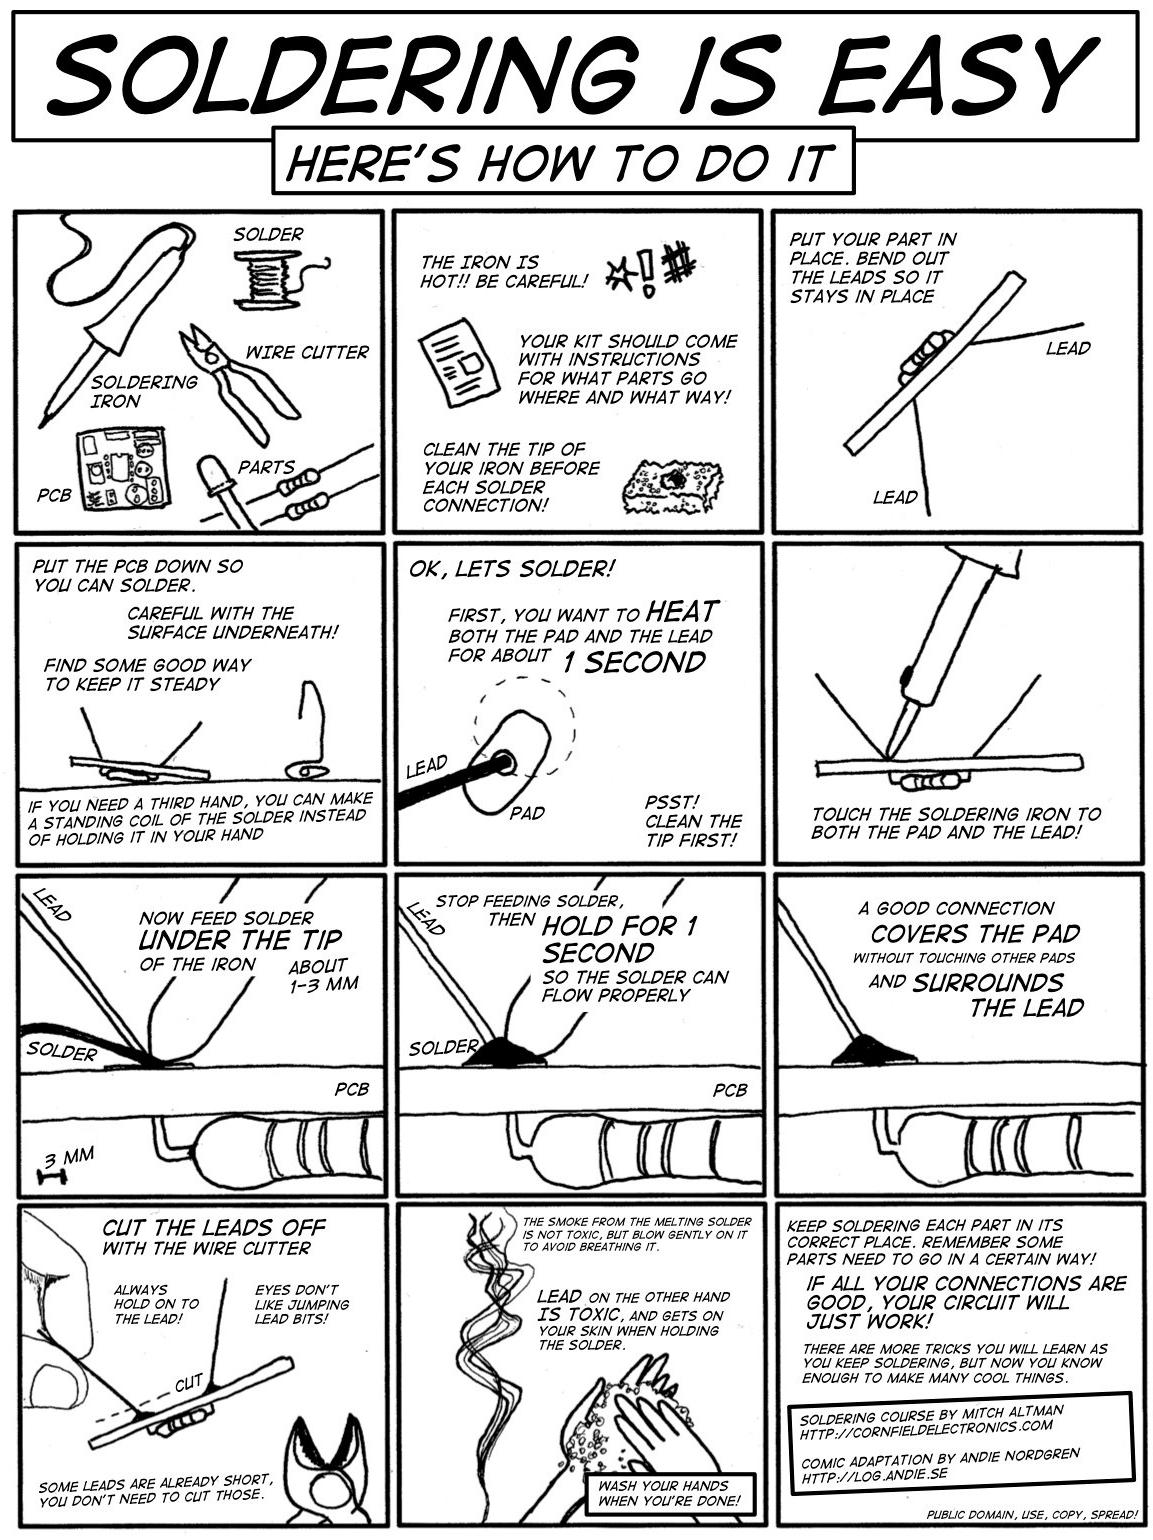
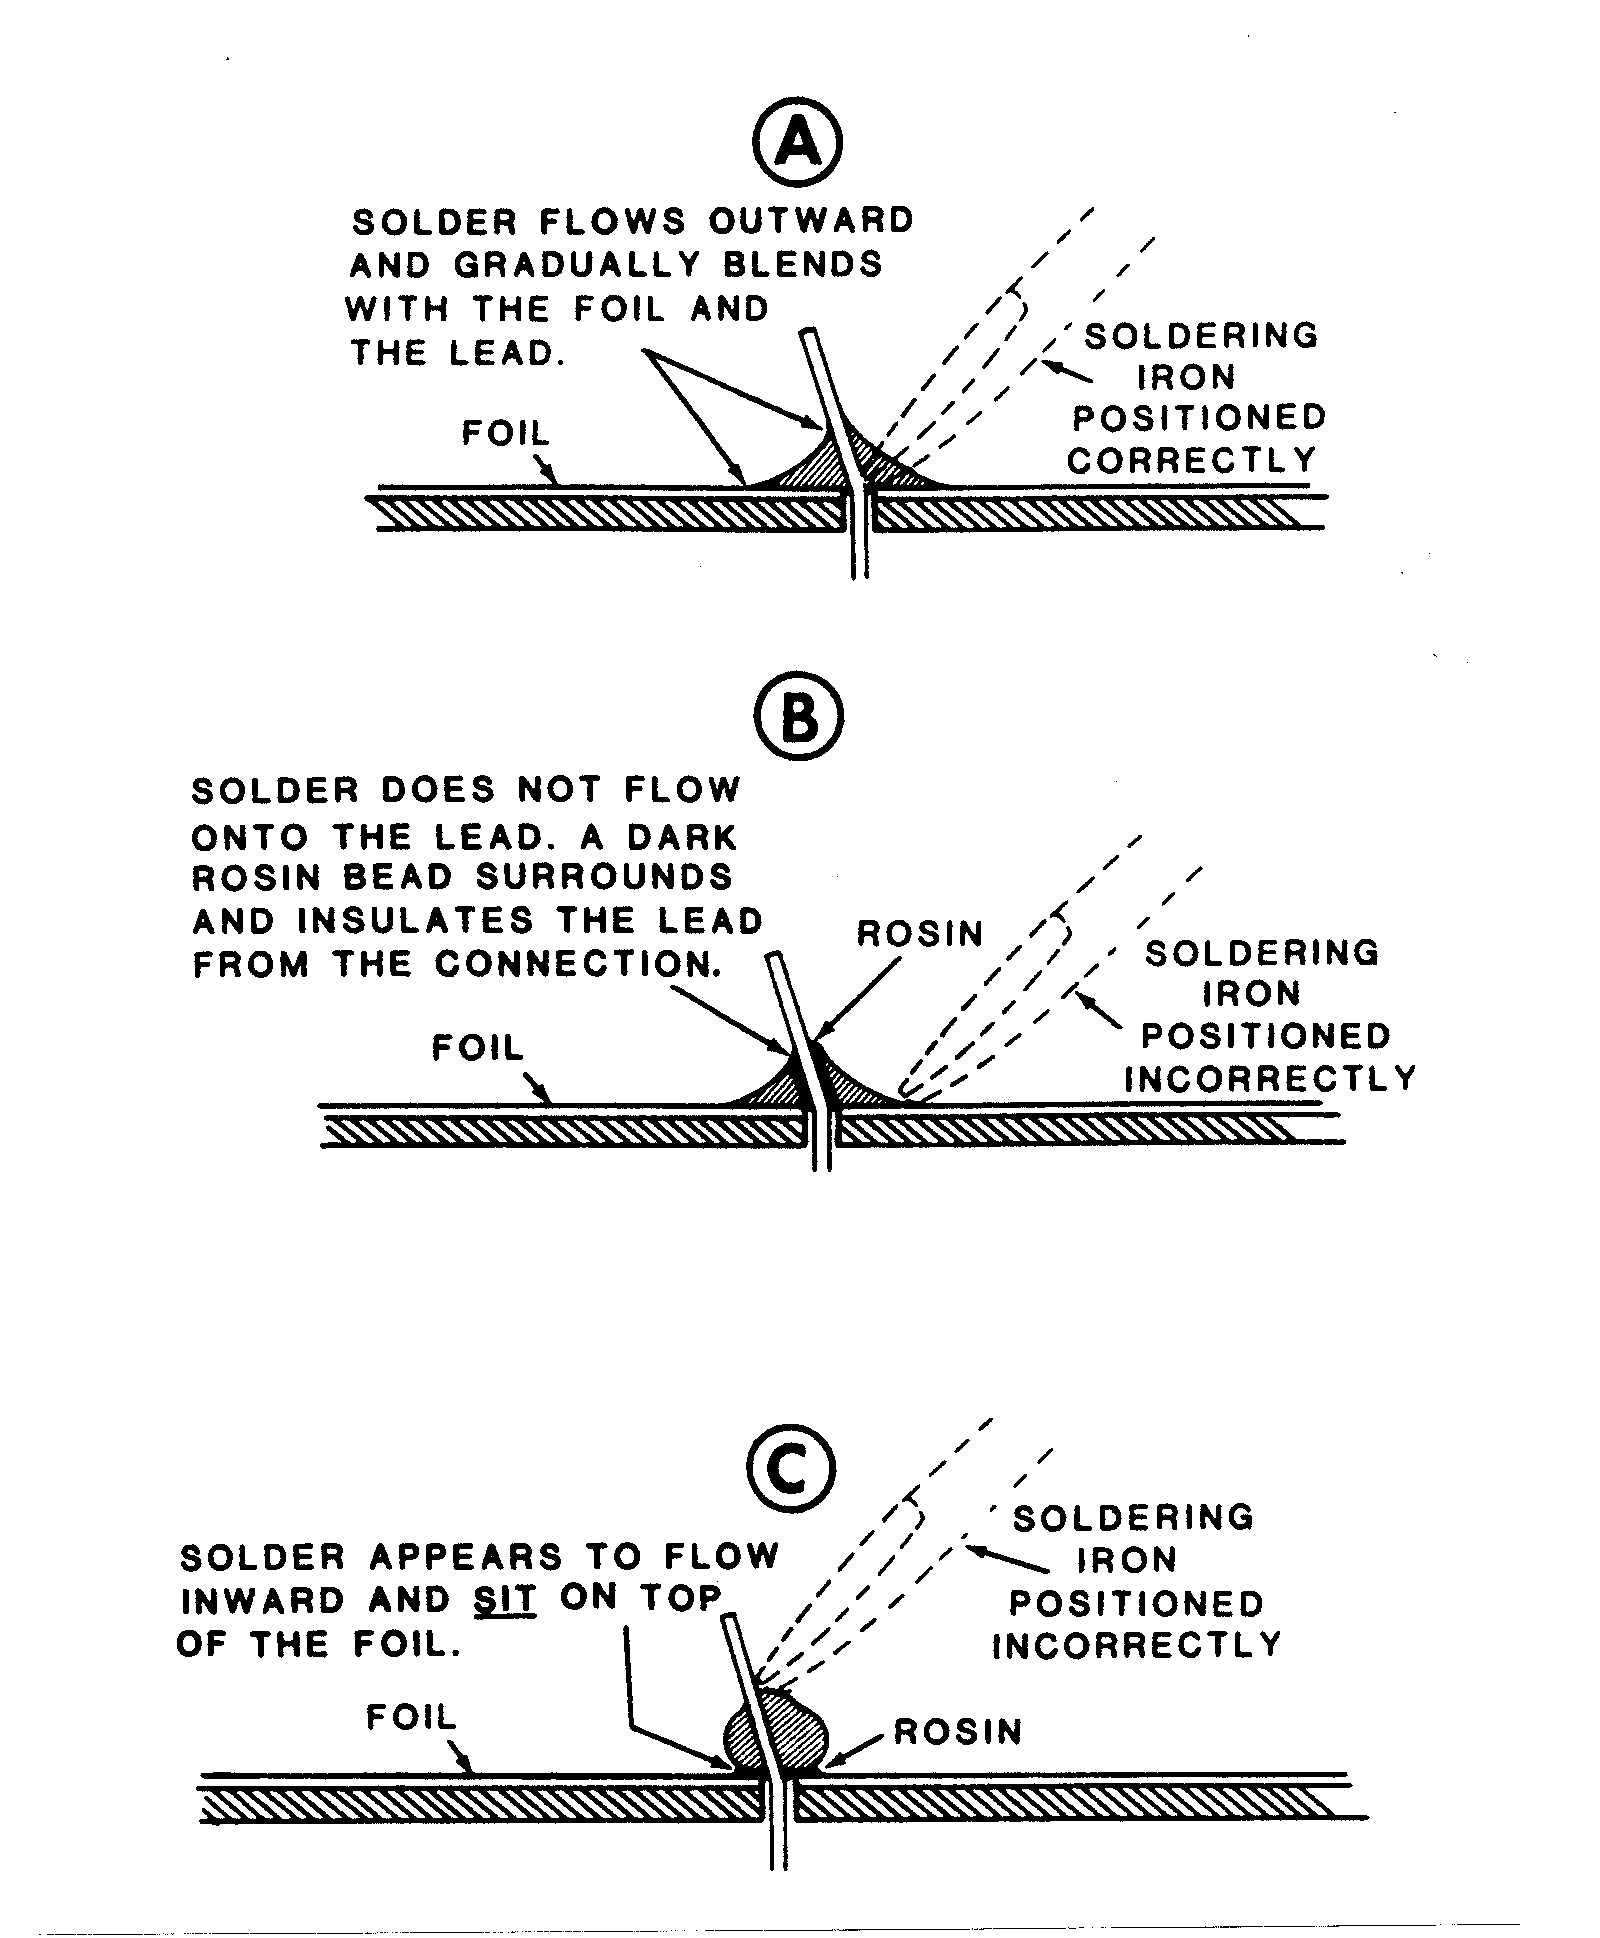
Flux – In soldering flux serves a threefold purpose: it removes oxidation from the surfaces to be soldered; it seals out air thus preventing further oxidation, and improves the wetting characteristics of the liquid solder. Basically, wherever you place the flux is where the solder will melt; we can use this to our advantage to create nice, clean joins.
Solder – Easy to find at most electronic, hardware and home improvement stores it is the material used to join two metallic surfaces together. In this article I’ve used 60-40 rosin core solder.
Tinning – The process of “pre” soldering your surfaces before making the actual join.
Annealing – Heat treatment that alters the microstructure of a material causing changes in properties such as strength and hardness. This technique is especially helpful when used to soften brass for ease of bending.
          |

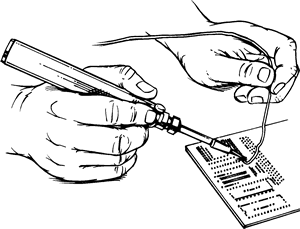
Generally, the first step in soldering is to TIN the parts that you will be using. Begin by applying a light coat of flux to the surfaces that you wish to solder. Flux is a wonderful tool as it basically dictates where the solder will stick to your photo etches pieces. I like to use a small brush to apply the Flux only to the area(s) where I want the solder to flow. Next, in homage to the “less is more” philosophy I cut small “chips” of solder with my knife and place the chips directly onto the Flux. The last step in the process is to apply heat to the area by touching the tip of the soldering iron into the Flux near the solder chips. Soon one hears the reassuring sizzling sound as the Flux begins to bubble. After a few moments the surface temperature reaches a sufficient point where the small chip of solder will liquefy. Then, keeping the soldering tip in contact with the liquefied solder, I simply spread the solder over the pre-fluxed area. This is the process of Tinning.
When it comes time to join the etch parts I simply re-apply a little flux over the Tinned areas of each piece, and then while holding the parts together (usually with tweezers) I again reapply heat to the area. The flux will sizzle as the solder re-liquefies between the brass parts. Removing the heat stops the process with the result being a strong, durable bond. Afterward a simple cleaning of the area may be required if the solder has crept outward from between the parts. This can be done by a light sanding with fine grit paper and/or steel wool.
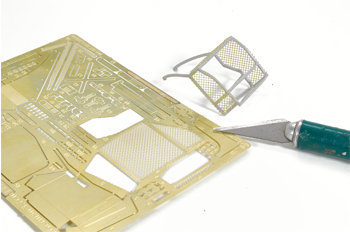
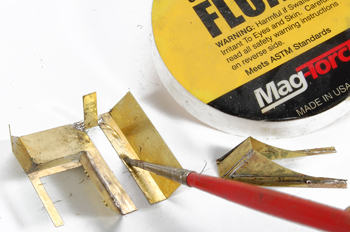
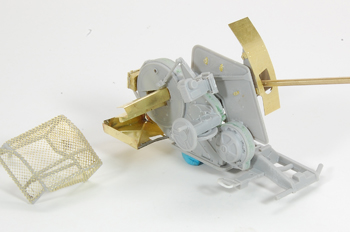
 For demonstration purposes I am using the Trumpeter Flak 43 base kit along with the E.T. Model photo etch upgrade set. Because of the complex bends and size, the large gun shield provides a perfect example of the type of assembly that would be difficult to achieve using CA glues alone
This is my first experience with using E.T. Model products and I was very pleased with the entire package; the photo etch was well crafted while the instruction are clear and easy to follow.
I love the small of burning….
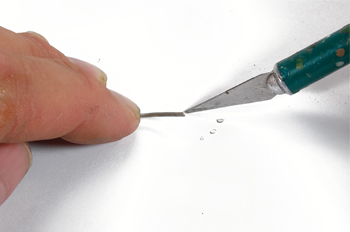
As in the case with the spent shell basket even with projects that we will be using solder there are plenty of times when CA glue will still be used. I generally use a sharp blade to remove the etched parts from their frets.
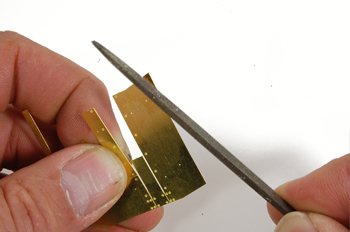
Cleaning the etched parts of the small attachment burs is easily accomplished by using a small file.
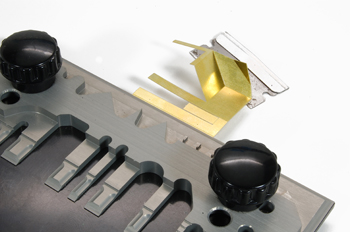
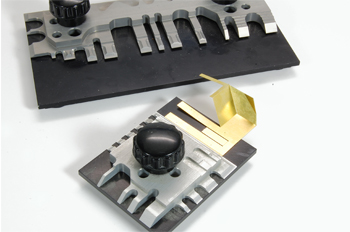
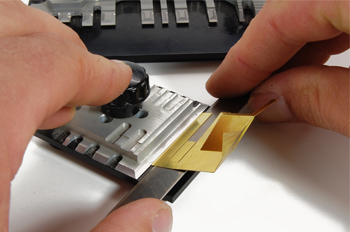
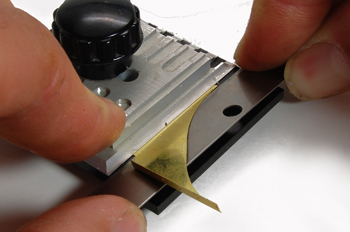
Using a good quality bending tool such as the Small Shops Hold-n-Fold makes working with photo etch much cleaner and easier. Sharp, precise bends are important for creating quality photo etched assemblies.
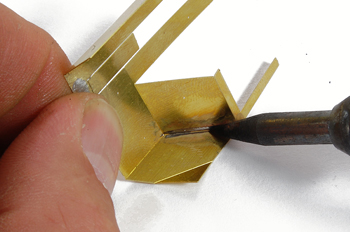
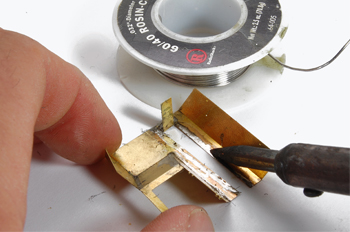
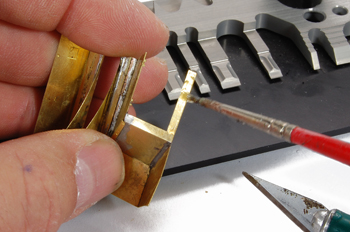
Getting ready to solder. Using a small brush Flux is applied only to those areas where I intend to join the parts with solder. In this case, I am lightly brushing the Flux on the two edges of the shield assembly in order to create a strong corner angle.
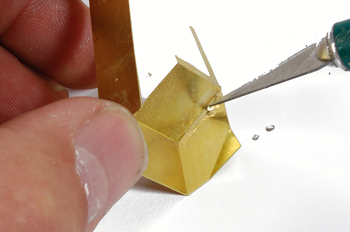
“A little goes a long way” when it comes to soldering. In order to limit the amount of solder (and mess) I cut small “chips” of solder from my spool.
The small solder “chips” are placed onto the Fluxed surfaces; the stickiness of the Flux will hold the “chips” in place.
The tip of the soldering iron is touched to the brass surface. The Flux begins to sizzle, the solder liquefies and then is spread using the tip of the iron.
    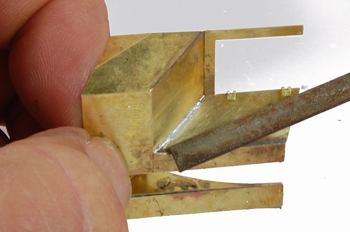    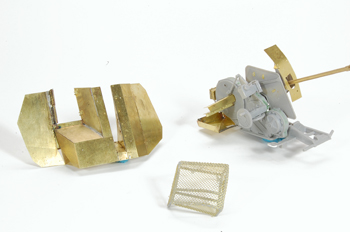  |
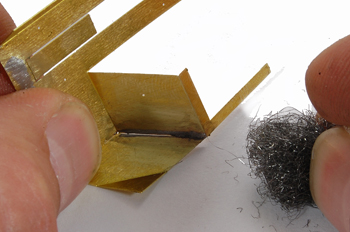
Any excess solder is easily sanded smooth using steel wool. Limiting excess solder and keeping your joins clean is important for achieving a nice looking result.
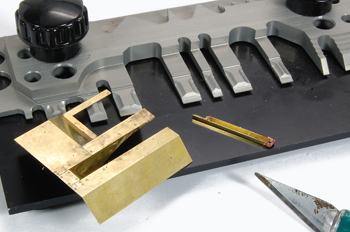
The bending process continues as more etched parts are readied for assembly.
In some cases using a simple pair of pliers is the best tool for the job. In this case these flat nosed pliers were the perfect width to make this bend.
Tinning parts is an important technique for attaching photo etches onto itself. Here, one side of an assembly (small brackets) are readied for assembly (Tinned) by brushing them with Flux and the solder “chips” are melted over the surfaces.
Flux is applied to the opposite part where the brackets are to be placed. Then the Tinned parts are placed solder side down onto the fluxed surface. The heat from the soldering iron will transfer through the thin brass part and liquefy the solder on the underside, thus attaching the parts.
A file is used to clean up excess solder.
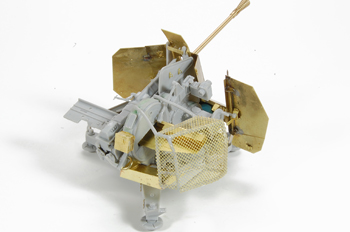
A few photographs of the Flak 43 with all of the shinny parts attached.
And there you have it, soldering in a few easy steps. As with any modeling technique better results will occur with practice and experience. Rather than learn on your nice, new shinny kit parts use the extra bit from the photo etch frets and practice. In fact, the scraps are great sources for providing material to practice every aspect of your photo etched skills, from bending to soldering.
If there is any single point that I feel should be reintegrated is to be restrained with the amount of solder that you use. Even the thinnest coating of solder yields more than enough holding power for the type of work we do. Using too much solder only will give you more build-up; less definition, tougher clean-up, and worse….destroyed parts. If you should make a mistake, soldering also has an added benefit over glues in that you can UN-solder parts if needed. Yep, just add a little flux to the area, reheat and pull the pieces apart. This is especially handy if you should happen to attach a part incorrectly or it became crooked during soldering.
 Of course the bending and soldering is only half of the game; there is still the matter of painting and weathering your kit. When working with any mixed media kit it is important to thoroughly clean and prime the parts before painting. This is especially true when working when soldering as there will undoubtedly be some remaining film or grime from the process. Washing can be done with soapy water as the Flux is water soluble. When choosing a primer I look for one that I know will adhere well to both the plastic and photo etched surface such as Gunze’s Mr. Surfacer 1000 or Plasti-Koat automotive primer.
Sprint to the end
I painted the base and camouflage colors of Flak gun and trailer using Tamiya XF paints. After sealing the base colors with Johnson’s Future acrylic floor wax I applied dot filters using a variety MIG Productions Abteilung artist’s oil paint colors. Filters, also from the MIG Productions line followed to subtlety provide color variations to the base colors and then finally MIG Productions pigments were used to add a layer of dirt and grime, especially to the lower areas of the gun and wheels of the trailer.
I hope that this small demonstration has served to take a little of the mystery out of soldering by showing you a few simple techniques. Enjoy the brass bits and happy modeling.
Good stuff!