
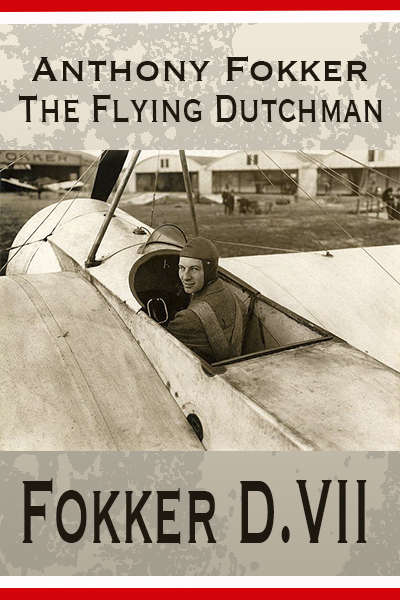
Flying Dutchman : Fokker DVII
When World War I ended in 1918, the Armistice required, among other things, that Germany turns over 1,700 warplanes, including “all D.VII’s.” Thus did the Allies compliment the boyish Dutchman whose highly maneuverable fighter plane, (the Fokker D.VII) boasted machine guns that could fire through a whirling propeller without hitting it. And thanks to the inventive Anthony Fokker and the Fokker D.VII, German aces terrorized Allied pilots in the closing months of the war; and the victors wanted to monopolize that fearsome technology.
Fokker was surely some kind of genius. He taught himself to fly, then to build flying machines.. This was in 1911, when he was 21, just eight years after the Wright Bros. invented powered flight. His ambition took flight as well. Upon the onset World War I, he applied for German citizenship because that was a requirement if he was to sell aircraft to the German air force. During the First World War, the Dutchman Anthony Fokker built airplanes first at his factory located at the Johannisthal airfield, near Berlin. In 1913 he moved to Schwerin. During these years, many types were designed and build there, among which was the famous ‘Eindecker’ series, and the Dr.I triplane. At the end of 1917, Fokker was out of the picture as a supplier for fighter aircraft. This is the time where the story of the D.VII starts.
.
The building of the prototype of what was to become the Fokker D.VII started in December 1917 in the Fokker factory at Schwerin. At that time, 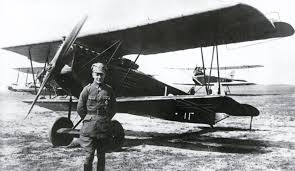 Reinhold Plaz was working as a designer. The designation for this type was V.11, which stands for Versuchsmachine no. 11 (Experimental aircraft No. 11). This V.11 had a number of novelties that included a car-type radiator in front of the engine and cantilever wings with no external bracing wires, which made for a very clean appearance.
At the end of January 1918, the first competition for D class machines was held at Adlershof. In this competition, German pilots from the front flew in new types, to test them, and choose which one would be produced for the front. In this first competition, the V.11 came out as the ultimate winner and was designated D.VII.
Anthony Fokker tells in his autobiography “The Flying Dutchman” that he flew the V.11 before the contest started. He noticed that it wasn’t flying too well, and it needed to be changed. So, working all weekend day and night, Fokker and some mechanics lengthened the fuselage and enlarged the vertical fin. Flying it again, Fokker noticed that it was very sensitive on the controls, but further, it was flying wonderful.
Fokker was awarded large contracts for the aircraft that was to become the D.VII. Because the Fokker factory at Schwerin did not have the capacity to build large numbers of the plane, Fokker’s rival Albatros had to manufacture the D.VII under license. Eventually, they were built by 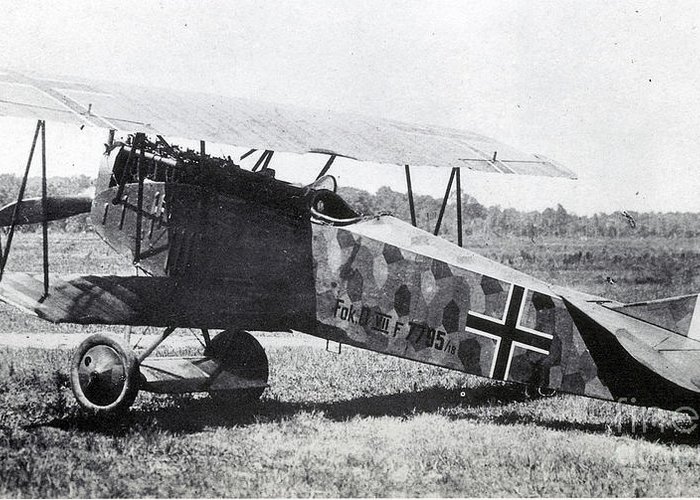 the Albatros factories at Johannisthal and the Ostdeutsche Albatros Werke at Schneidemühl. Fokker received a 5% fee from Albatros for every D.VII they build. The total number of D.VII’s built is unknown, but production is estimated at 2000 by all three factories.
In the end, not all D.VII’s were handed over in accordance to the Armistice agreement. Some were flown back to Germany by their pilots and hidden in sheds. From the ones that were flown to the collection points of the Inter-Allied Control Commission, some were wrecked during landings or taxiing. After the war, some were sold abroad. Anthony Fokker flew from Germany and smuggled six trains with sixty wagons each full of airplanes and tools to Holland. Among these were 120 D.VII’s. In Holland, he started a new company, but that is a different story.
This introduction brings me to the second of my WNW projects, the Fokker D.VII. While I’ll show my work along the way here, and contribute some narrative explanation., I must first take a trip down memory lane. My first modeling project around the D.VII was when I was around 10 year of age. 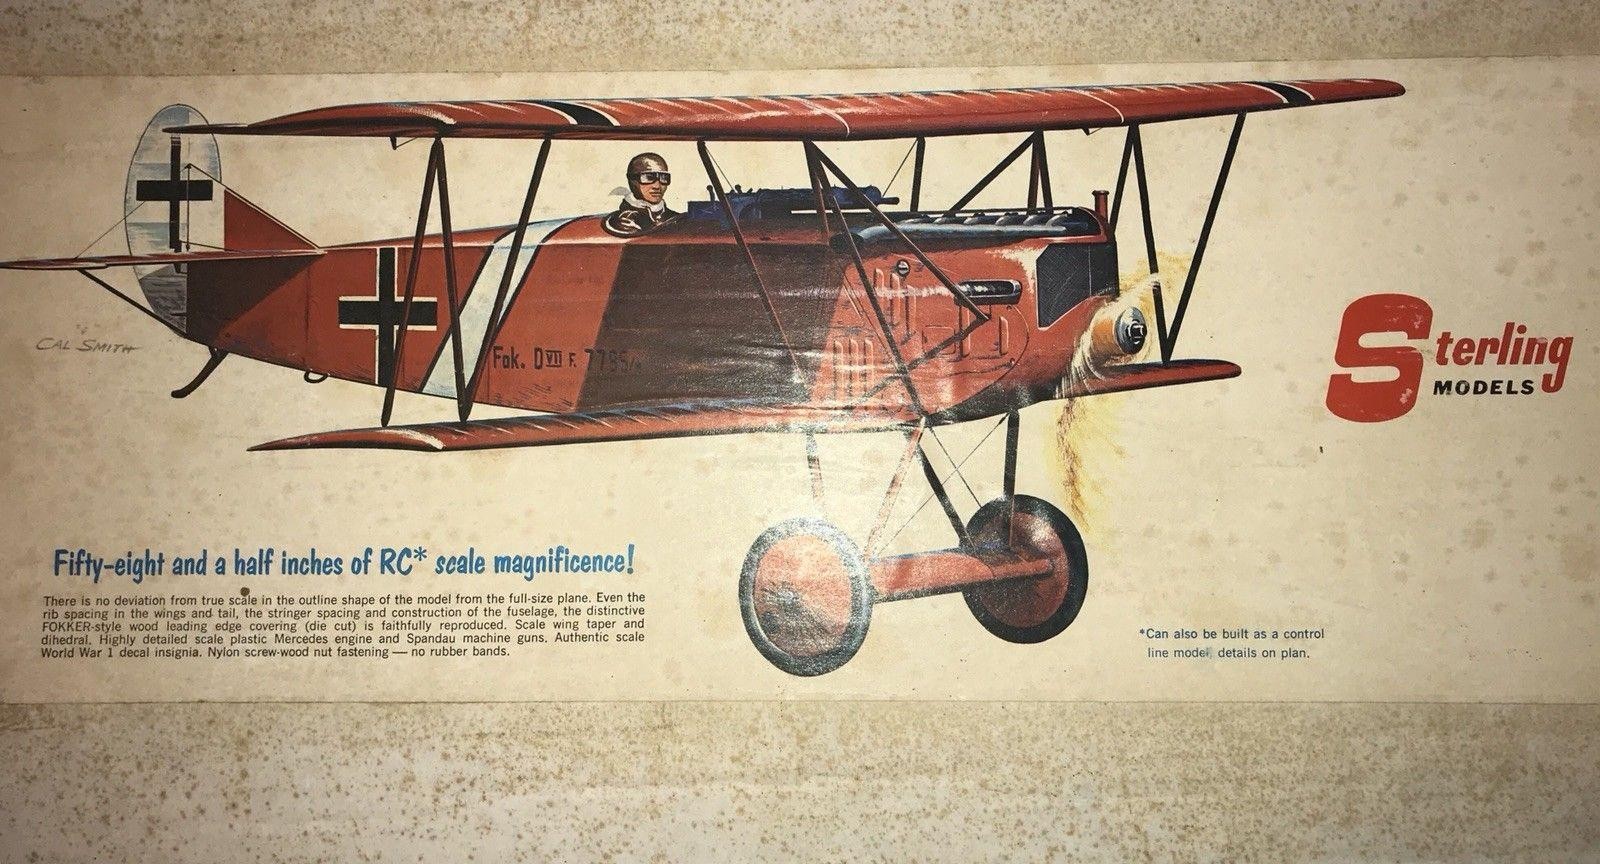 It was a balsa and fabric kit, with a gas engine – if completed it would have been a tethered, flying model. I’m not sure of the scale, but if memory serves the wingspan must have been 24-28″. It was big, it was massive, it had a lot of parts that needed to be cut to size from many pages of instructions.
Obviously, this project was well beyond my skill level at the time (probably still is), but I do remember looking forward to the evenings when my father could take time to help me along, guide me through the steps and give me a bit of reassurance. In the end, I never did complete that build. 
I’ll use that intro as a nice transition to this current project. This is the second of my WNW projects, the Junkers D.1 being the first. As I mentioned in the Junkers’ article, I was curious about the WNW models as I’d heard so much about them. After my experience with the Junkers D.1 I was hooked. The building and painting experience was simply fantastic and re-energized my modeling mojo. The D.VII was the perfect and obvious follow-up, first because it had minimal rigging (always being practical), and secondly, I very much wanted to revisit the aircraft from my earlier memories
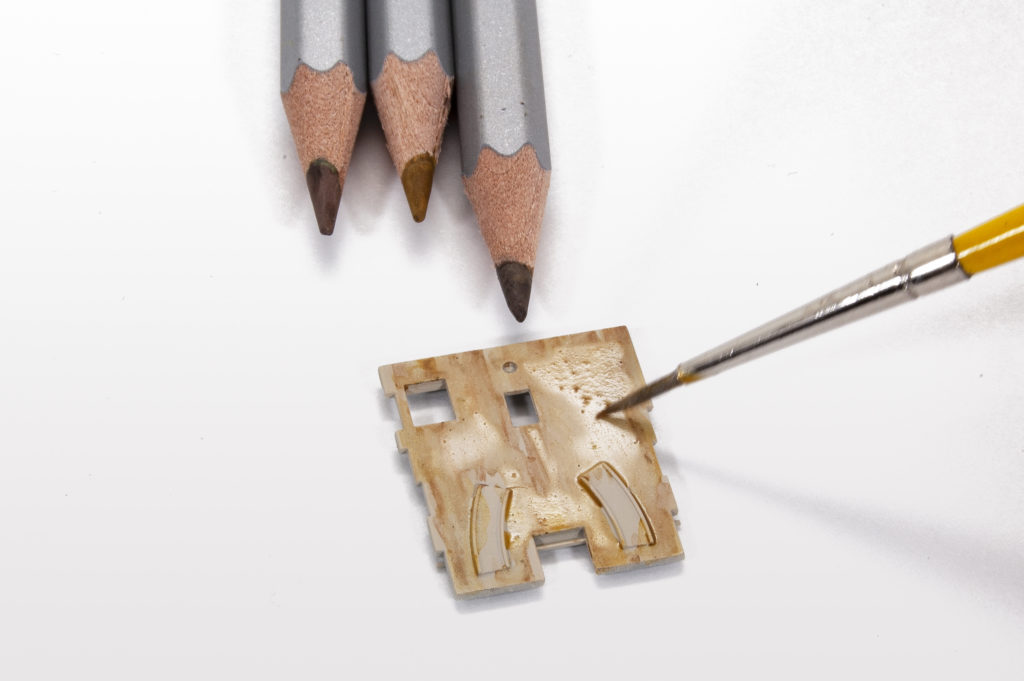
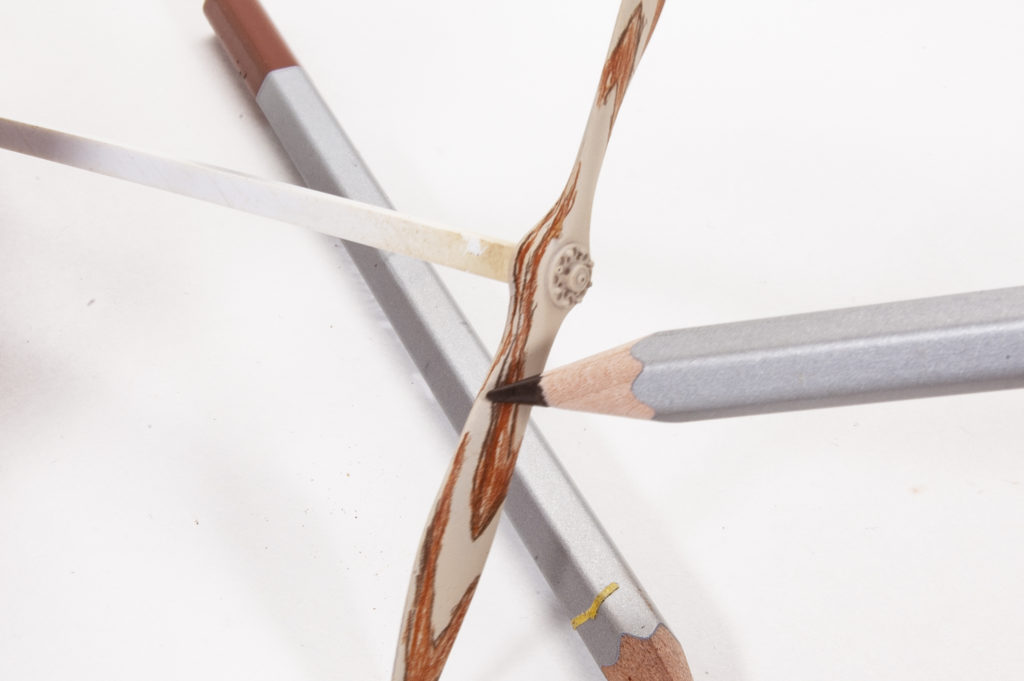
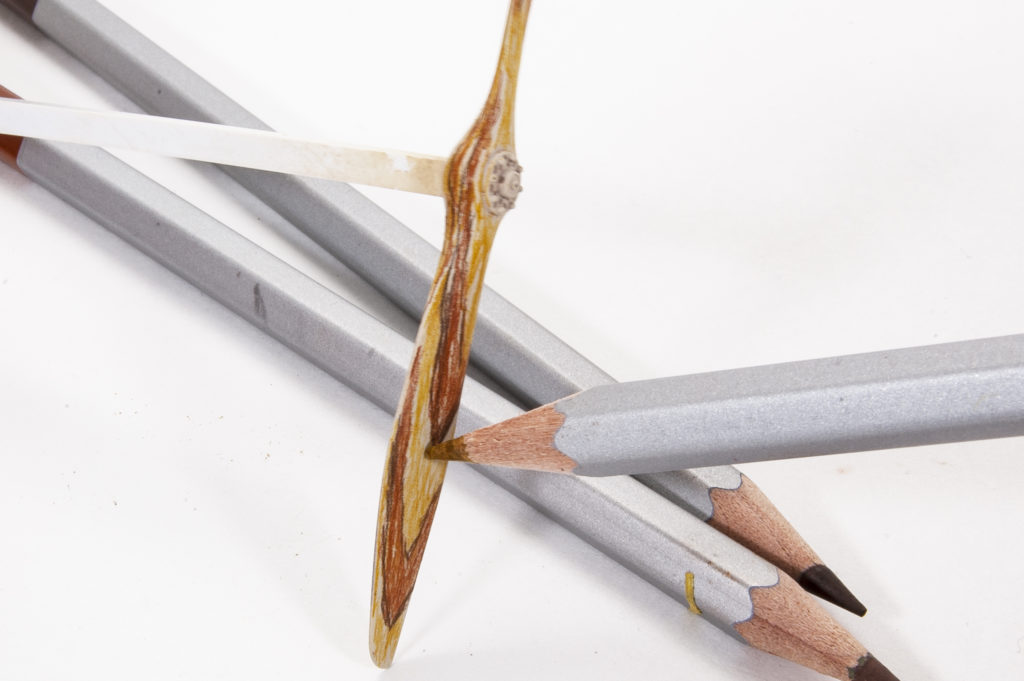
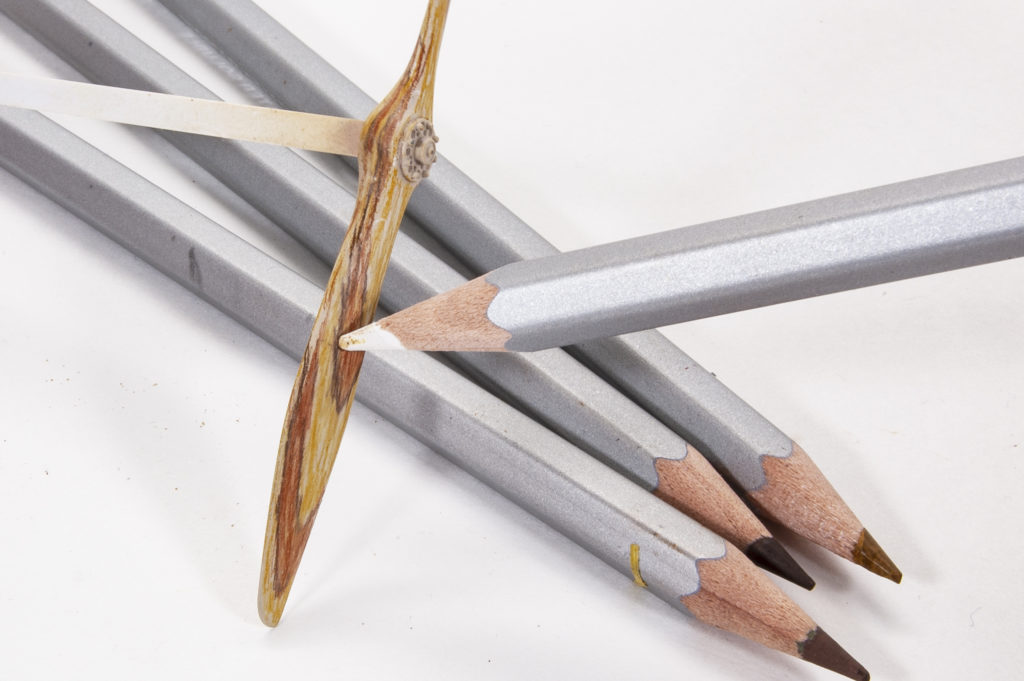
Having experienced the WNW Junkers, I began this project with a bit more confidence. And with that extra confidence, I thought that I’d try a few new ideas, things that might work on this project and perhaps translate to my usual armor modeling. Right off the bat, I experimented with watercolor pencils in order to replicate woodgrain surfaces. My first attempts were on the flooring of the cockpit and instrument board, maybe not the best results but certainly passable. Later I will use this same idea on the propeller.
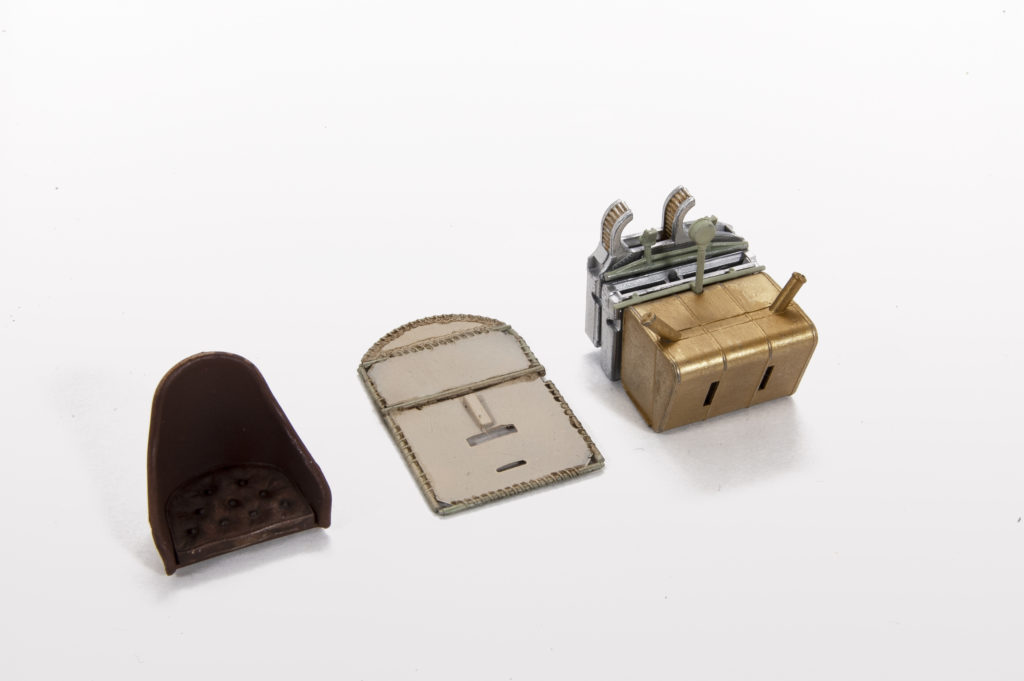
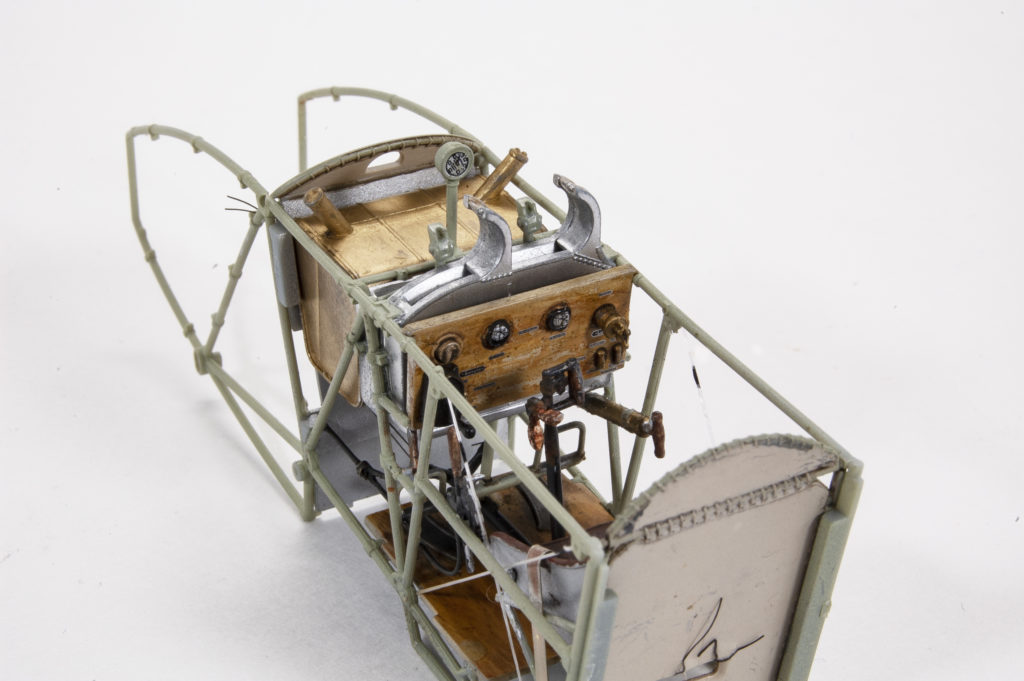
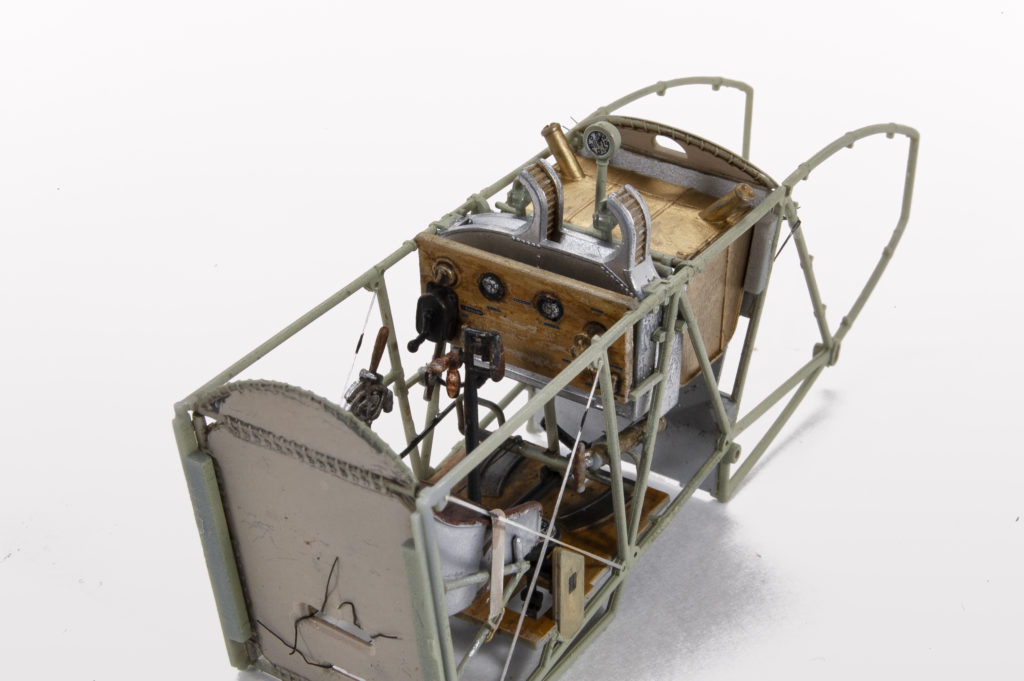
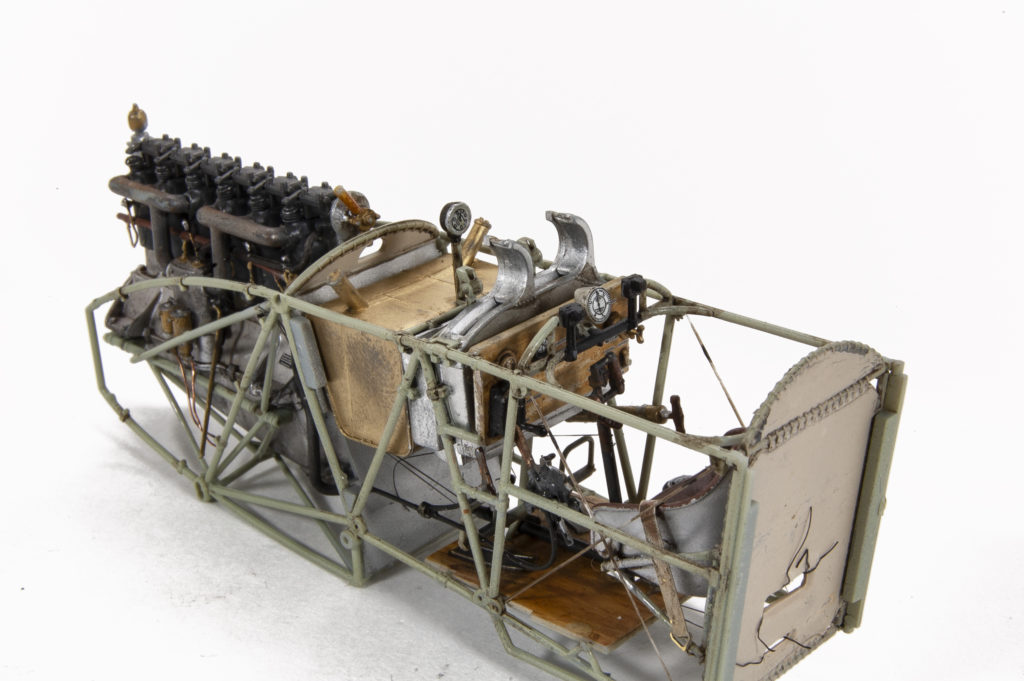
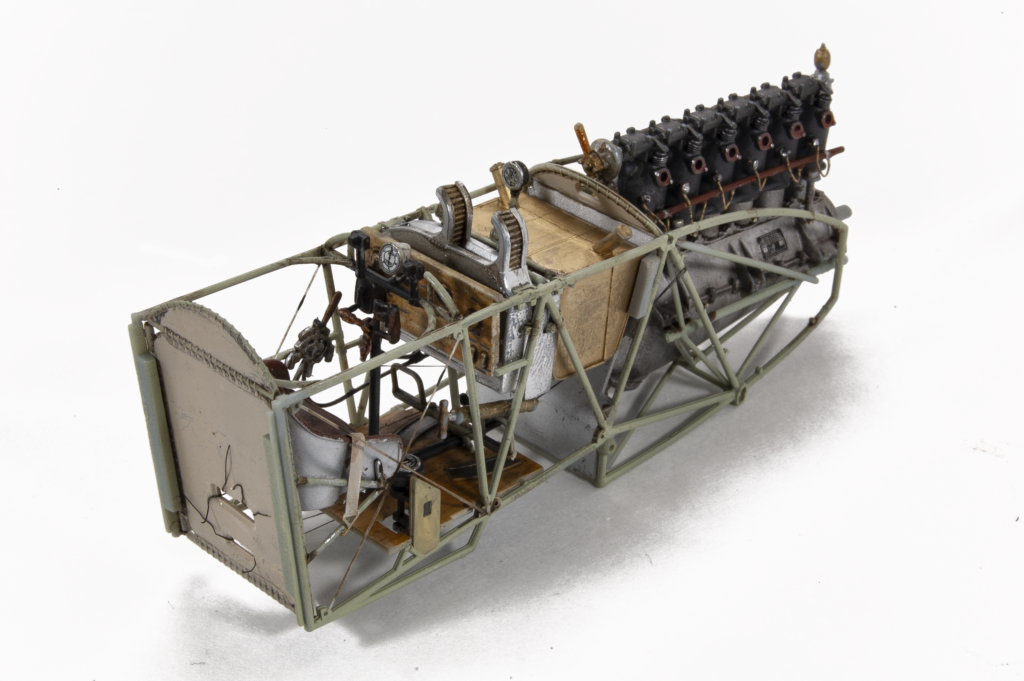
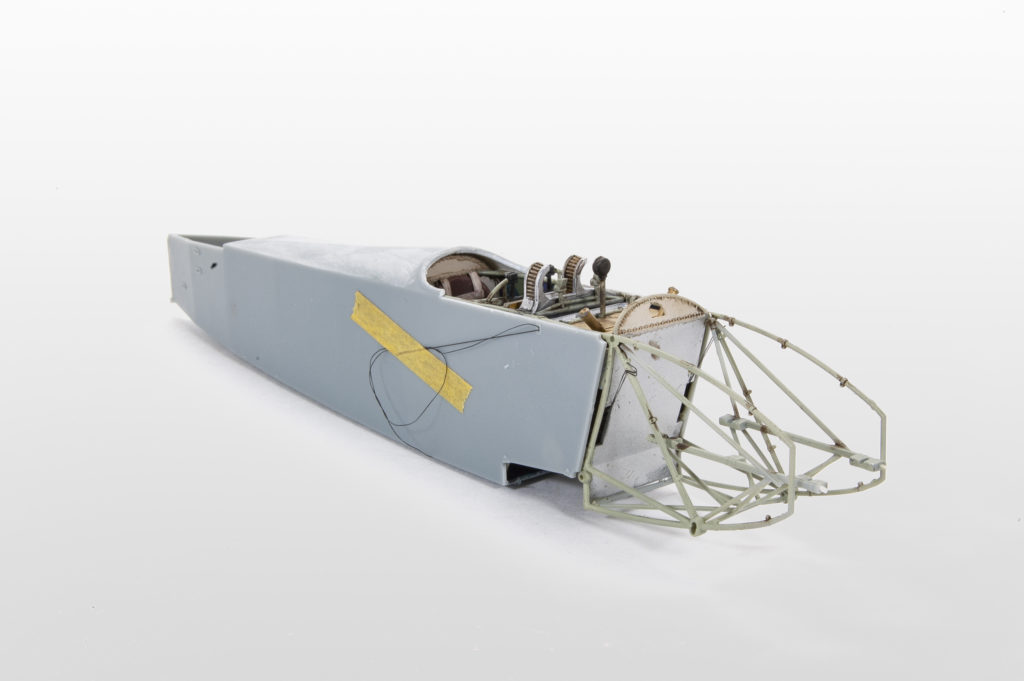
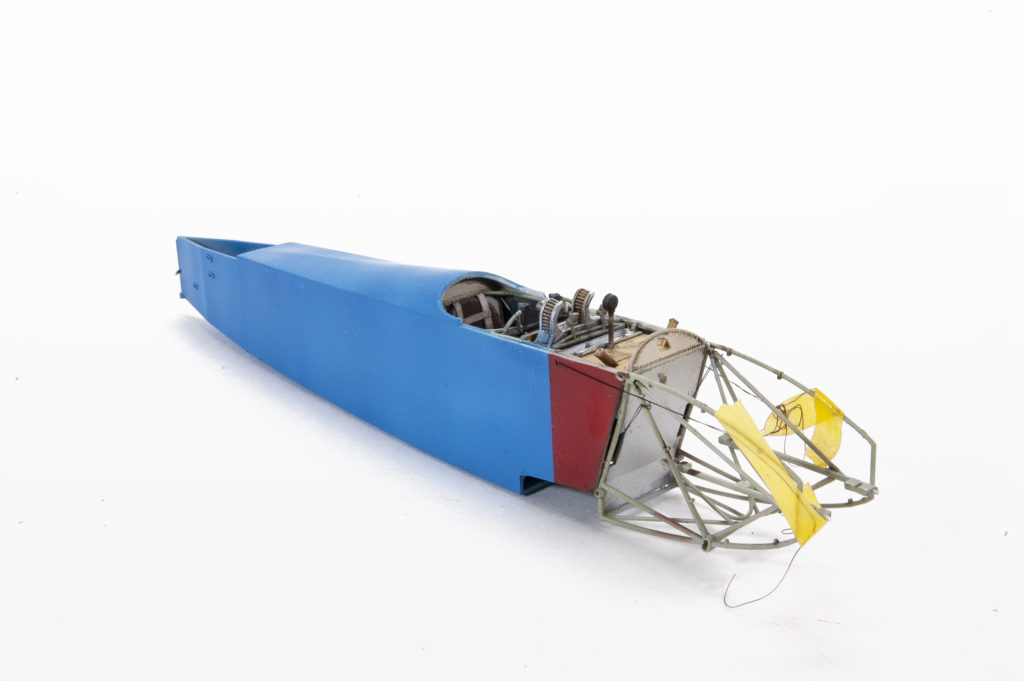
I followed with the completion of the cockpit and frame. Again, I find myself really enjoying these smaller sub-assemblies, working them through completion and being rewarded with this little jewels.
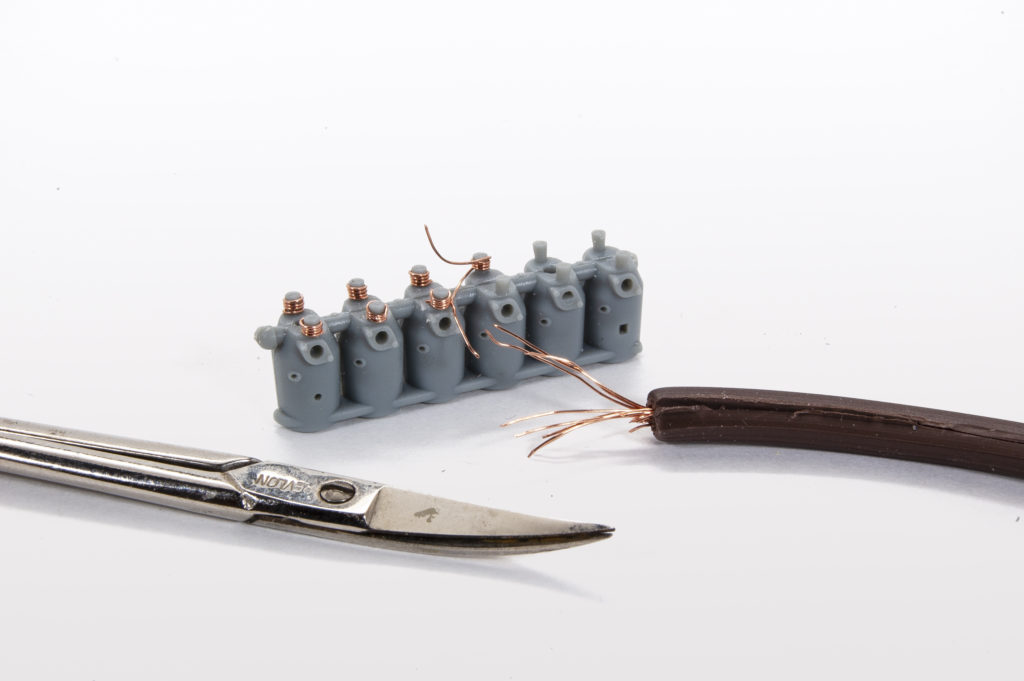
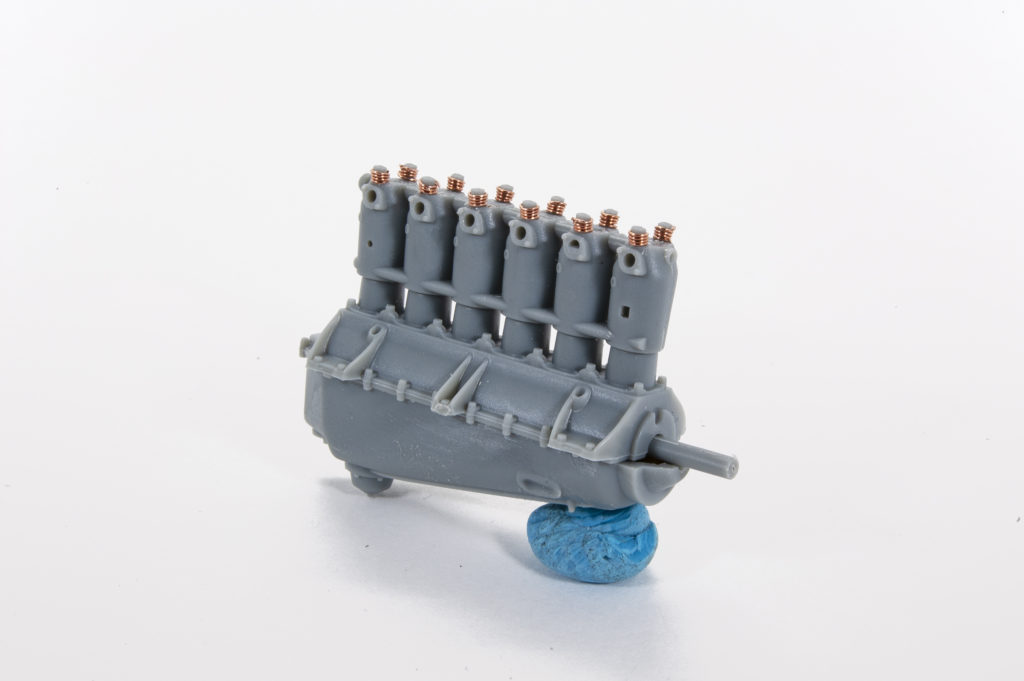
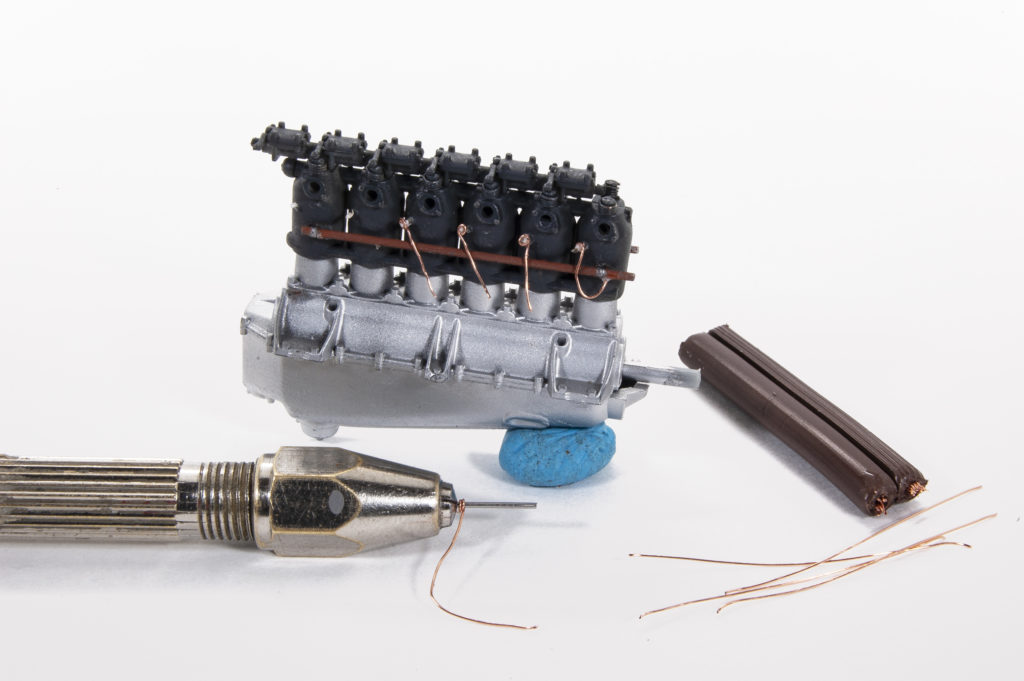
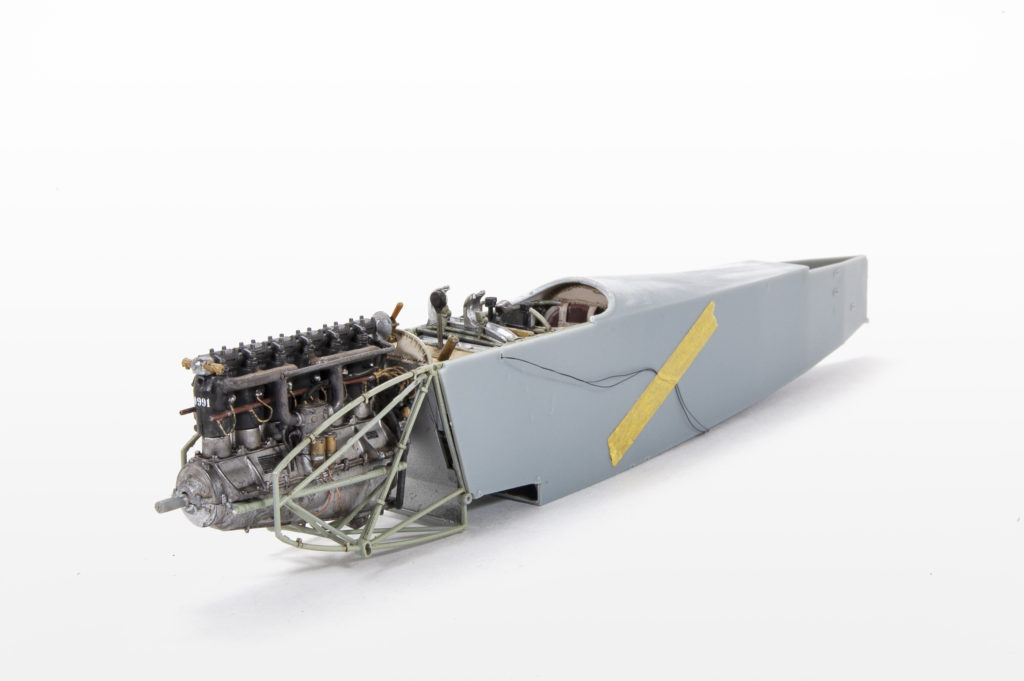
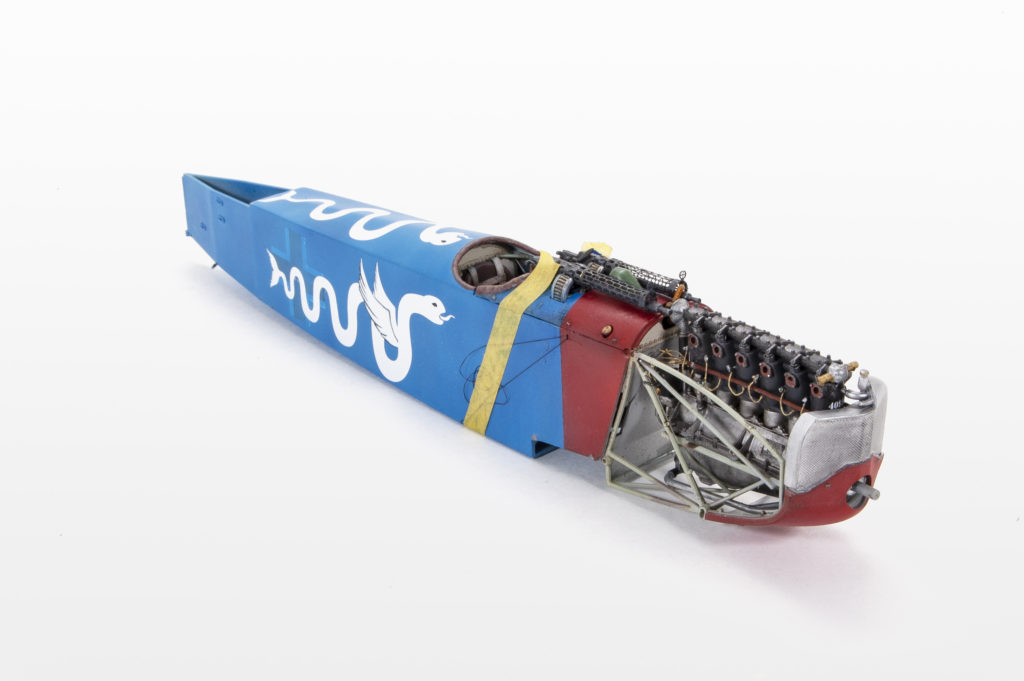
Next came the engine and once again these little components are simply fabulous as built from the box, but with my added confidence and a little research, I added a few extra details. Details such as wiring of the plugs. I’m not an expert at this type of detailing by any means, but at least it looks cool. Funny thing, in the end, most all of this work ended-up being covered by the cowling. Of course, I could have left the cowling covers off…but I didn’t. Maybe next time?
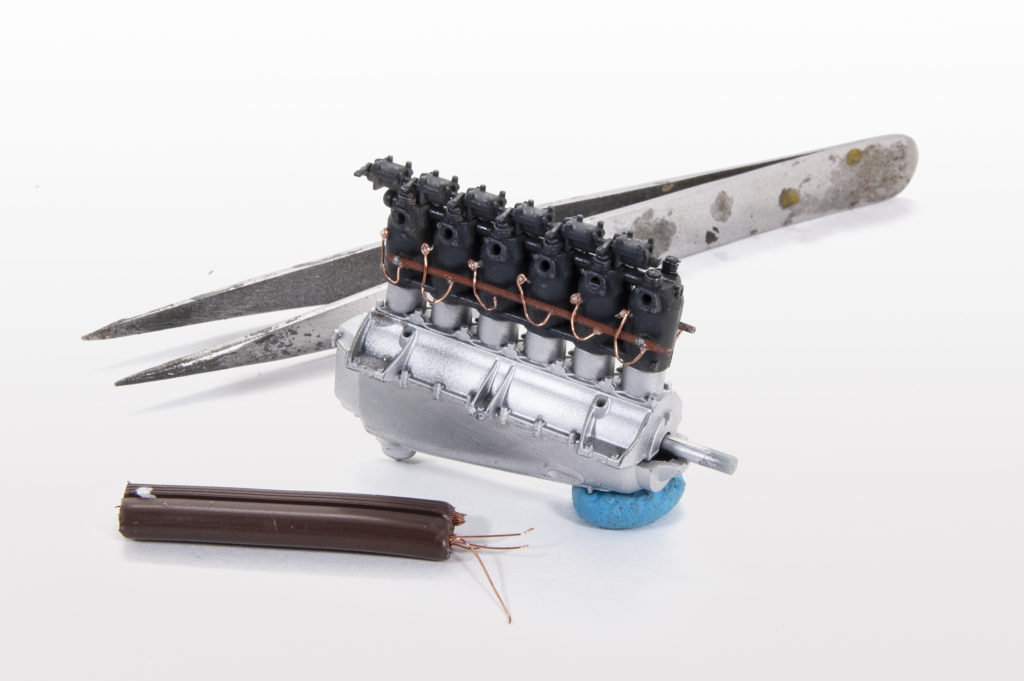
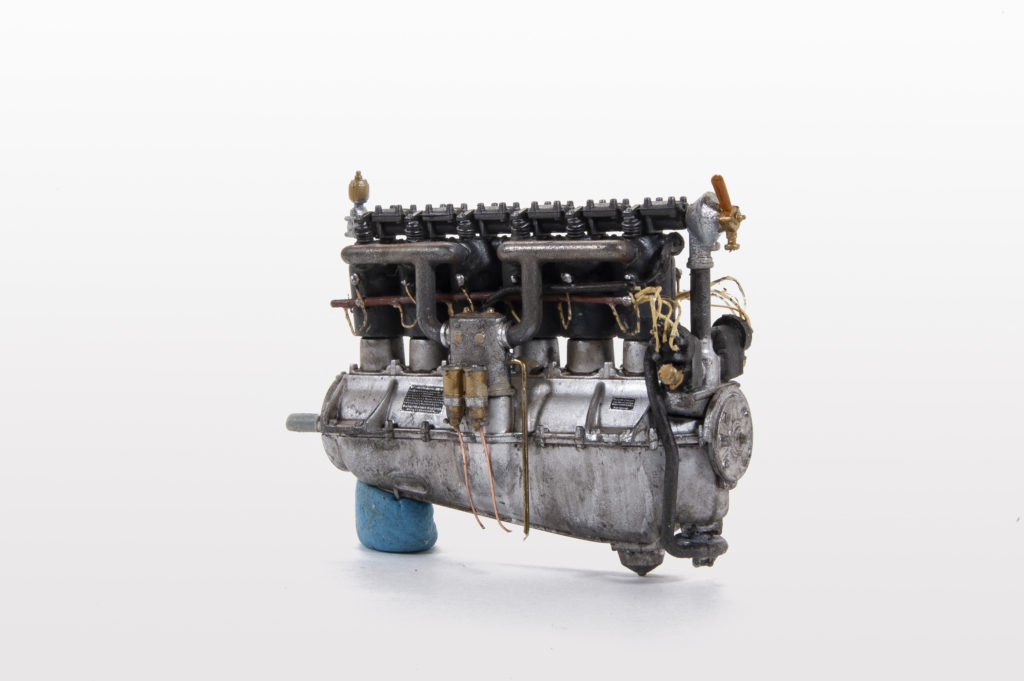

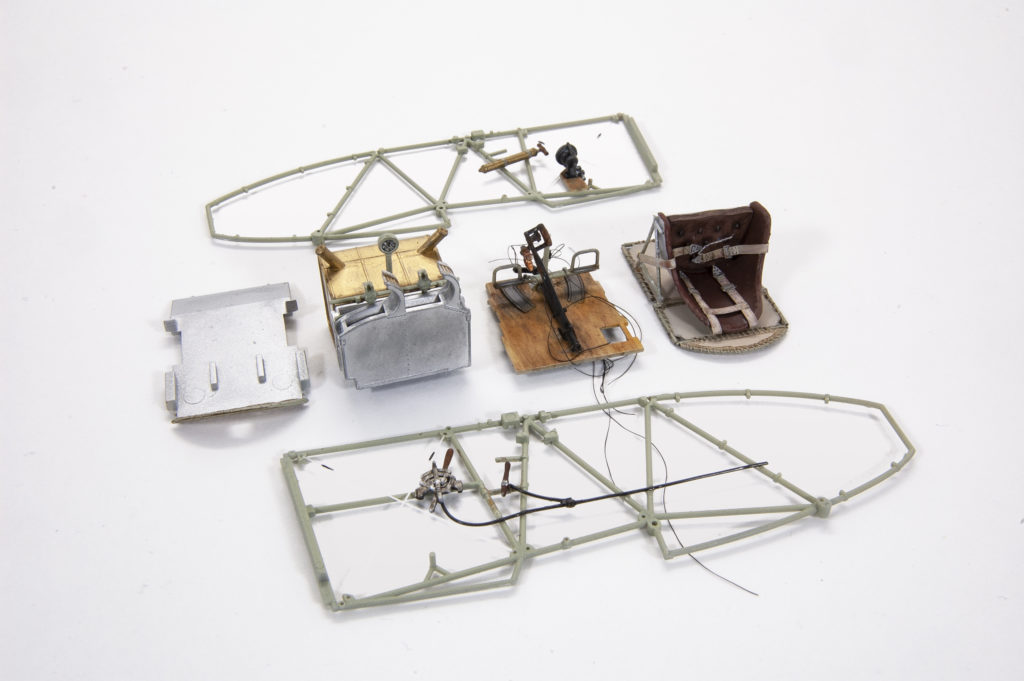
At this point construction of the cockpit, engine and mounting supports is going along smoothly. But I will admit that since each of these components is built individually, it’s always a relief when they are all fitted and glued together. Once again, the sum of the parts makes for a very nice sub-assembly presentation.
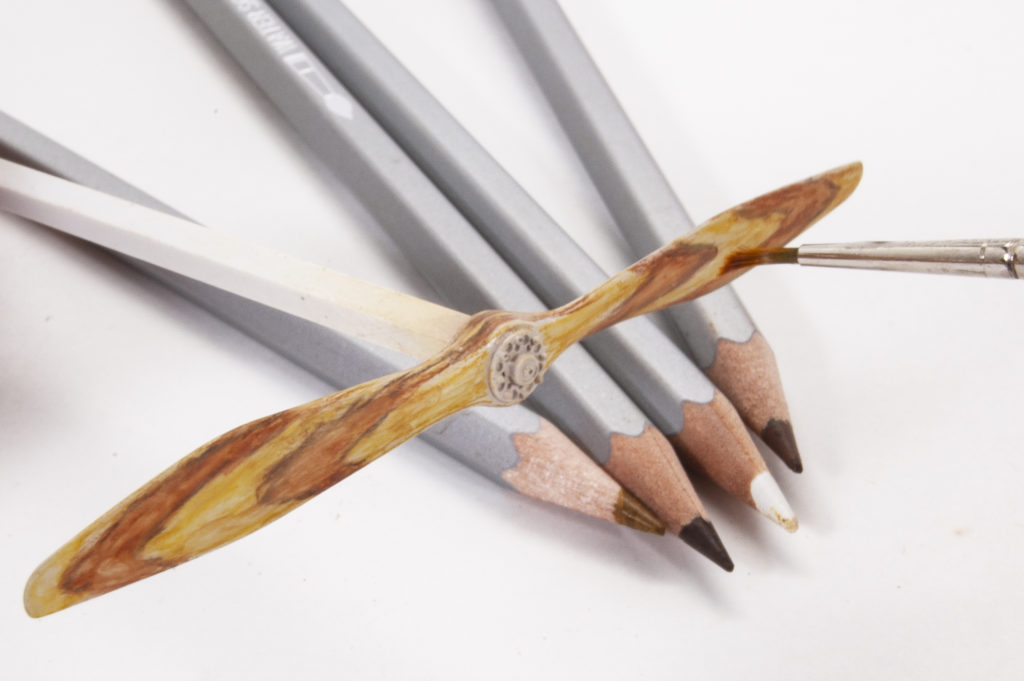
I mentioned earlier that I had used acrylic water based pencils to create the wood grain effects in the cockpit. The propeller was my chance to really push this idea. First, I had to research how these things actually looked, and how they were manufactured. The process of laminating different pieces of wood and then sculpting back the shape is what gives these wooden props their characteristic stripes. And that strip is what I set about to recreate with the pencils. The photos show the process, but one step that shouldn’t be overlooked is the use of the white colored pencil at the end to buff, or blend everything together. Until I used this pencil at the last step I had what looked like a drawing, but the blending effects of the white made all of the difference. I did give the surfaces a very light overspray of Tamiya clear orange, and the sealed the deal with acrylic clear gloss.

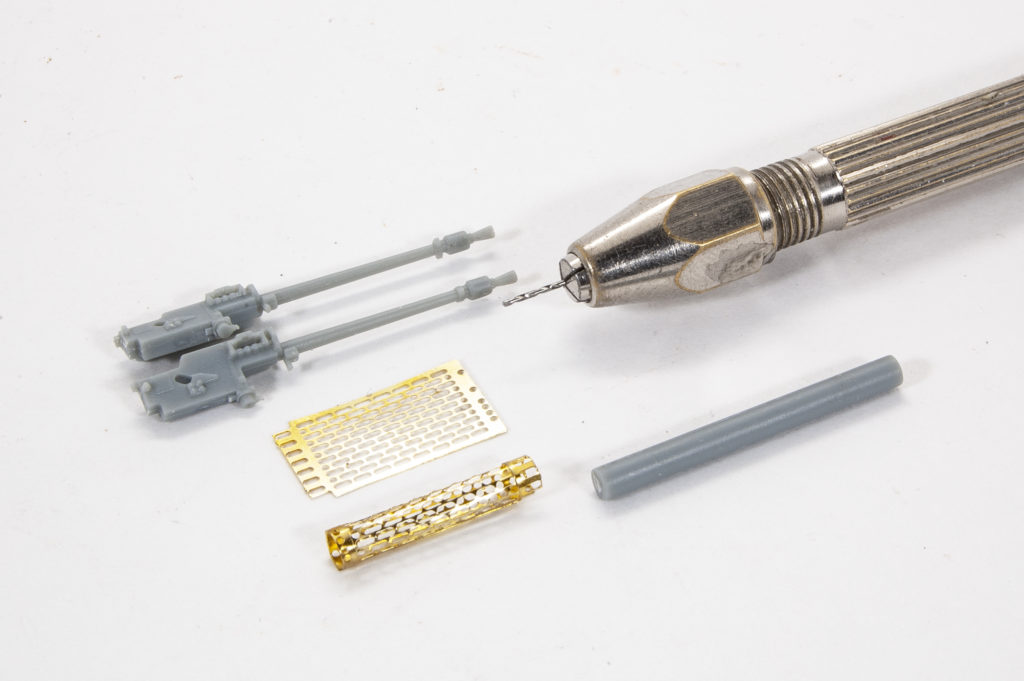
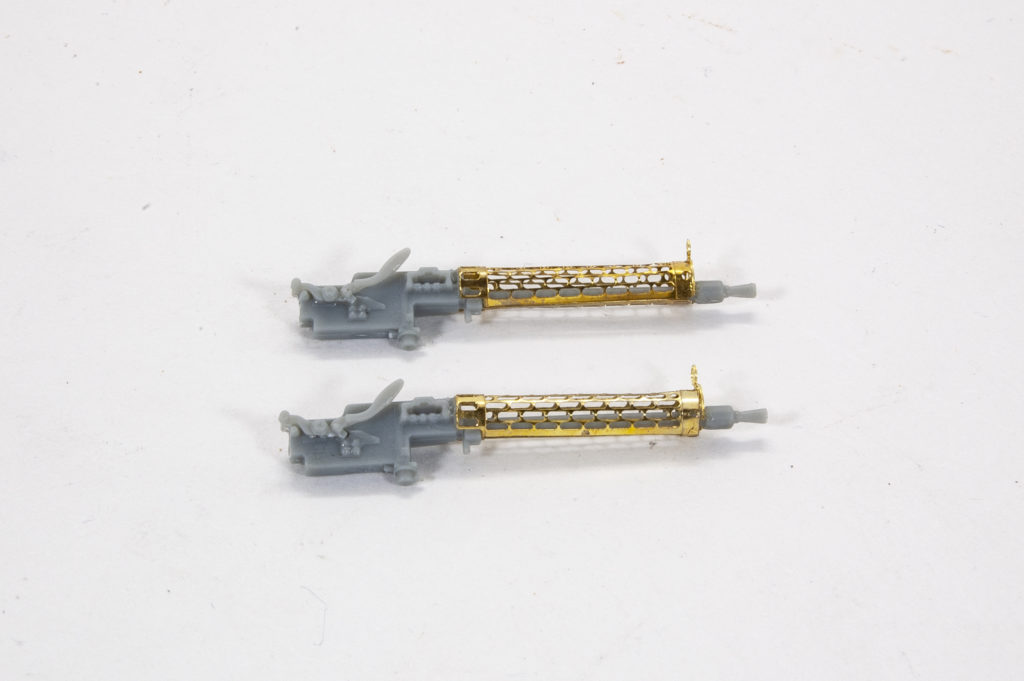
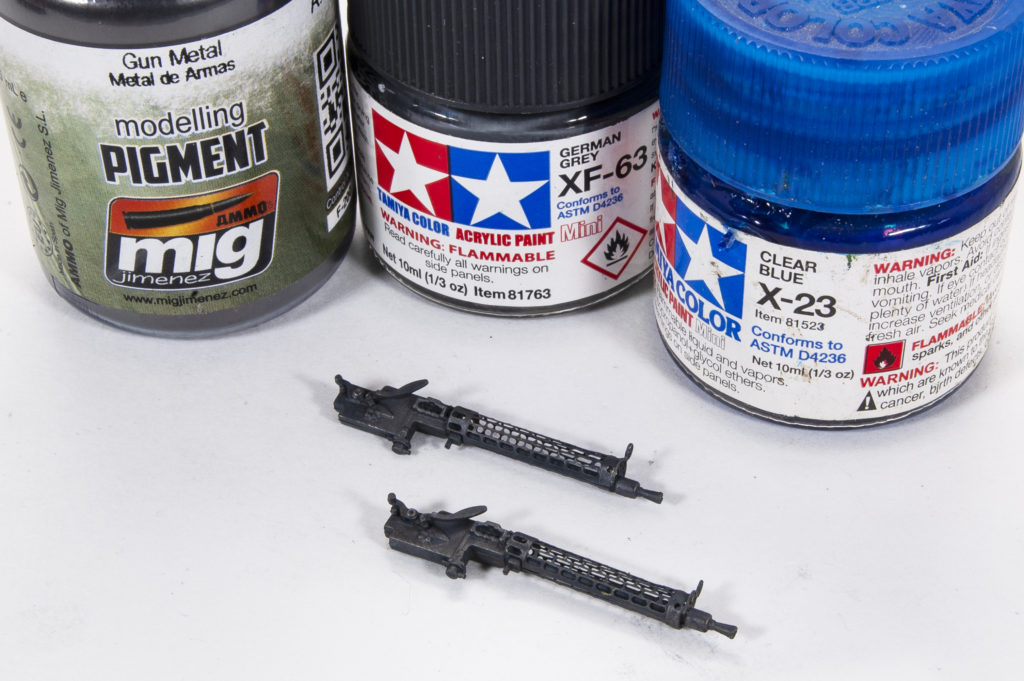
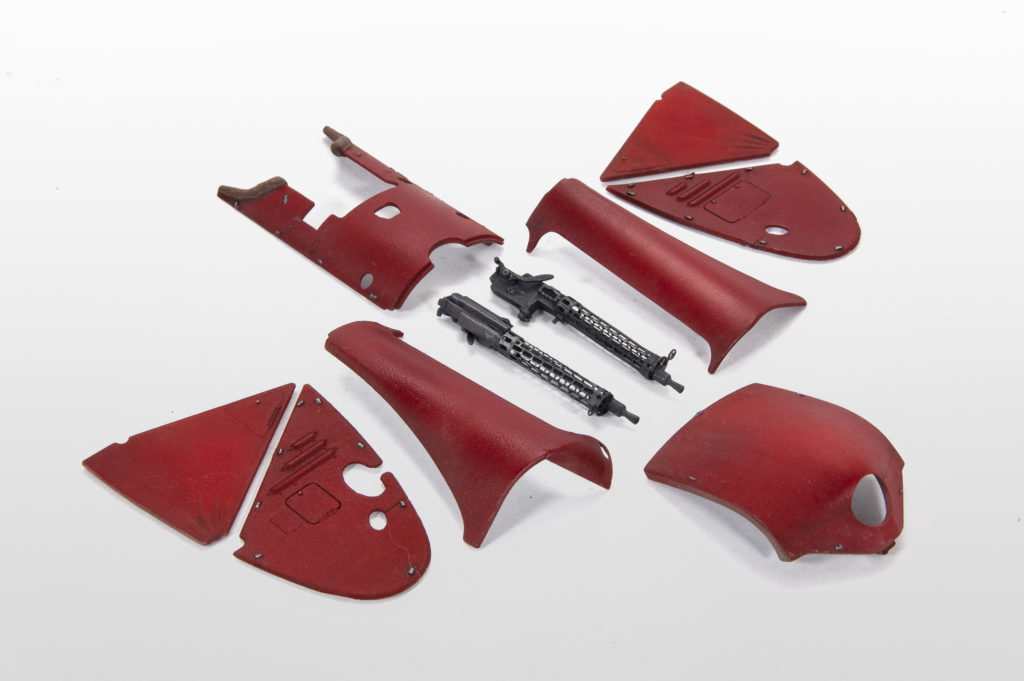
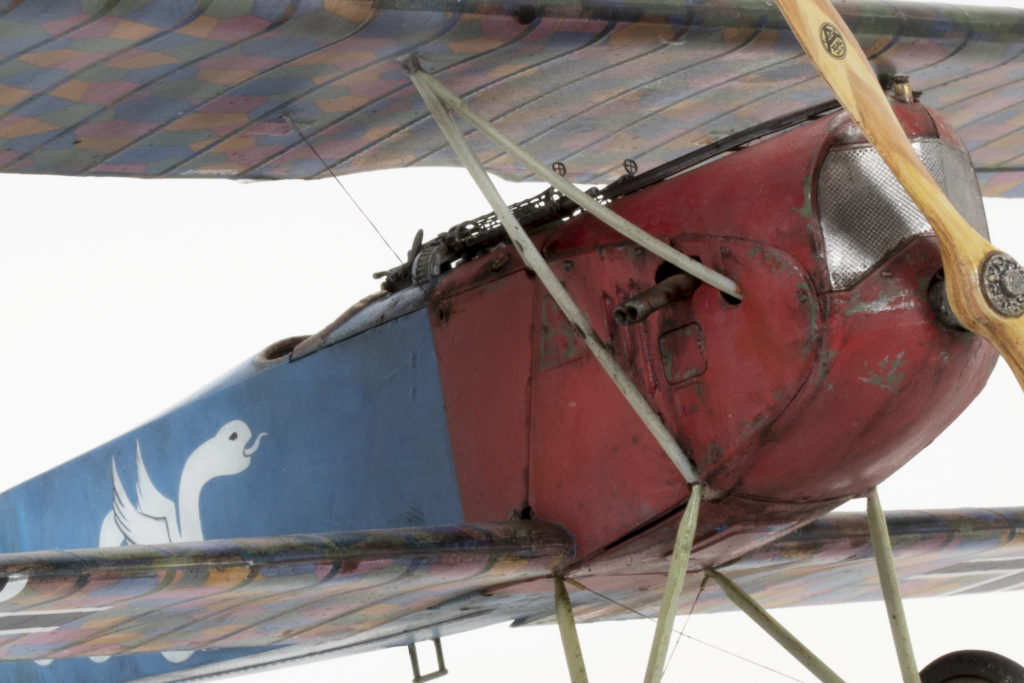
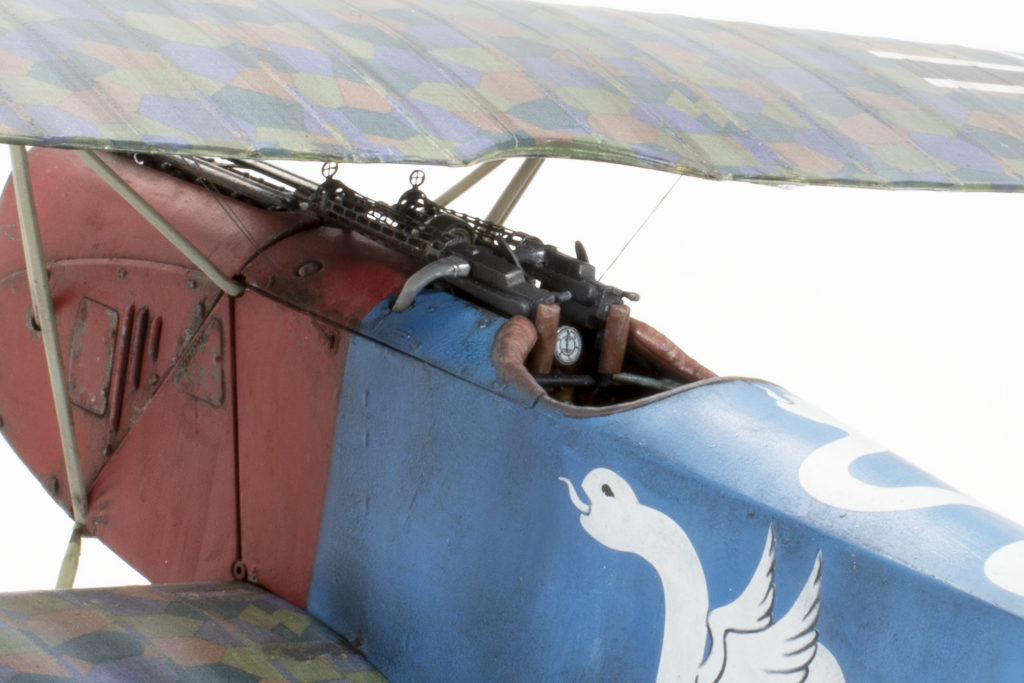
Next step was to get the twin Spandau’s locked and loaded. As usual, the kit offers alternatives for the guns, the differences being either a fully molded plastic version of the cooling jacket or a photo-etched option. Of course, choosing the PE version produces a much better result, and the nice thing about using WNW PE is that the parts are not that fiddley and are engineered to marry with their plastic counterpart securely and easily. This small sequence of photos show the steps in producing the PE version of the weapons, including painting and a dusting of Gun Metal pigment.
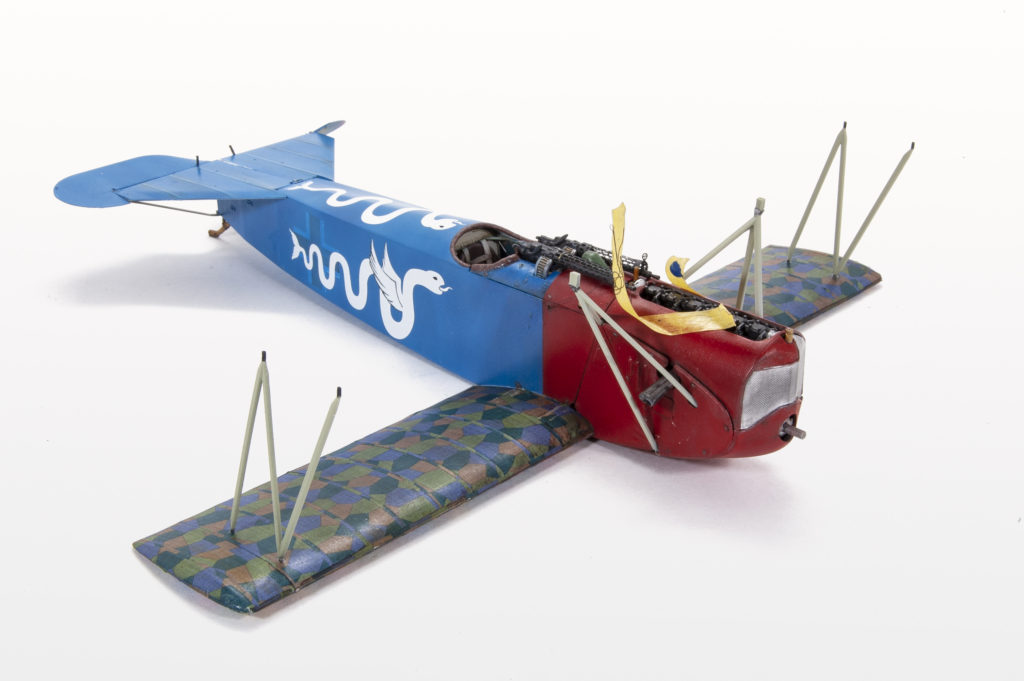
The next big step involves mating the two halves of the fuselage together, completing the cowling and of course installing the wings. I’ll admit that I was holding my breath during each of these steps. For instance, the fit of the fuselage halves is contingent upon making sure that the cockpit is seated correctly within the interior framework, the same is true of the engine and its mounts. Needless to say, I was relieved when everything fell into place (with a bit of coaxing) and was finally secured.
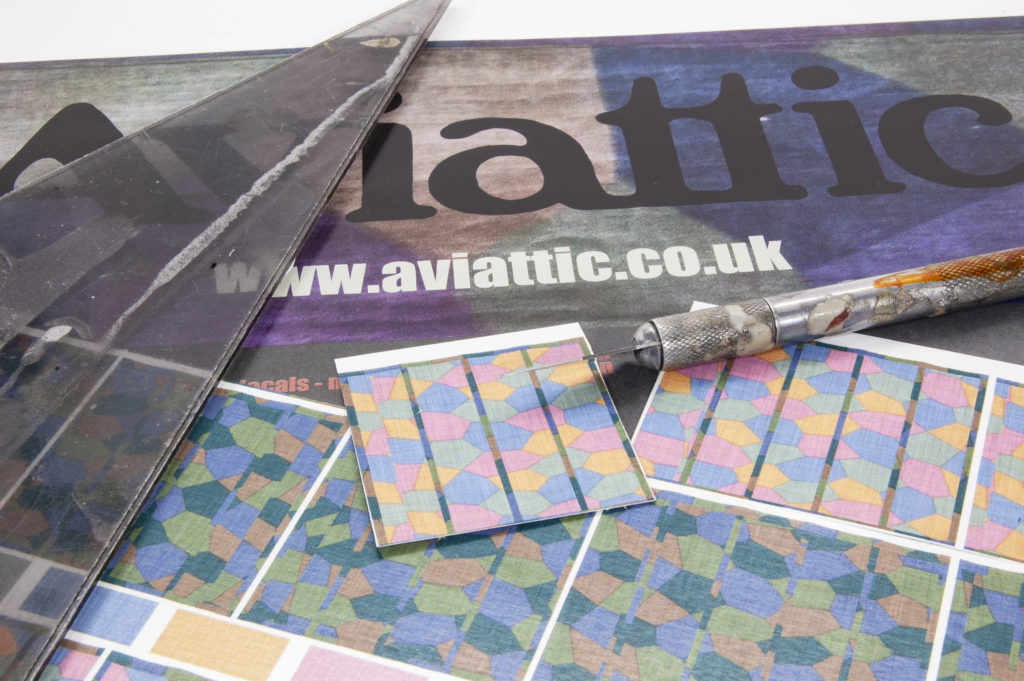
From this point to the end my concentration was focused upon the finishing. But, before I get too far along in the story I need to give a very big thanks to Richard Andrews and his company, Aviattitc. While building the Junkers I found a lot of inspiration on some of the FB pages devoted  to WW1 aircraft modeling – great builds and a great resource. I posted a few pictures of the Junkers on these pages during that build, but during this D.VII build, I shared many more progress pictures. Richard saw this build and offered a set of his fantastic Aviattic decals for the distinctive lozenge pattern on the wings. He also suggested that I might choose a to portray a different aircraft that the one that I was planning as he said it would be more interesting. I gratefully accepted both of his gifts, the decals, and the suggestion.
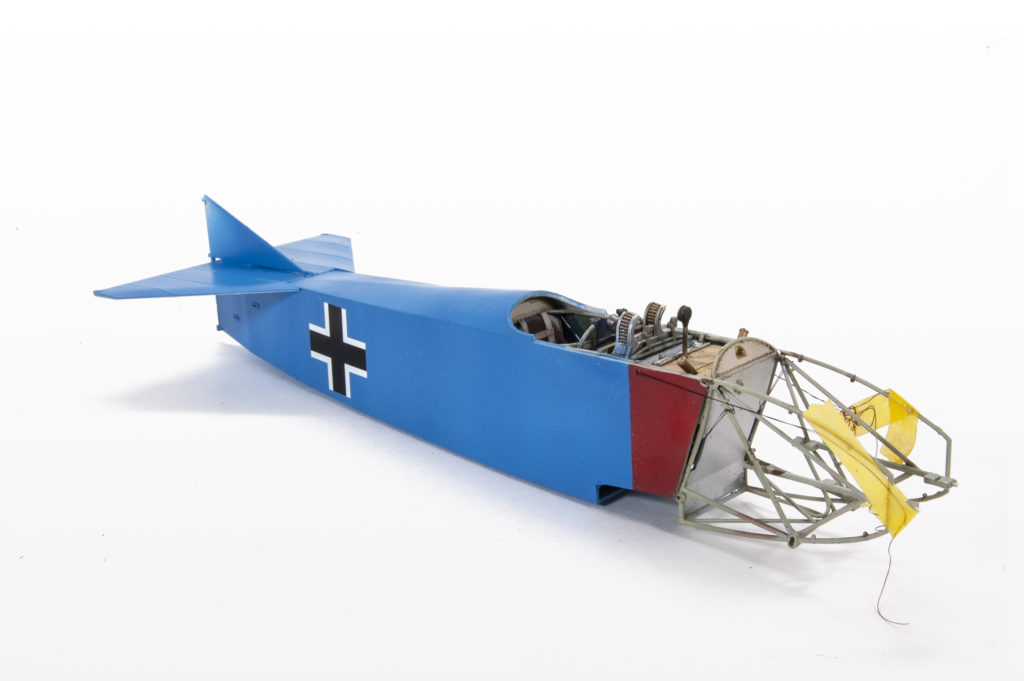
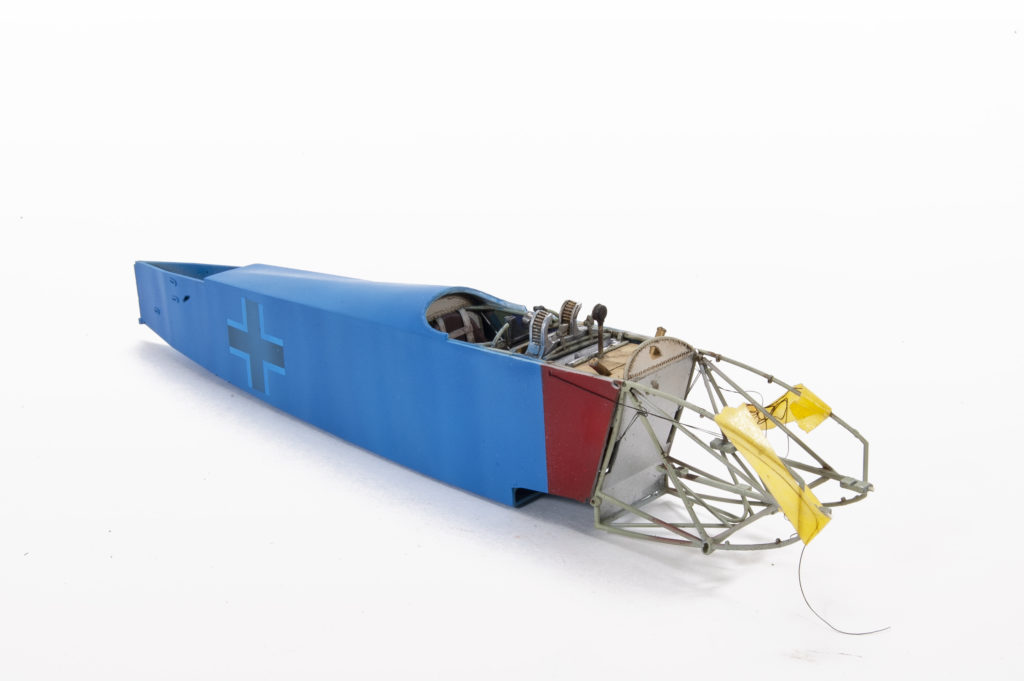
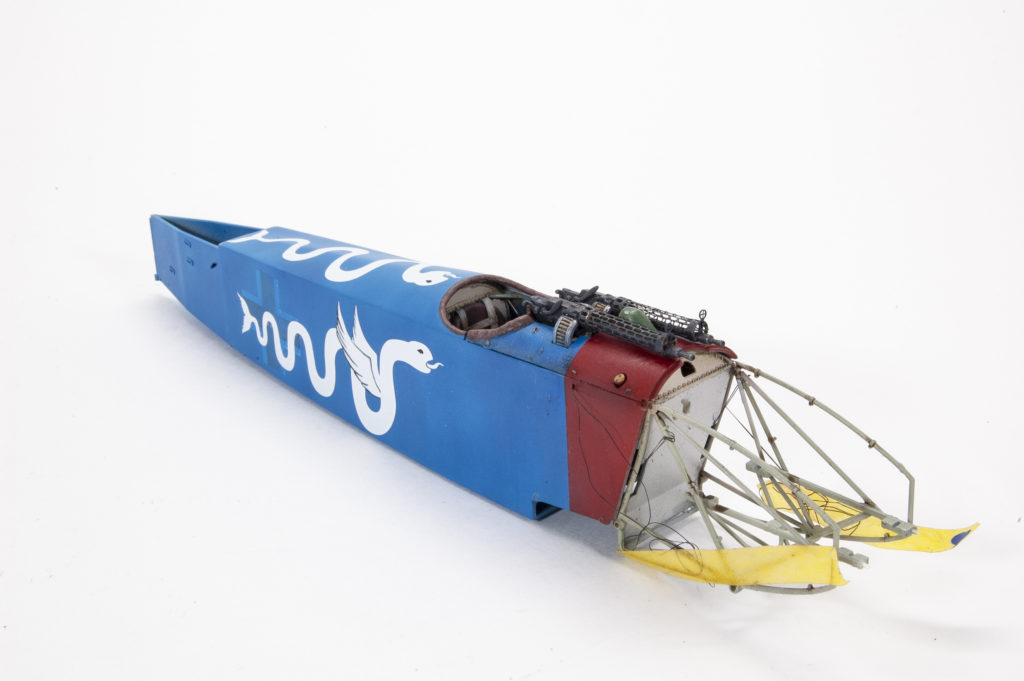
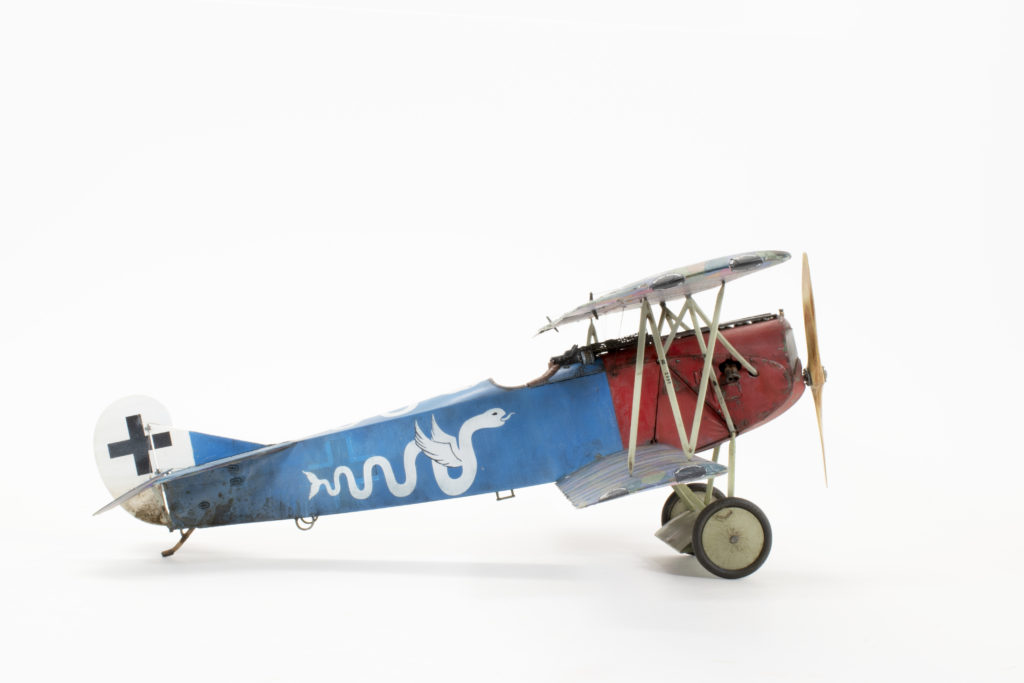
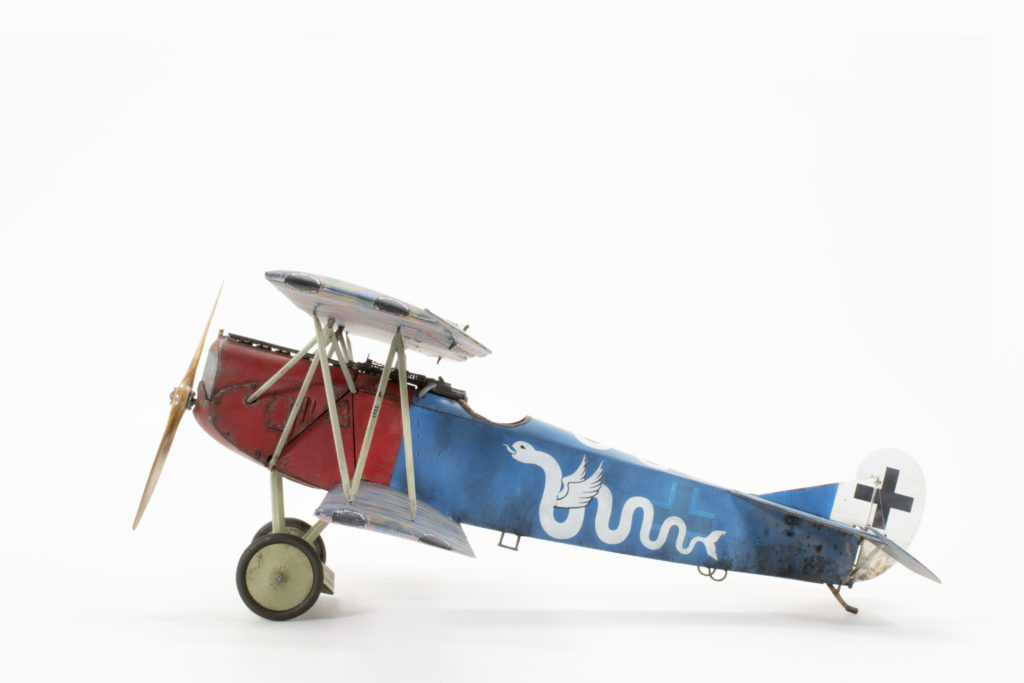
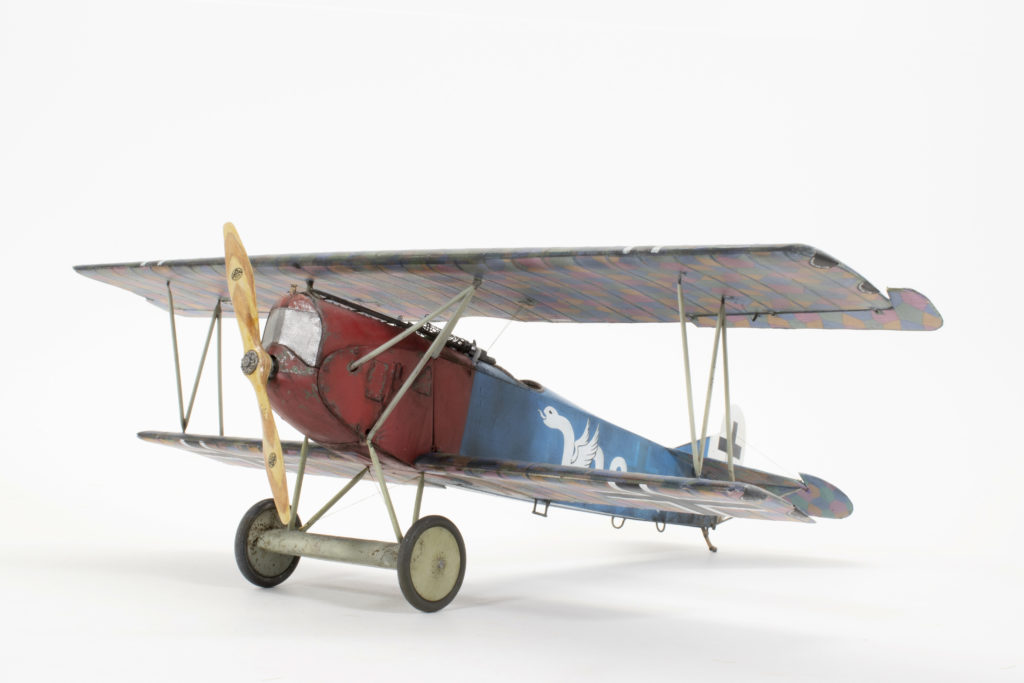
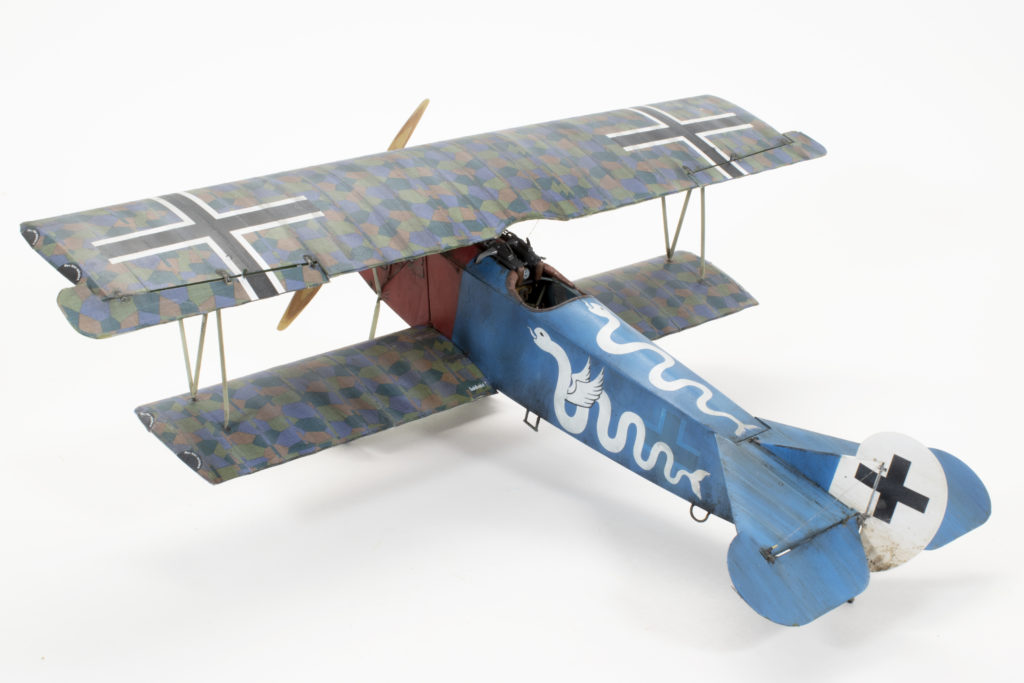
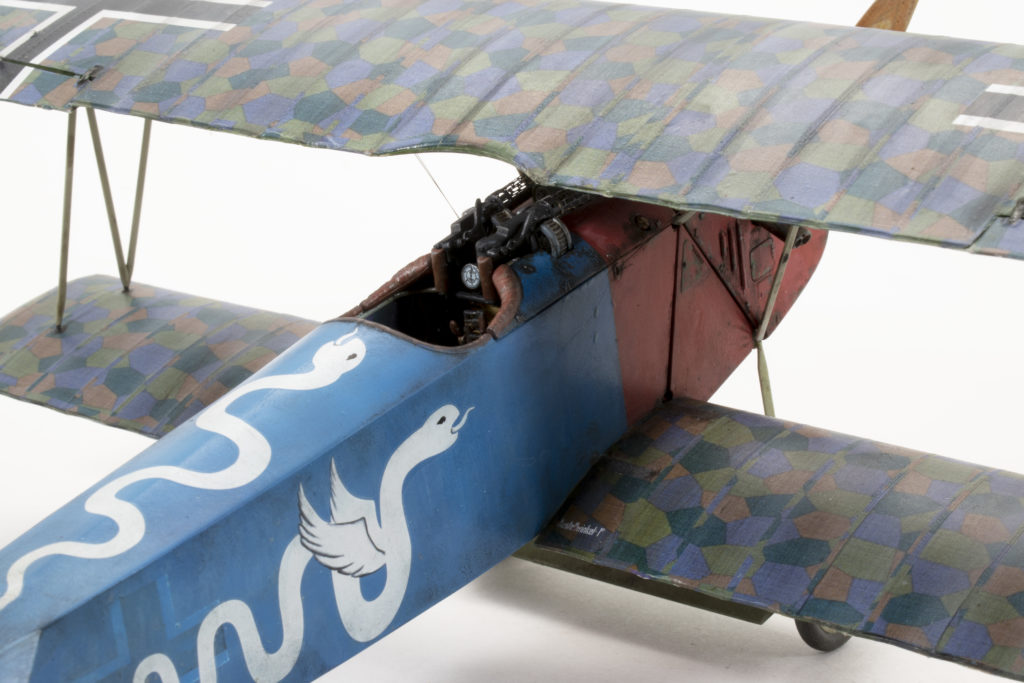
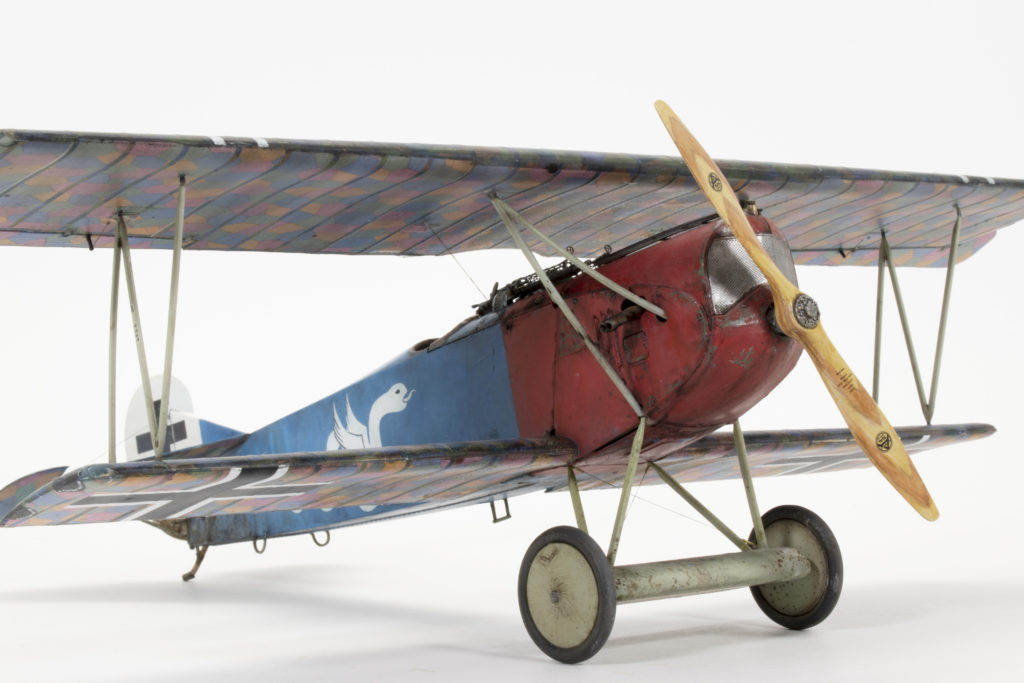
The colors for this particular aircraft were a blue fuselage and red cowling, and of course the lozenge camo wings. The blue color had been painted over the pre-existing camo colors and markings, leaving just a faint trace of the German Cross showing through the blue color. A white serpent marking particular to the pilot, Hugo Schafer of Jasta 15, 1918.
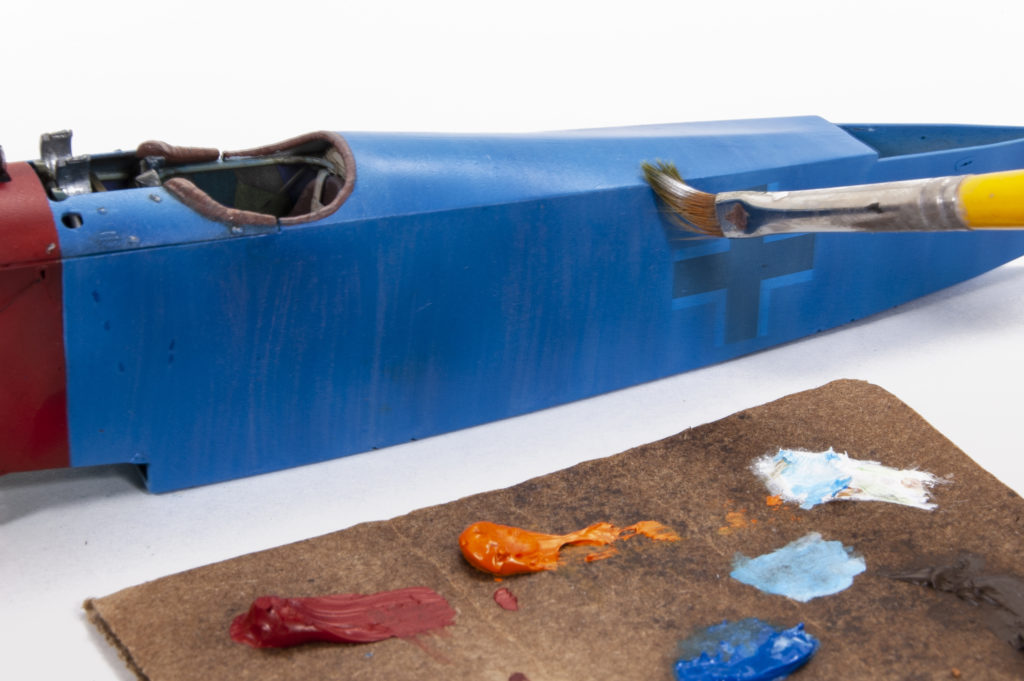
The Aviattic decals were used with great success on the wings. These are wonderful decals and I would highly recommend them. Not only are they easy to work with as they have surprising strength and resilience that allows easy placement, but they are also somewhat transparent which allows the modeler to add shading or stains on the models’ surfaces and then overlay the decals. This idea provides unlimited ideas for adding subtle shading, stains, and texture.
![]()