
Mobile Worker MW-01 Late Type [MASH]
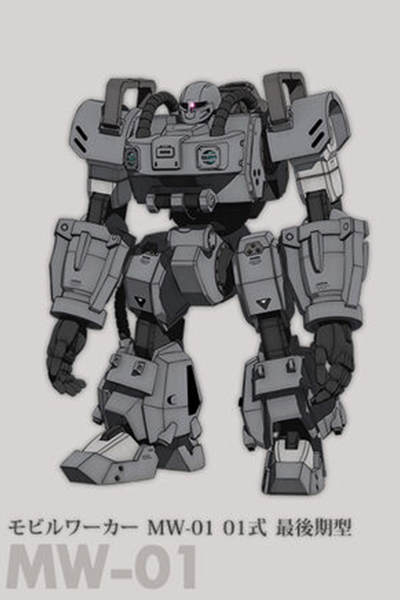 The Mobile Worker MW-01 Model 01 Final Type is a mobile weapon that appears in the Mobile Suite Gundam: The Origin OVA . It belonged to the Autonomous Republic of Zeon and would ultimately lead to the development of the mobile suit technology.
On the dark side of space colony Side 3, the last improved and developed Mobile Worker MW-01 Model 01 Final Type, a prototype experimental man-made mobile weapon led by Dozle Zabi was under development. Improvements have been made to each part based on the data from the Mobile Worker MW-01 Model 01 Late Type, and opinions from the test pilots. Improvements were made on the chest armor around the cockpit to protect the pilot from incoming attacks.
The space version is equipped with thrusters and verniers for attitude control in outer space on the shoulders, back, torso and legs, and was used by the Autonomous Republic of Zeon in the recovery of space debris in its neighboring zones. Its attitude control technology and operational data in space were used as a reference in the development of mobile suits.
One of the great aspects of the Gundam kits is their ease of assembly, they’re basically a snap-tight kit, making construction a quick and easy with the parts even molded in appropriate colors making painting optional. Here I’ve laid out the parts that will make up the torso just to get a sense of how the model will go together. Of course I will be painting this model and so begin by giving the parts a light primer coat using Mr. Surfacer 1200. I’ll be using the new AK Interactive Generation 3 acrylic paints through-out this project, in this case, Grimm Black is diluted roughly 50/50 with the appropriate thinner and then sprayed onto the internal parts. Details are then painted by brush, including a few subtle highlights around the edges for a little extra visual interest.


Similarly, the exterior body armor is painted in shades of orange colors. Adding a bit of Light Orange and/or Ivory to the mix now will help to convey the appearance of sun-faded paint.
For those of you who are so inclined, there is a lot of detailing potential when building Gundam’s, but since I’m new to these type kits I tended to keep close to an out-of-the-box construction. That said I did manage to replace the molded headlights and replace them with small reflective 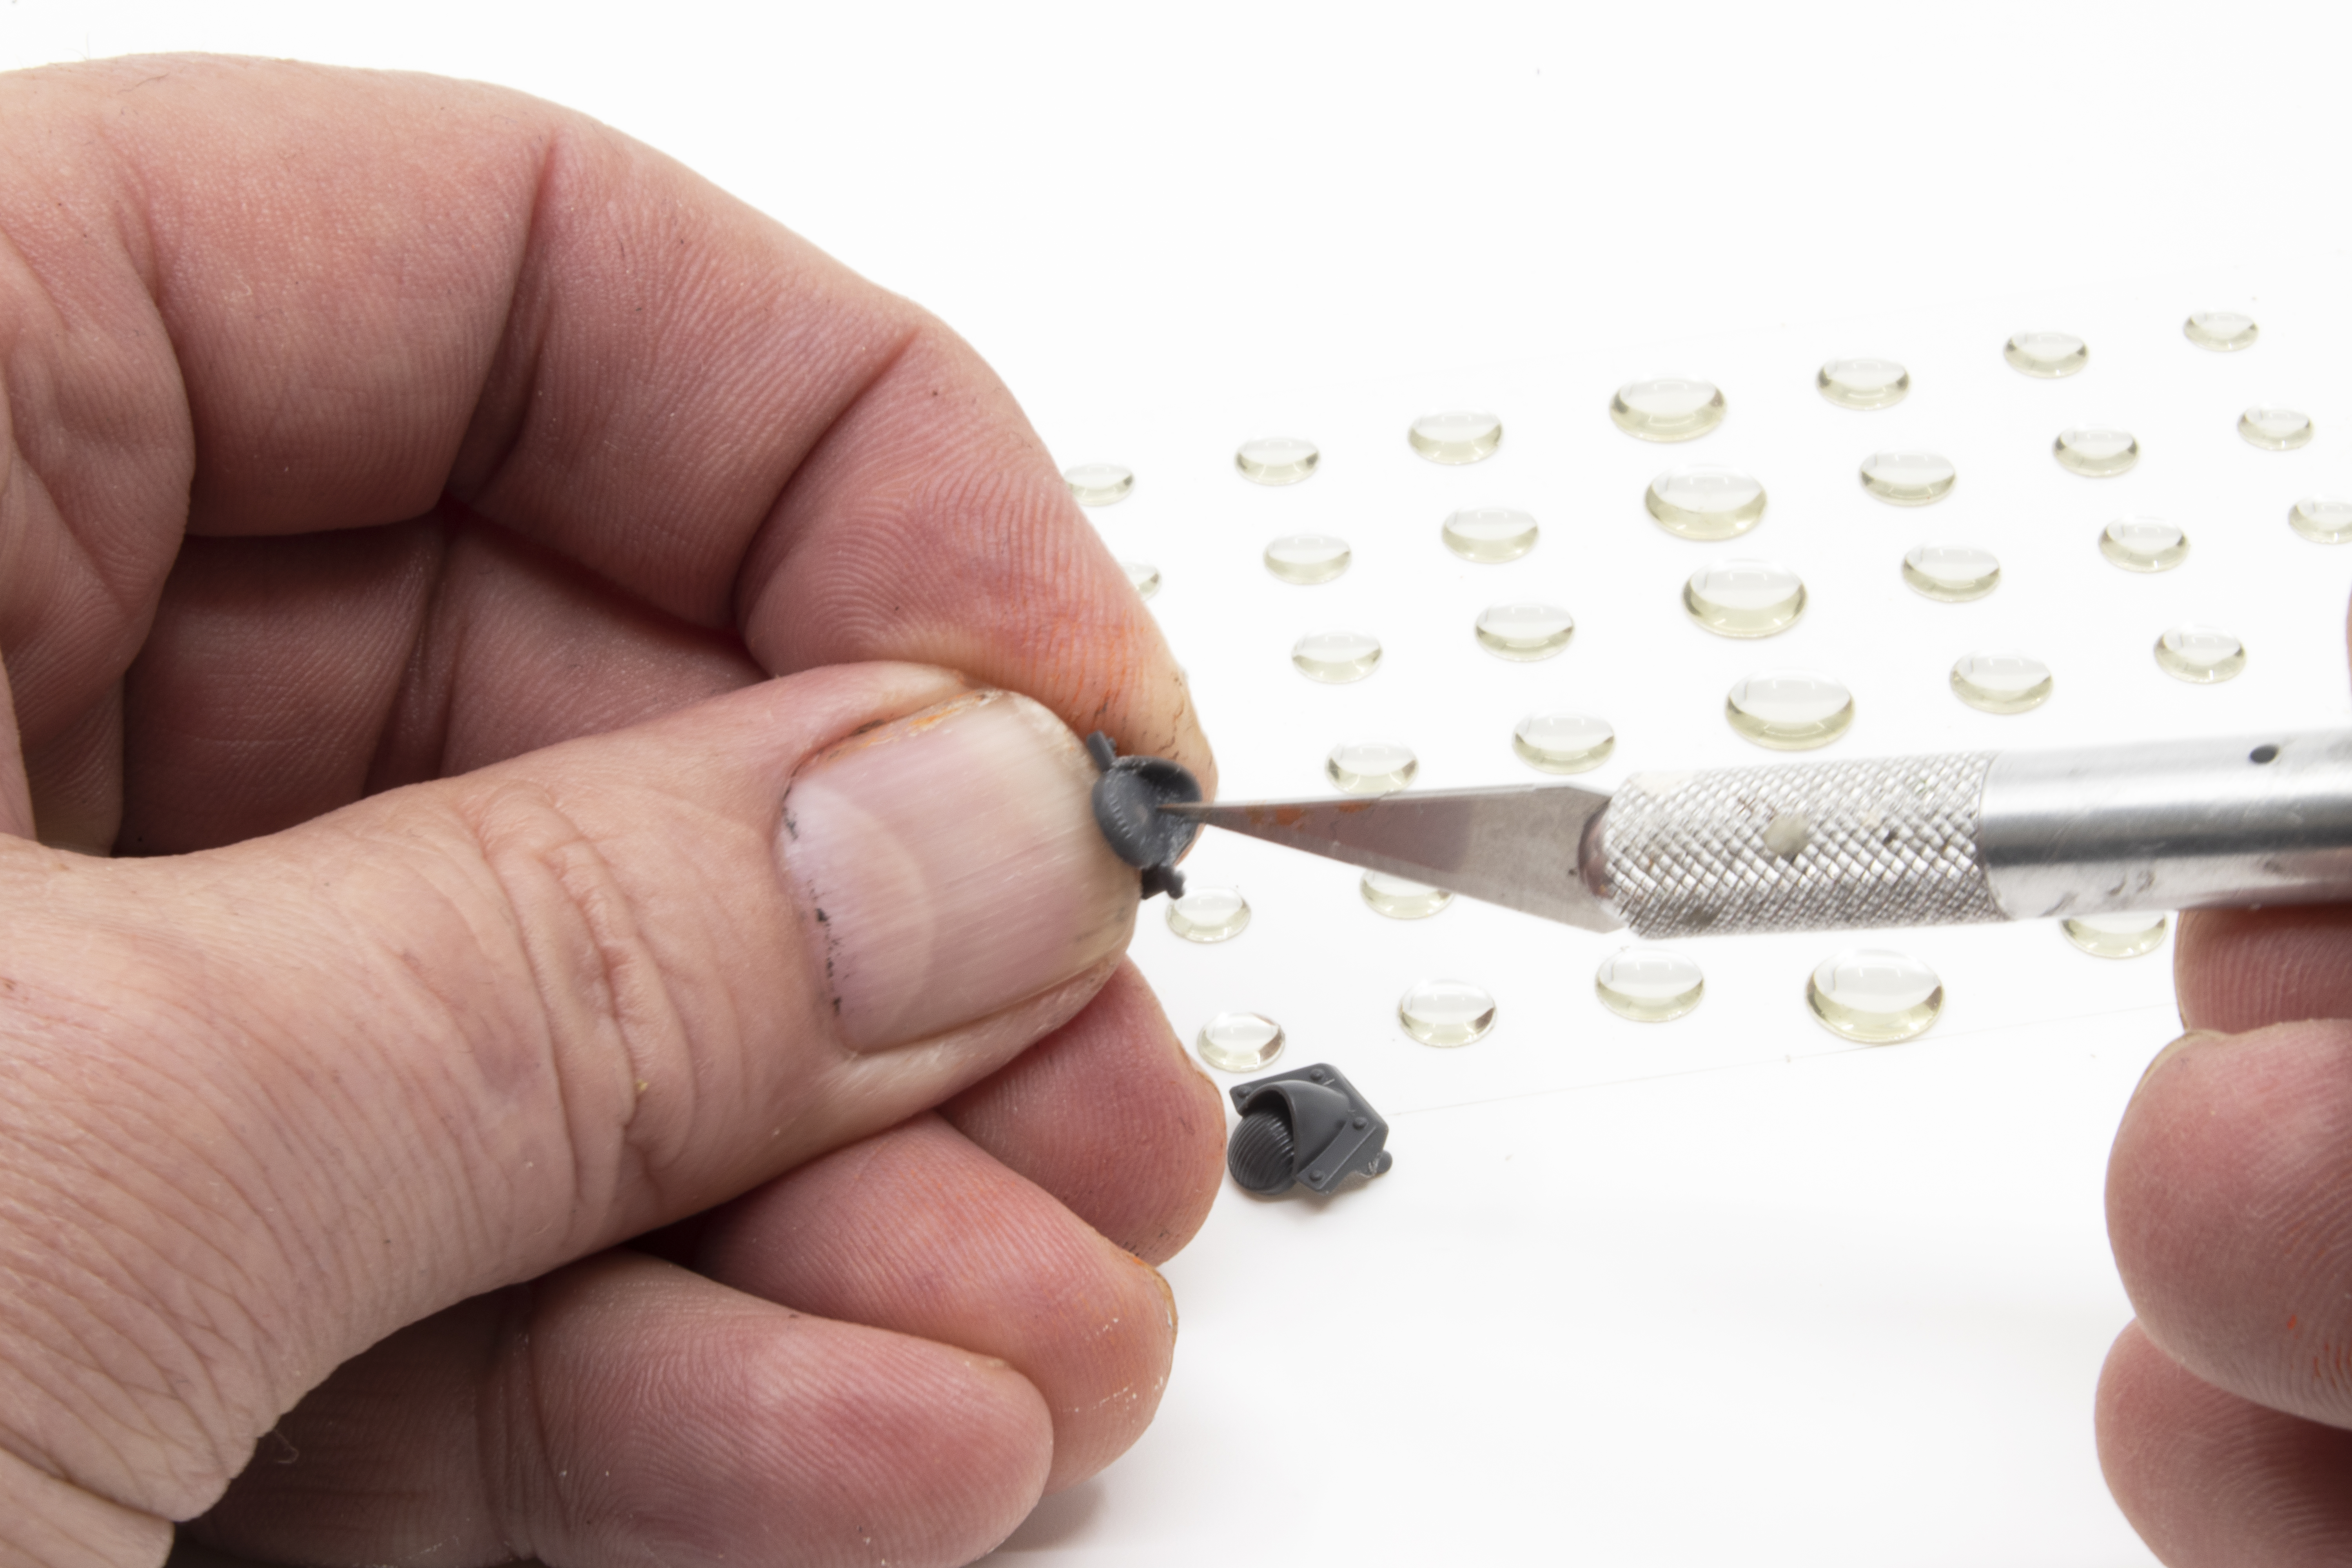 dots that I found at my local craft store. The transparent areas of the chest “canopy” were first painted in a light gradient pattern and then given a wash of Tamiya Clear Orange to produce a glass effect. In retrospect, I believe a few extra drops of pure acrylic gloss would have made the effect even more convincing. Maybe next time!
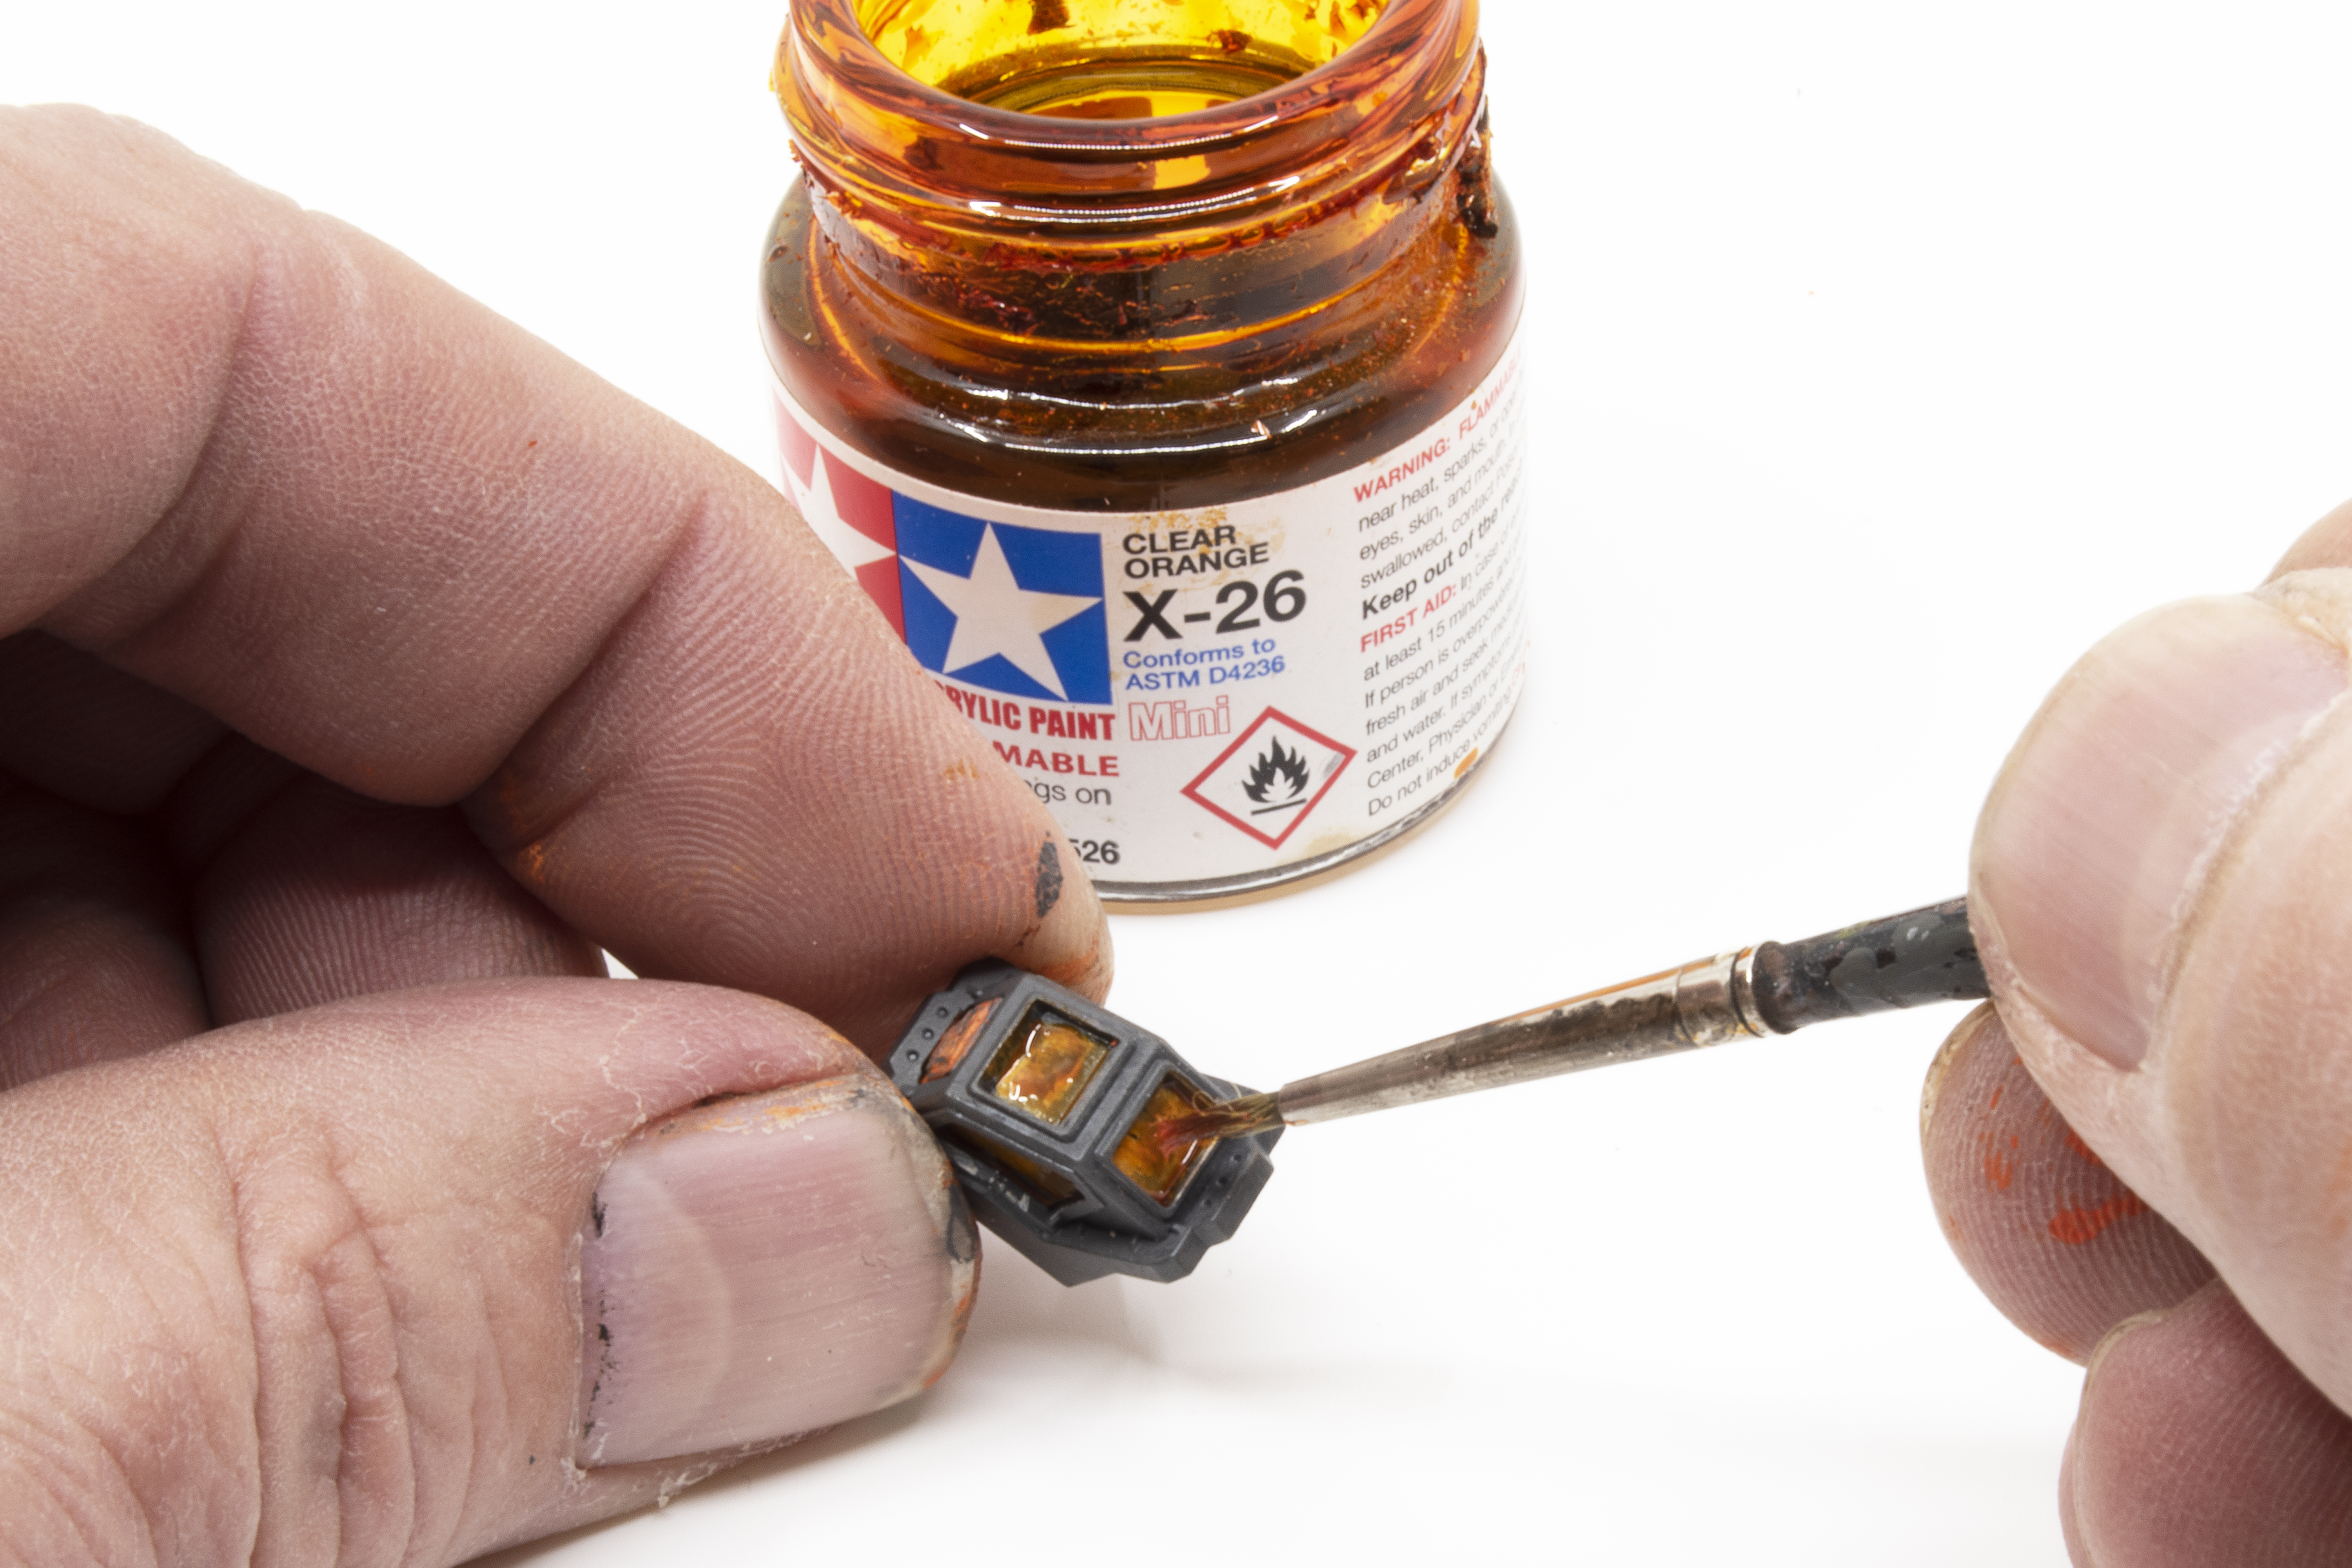
I’ve discussed this before in some of my other projects, but I think that it’s an important milestone when you can put the assemblies together and see your progress. This is that step. The upper torso is basically completely assembled and painted, including a small number of scratches and weathering, just enough to help me visualize where I want to go as I work toward the final presentation.
With the upper torso completed, it is was now time to concentrate on the legs and feet using the same process of airbrushing the larger parts and then picking out details using a brush. “The devil is in the details”. This is actually the part of any project that I enjoy the most, picking out and painting the smaller details as it’s the little things that really bring a model to life. A metallic finish is being applied to the winch cables using an undercoating of aluminum Mr. Metal Color and then a buffing using AK Dark Steel pigment.


Initially, I was going to paint out these wrist/forearm areas in a metallic color but decided instead to follow my Hitachi equipment color references where the primary colors are a combination of orange and dark grey, with some lighter grey trim parts. And with that, the trims are painted in a lighter grey color using AK Graphite Grey. The metallic color is used for the ball joints, this time using AK True Metal paste applied to the part with a brush and then buffed to a nice sheen using a cotton swab.
 I needed to make some decisions as I approached chipping and scratches. The first being whether there would be scratches at all, perhaps this suit is made from some type of impervious material? I quickly decided that having a clean suit didn’t tell a very good story, and so I would do scratches. Then it came to a decision about the suit’s material, would the scratches be realized in the usual colors and methods? Or, maybe perhaps these scratches would expose some exotic material? Decisions, decisions! To help me decide, I recalled some advice from a concept artist who basically said you can do whatever you want in terms of forms and color, make up your own world, but for it to be understandable to the viewer it must have some common basis with our own experiences. This case meant that I would basically be following traditional chipping techniques.
 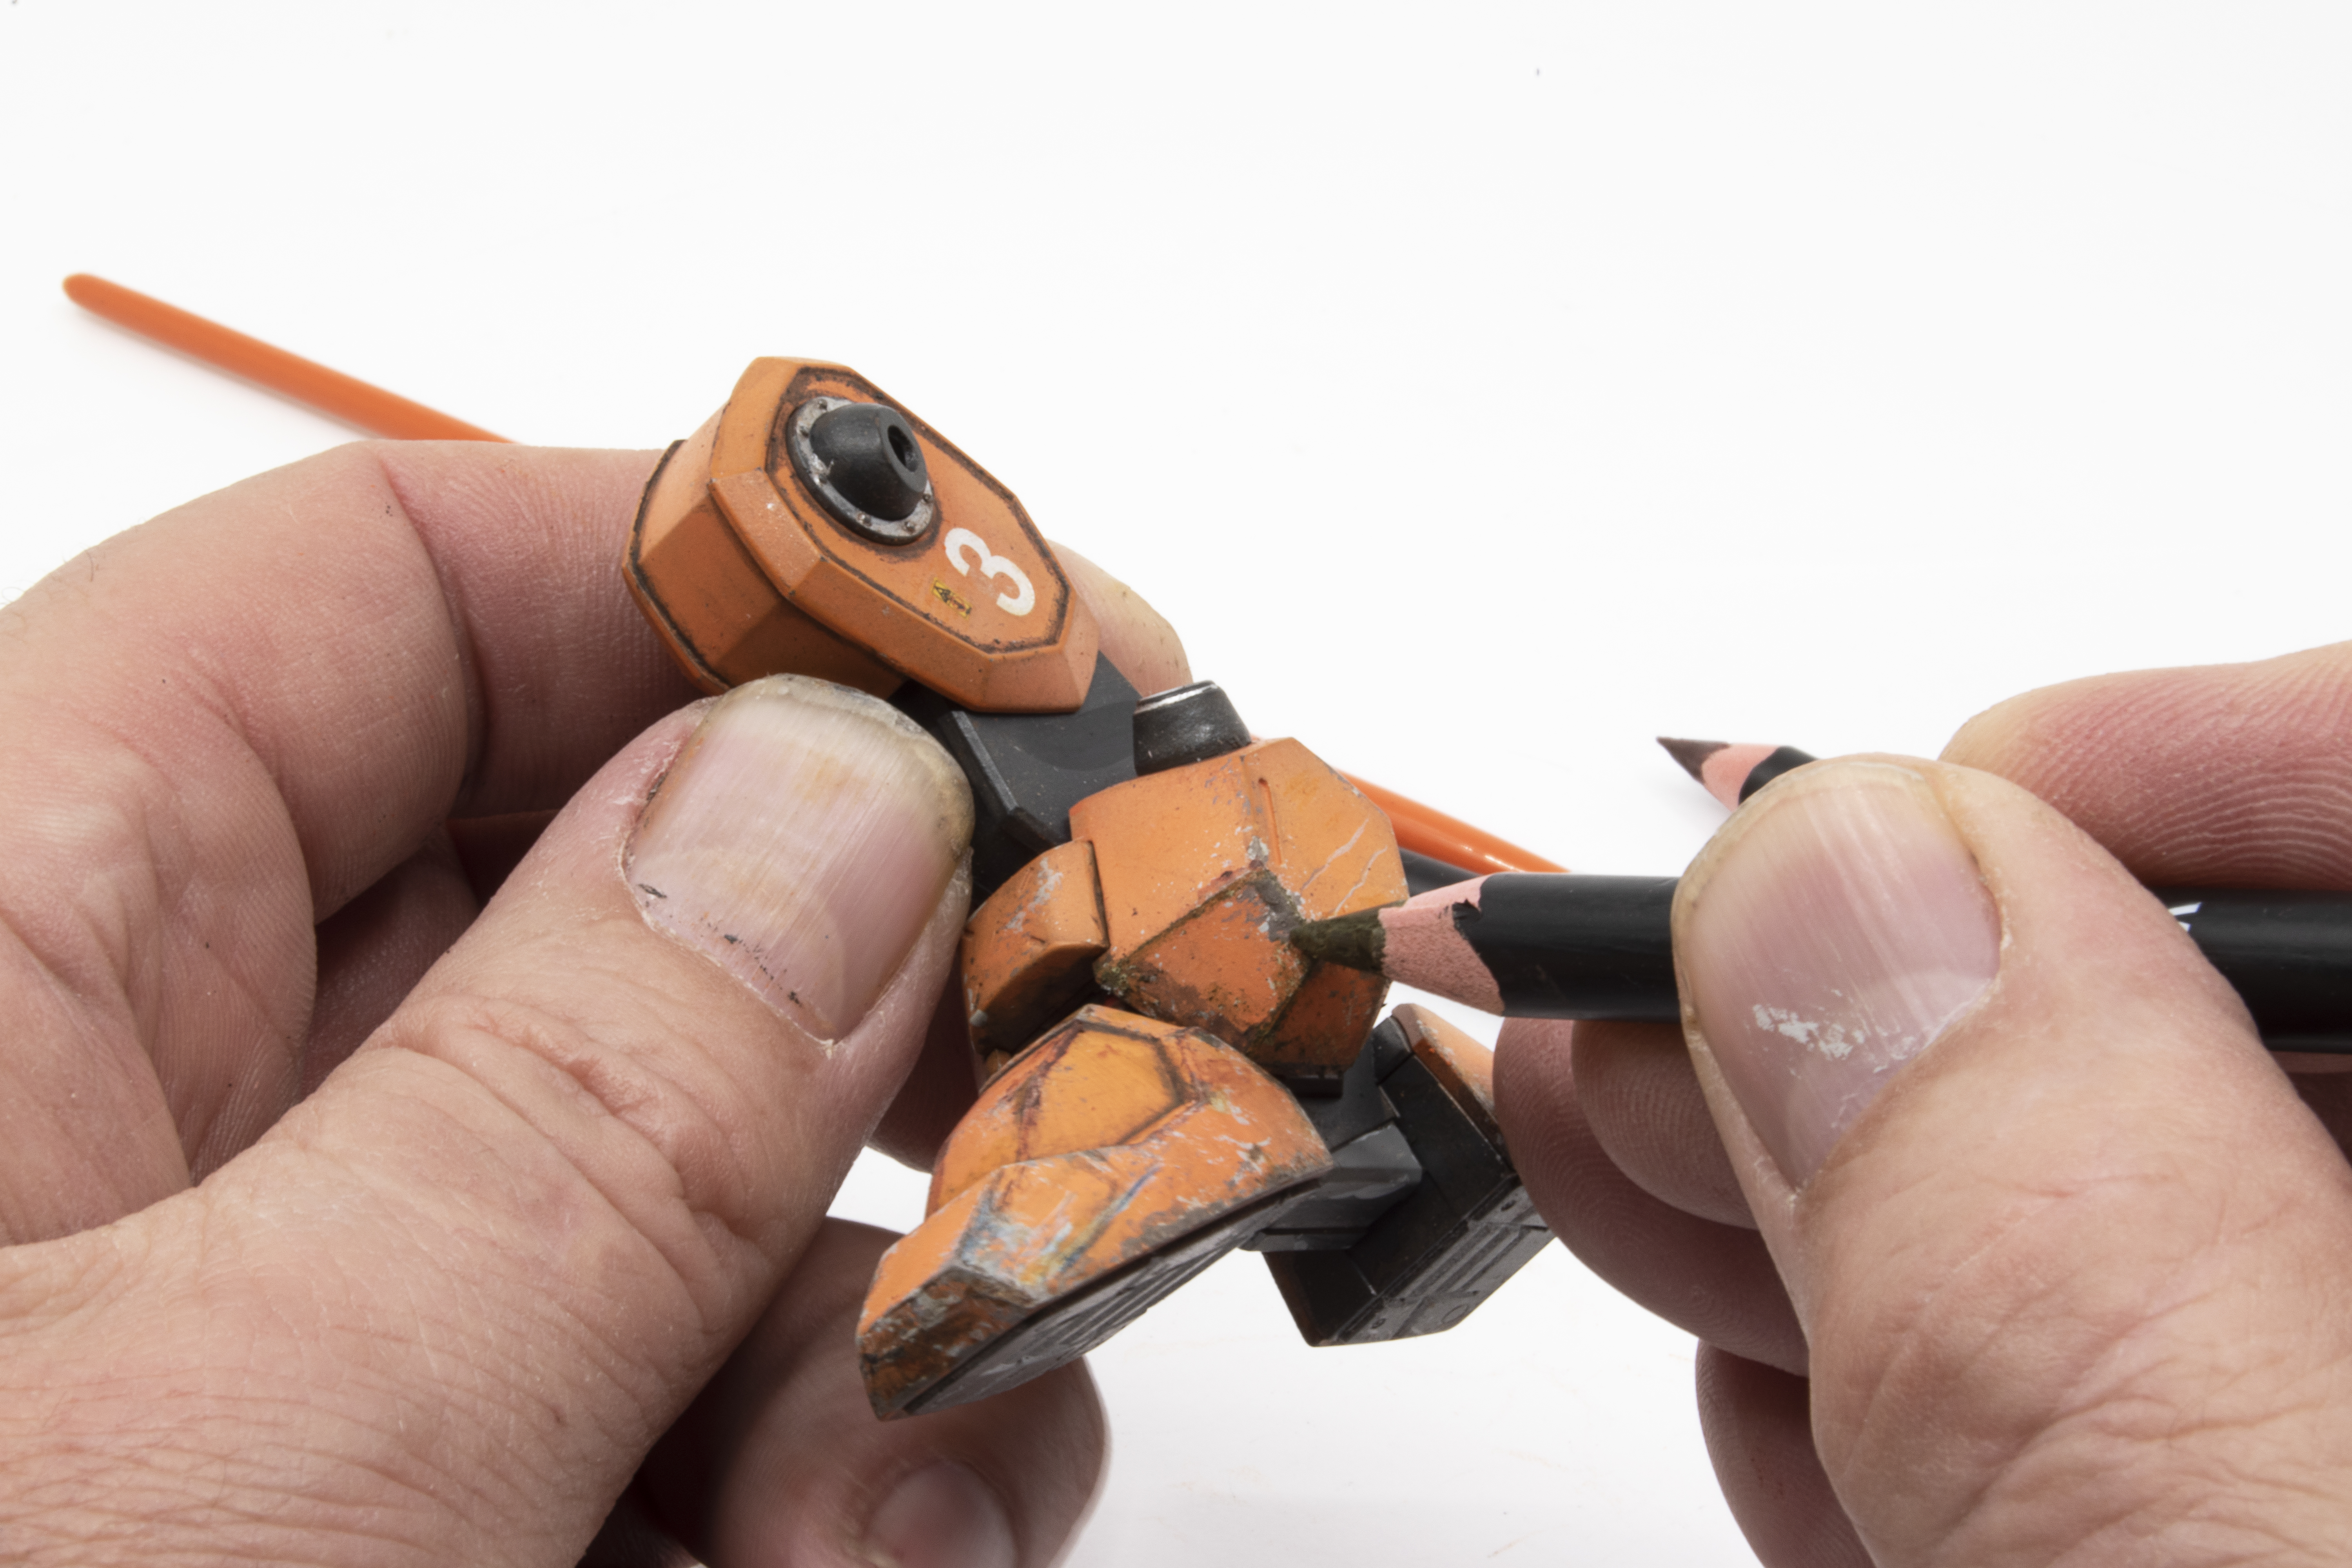 Chipping and scratches continue over the entire model with concentrations in logical areas. Notice that I begin the scratch outline using the lighter color and then fill the center area using a darker color. Secondary chips are applied in the darker grey color using a fine sponge. Those of you paying close attention will notice that I began the feet using the sponge and then filled using a brush, and did the opposite for the arms. This wasn’t on purpose, and so I guess that the sequence really doesn’t matter?
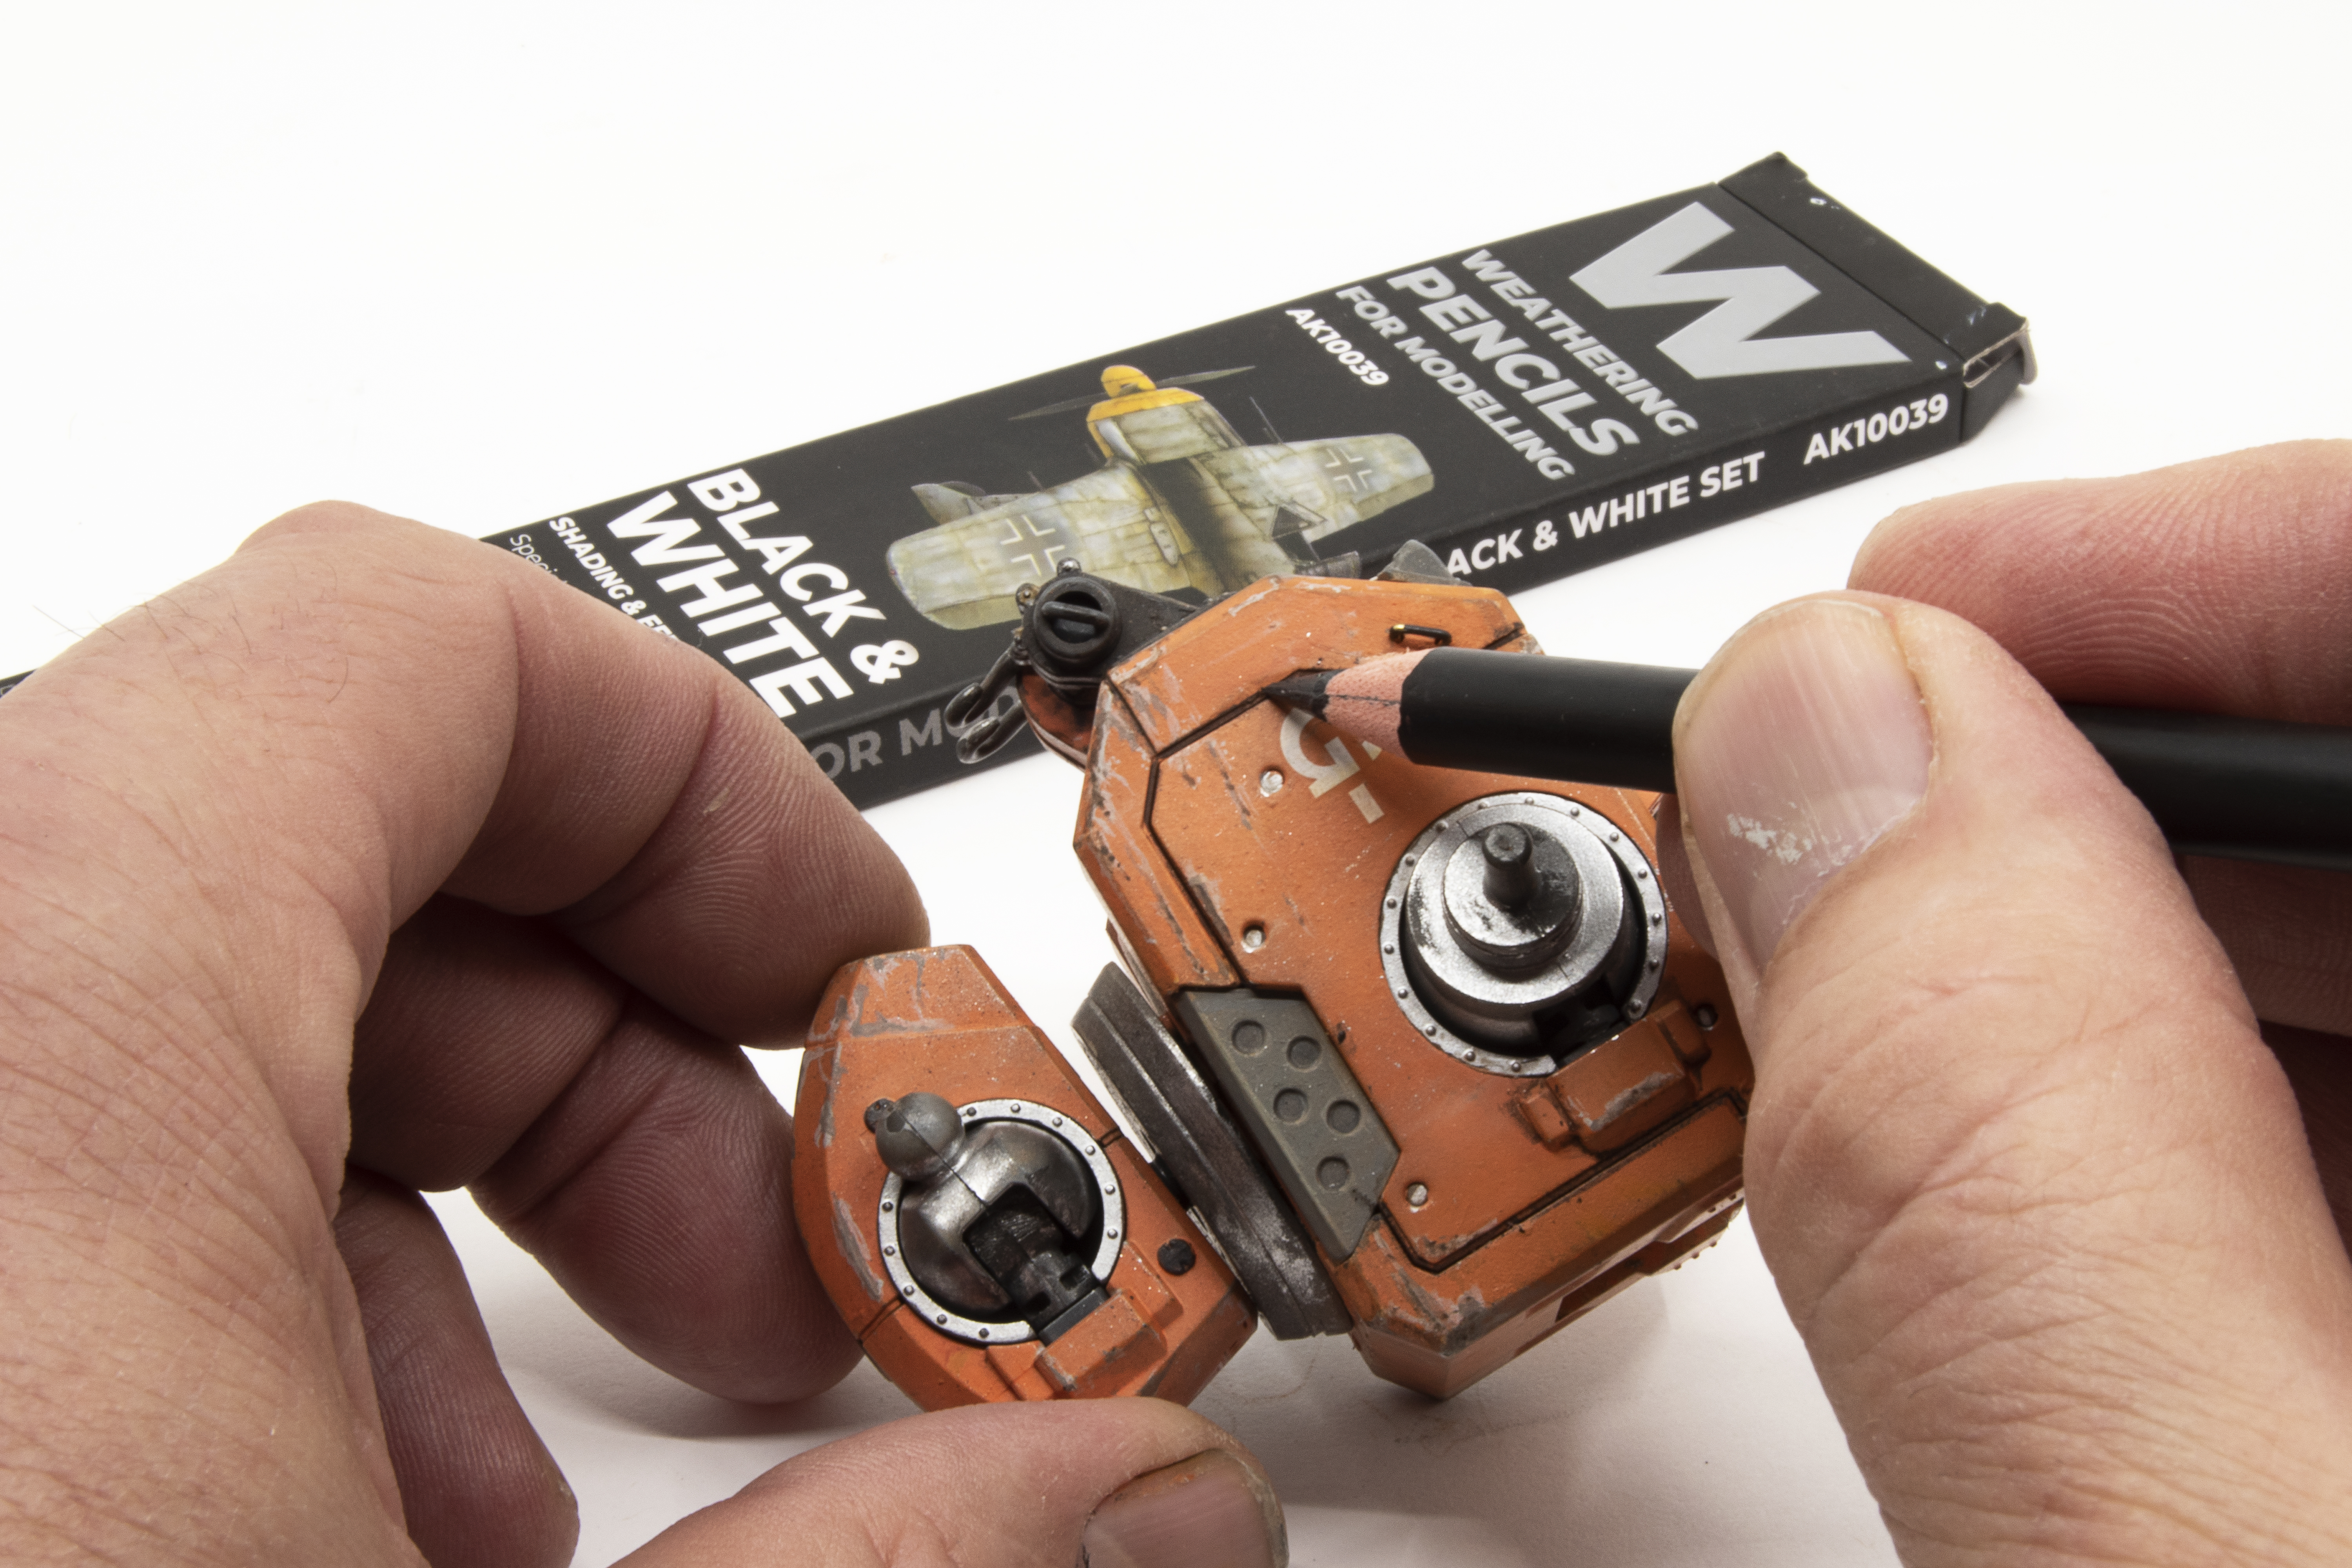
 Once the chips are more or less completed I give entire sections of the model a very light acrylic wash of the base orange color. I find that this little step helps to settle the chips and scratches within the finish for an aged appearance, rather than appearing to be brand new and sitting on-top. To further create visual interest and depth to the finish I break-out the 502 Abteilung oils to add subtle shading and color variances to the surfaces. I also use this opportunity when using the oils to lay the foundation for heavier oil and dirt deposits, especially along panel lines, joints, and the lower body. A final layer of chips, scratches and wear is applied using AK Weathering Pencils. As shown in this photo the precise tip of the pencil is ideal for reinforcing panel lines.
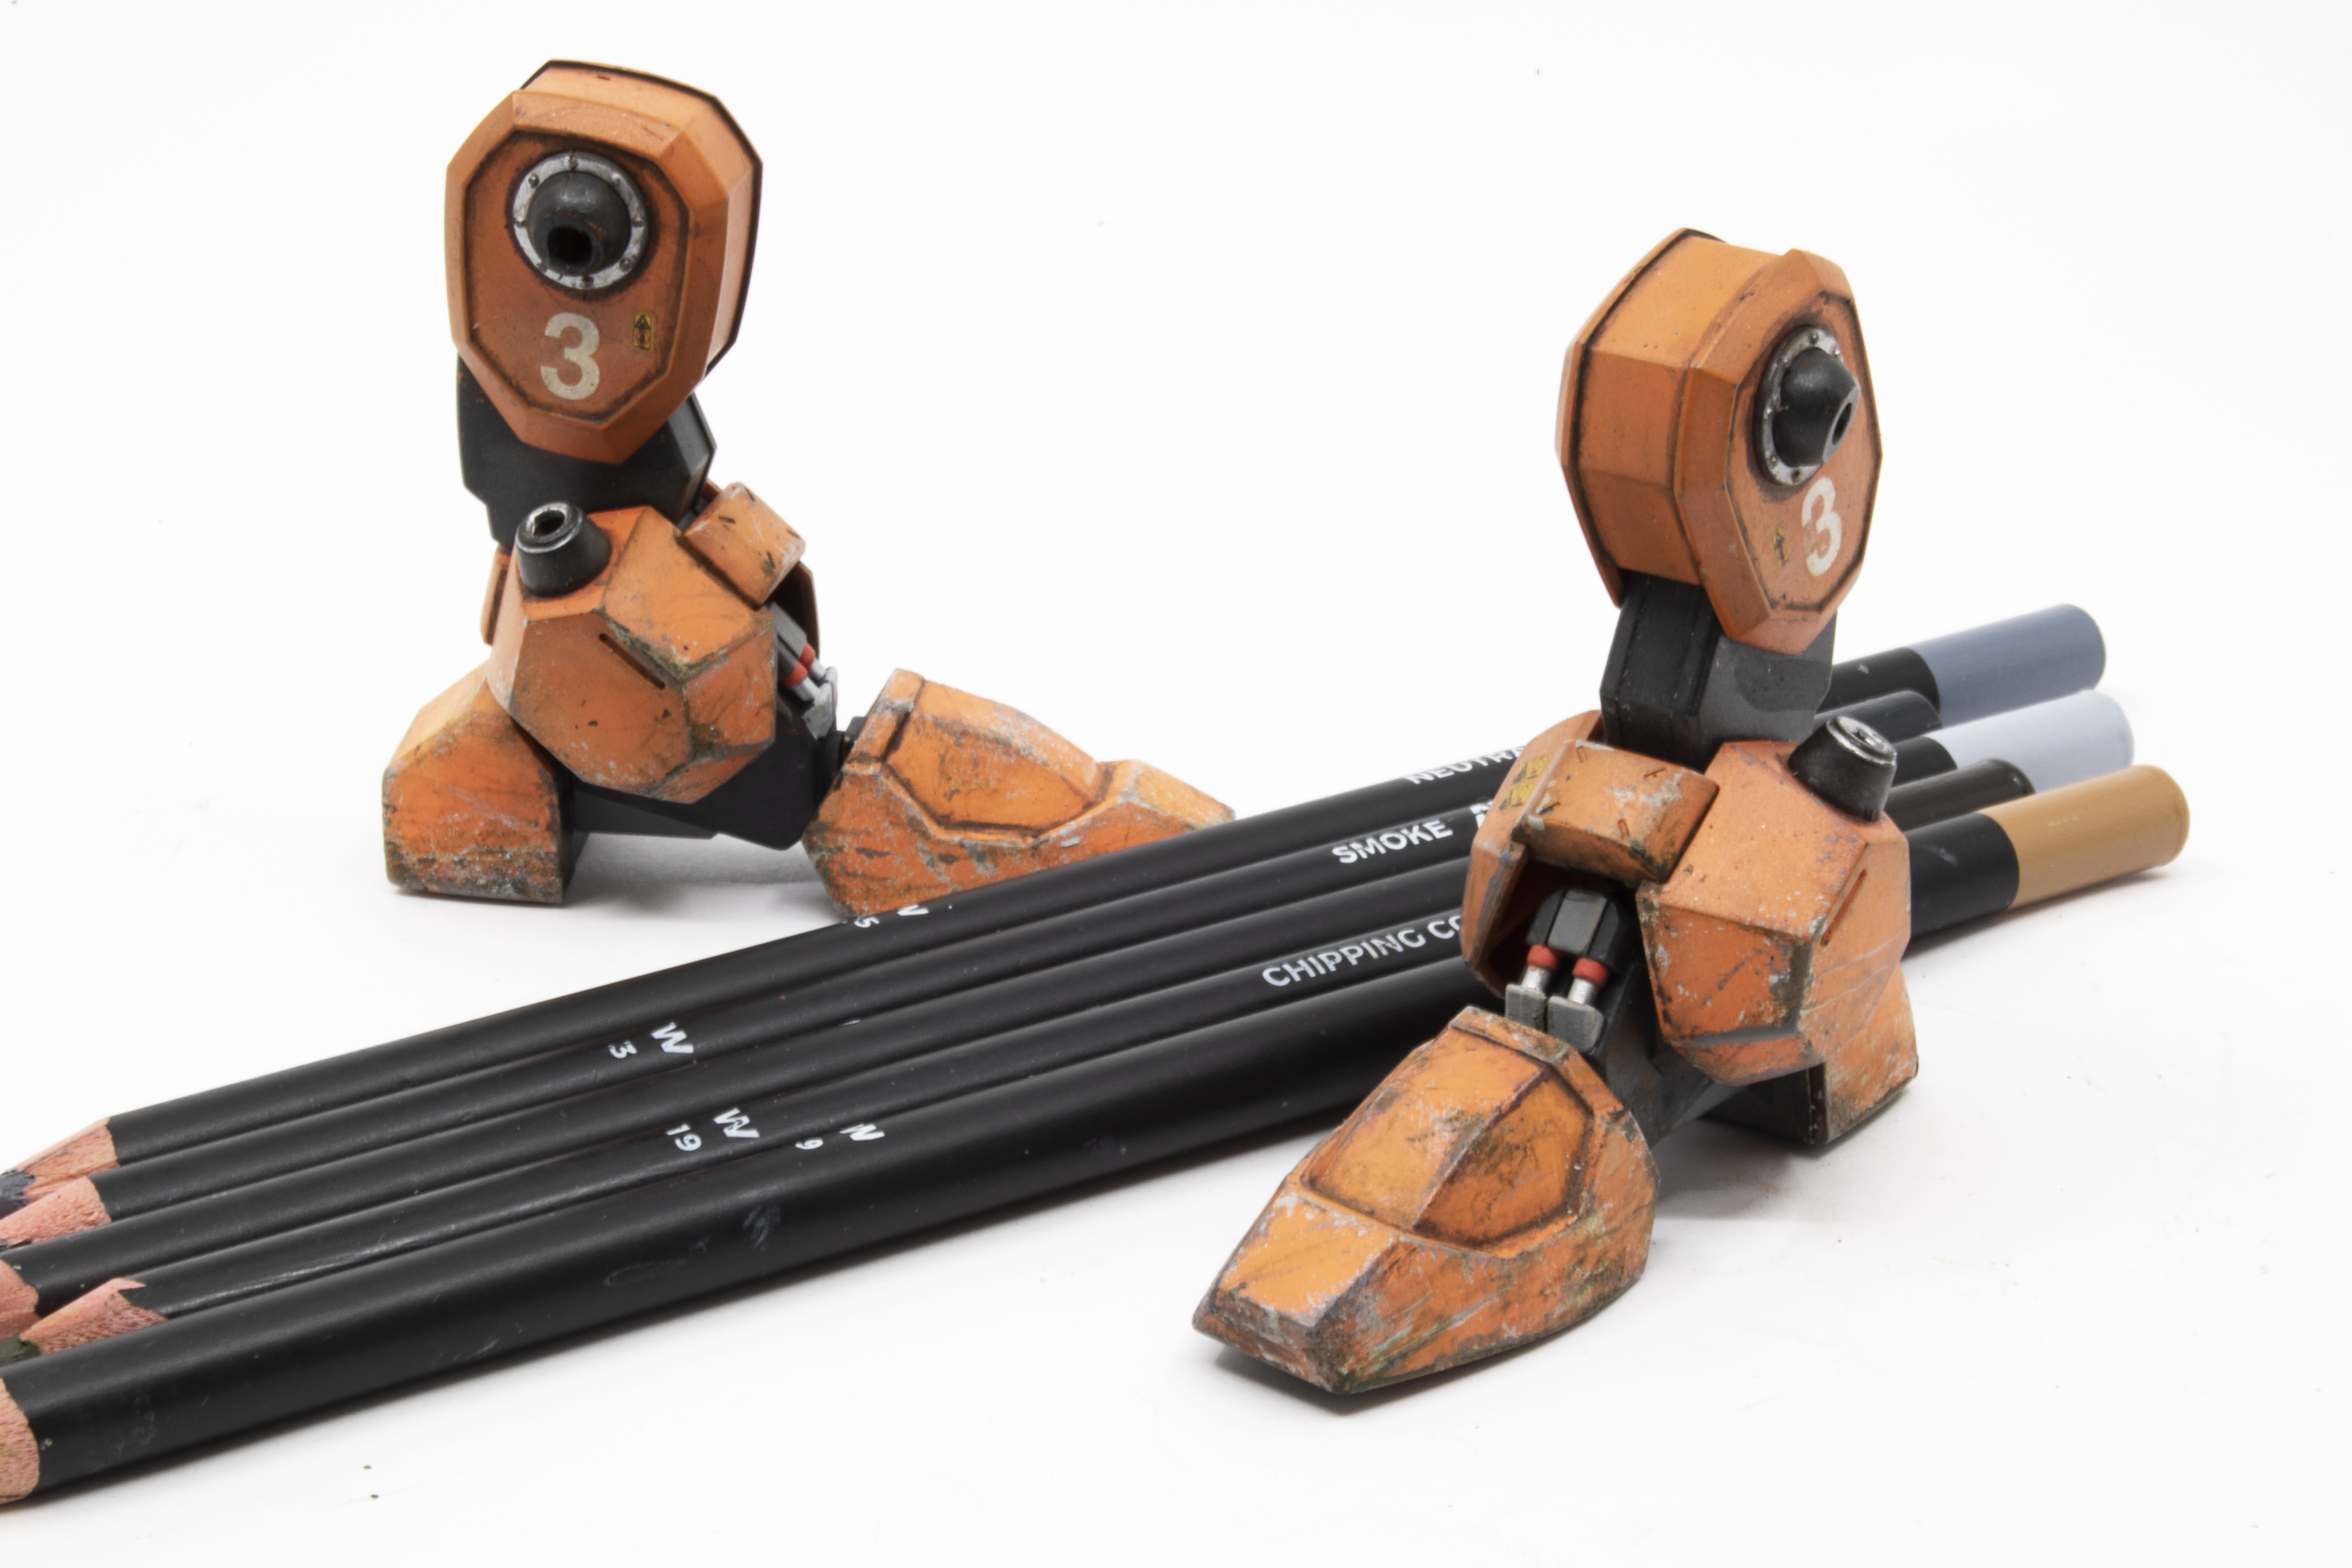
Again, the pencils are used to enhance areas of heavy wear on the lower armor. In this case, the tip of the pencil has been dipped into a cup of water to slightly moisten, and then, the marks are applied upon the surface. In certain areas, I will apply directly on top of an existing scratch or blemish, and other times I will use the pencils to create new scratches and chips.
 The final results of using a combination of acrylic and oil paints, along with the weathering pencils. Not one particular method dominates the effects, but work together in harmony to produce an interesting and realistic finish. A final touch is to apply a light dusting of pigments to the lower body. The pigments not only give the model a gritty appearance, but these colors will help tie the model into the small scenic base.
As mentioned above, I decided that a small scenic base would make for a nice presentation. I began by carving interesting elevations into AK 30mm A4 extruded foam. The abandoned tire is from my parts box, originally from the Hasagawa Hitachi front loader kit. I used the extra pieces of the cut-out foam and small rocks to represent rubble and debris. AK Asphalt paste was applied to the road, while Earth texture was used to represent the damaged areas. The rocks and debris and yellow road stripe are painted out using AK acrylic colors. Finally, a light dusting of pigments was applied, especially concentrating on the debris areas (same colors as dusted onto the Mobile Worker), as well as a light application of Africa Dust and Dark Brown wash.


![]()