
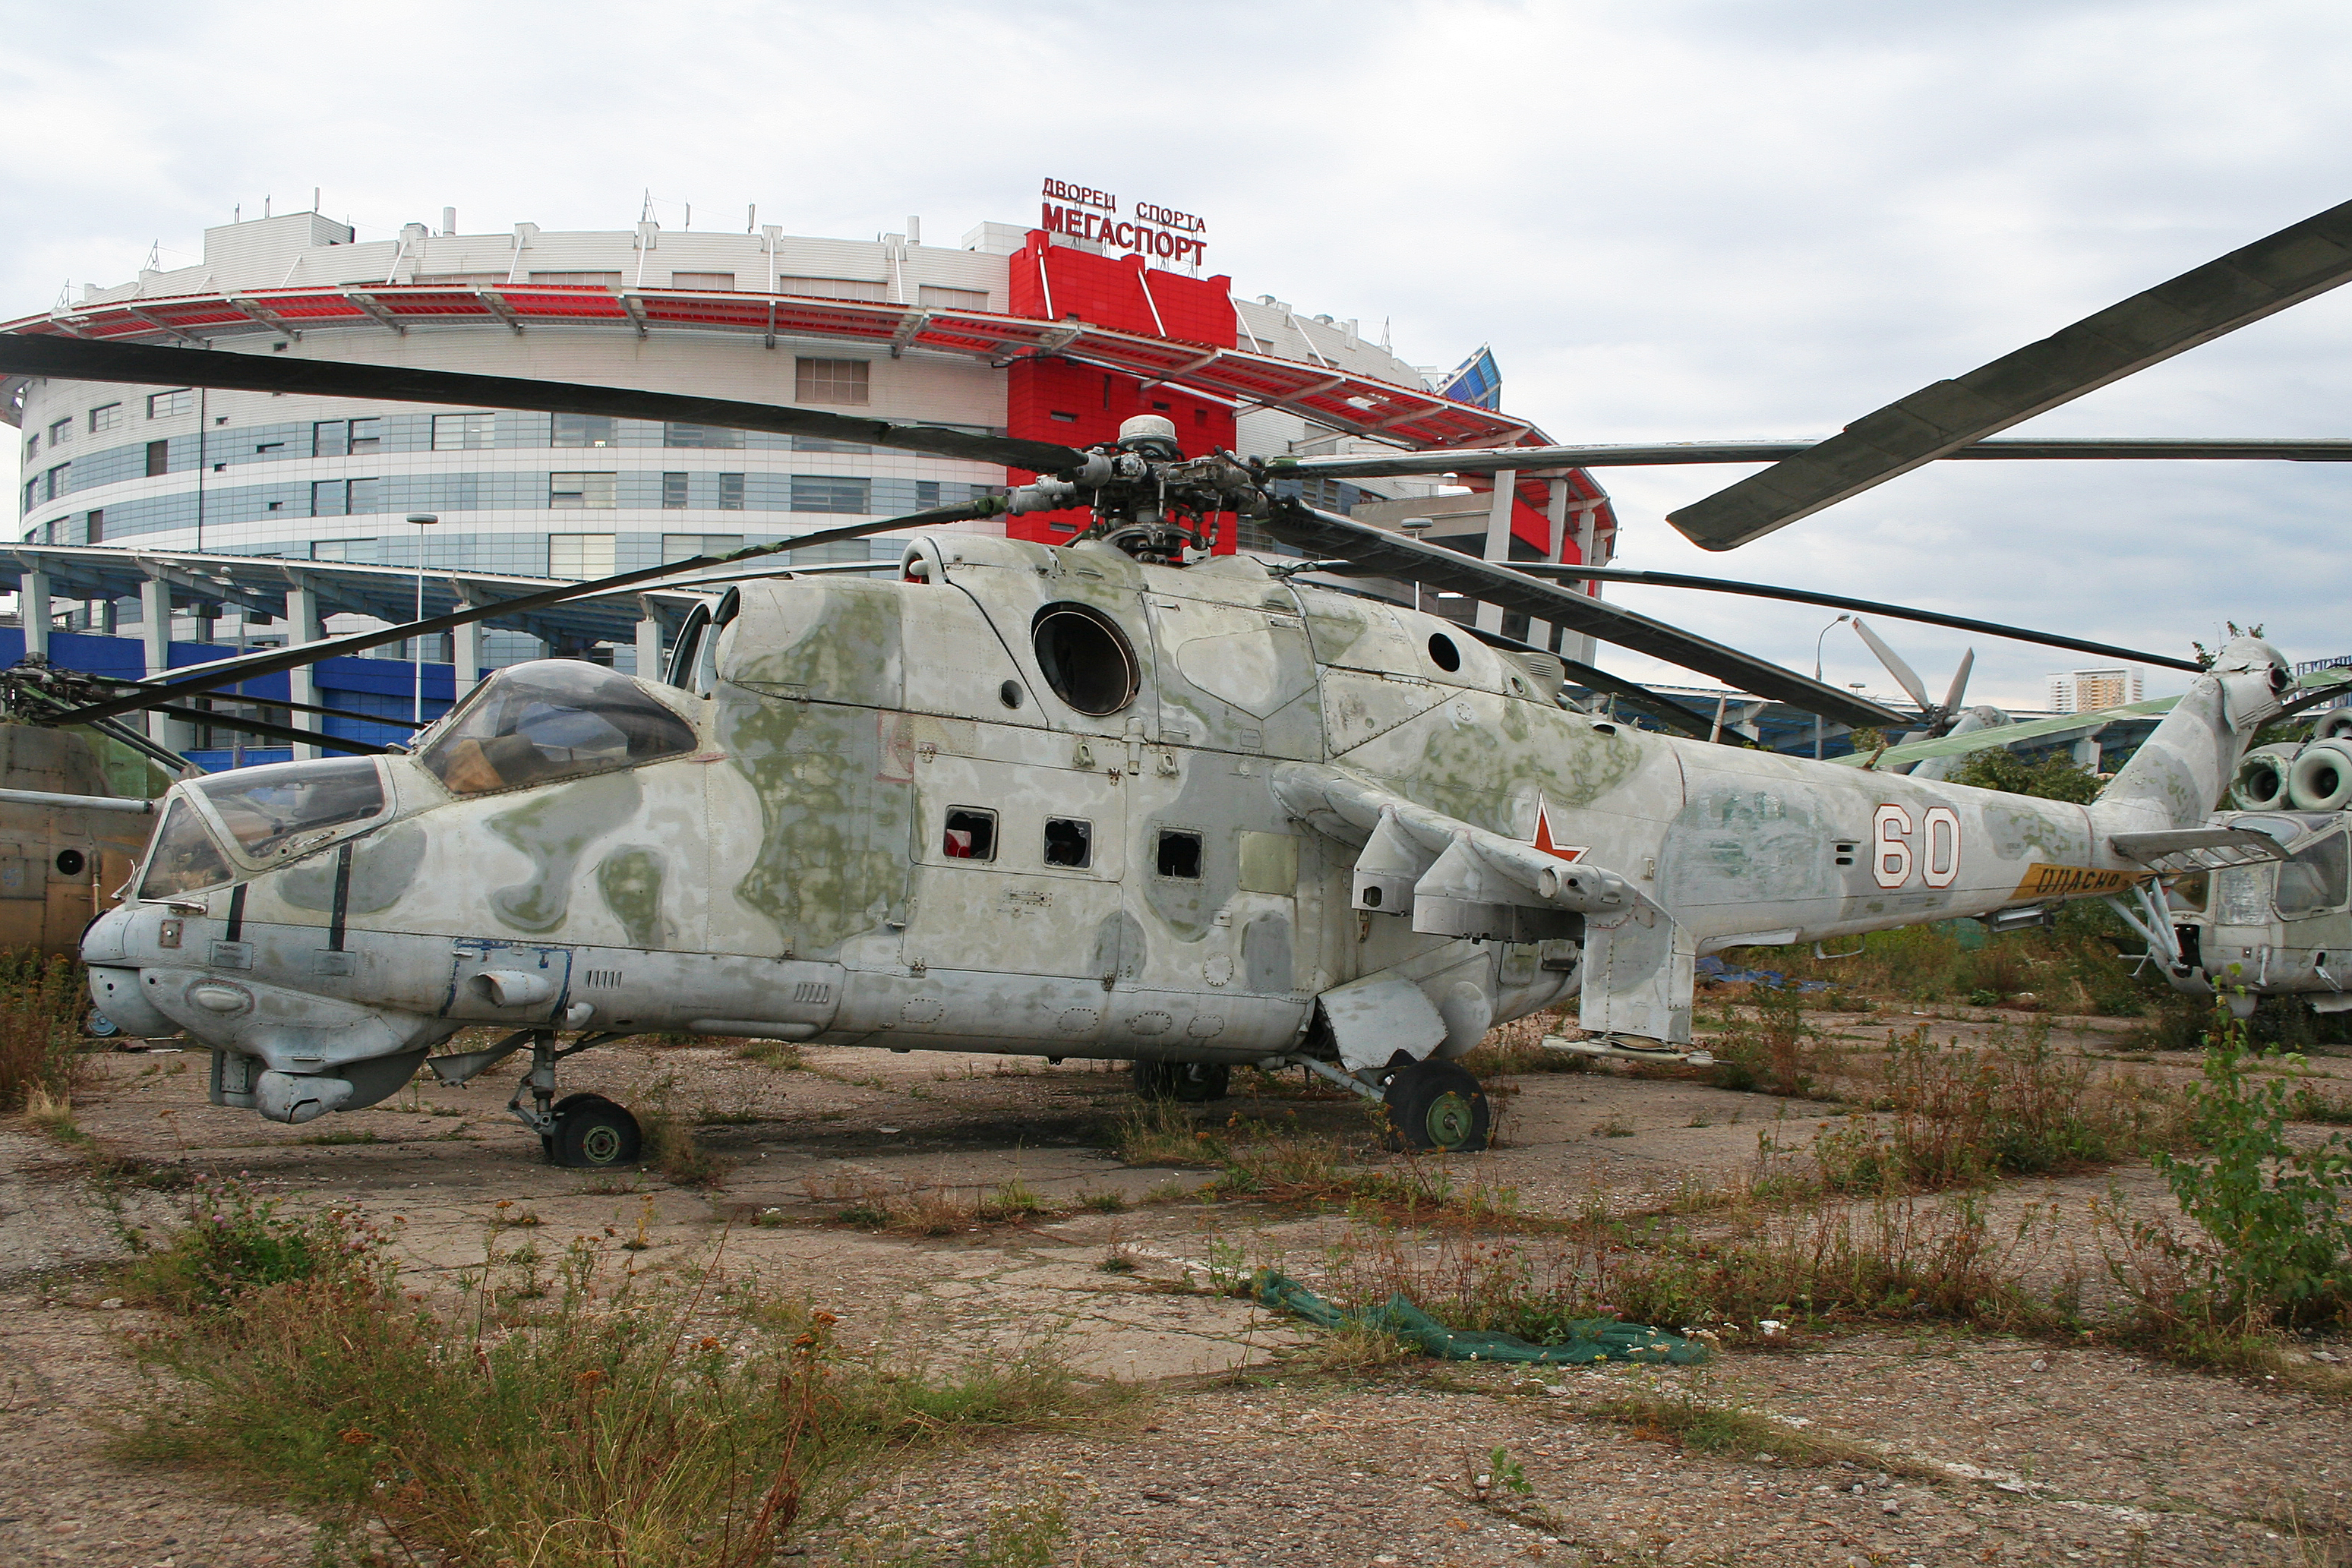
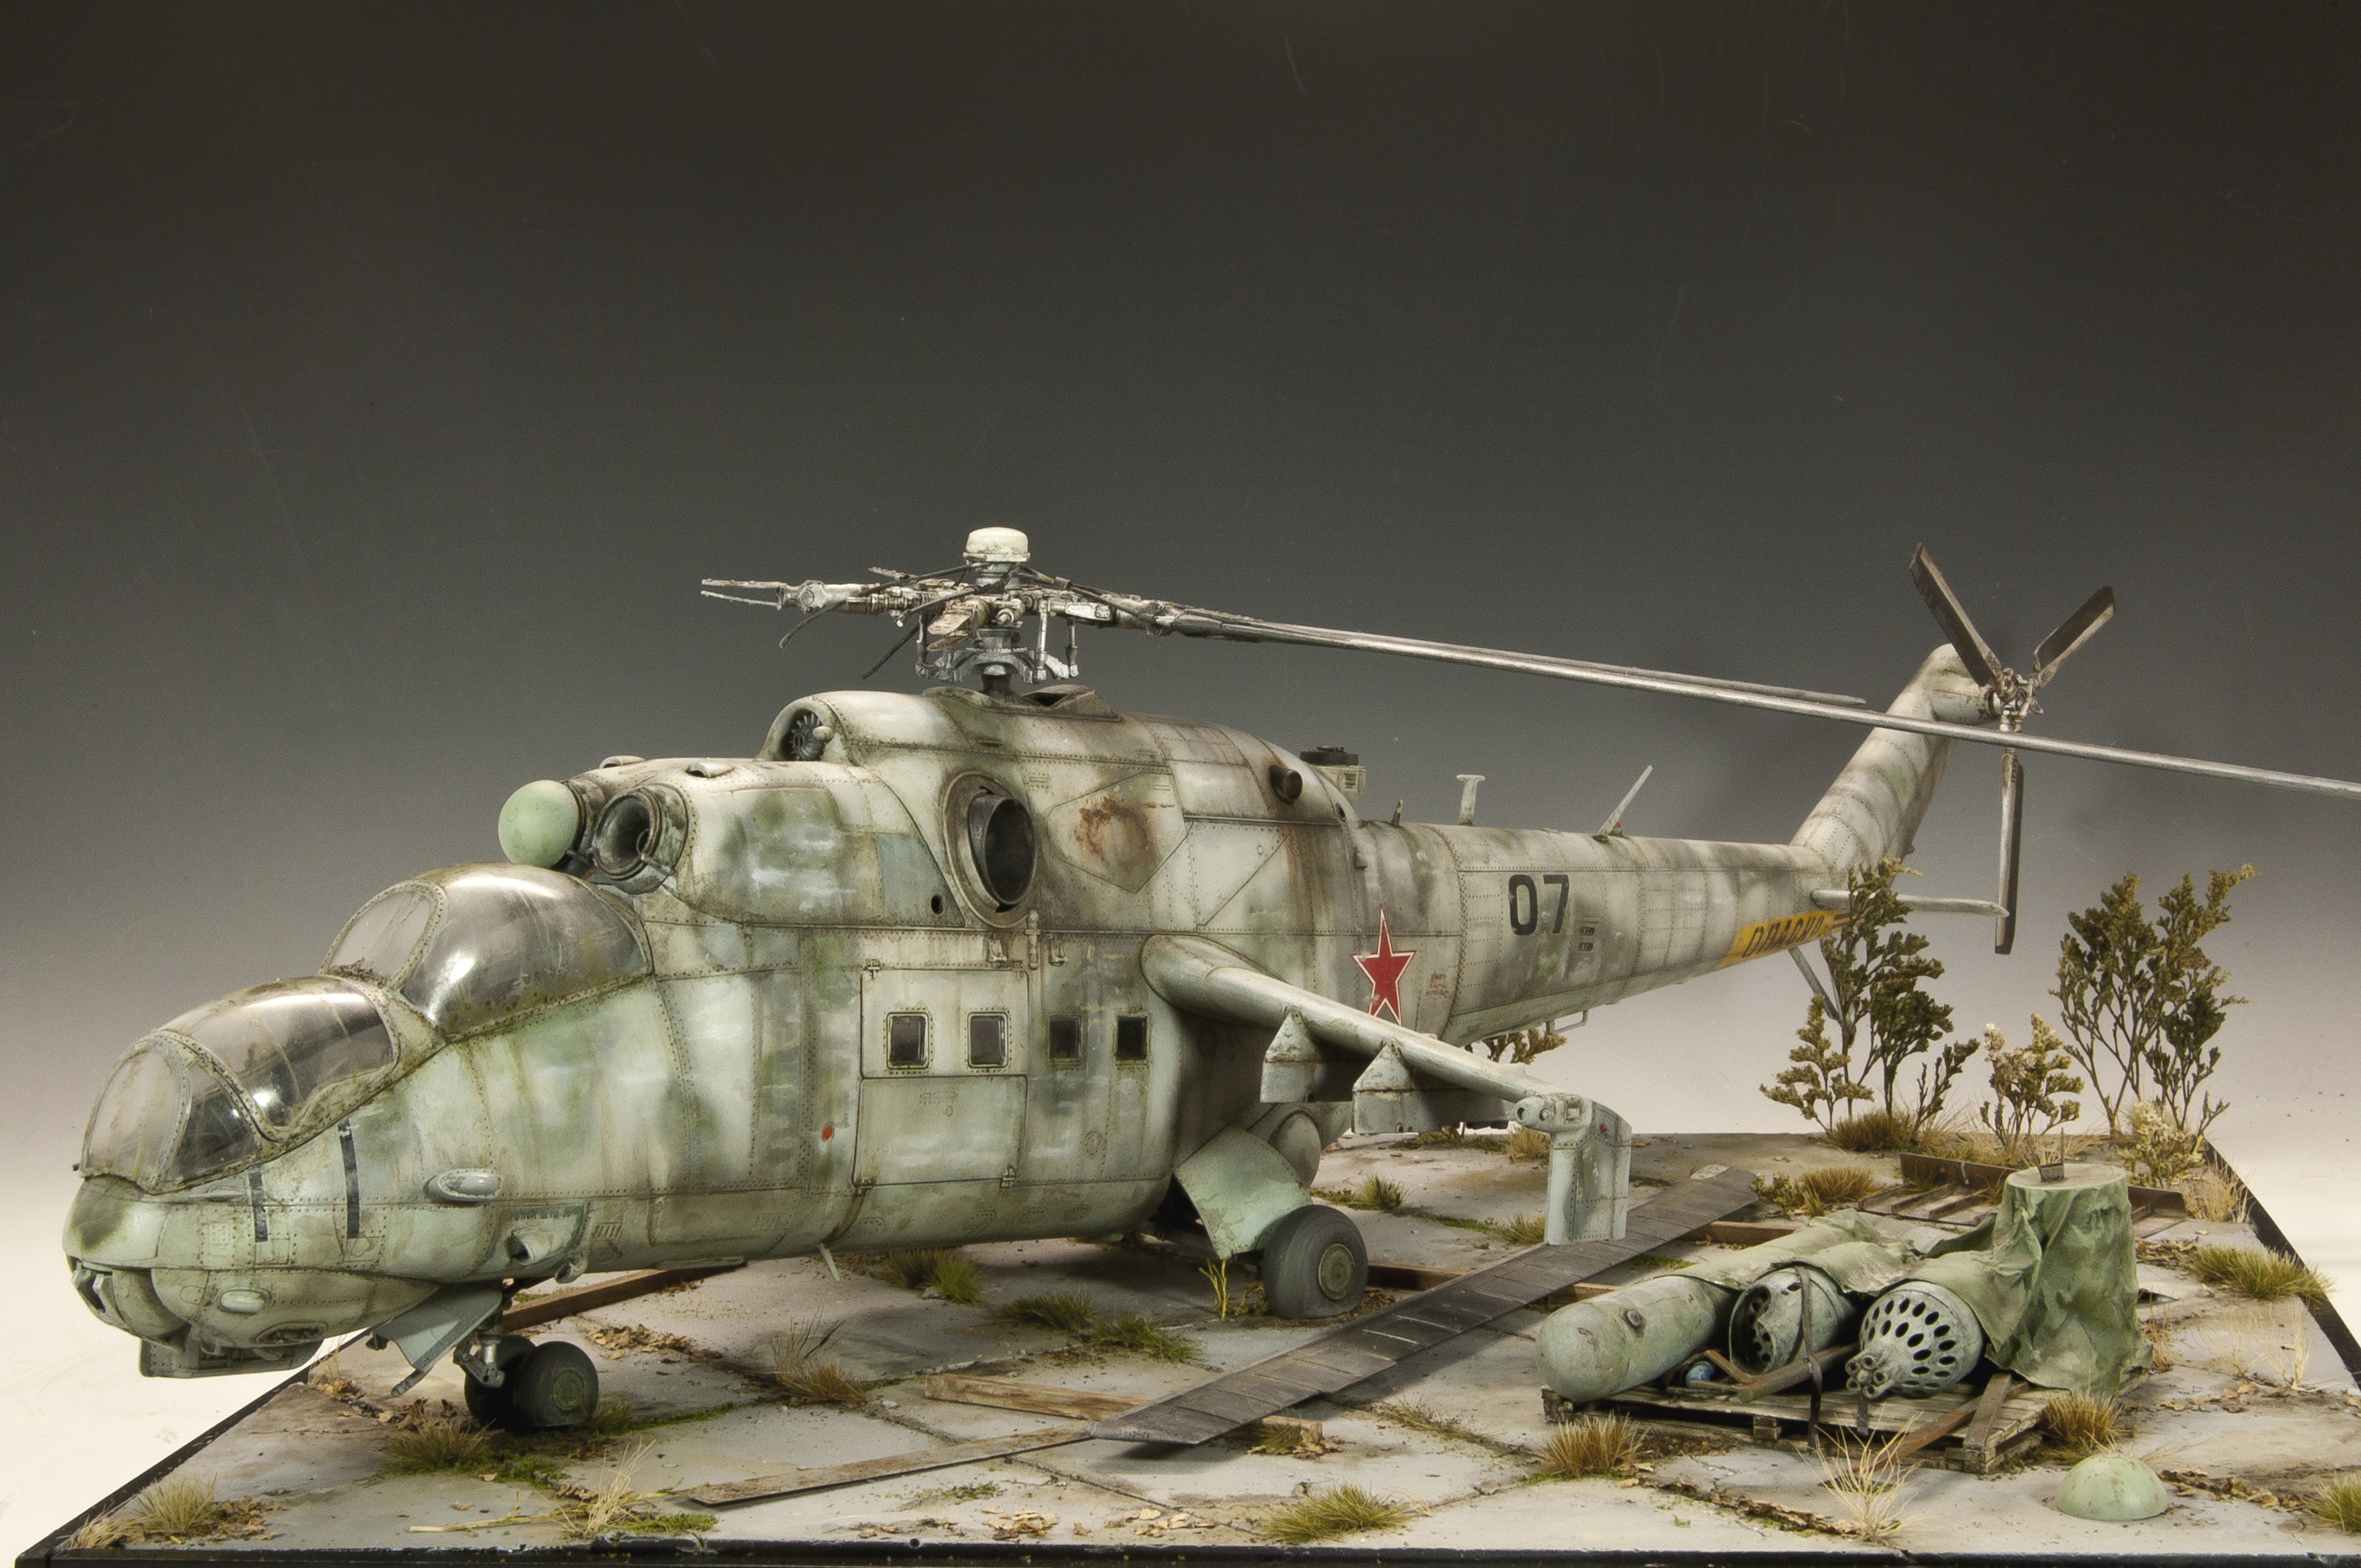
 This is one of those projects that I do just for the heck of it. At least at the time I was building this model I had no particular goal, no particular magazine space needs to be filled, no particular new product release needs to be highlighted. One evening while surfing the web I stumbled upon a gallery of photos showing abandoned Russian helicopters; parked and left to the elements in what appears to be inner-city parking lots. The thought of all of that high-tech hardware simply “put out to pasture” is quite mind-boggling if you think about it. Cold war weapons reduced to discarded carcasses of aluminum and fading paint. And there is the key, the faded paint!! The colors and patina exhibited on these forgotten beasts is amazing – yes, in my case irresistible.
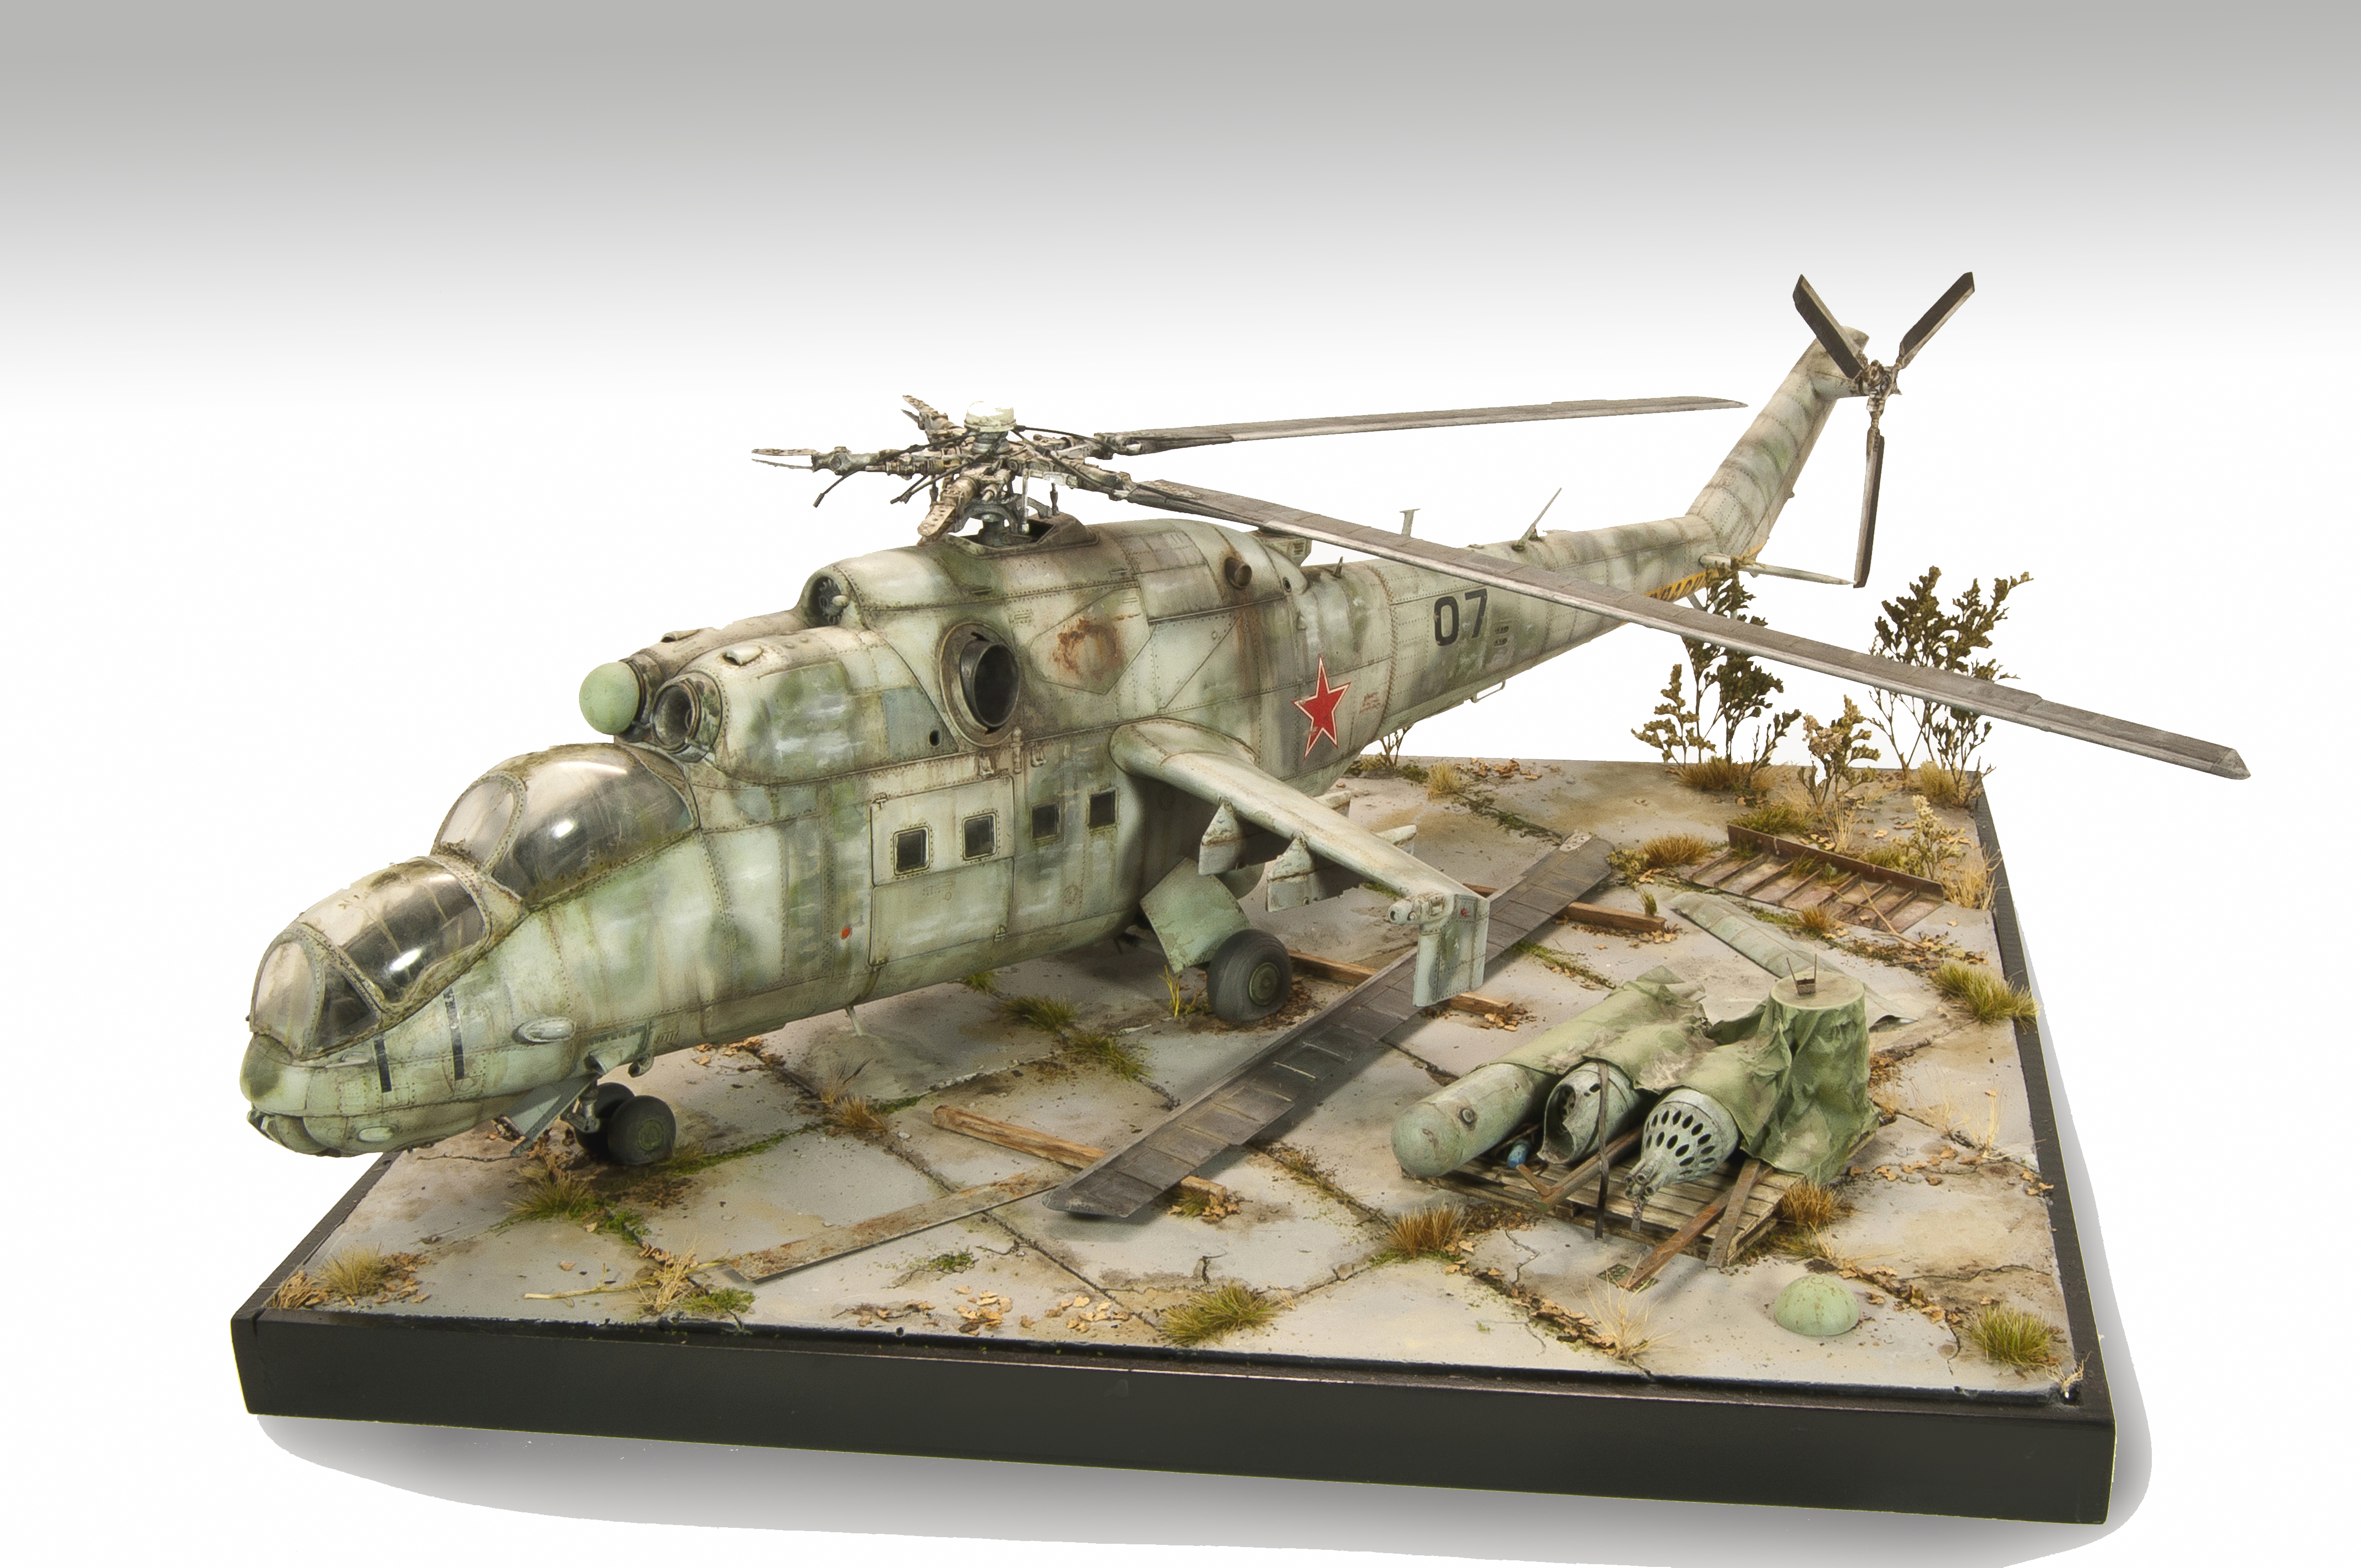
My weapon of choice is the Hind MIL-24 from Trumpeter in 1:35 scale. During the early 1960s, it became apparent to Soviet designer Mikhail Leont’yevich Mil that the trend towards ever-increasing battlefield mobility would result in the creation of flying infantry fighting vehicles, which could be used to perform both fire support and infantry transport missions. The first expression of this concept was a mock-up unveiled in 1966 in the experimental shop of the Ministry of Aircraft’s factory number 329 where Mil was head designer. The mock-up designated V-24 was based on another project, the V-22 utility helicopter, which itself never flew. The V-24 had a central infantry compartment that could hold eight troops sitting back to back, and a set of small wings positioned to the top rear of the passenger cabin, capable of holding up to six missiles or rockets and a twin-barreled GSh-23L cannon fixed to the landing skid.

|

|

|

|
Mil proposed the design to the heads of the Soviet armed forces, and while he had the support of a number of strategists, he was opposed by several more senior members of the armed forces who believed that conventional weapons were a better use of resources. Despite the opposition, Mil managed to persuade the defense minister’s first deputy, Marshal Andrey A. Grechko, to convene an expert panel to look into the matter. While the panel’s opinions were mixed, supporters of the project eventually held sway and a request for design proposals for a battlefield support helicopter was issued. The development of gunships and attack helicopters by the US Army during the Vietnam War convinced the Soviets of the advantages of armed helicopter ground support doctrine, which had a positive influence on moving forward with the development of the Mi-24

|

|

|

|

|

|

|

|
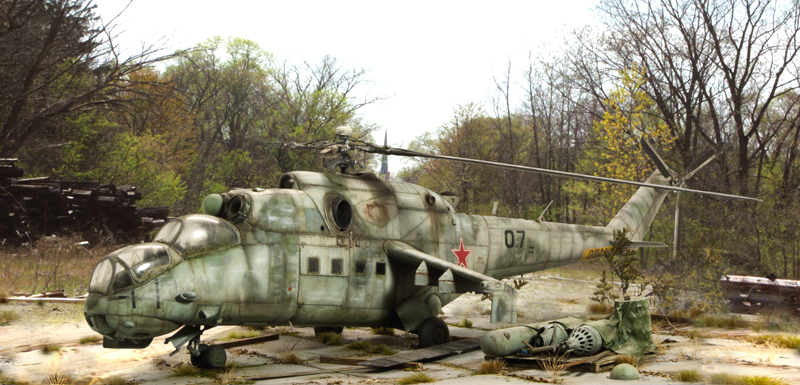
Being that this is the first helicopter that I have ever built; my first response is that I am surprised by how large this thing is. In 1/35 scale the ‘chopper measures roughly 20″ from nose to tail. That’s a lot of space to deal with!! As mentioned it was the faded, stained, and oxidized finish of these machines that caught my eye, now the problem is how to achieve these effects. Recently many of my modeling friends have been experimenting in this area – creating oxidized appearances – using a number of chemical and technical solutions. These processes run the range from hairspray, chipping solutions, and now experiments using Windex and other types of household cleaners. I’ve used, or at least have tried, each of these solutions, and the results are undeniable – they each can lead to excellent results. However, my approach for this particular project will lean a bit more toward “traditional” techniques. Well, sort of – I feel that regardless of the method of application and the processes that you are following, even the most “dated” of techniques are constantly influenced and refreshed and have a place and relevance in today’s modeling world. With that said, my methods for this project will tend to follow a more traditional tact, relying heavily on airbrush and hand brush techniques. Yet, it is undeniable that the use of a more recent layering philosophy, the use of artist’s oils, color mapping, and a host of newer techniques will make their presence felt during the course of the project.
|

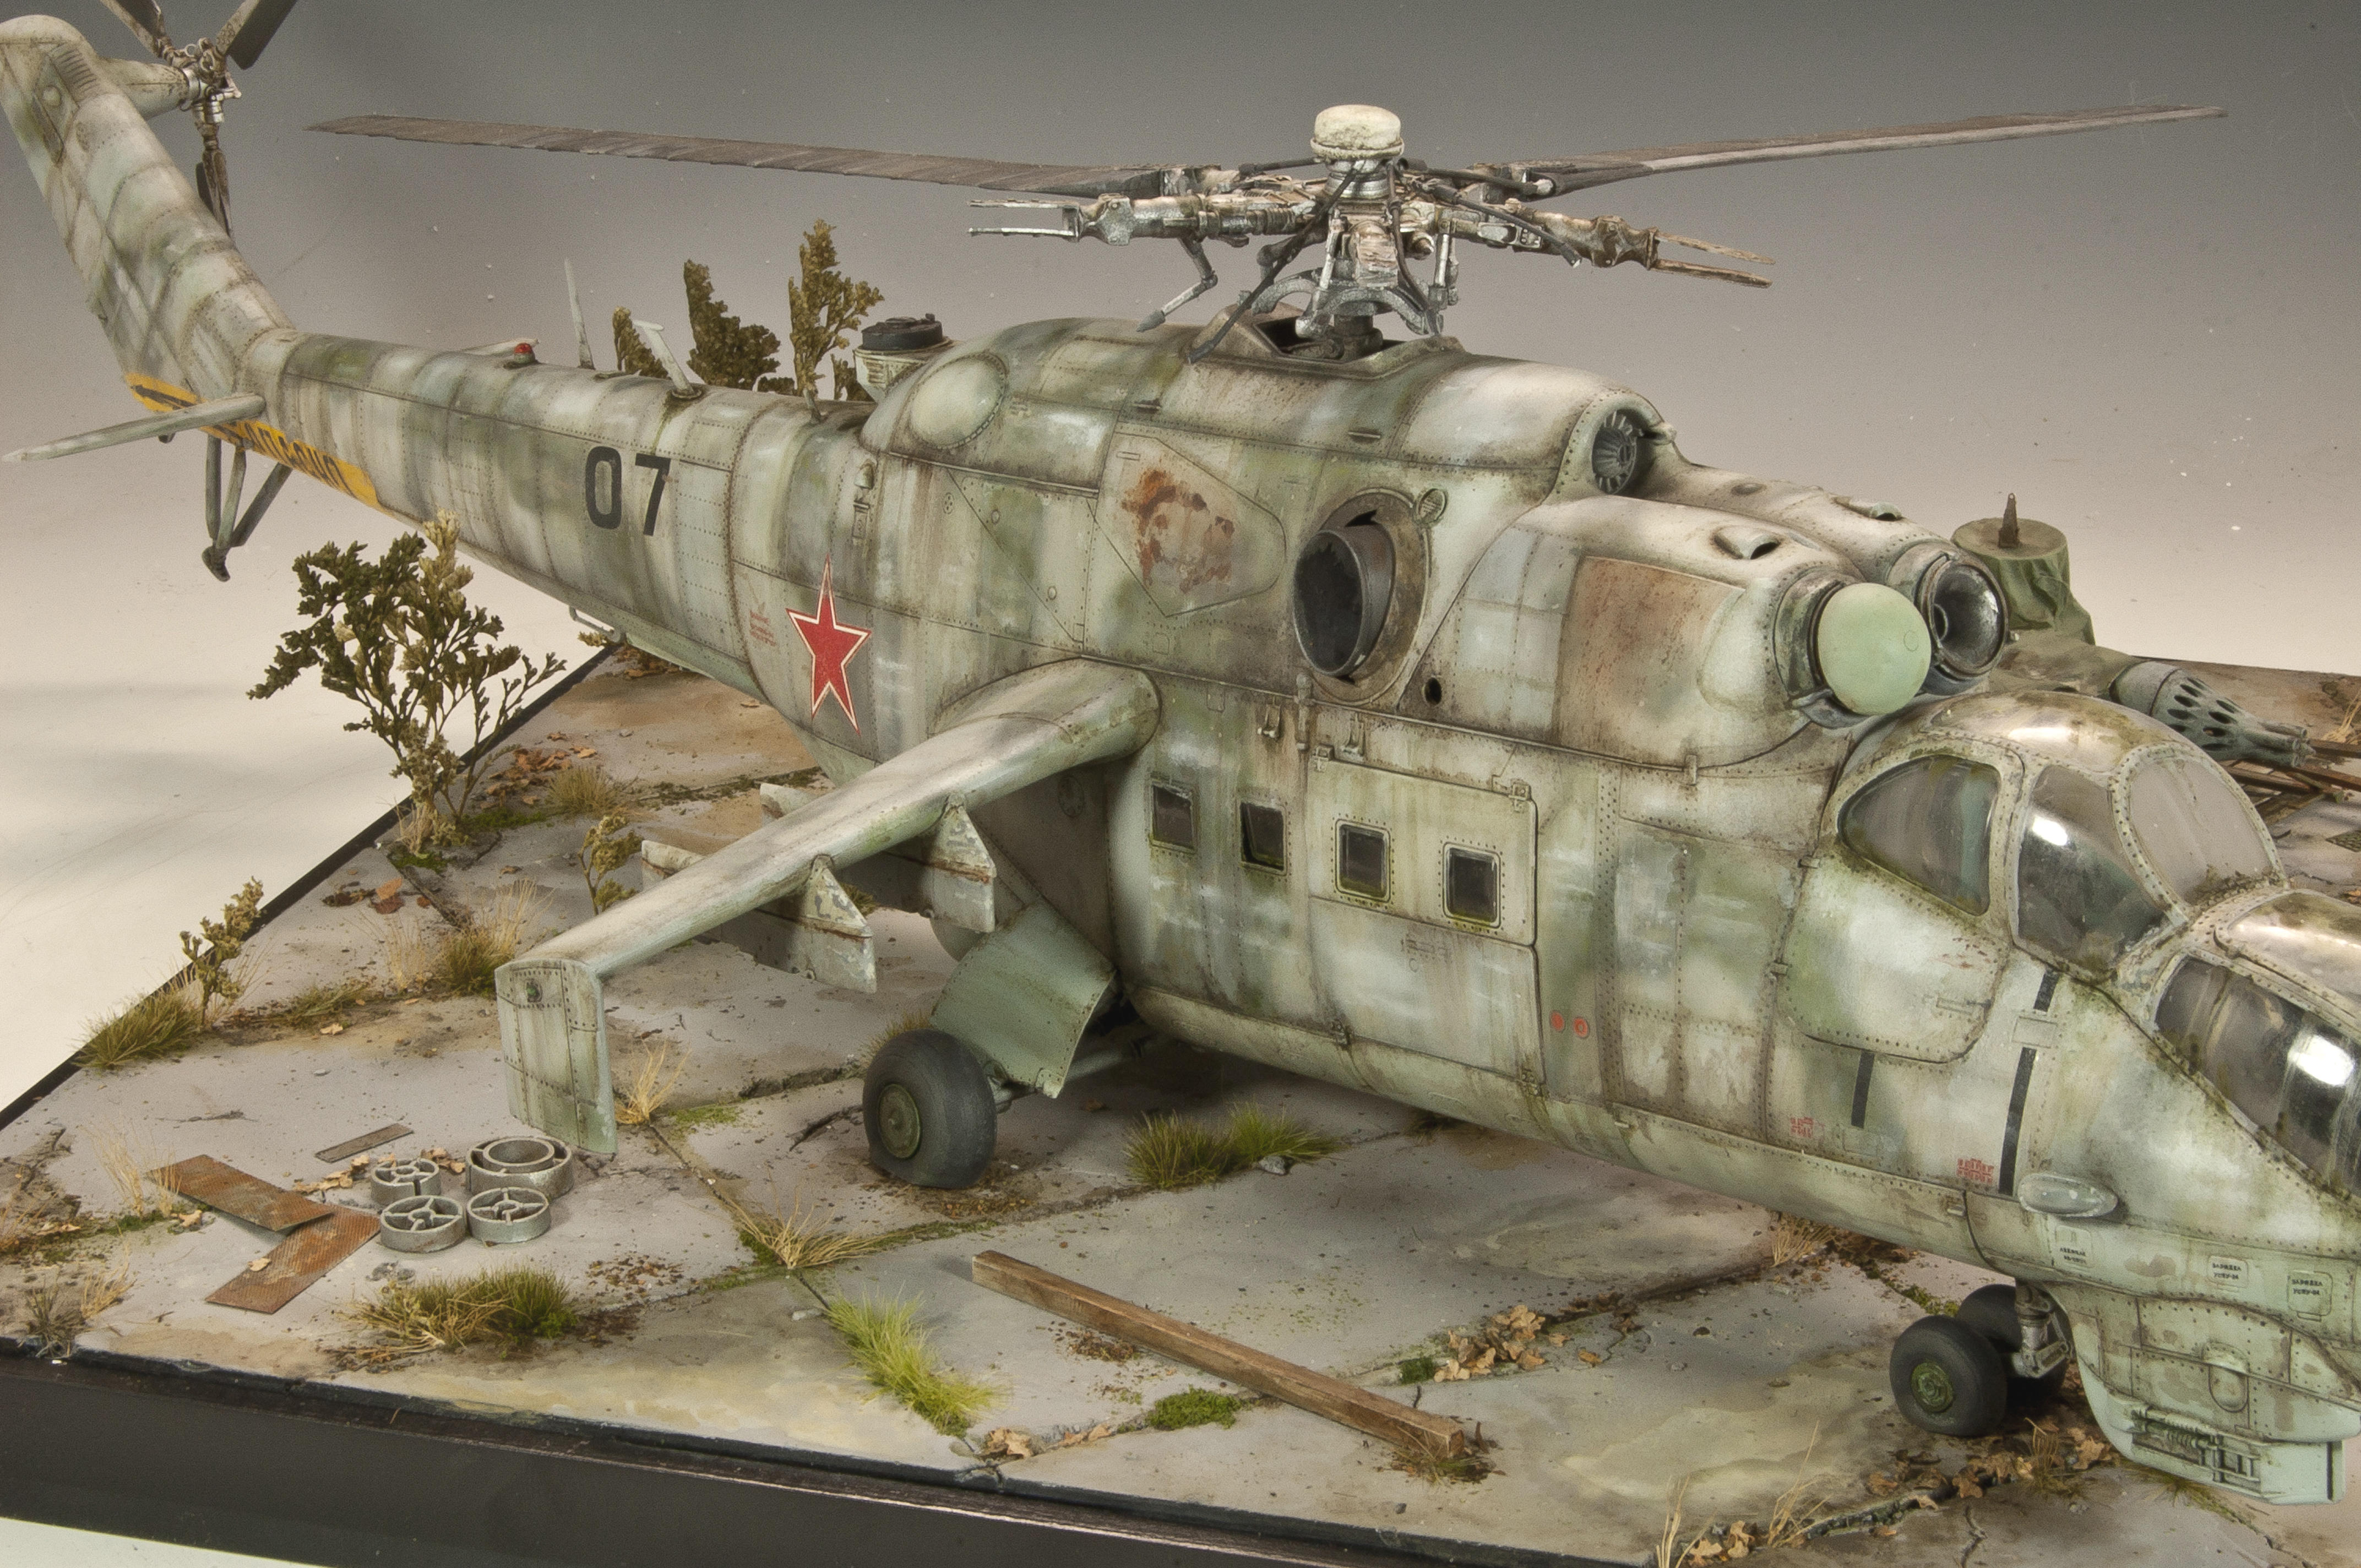
Even though much of the interior portions of the helicopter will be hidden upon final construction, I decided to go ahead and spend the time to finish almost of the elements. Why rush through a build? And, since this was my first helicopter model I felt that the time spent constructing and painting the hidden elements would help get my head into the game. The cockpit color is a mixture of Tamiya colors to match the distinctive colors used in Russian craft. The engines are painted using Model Master Metallizer paints…I love these paints as they cover well and provide very realistic metal finishes. The Buffing colors, in particular, are extremely useful as they can be rubbed (buffed) to achieve a polished metal appearance. Applications of various enamel washes provide nice shadowing and a general grimy patina – super easy and effective.
Construction follows the kit instructions which have a logical, relaxed flow. The parts count is relatively low and the pieces are relatively large so the structure takes shape quickly. The only deviations I made were to flatten the tires and remove some of the top rotor blades to help portray the abandoned feeling. A bit of hydraulic tubing was also added to the top and rear rotor – just enough to make it look interesting.
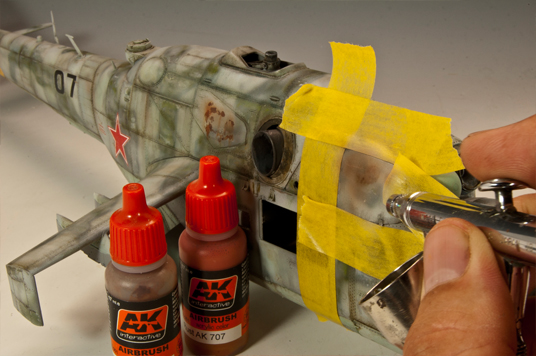
The cockpit interior is taped off for protection and then the painting begins with an under-layer of grey primer. The primer is followed by an overall application of varying light grey colors and a general pre-shade of the panel lines. The use of panel pre-shade seems to be typical of aircraft modeling – so, since I don’t have a lot of experience finishing aircraft I simply elect to follow their lead and use the technique. I should, however, explain a bit about the application of the grey base colors and my thoughts on the methodology I used for this project.

|

|

|

|

|

|

|

|

|

|
You’ve probably noticed by now that I used a large array of grey/blue colors – this is intentional. Most weathered finishes, and especially oxidized finished display a wide range of colors – laying down an interesting, variable base is the first step toward achieving this appearance. I’ll continue to refine and enhance these variations throughout the process. A quick spray of a commercial satin seals the base layer and I’m ready to get on with it. The satin layer is just a personal thing of mine. Call it a safety net, if you will, but I like knowing that I have a stable base underneath all of the colors and abuse that I’ll be throwing at it next. Plus, I just like the “feel” of working over a hardened, smooth surface.
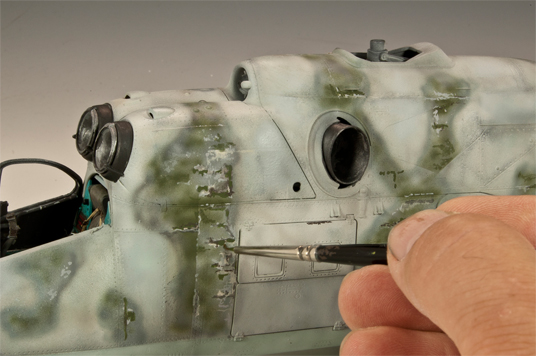
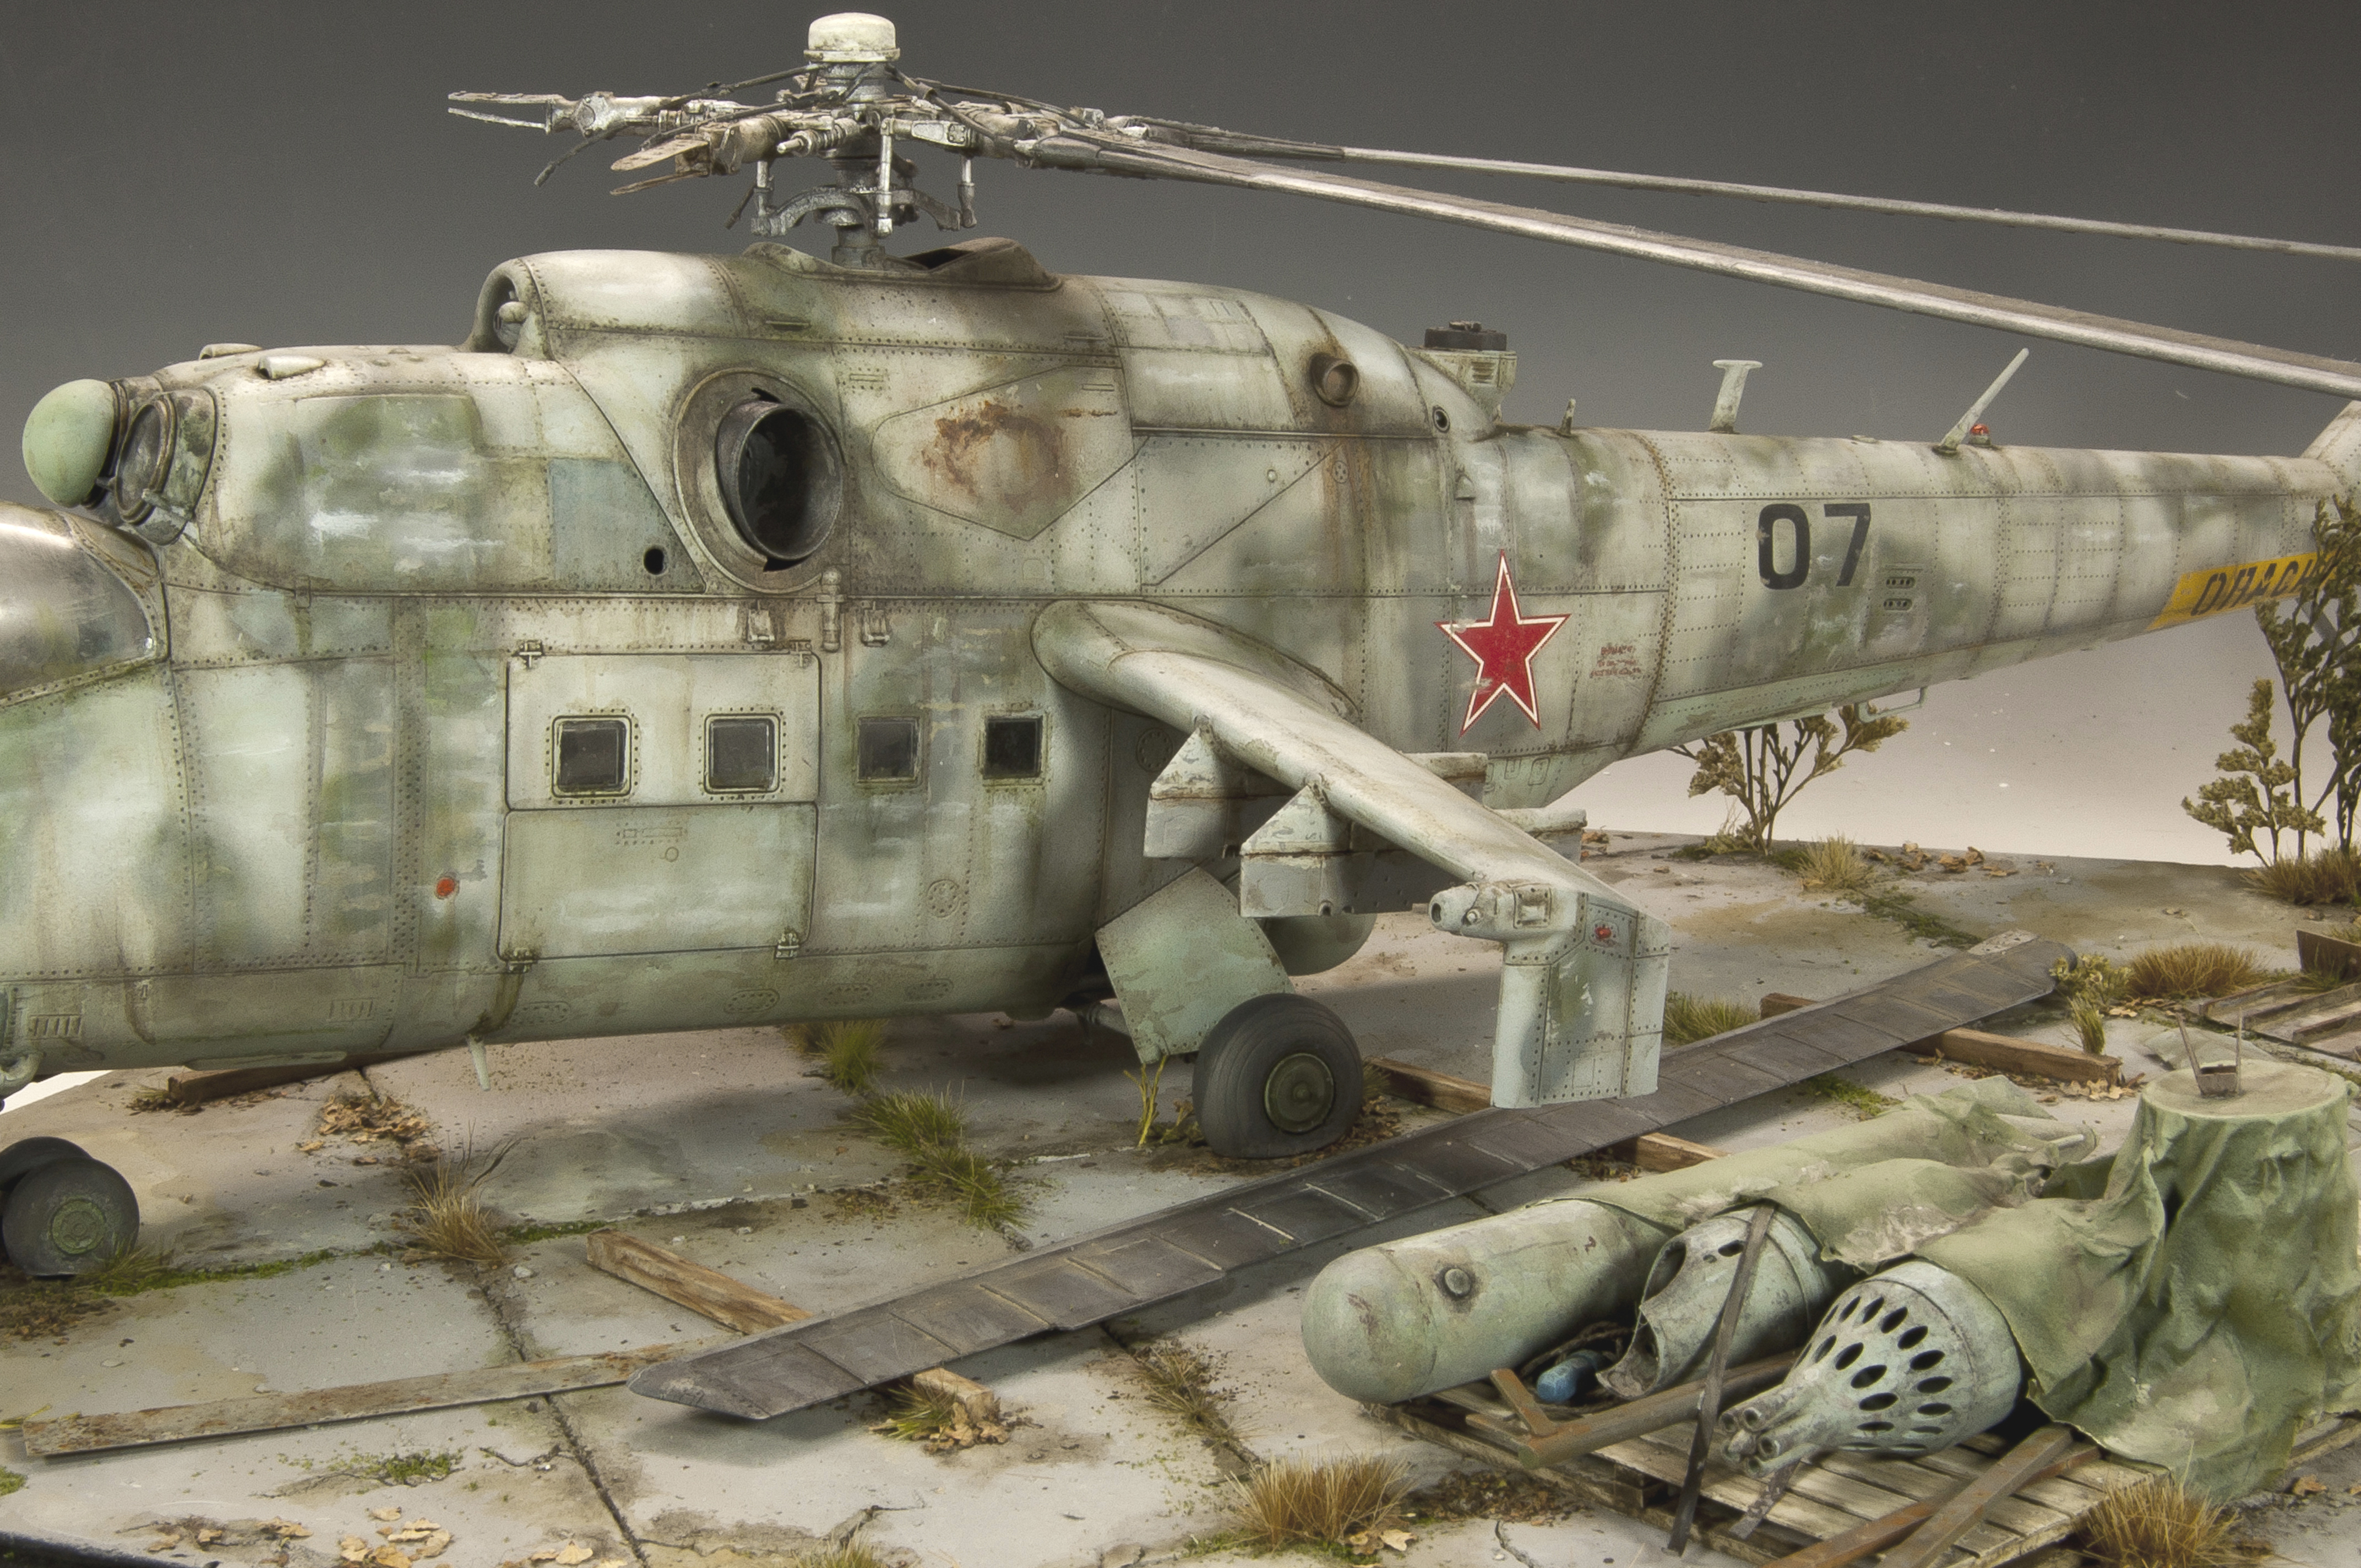
A quick spray using light grey lightened with white is UN-evenly applied overall. I want the underlying layers of grey and pre-shade to still show through in places. Adding white to the paint helps with the oxidized appearance. Over this, I added a truly random variation of color – light wavy stripes using grey and tan paints are applied overall. My intention is that these squiggly lines will add just one more layer of “something is going on” with the finish….the key is layers. Next, the camouflage is laid on using light layers of grey and green paints. In this case, I have a particular reference image that I am using to follow the distinctive pattern. Once the camo layers are completed the overall effect appears mottled and unfinished, certainly, the coverage is less than complete – but that is exactly the appearance that I am looking for. The non-uniformed coverage, the multiple (thin) layers of coverage will provide me with the perfect base upon which to add additional fading and oxidation effects.
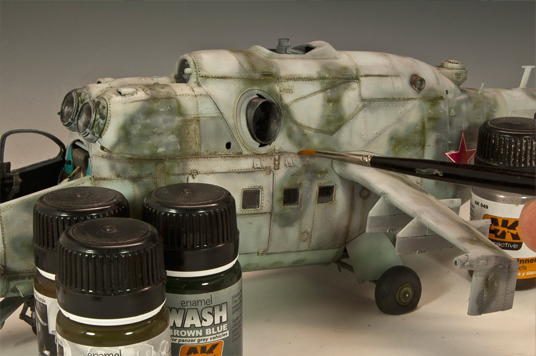
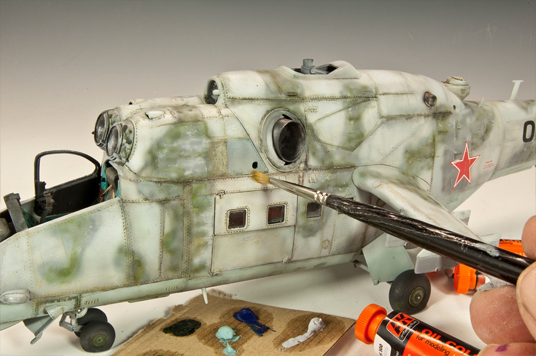
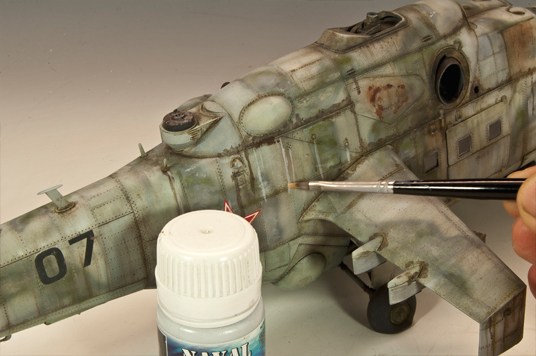
It’s difficult to break down my workflow into any sort of linear flow – the attached photographs attest to this fact. As can be seen, my work path is overall – working here, touching up there, adding a wash along this area and that area. I am well aware that some modelers prefer to work in one small area, bring that area to full perfection and then move onto the next small area – working around the model section by section. The results by some of those who prescribe to the style cannot be argued, some of modelers that I admire most follow this path. I, however, apparently lack the concentration and patience to follow that approach – preferring instead to work in a more “organic” approach. Neither method is superior – just different.
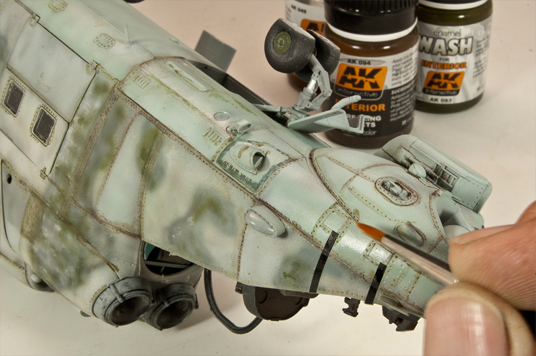
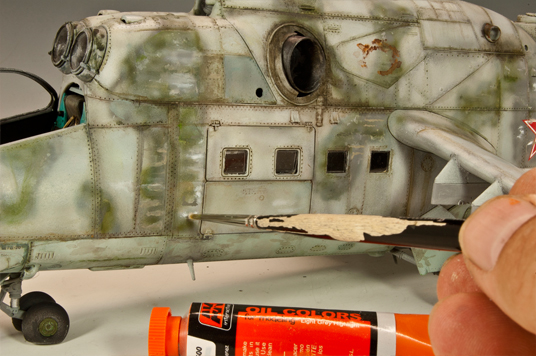
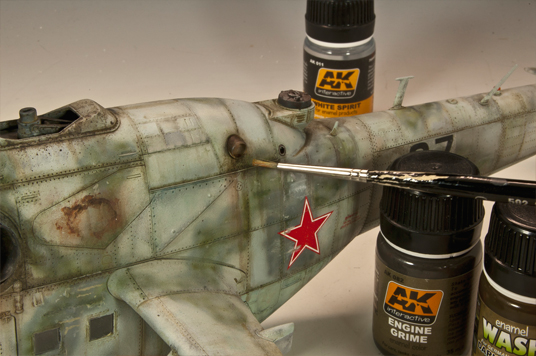
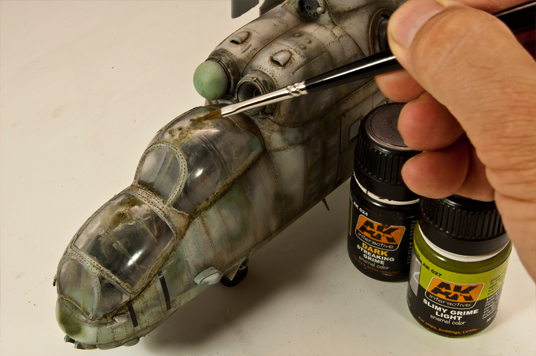
 Ok, enough of that! Focusing back on the finish, one of the keys to my chosen approach to achieving fade and oxidation is the application of layers to slowly fade, or mute the colors. Light washes of light grey and greens are applied over the camo pattern; light grey and even white is applied over the base grey. Definition along panel lines and surface details are picked out using enamel washes and filters – again using a variety of shades. Of particular note is the use of artist’s oils to add larger peels and faded areas. Artist’s oils offer a unique capacity of providing all types of nuanced effects from highly opaque (even textured) to barely visible, translucent veils.
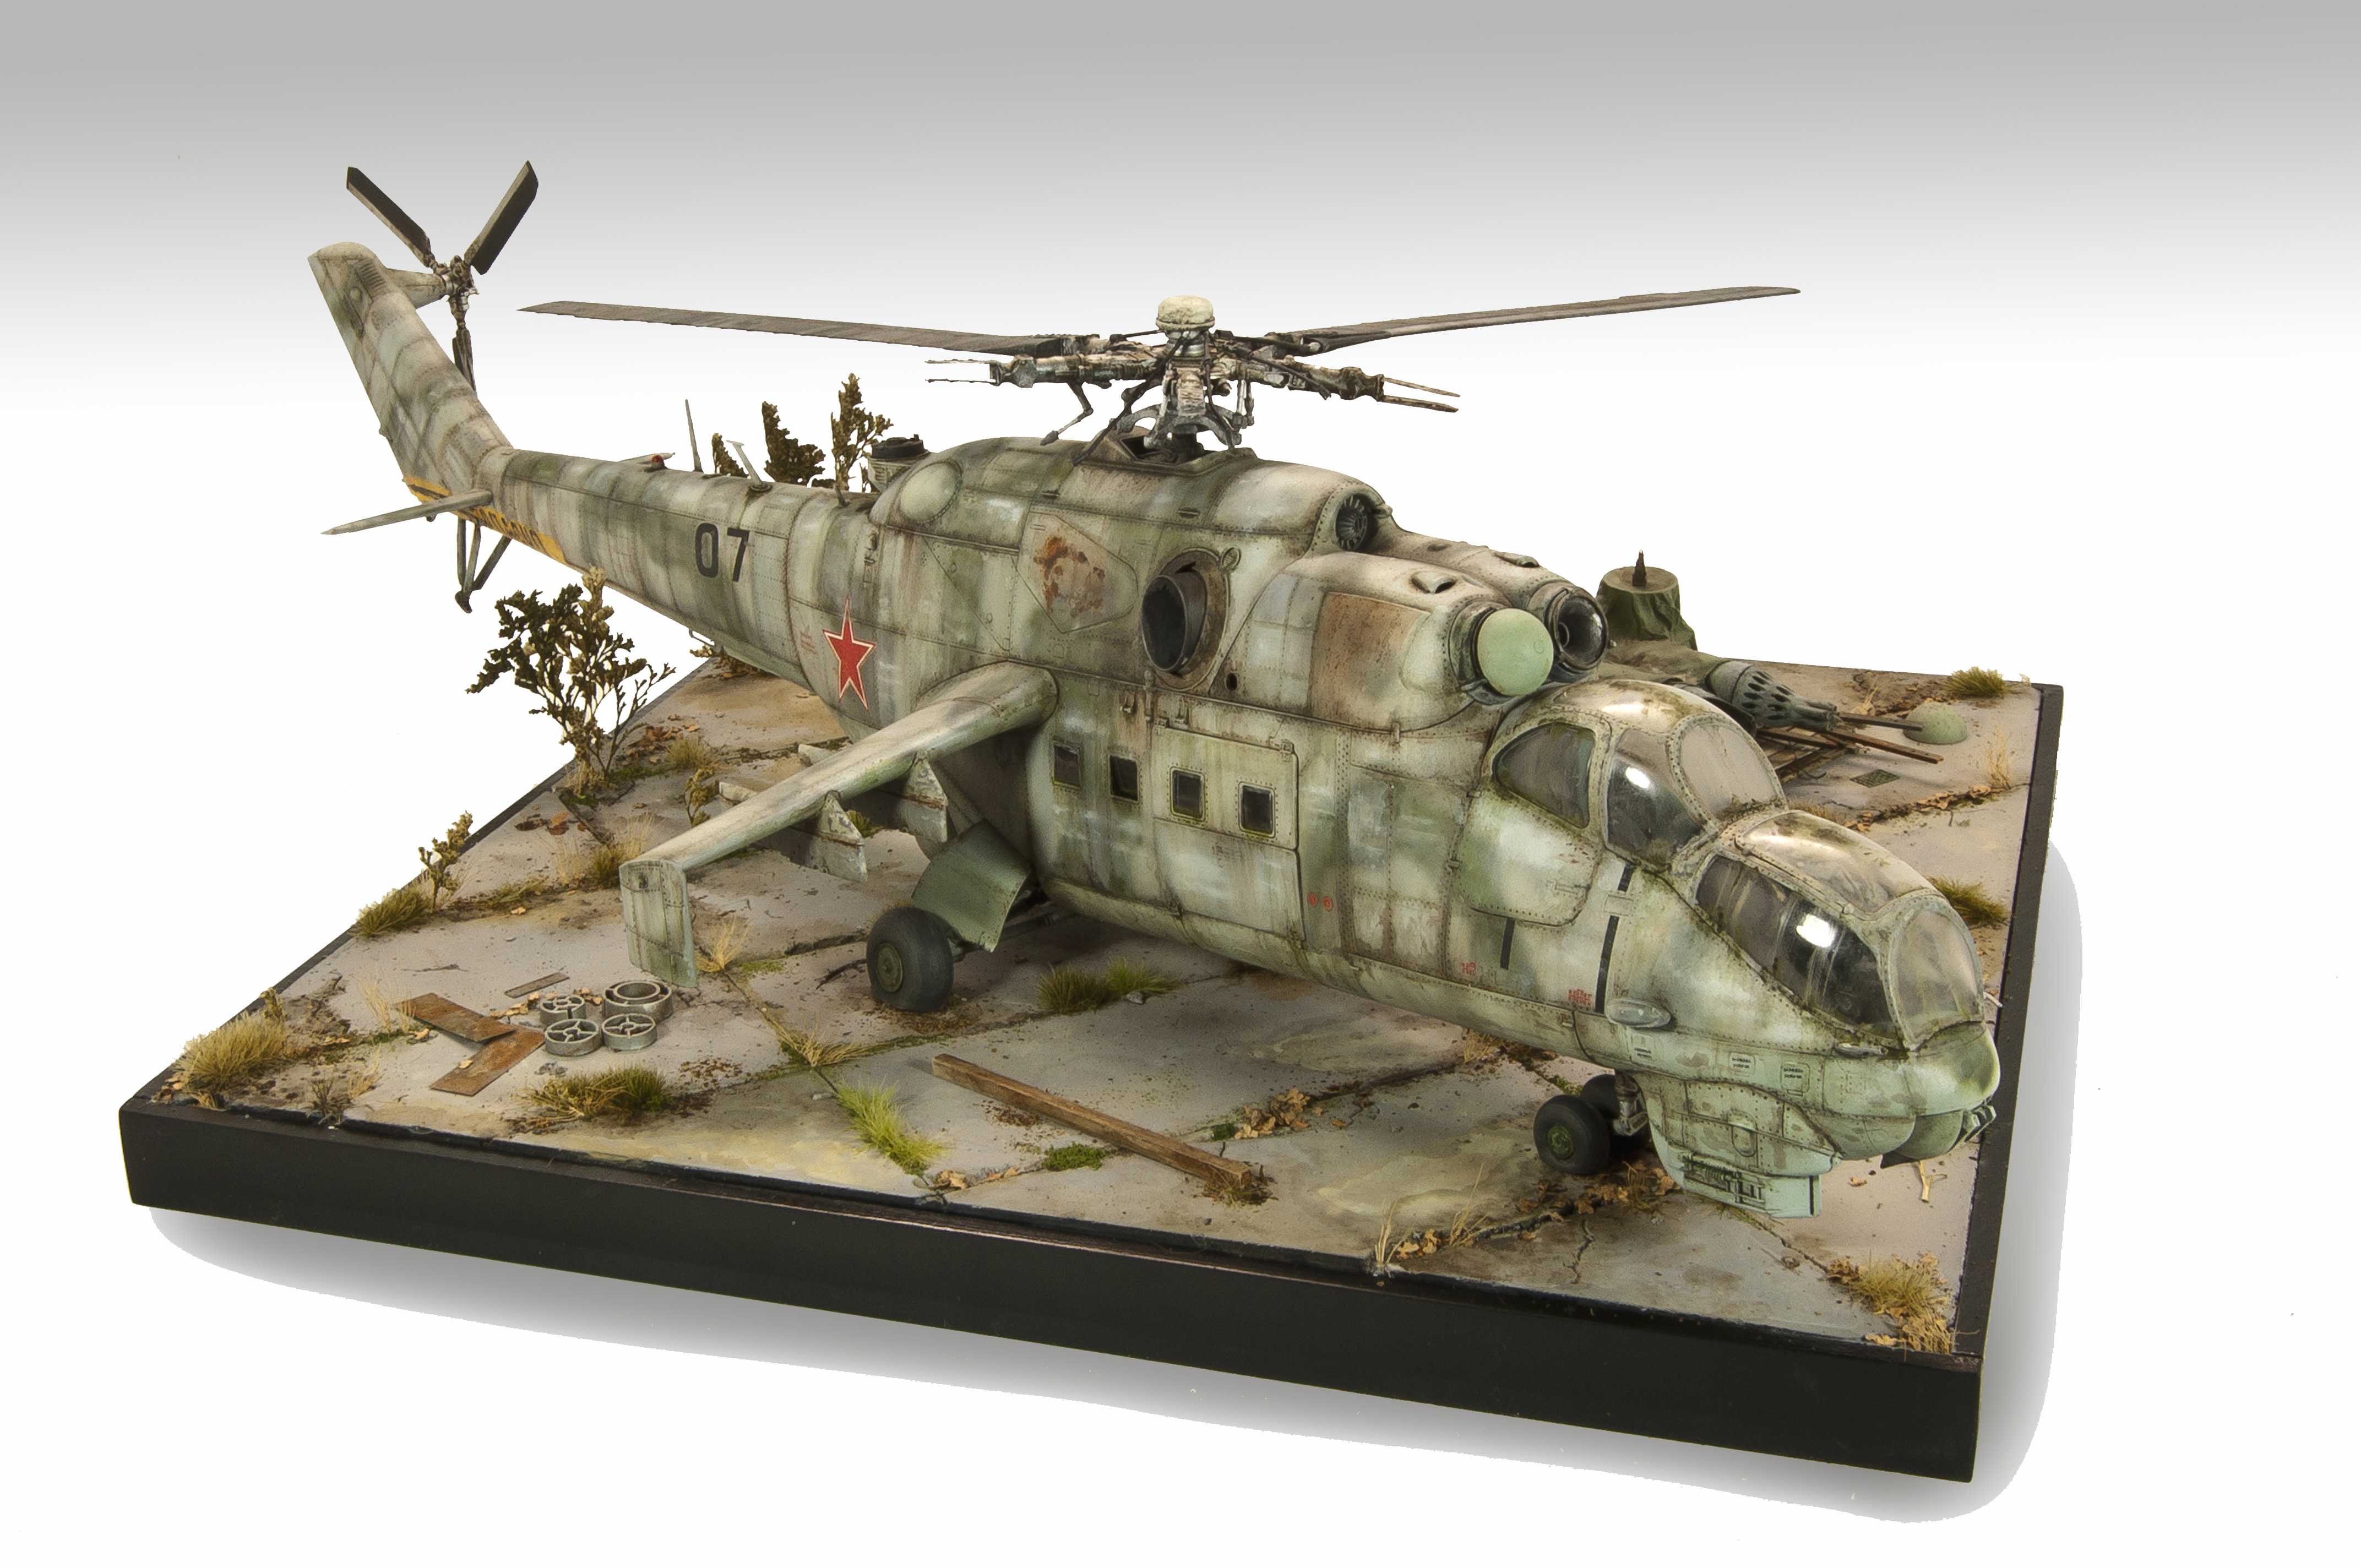
The base is made from a poured piece of plaster, scribed using the back of my hobby knife. The overall color is provided by a variety of grey acrylic paint colors, the stains, dust and dirt are enamel effects. Vegetation is provided from a mix of backyard items and commercial products. The small shipping palette was constructed from Evergreen plastic strip and then painted using a grey/tan color from Lifecolor. Layers of enamel washes are applied to stain the “boards” to the aged wooden appearance.
The collection of “junk” on the palette comes from the kit along with small bits and pieces of painted plastic stock, the tarp is made from Bare Metal Foil painted with multiple layers of automotive primer to soften the crinkles and then painted.
|
Finally, now that I have described a little bit of how I work, many ask how long a project like this takes me to do. I’ll begin by saying that I’m pretty quick, both out of necessity and just my personal pace. This particular project was completed in a period of 3 weeks, comprising of about 2 hours per weekday (early mornings are my time) and about 4 -6 hours on the weekend days. For instance, the base was completed in one sitting over the course of a Saturday session. More often than not I step away from the bench simply to allow let paints to dry, not because I particularly want to.
|

My chin is on the floor right now …Awesome work Rick !!!!
Beautiful work! I’m green with envy, and I’ve built quite a few kits so I can appreciate the incredible work you’ve done.
Thanks a lot for describing your approach to weathering, that´s very inspiring! I just love the subject and what you have done with it!
Hi Rick. WOW! Amazing diorama. I’m truly impressed. I have tried to contact you through Facebook but I don’t think they allow me to write to “strangers” and my pm has properly been caught by the spam filters.
Anyway, I got so inspired by your work I created this video. https://www.youtube.com/watch?v=9sLZimcsWPI
The video hasn’t been published and I don’t want to do so without asking your permission first but I’m really hoping you like the video and don’t mind me publishing it. Bare in mind that it is only a first draft and I’ll make a few changes but nothing major. I will (of cause) add links to your website so people can see more of your fantastic work.
Greetings from Copenhagen
This is simply amazing!!! I’m just left speechless seeing the quality of work you’ve done here!
Thanks for sharing the details with us “mortals” 😀
Cristian