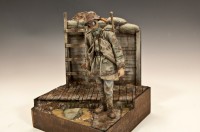
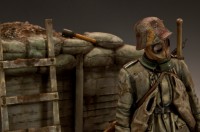
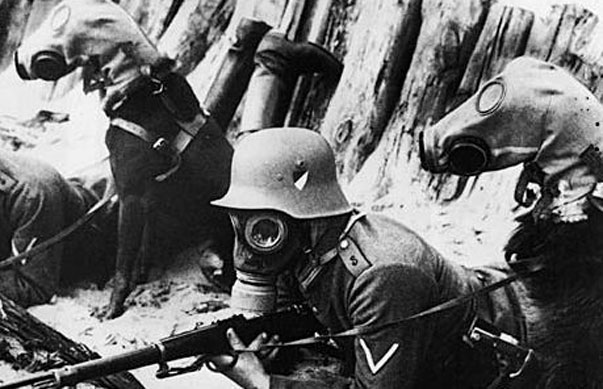
It is almost unimaginable to comprehend the extreme level of discomfort and suffering the average foot soldier endured during World War I. Fear and death his constant companions; 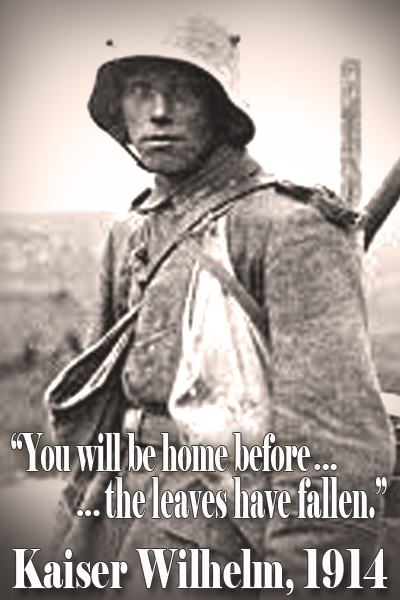 the only refuge was to be found within a shallow ribbon of earth carved into the apocalyptic landscape. Filth and dampness become his home; a daily routine of misery with no escape. Here we find a lone Stormtrooper standing in the mire of the trenches, quietly awaiting the next onslaught.
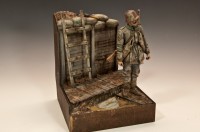
The setting for this small vignette is a small section of German trench on the Western Front, 1918. Creating mud in a scene such as this requires careful observation of the interaction between dirt and water. In broad terms our goal here is to portray mud in some of its many guises; fresh mud, dried mud, dirt, water and splatters.
The following project and article was originally published in The Weathering Magazine, Issue 5 – The Mud Issue. Within the magazine the focus is upon technique, relying upon images and short descriptions to describe the processes. As you will see, the process is to describe how to the issue theme, Mud, not about how to paint a figure….a skill that I wish I had a better grasp upon!!
- In order to ensure depth of effect, mud color paint is added to the figures clothing at earliest stages of painting to begin the layering process.
- The base colors of the figure are painted separately using acrylic paints.
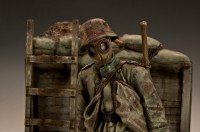
- The gas mask is a separate item and will fit over the face just as in real life.
- Evergreen strip comprises the majority of the material used to create a section of trench. Wood grain texture on the boards is simulated using heavy grit sandpaper.
-


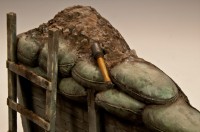
The sandbags are sculpted from two part putty, while the groundwork is created using Plaster of Paris in the powdered form is mixed with water into a paste consistency and then carefully poured to create the basis for the groundwork.
- While the Plaster of Paris is still workable, the duck board walkways and other base features are pressed into the surface.
- Ground texture and small rocks are created by sprinkling the dry Plaster of Paris powder over the surface dampened with water
- The sprinkled, dry plaster powder self-moistens through wicking action thus resulting in a convincing dirt texture.A quick test fit of the figure onto the base.
- To insure continuity of color and finish between the figure and the base additional weathering of the figure will occur simultaneously along with weathering the base.
- The white of the styrene base is covered using a black primer coat of paint. Black was chosen as our first color layer as it will aid creating deep shadows for a damp, somber mood.
- Earthen tones of color are applied to the base using acrylic colors. Notice that the coverage, especially on the wooden sections is very thin allowing much of the black primer color to show through.
- Continuing to add thin color layers the sandbags and chest are differentiated from the earthen colors using light green tones. Lighter sand and cream colors are used to give the wooden planking definition and highlights.
 Individual boards are defined using a quick mask made from a piece of card stock.
- A highly diluted wash of dark brown acrylic paint to add depth and shadow to the groundwork. This step is repeated a number of times, each using slightly differing shade of the brown color.
- Individual rocks and dirt clumps are picked-out and highlighted with a fine brush using acrylic colors.
- Earthen colors of acrylic paints are washed over the sandbags and other elements in order to give all of the scenes features a unified, dirty color.
- The wooden planking receives localized applications of AK Interactive Dark Brown Wash to the areas between the boards. This narrow wash will help to create shadows and definition between the boards.
-


Dark Brown Wash thinned using White Spirits is used to simulate moisture and dampness seeping through the wooded walls. Small drops of the wash are applied to an area between the boards, and then drawn downward using a smaller sized brush.
- The walkways are stained and discolored for an aged appearance using AK interactive Dark Wash.
- The areas where fresh mud and water are to be created are first treated with a layer of Damp Earth and Fresh Mud Effects to create a shiny, wet appearing base.
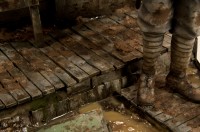
- Muddy footprints stains are created on the wooden walkways using mud colored pigments mixed with varying levels of black pigment to achieve a moist appearance.
- Pigment Fixer is applied to the upper wall and under the sandbags as a prelude for adding pigments.
- Over the areas previously moistened with Fixer, a light sprinkling of pigments are applied by flicking a fully loaded brush. The pigments fall onto the areas of Fixer creating a realistic texture.
- The base is ready for the addition of the muddy water that is created from a two part clear resin.
 The two part resin is lightly tinted to a muddy color using just a touch of AK Interactive Kursk Earth Effects. The A and B sides of the resin is mixed together in a cup and then carefully poured onto the base.
- A syringe applicator can be used to distribute the liquid into the difficult to reach areas. The type of resin that I have used requires a full 24 hours of cure time after application. It is always a good idea to place a lid over the work while it is drying in order to prevent dust and other impurities from landing onto the sticky surface.
- Very fine glass spheres are added together with AK Interactive Dark Mud Effects to produce a very fine textured paste. This material has the benefits of adding volume to the liquid without the unwanted discoloration that can sometimes be associated with using plaster.