Bishop 25pdr. SPG “Mudslinger”
 Regular readers of MMI will certainly recognize the name of Mike Stevenson. Mike is a good, prolific builder whose work is featured quite regularly on the pages of this magazine. Behind the scenes Mike and David Grummitt (MMI editor) maintain a robust email conversation as they discuss upcoming projects. As a courtesy, there are times that I am included by email copy and invited to join into the conversations. During one recent exchange Mike casually mentioned that he would be building a model for David to paint. Hey, wait a minute! Mike builds and David paints? That sounded like a pretty sweet deal to me. Seeing an opportunity to skip directly to the “fun” part of modeling I joined the conversation and asked how I might snag one of these painting gigs. As it turns out, Mike was just putting the finishing touches on the Bronco Bishop and graciously offered it to me for the painting.

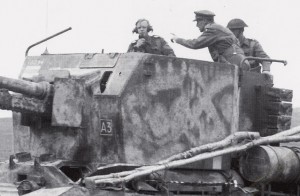
A couple of weeks later the model arrived at my doorstep. As the Bishop’s primary area of service was in North Africa and Italy it quickly became apparent that my painting choices might be somewhat limited; bronze green or desert tan were pretty much the only games in town. But wait! As fate would have it during a search though the Imperial War Museum archives I happened across a photo showing a Bishop serving in Italy with hastily applied “mud camo”. Perfect! Well, not really. The problem is that mud camouflage is an incredibly tough finish to pull off convincingly. Balancing the rough and hasty nature of the applied mud versus the real modeling requirements for a cohesive and athletically pleasing presentation seems to be at permanently odds. Never mind the fact that I had long ago promised myself that I would never even attempt this type of finish because of the inherent difficulties. But as is generally the case one thing led to another; I shared the photo with Mike, he sent me a few additional photos from his collection, David was brought into the conversation and then before I knew it I was going to be attempting a mud camo finish. How did that happen? I guess there’s no turning back now.
|
|
|
|
|
|
|
|
|
|
|
|
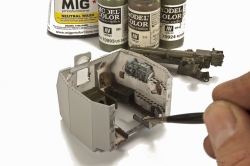
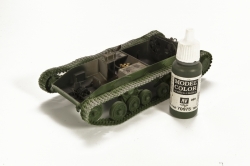
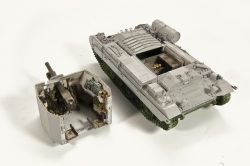
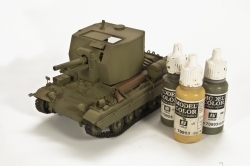
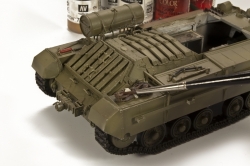
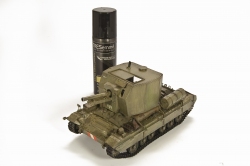
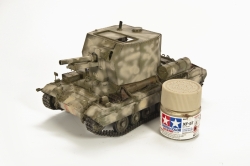
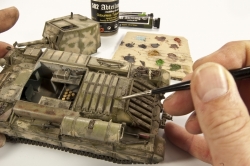
Mike had sent me the model as sub-assemblies in order to aid the painting process. My first order of business was a quick review of the parts and instructions in order to familiarize myself with the kit. A quick primer coating of Gunze Mr. Surfacer 1000 and I was ready to begin painting. The interior was first to be painted and provided a nice warm-up as I continued to contemplate how to best approach the exterior work. As a footnote, at the time of this project Tamiya acrylic paints, my preferred choice for use as base colors are very difficult to find at the moment do to manufacturing and distribution issues. As an alternative I have chosen to Vallejo Model Colors for both brush and airbrush work. The overall interior color was painted white with the details picked out using a fine brush. Weathering on the interior also followed fairly traditional methods of painting small chips and scratches using a fine brush and scouring pad followed by discolorations using Filters and Washes. Before matting the upper and lower hull I sprayed a quick base green color into the road wheel and track area. I did this for two reasons: First, it acted as a base color for the hard to reach areas, and Second, I was simply testing green colors in order to find a good match for the British Bronze Green color – obviously this wasn’t it. I attached the upper and lower sections together and then got onto the business of the exterior painting. Continuing to use the Vallejo colors I first gave sprayed (in uneven coverage) 924 Russian Uniform followed by second coverage layer using a mix of the Russian Uniform with 893 US Dark Green. Finally, a highlight layer was applied after adding 913 Yellow Ochre to the green color mix.
|
|
|
|
|
|
|
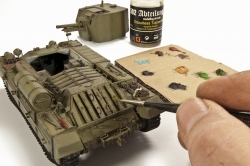
Although much of the underlying base color(s) would eventually be covered with mud I felt it was important to bring this layer fairly high level of completion as this is the foundation for all of the subsequent layers of painting and weathering. Tools and accessories were painted with Vallejo paints and a fine brush. The muffler cover was repainted in rusty colors, sealed with a light layer of future and then a misting of hairspray before repainting it the base green colors. After a few moments of drying time a light scrubbing with a stiff brush and warm water revealed some very nice, realistic heat rust spots. Next, a few evenings of painting were spent using MIG Productions 502 Abteilung artist’s oils were used to create greater depth of color and visual interest to the finish. It’s no secret that the longer drying times of artist’s oils can slow down the process, but in my opinion the results are certainly worth the extra time. When building models I try creating a small storyline for the vehicle. This helps me focus my painting and weathering decisions as I work through the process. For this project I had in mind a vehicle that has gone through the requisite training and field exercises before embarking for the landings in Sicily and Italy. Once in action, the crew came to the realization that their dark colored, high silhouetted vehicle was a little too conspicuous on the semi-arid battlefields of Southern Italy. Taking matters into their own hands they used the local mud-puddles to their advantage. As a support vehicle battlefield damage would be at a minimum, though the vehicle would certainly show evidence of crew wear and use.
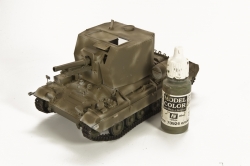
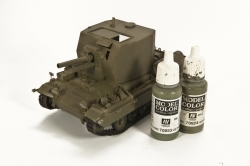
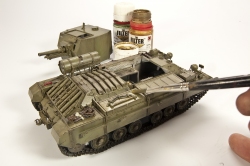
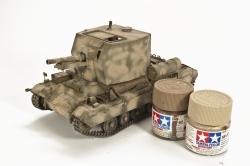
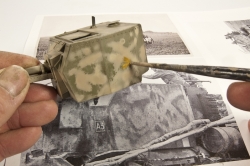
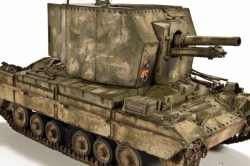
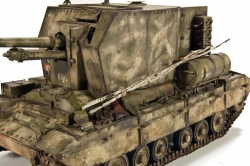
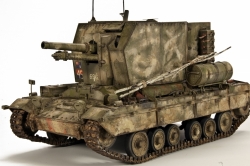
Maybe not the most creative story, but it works for my purposes. Ok, enough of the fiddling around now it was time to get on with the task at hand. The real challenge when creating the mud camouflage scheme is how to make what is in essence a sloppy brush paint job look like more than a just a sloppy brush paint job. It needs to look as if applied with spontaneity, but the methods would need to be controlled in order to achieve the desired results. To begin I sealed the base green color using a light misting of Johnson’s Future acrylic floor polish. Over this I sprayed an overall coat of hairspray and let dry for about half and hour. Then, using the reference photo as a guide I sprayed a quick under color pattern using Tamiya Buff. I followed this with a light over-spray using Tamiya Flat Earth. It is important to note that this application is purposefully uneven in both coverage and color. The uneven densities help to promote an organic or spontaneous appearance. This becomes apparent even at this early stage during the scrubbing process as certain areas flake off completely, while the areas with a higher density of paint retain coverage. I’ll use this unevenness to my advantage as I continue to add layers and refine the finish. With the flaking and chipping stage completed I now had a nice (read uneven) foundation over which I could work further color and texture refinements.
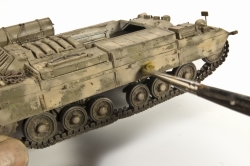
One of the consequences of using the hairspray technique is that the excess “dirty” water created during the scrubbing process can add a thin “wash” layer over the surface. The next step was to regain some of the color and definition lost during the mud application and hairspray removal process. Returning once again to the 502 Abteilung paints I worked to regain some of the lost color and definition. This time I used a palette of mostly green colors to the areas between the mud splashes and also to areas of high traffic where the mud would have been removed due to crew movements. The mud areas were also treated to the oil colors using a palette of Light Mud, Basic Earth, Buff, Starship Filth and Shadow Brown colors. The goal for the muddy areas was to create some definition, but to also try and show differing layers of dirt and drying times. As you might imagine this became quite a process of back and forth adjustments – or dare I say trial and error. At one point during the process I decided that my initial base mud colors had become too muted so I decided to “refresh” them with localized, highly diluted airbrush applications of the Tamiya Buff color. Without realizing I had accidentally thinned the mixture a little too far which led to paint splatters – and what do you know they looked great! Those spatters helped to the give the mud a sense of spontaneity and scale – yes, even sloppiness. It was one of the Bob Ross “happy accident” times which can really help move a project forward.
|
|
|
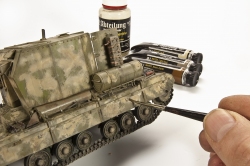
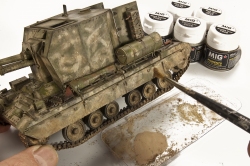
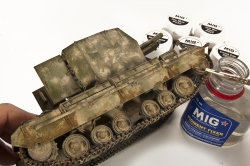
Early in the process I had decided that I would try and complete the ‘mud camo’ only using paints – no pigments. My concern was that I might once again loose definition and perhaps even scale if pigments were used for the brushed camouflage. I did feel, however, that the tracks, wheels, and even the side skirts would benefit from the pigments. The trick was to match the pigment color with the paint colors that I had applied to the upper areas. With a little experimenting I was able to create similar colors using a mix of MIG Productions Gulf War Sand, Europe Dust, Concrete and Dry Mud. Applications began on the tracks which first received a wash of MIG Productions Track Brown pigment solution; the pigment having first been dissolved in turpentine. Next, all of the lower areas of the vehicle, including the tracks received applications of the dry pigment mix. I varied the pigment mix from time to time by adding more or less of a individual color in order to create depth and visual interest. The wheels and lower skirts received the heaviest accumulations though repeated applications that were set in place using Fixer. As with each of the earlier weathering steps the pigment phase also requires quite a bit of back and forth work. In this case once I had applied a layer of pigments I will regularly return with a pin wash or a localized wash in order to regain any lost definition. Topical details such as fuel and exhaust stains are added and refined near the finish as well. In the end pigments were used only on the side skirts, lower hull, wheels and tracks. All of the mud camouflage, dirt and stains on the uppers surfaces were created using paints.
With the painting completed I will return the model back to Mike. My description of the painting process will be combined with his construction notes into a seamless article – hopefully! A few final thoughts regarding mud camouflage. I still think that it is a difficult finish to pull off convincingly and I’m not sure how successful I was in my attempt. In retrospect I can see that my process relied heavily upon techniques common to winter white wash schemes, a bit of experimenting and a bit of luck.
