Twisted Fate
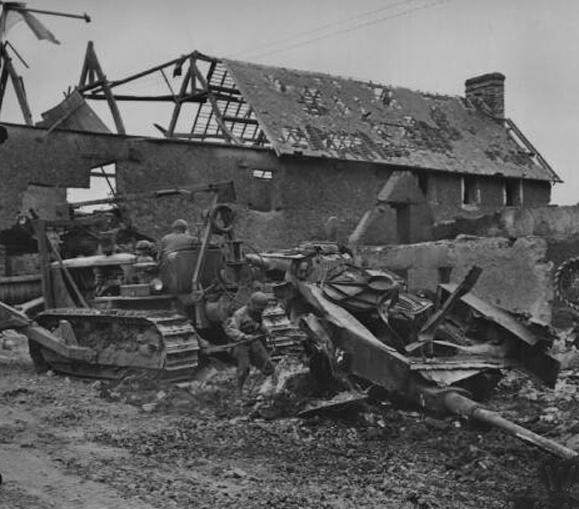
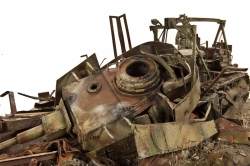
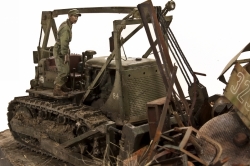
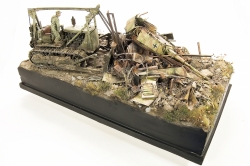
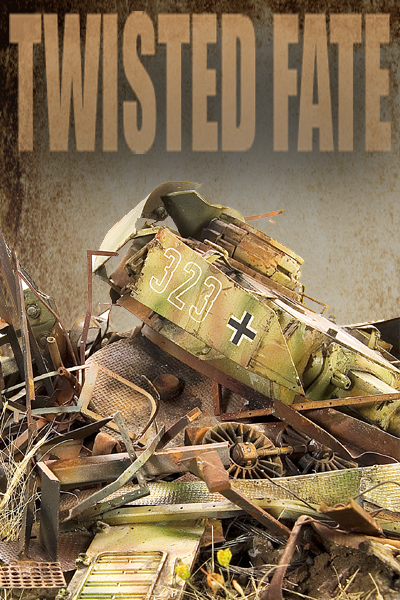 The Caterpillar D7 series medium bulldozer began service with the U.S. military during World War II. With upgrades and changes, it has been a workhorse for the U.S. Military for over fifty years, fulfilling its primary earth moving role as well as a host of other roles discovered for it, for example mine clearing with a special flail adapter kit. As is so often the case, the idea for this project is based upon a photograph showing a D7 Dozer in action during World War II clearing the wreckage of a Panzer IV from the roadway.

Construction of the Bulldozer
Upon opening the Resicast box I couldn’t help but feel just a little overwhelmed by the shear number of parts. This was certainly going to be an ambitious project. Fortunately, Resicast has done an excellent job of laying out the construction in a clear and logical progression.
I began work with the chassis and engine. The bulk of the chassis is molded from a single cast block, upon which the dozer is based. The engine is nicely cast in its basic form although I chose to add wiring for the spark plugs using copper wire. Although not specifically called out in the instructions, the bonnet (optional) should be placed before the addition of the exhaust stack.
 By far the tracks presented the greatest challenge (read frustration) to the building of the CAT. The tracks consist of 4 lengths that comprise the top and bottom runs, while single links are to be placed around the drive and idler wheels. The first issue concerns the rear drive wheels as these need some particularly careful attention in order to get them to line-up with the road wheels. I also found that I needed to narrow the axle by sanding either side while also realigning the anchor holes by moving them forward slightly. Neither process is difficult, but the inaccuracy of the alignment will produce ongoing problems if this is not addressed.
With the tracks in place construction resumes with the addition of the towing bracket and winch supports onto the rear of the dozer. The operator cockpit is outfitted with a fine array of levers and pedals. Resicast provides the option of using resin, or replacement photo etch for some of the levers. I opted to use the fine resin parts as I felt they are superior to the flat photo etch replacement.
The business end of the dozer, the blade, is cast as a large, singe piece. Added to it are the leveling arms and hydraulic pistons. Interestingly, the suspension from on the left side was missing the blade attachment details. I reproduced the brackets and rivets from plastic stock using the assembly on the reverse side as a pattern. Later steps provide photo etch for the blade cutting edge. The dozer really bulks up and takes shape with the addition of the overhead gantry posts & beams and the rear winch assembly.
Wrecking Crew
|
|
|
|
|
|
|
|
|
|
|
|
|
|
|
|
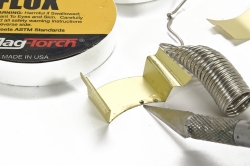
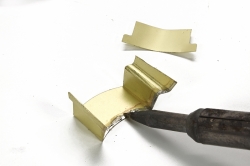
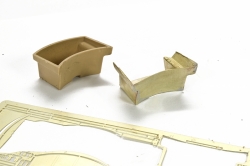
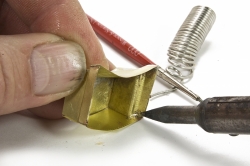
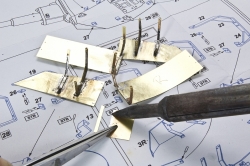
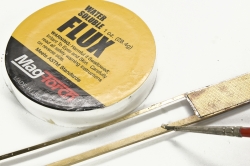
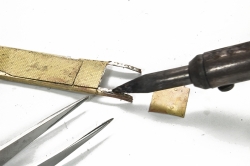
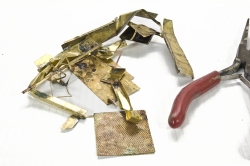
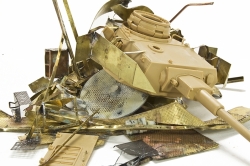
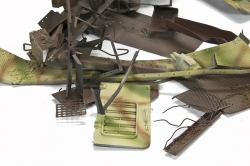
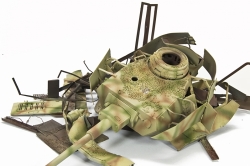
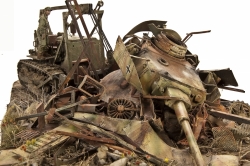
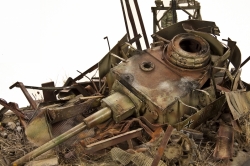
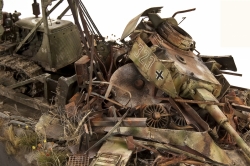
Constructing, or should I say “destructing” the Panzer IV was an incredibly fun part of this project. When planning out the scene I initially had thought that the bulldozer would be the star player and that the wreckage would play only a supporting role. Once begun, however, I soon realized that the Panzer IV wreckage would certainly share in the spotlight. I composed the wreckage based on a few key, recognizable elements; the Tamiya turret and gun being the most prominent along with a few odd wheels and hatches coming from my spare parts box. The majority of the wreckage, however, is nothing more that extra brass bits and pieces that I have bent and soldered into interesting shapes.
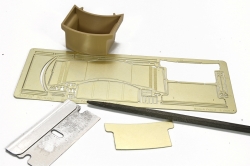
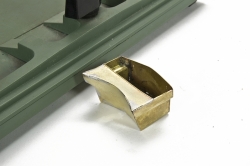
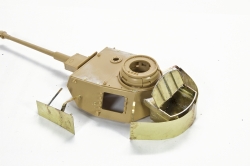
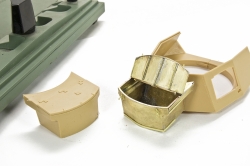
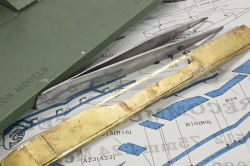
I begin by building the Tamiya turret straight from the box. To this I replaced the turret stowage box and side armor using photo etched parts from Aber. Both of these sets are outstanding in their quality and detail and certainly lend a high level of realism to any project. I approached the Aber side skirts, in particular, with a fair amount of trepidation as they have a reputation of being somewhat difficult to construct. Gladly my fears were mostly unwarranted as the assembly went together without incident. However, I would highly recommend soldering the parts as I do not believe that CA glues have the sufficient holding power. Lionroar panzer IV fenders as also used within the tangle of brass.
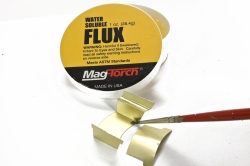
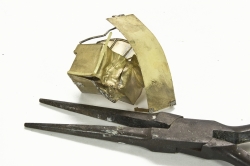
Nothing can convey the look of twisted steel better than twisted brass so no sooner than I had the photo etched parts bent and soldered into pristine shape it was time to mangle them into a mass of twisted metal. Using a pair of pliers I began by creating an impact area on the rear turret box as if it were created by the dozer pushing the turret forward. Similar damage was also performed to the side armor and fenders. Although the wreckage looks chaotic it actually has been thought-out. Each piece of brass has been selected, cut, bent, and soldered into position making a sort of wreckage “sculpture”, if you will. From time to time I check progress against both with the turret and the dozer blade to insure that it had a natural appearance.
Polished Steel and Fire
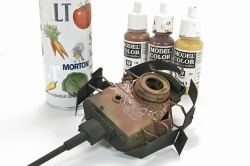
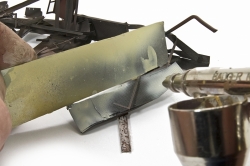
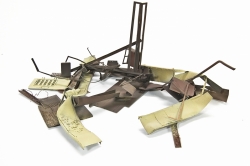
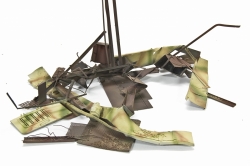
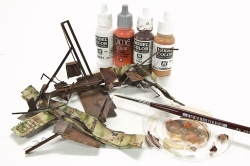
At first glance it’s obvious that this is going to be an involved painting session(s) as there are many details and small elements to be painted and highlighted. The dozer blade is begun first with a primer spray coat of Mr. Surfacer 1000 followed by the Olive Drab color made from a mix of Vallejo colors. I decided to use the “salt technique” or salt masking on the blade to help create the effect of light rusting and weathering to the upper areas of the blade surface, while creating a high polish to the lower area. This method is relatively simple only requiring a little fore-thought to the color layers, but results in very realistic weathered effects. After the olive color was sprayed, I then lightly sprayed the rusty colors to the upper surfaces. After the paint had dried I moistened the surface with tap water and sprinkled salt. Over this I sprayed Model Master Oily Aluminum enamel paint to represent the polished steel areas. Finally, I washed the salt away under the tap to find a very nice mottled, subtle, rusty looking surface to the top of the blade, while the bottom buffed to a high polish. I was pleased. The remainder of the blade follows the process of light washes using acrylic paints and artist’s oils, and chips and scratches applied both with the brush and scouring pad.
|
|
|
|
|
|
|
|
|
|
|
|
|
|
|
|
With the blade well underway I preceded with painting the Caterpillar D7. As usual I began with a primer of Mr. Surfacer spray to prep the surfaces. The olive color was achieved by successive light layers of green and yellowish colors from the Tamiya range. Initially, the color is much too light and bright by intention knowing that the later weathering will darken and tone down the color. At this point I also added caked mud and dirt to the lower hull and tracks made from plaster dust and plaster chips mixed with a combination of putty and MIG Productions Resin.
One benefit of working on the Dozer is that there are plenty of real world examples to be observed. When doing so, one cannot but help to notice how much wear and tear these type vehicles accumulate. With this in mind, I began to add numerous chips and scuffs, first using a scotch pad then later a fine brush. Over this a number of very light acrylic filters where applied to add visual interest to certain areas, and also to begin the weathering and fading process.
Next I turned to using artist’s oils. MIG Productions Faded Green, Olive Green, and German Ochre were used on the upper surfaces to add depth and richness to the finish, and to also further the fading process. The lower hull, tracks and suspension frame received washes of MIG 502 oils Light Mud and Dark Mud in preparation for the pigments to follow.
By this stage, the project has taken almost taken a life onto its own; as is so often the case. Initially, my intention was that the Caterpillar would play the dominate role, while the wreckage would be supporting actor. As the project has developed I found that the Panzer IV wreckage would need to share equally the limelight.
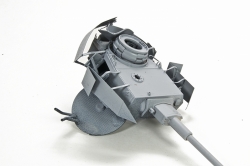
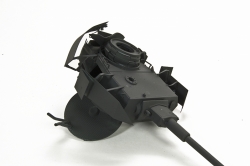
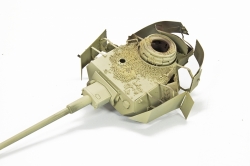
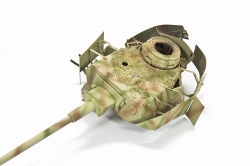
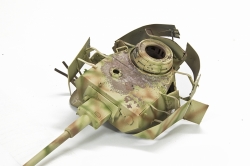
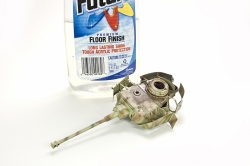
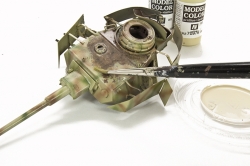
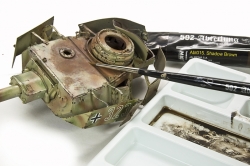
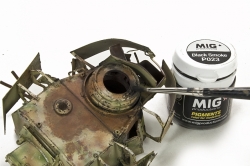
Turing to the salt one more time I moistened the burned area on the turret with tap water and then sprinkled a random layer of the white grains, being careful to only mask the burned area. I began with my usual primer of Mr. Surfacer, and then added a second primer of flat black; this would also become my shadow colors and interior color. Next, turning to the salt one more time went about creating the burn patches on the turret; moistening the surfaces, adding a small amount salt, and then sprayed another color layer. I repeated this time and again, slightly altering the colors and distribution of the salt pattern. Once I felt I had a sufficient burn area I completed the turret by adding the base and camouflage pattern as usual. When completed, I simply ran tap water over the turret to dissolve the salt. A light scrubbing with a soft brush was also used to remove all salt traces.
Continuing, I next sealed the preliminary turret work using Johnson’s Future acrylic floor polish. After which, I employed an ad-hoc back-n-forth process of adding colors (washes, filters, mapping) as well as removing color layers (lacquer thinner, alcohol) to reveal underlying colors within the burnt areas. MIG Productions Black Smoke and Ashes White pigments were used in a limited manner to further reinforce the appearance of fire and smoke.
Moving along in the process it is now time to bring color to the tangle of wreckage. Using a small piece of card stock as a mask, I worked my way around the wreckage “sculpture” laying down the foundation colors of oranges, reds, browns, blacks and yellows. During the process I also continued with the use of salt-masking adding texture and interest to certain elements.
Down to Earth
When working with the wreckage I knew that it would be important the wreckage be tightly integrated to the groundwork. To make the base, I poured a plaster block (using Lego forms) to the desired size. Once the plaster had dried I textured the surface using small plaster bits and plaster ‘dust’ held in place using white glue. My primary focus was that the Dozer blade be made to look as if it were engaged in moving a pile of dirt and wreckage; and that the wreckage be integrated within the terrain. I proceeded by working small sections at a time, added small amounts of new plaster to the surface and then pressing the wreckage into the drying plaster.
Earthen colors were sprayed using both Tamiya and Vallejo acrylic colors for the overall base color and then I turned to using washes of artist’s oils to which add additional color and depth to the surface. Individual rocks and dirt clods were picked-out by brush work adding another level of detail and highlights. Finally, a color variety of MIG Productions pigments were painted onto the surfaces which contribute greatly to the dust and dirty appearance.
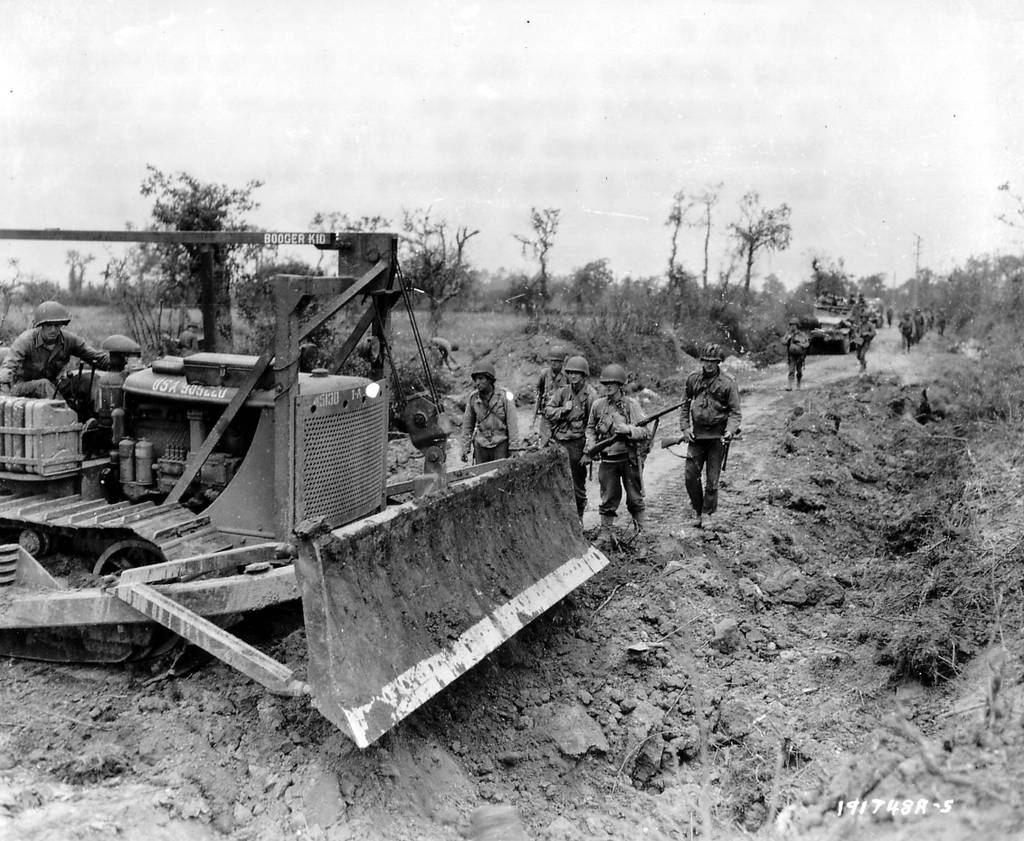 Working simultaneously while adding the dirt colors, I carefully added the rust and burn colors to the metal parts and pieces using a fine brush. I made extensive use of Vallejo colors (orange, yellow, and reds) to add bring highlights to the wreckage. I followed this by applying a variety of MIG Productions rust colors. In total the processes is quite an extensive back and forth exercise, but one which I believe yields good results worth the time and effort.
At this stage the workbench is getting quite busy as all of the elements are being made ready for final placement on the base. Since the wreckage was already in place, I now placed the Dozer in position. I made particular attention to the blade and tracks being sure that they were fully engaged with the terrain. Around the blade I carefully added additional plaster and debris to settle the blade into the earth. To the area of the wreckage I added finely cut, dried grasses from my yard to simulate taller grasses and weeds. I also mixed some of this same grass in a mixture of white glue, pigments and plaster, then using a small brush I applied this mixture amongst the twisted metal to simulate the torn earth produced by the movement created by the Caterpillar. Finally to the base I added small dried flowers which I painted a variety of yellows and reds to add a little color splash.
|
|
|
|
|
|
The soldier/operator is from the Alpine range. To begin, though I believe that figures add much to a scene, but I am the first to admit that I am not much of a figure painter. I do what I can and watch with great respect those who perform their artistry on the little people. Painting began with a primer spray of Mr. Surfacer, then using a medium green from the Vallejo Model Color range I airbrushed on the overall clothing color. At this same time I also carefully airbrushed Vallejo’s Medium Flesh to the face and hands to lay a foundation to the painting process. To bring life to the little fellow I simply added a few drops of darker green to the medium mix and painted shadows into the creases and folds, while adding a few drops of Vallejo Buff and Luftwaffe Yellow to the mix for the highlights. The face is always a challenge for me. The key seems to be a fine brush and a lot of patience. The general process is the same as the clothing, adding a few drops of Vallejo Earth and German Camo Black Brown to the mix for the shadows, while highlights were achieve by adding Vallejo Flesh and Sunny Skin Tone into the mix.


Incredible work Rick! Love the site too!