End of the Line
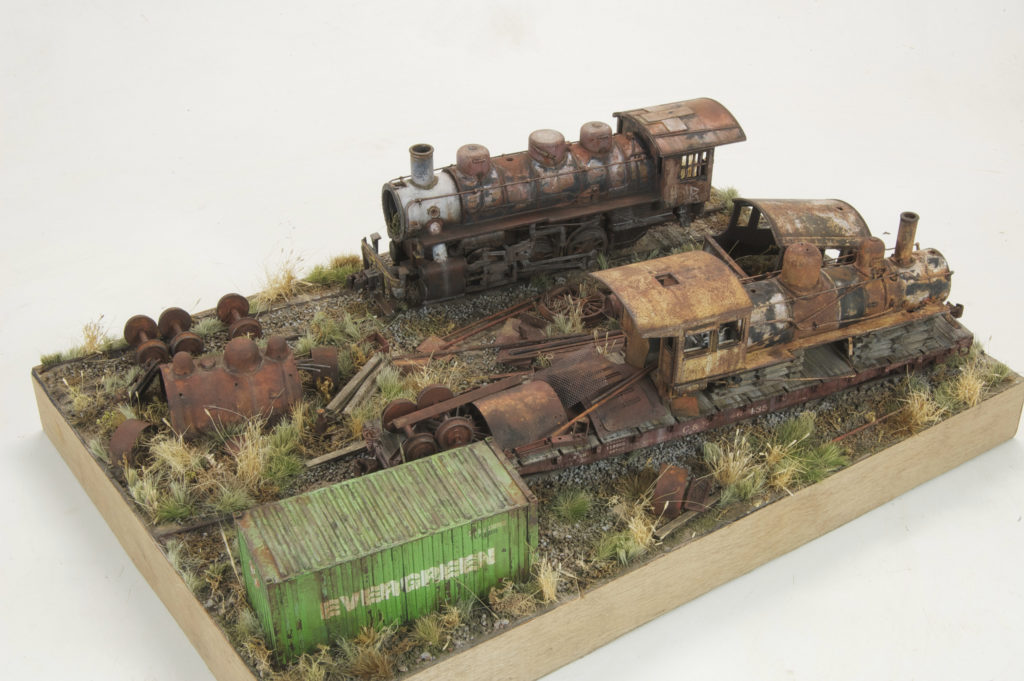
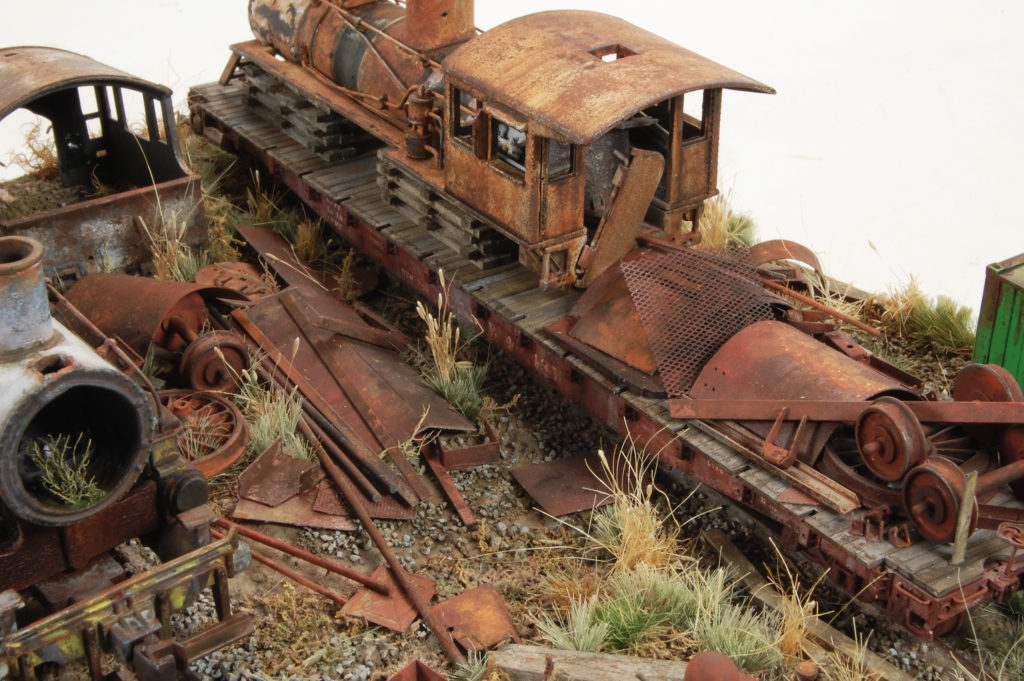
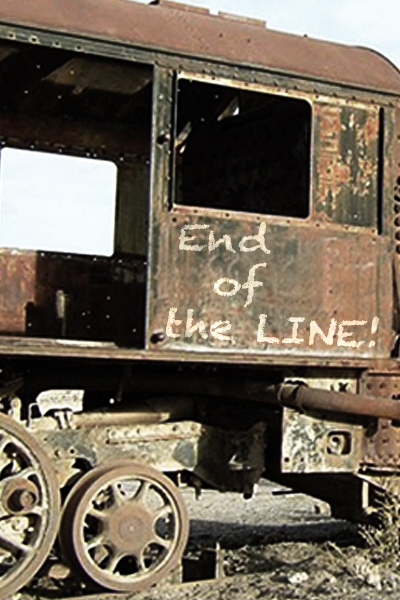 Retired from the tracks, many old locomotives find themselves left to decay in forgotten graveyards of steel and rust. Once proud and powerful, the crippled Iron Horse is put out to pasture to await its fate with the cutting torch. This HO scene portrays such a graveyard, the Last Stop for locomotives.
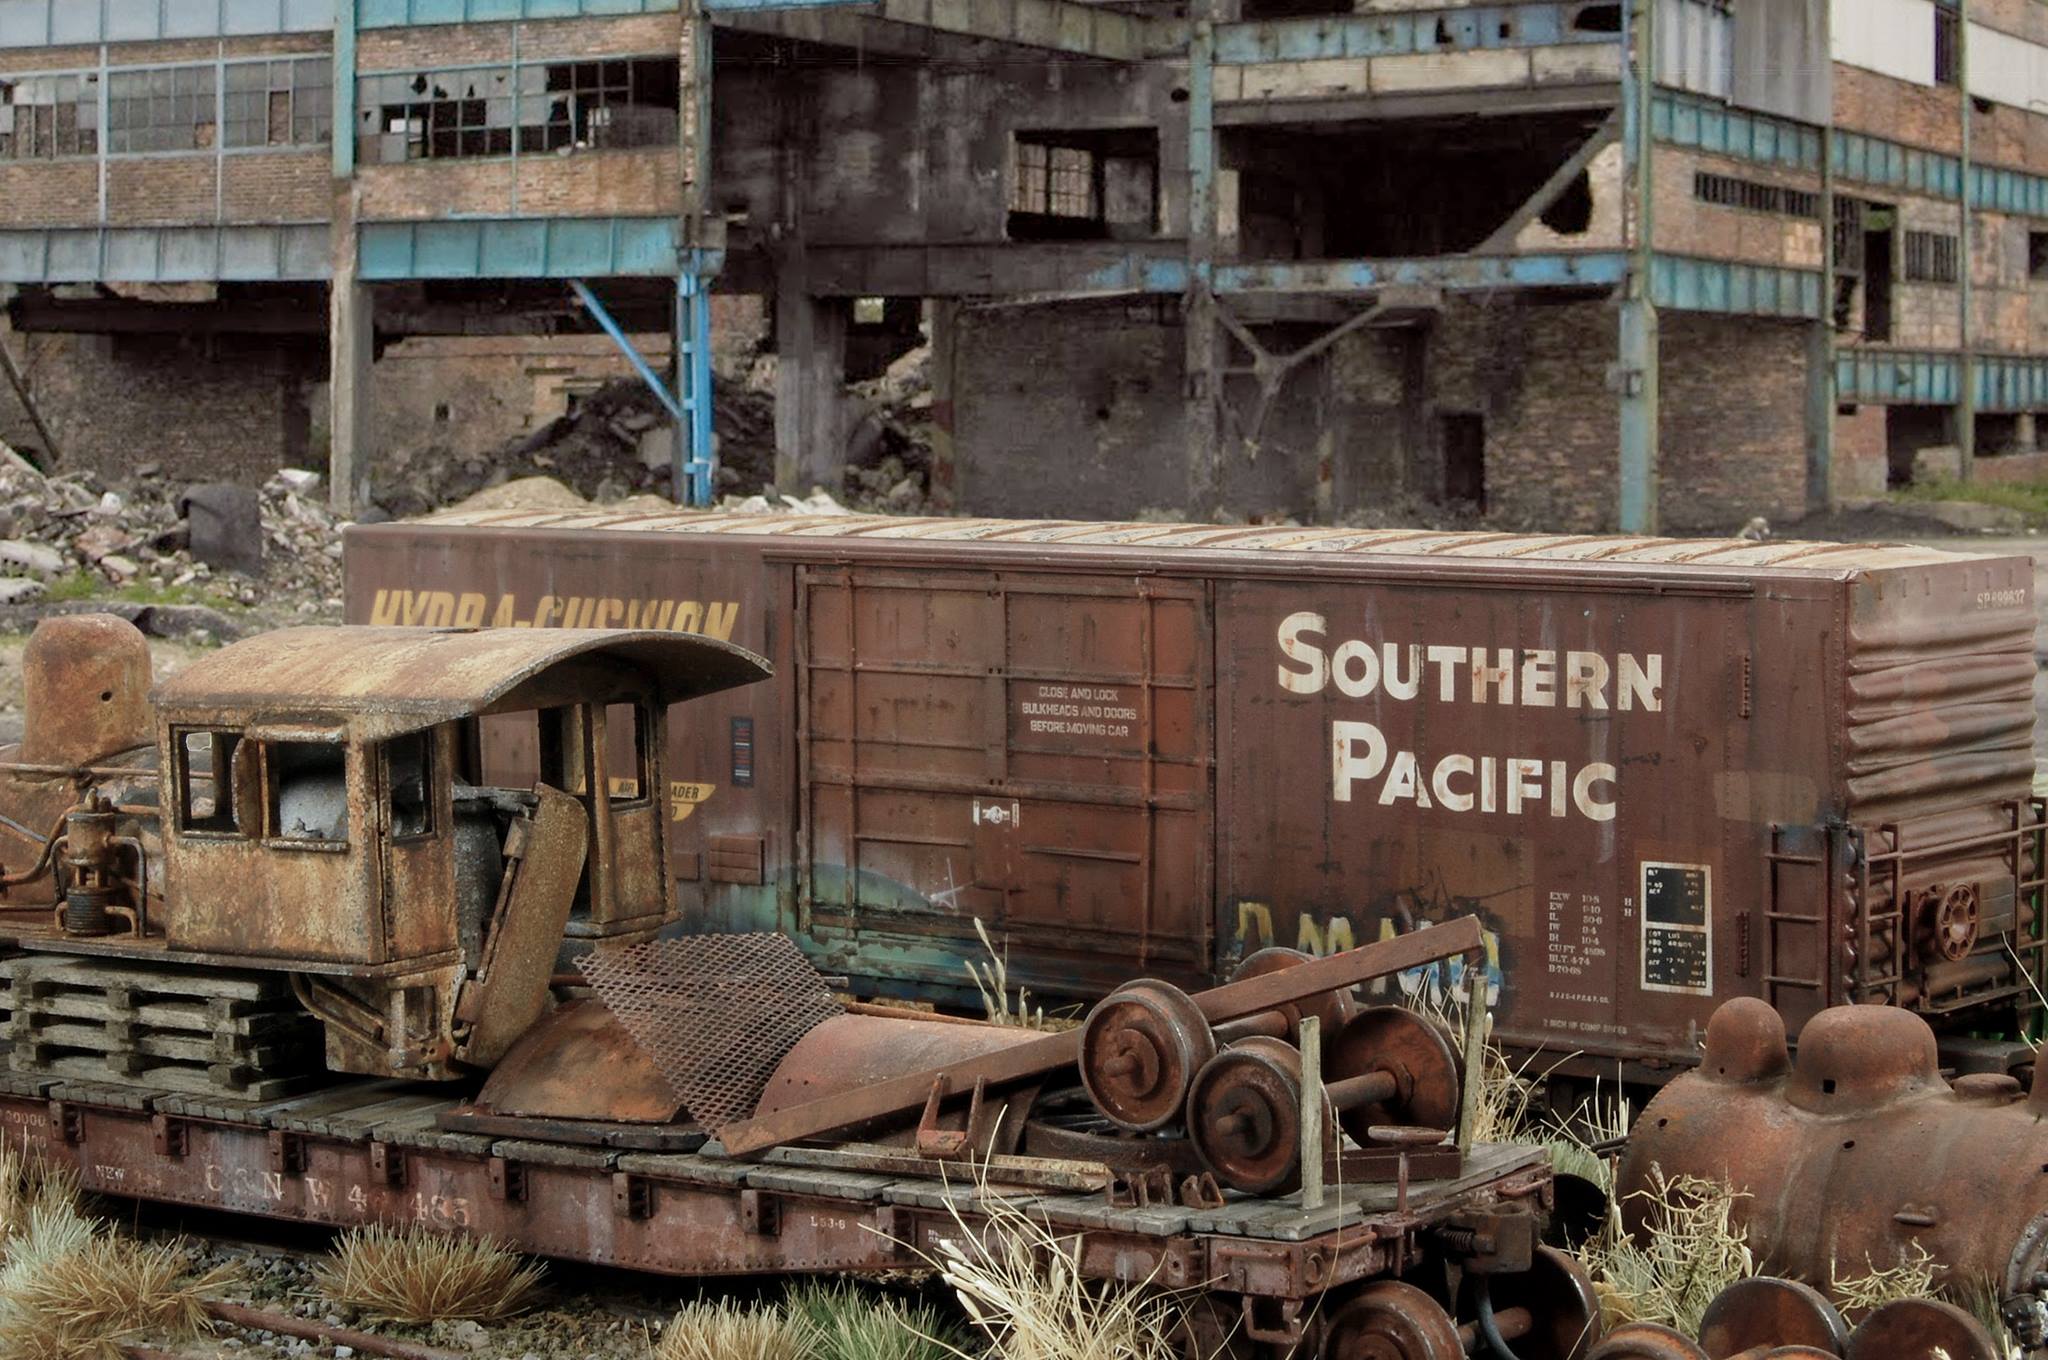
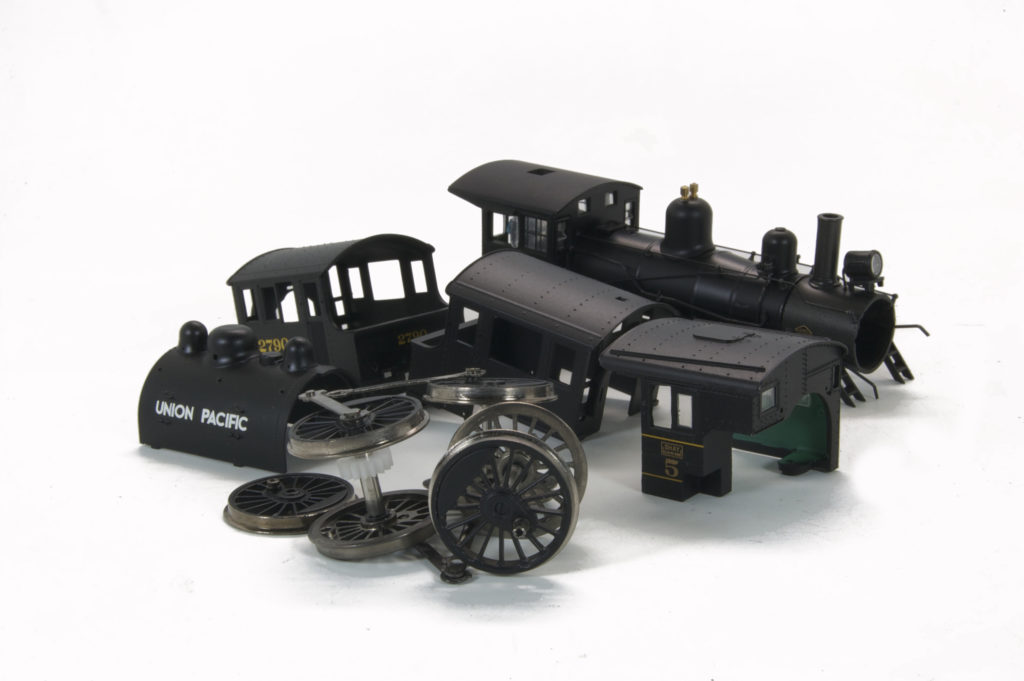
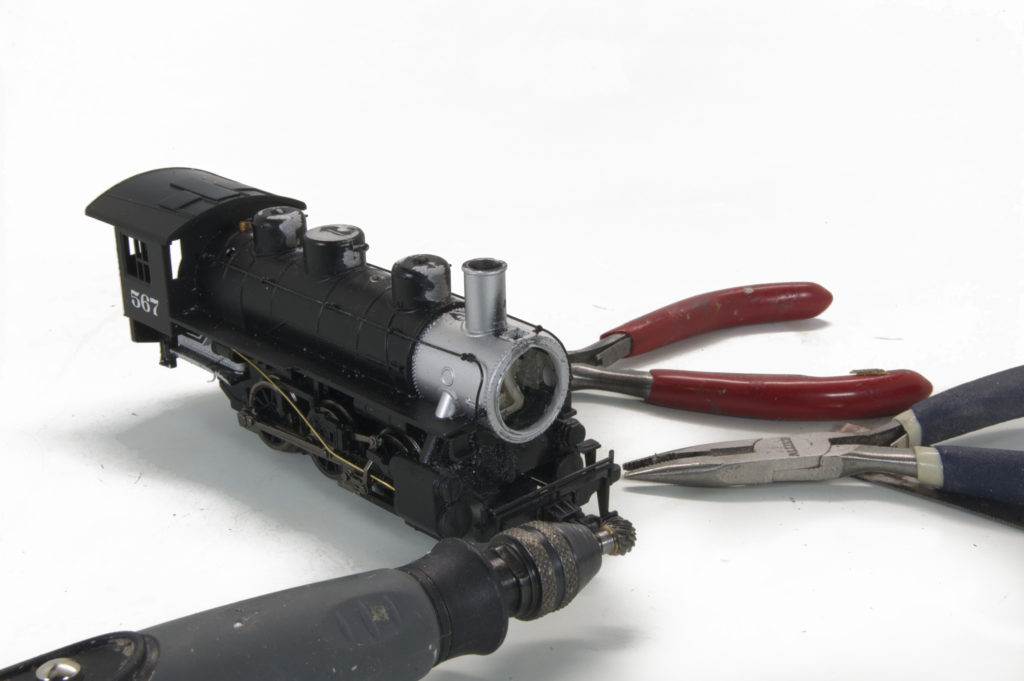
This project began with a trip to my local train store to purchase an HO scale locomotive, which I did. However, while talking with the store owner about my upcoming project he suggested that take a look at the Bachman scale train website were they offer replacement parts for those wishing to customize their trains. A few mouse clicks later and I was awash in all sorts of extra locomotive goodies that would be perfect for adding to my scene. And then without hesitation or remorse, I proceeded to ruin a perfectly good HO scale engine by cutting off the front boiler hatch and removing all of the visible “guts”. The purpose, of course, for this Iron Horse sacrifice is to portray an engine that looks as though it’s been abandoned, and scavenged for usable parts and scrap metal.
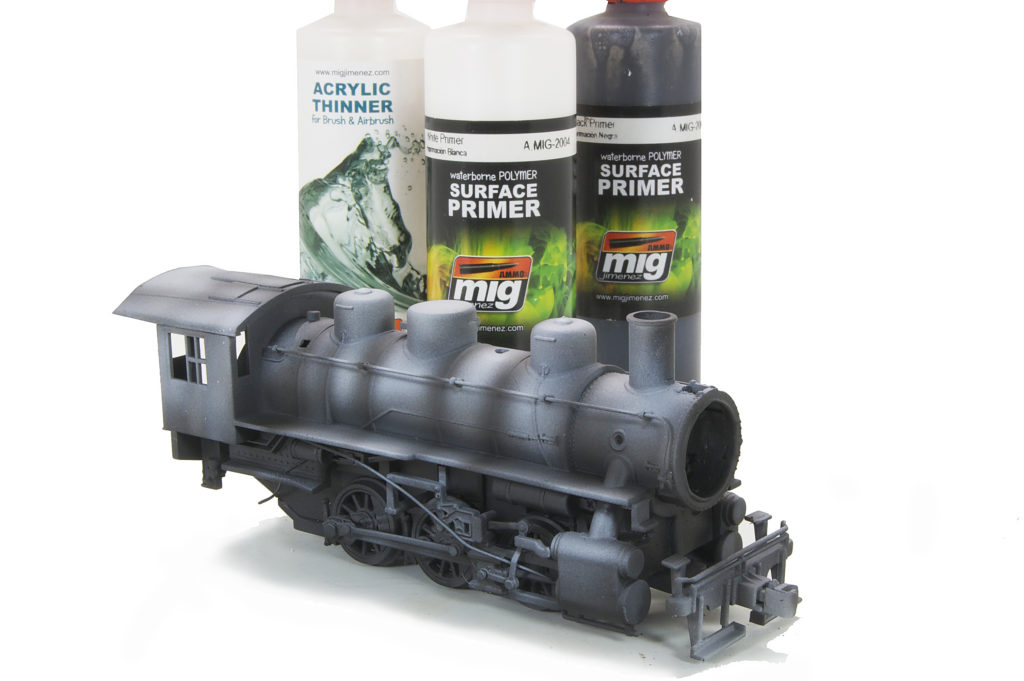
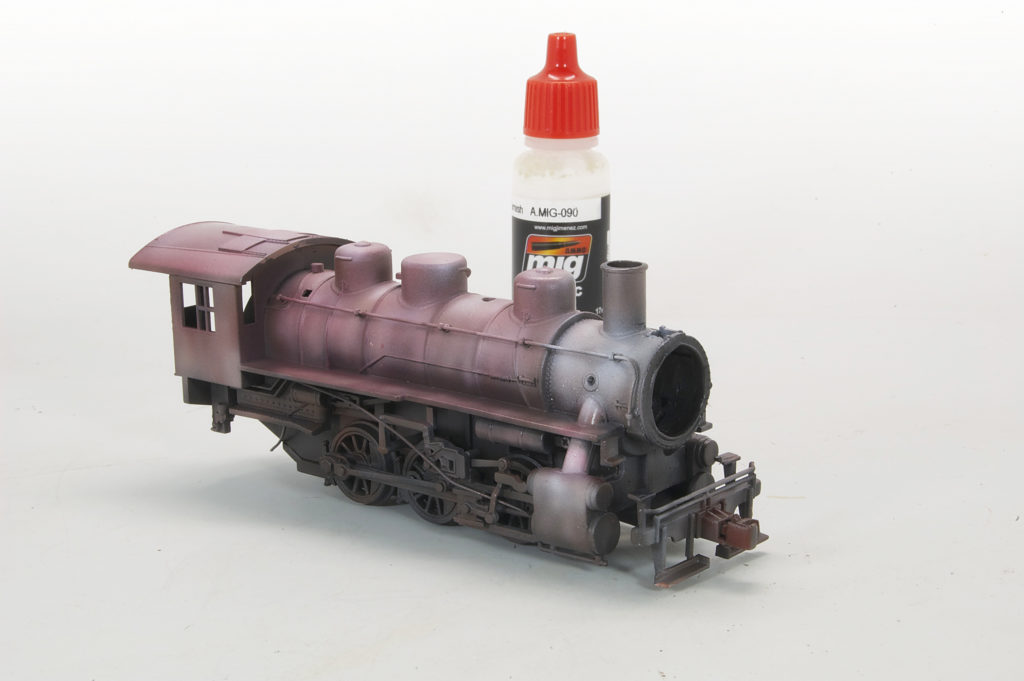
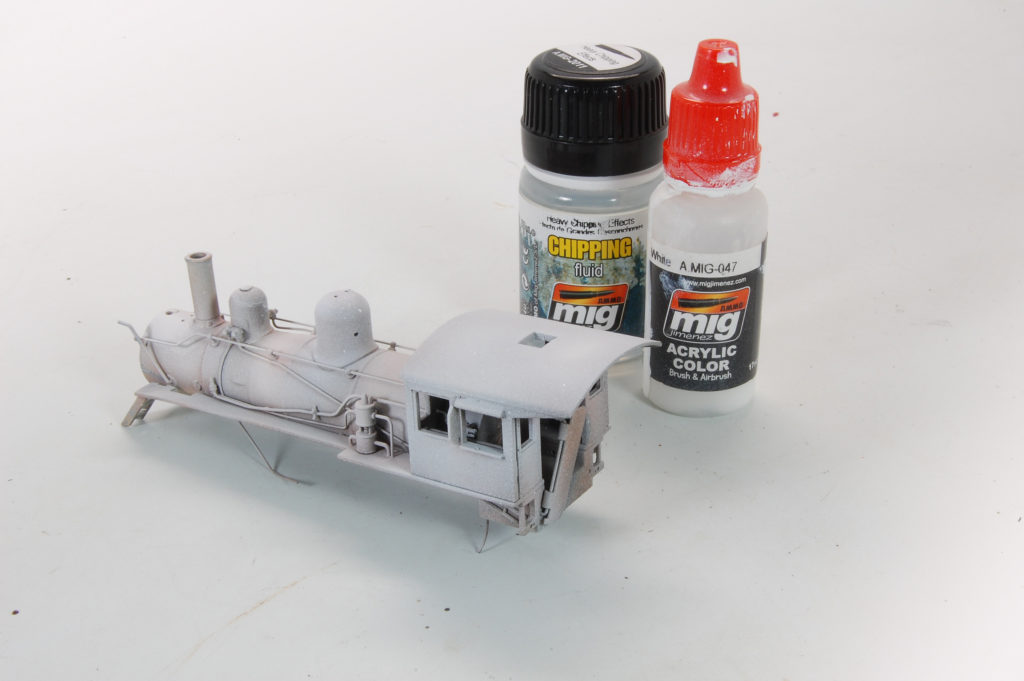
I began painting by spraying a primer surface, over-which I will be able to add the requisite corrosion and rust typical of these forlorn beasts. I chose to use AMMO black and white colored primer – slightly thinned – to provide a bit of pre-shade contrast to the base. I noticed in some of my references that many of these forgotten locomotives, rather than turn into a rusted heap, instead reveal t heir primer colors giving them a definite pinkish tone. Working toward this oxidized finish I begin by laying base tones using AMMO Primer colors, further tinted with red and white colors for added highlights. Next, choosing darker tones from the same range colors I added shading and shadows to the lower areas of the locomotive, providing depth and volume to the shapes – especially the cylindrical boiler. Feeling as though I have a good start on the base, I seal and protect the work done thus far by applying a layer of AMMO Satin Varnish. Once the Satin layer is dry I follow by a spray of AMMO Chipping Fluid. This is the part where I’m realizing that I’m not really sure where I’m going with this, but I’m planning for any event!
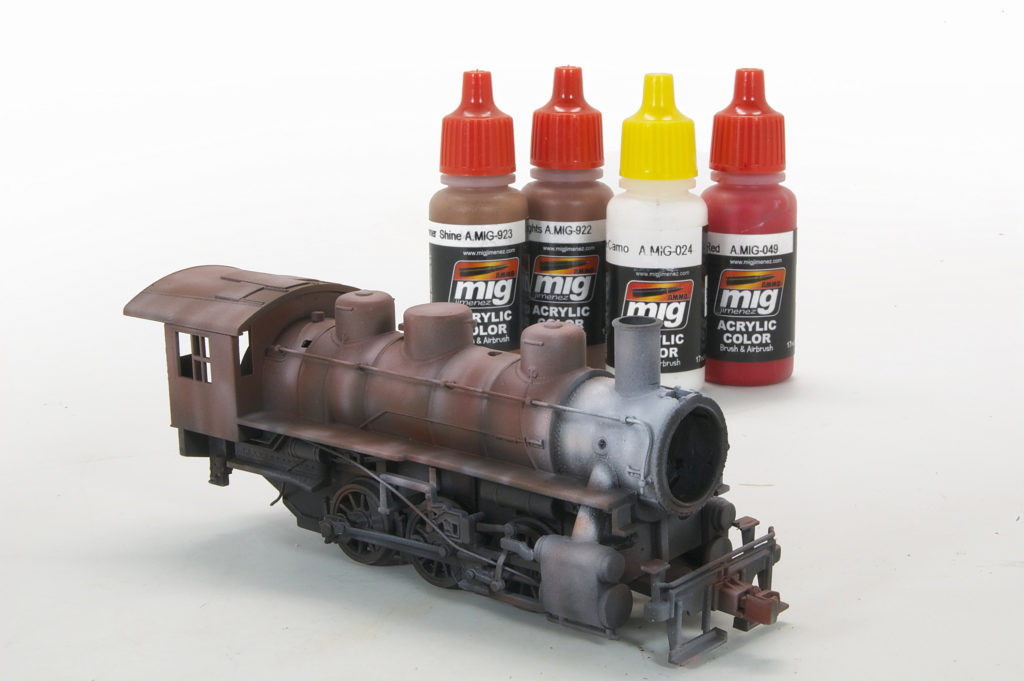
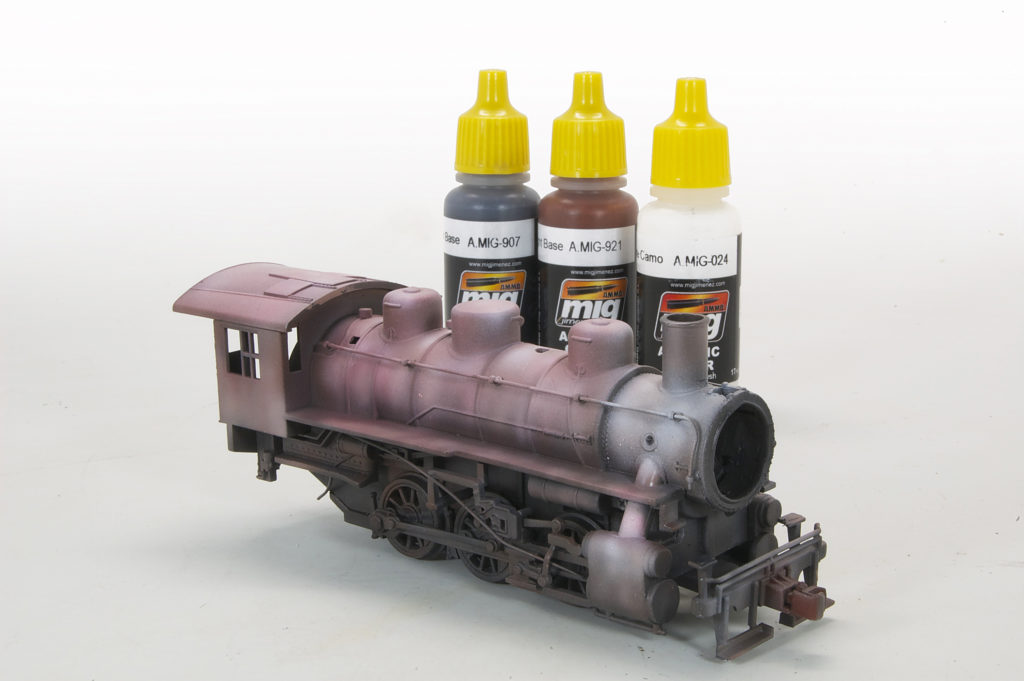

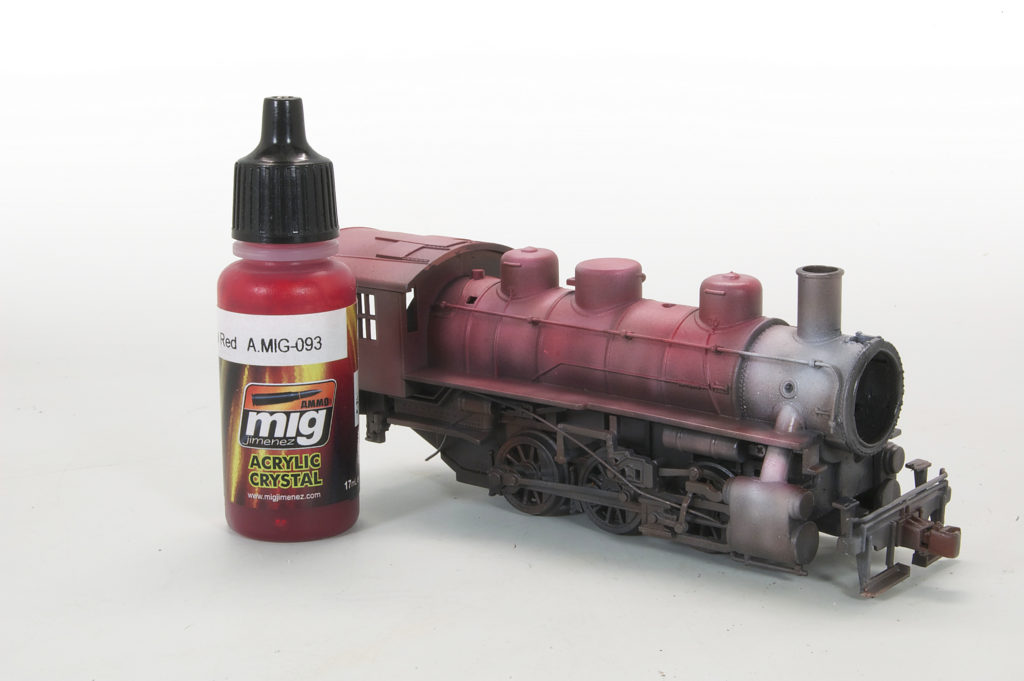
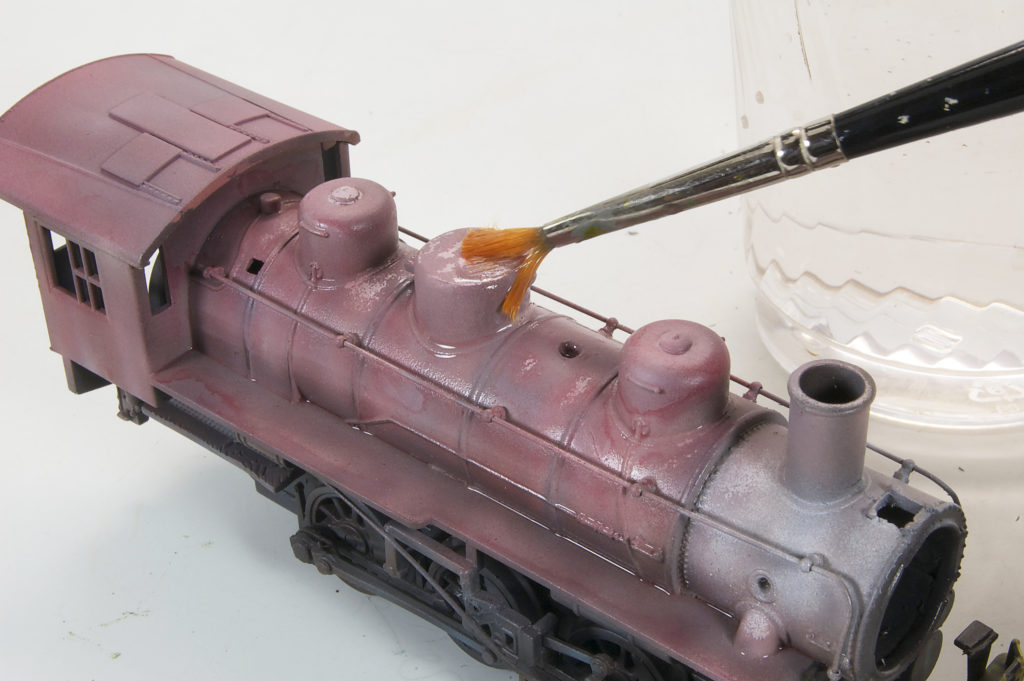

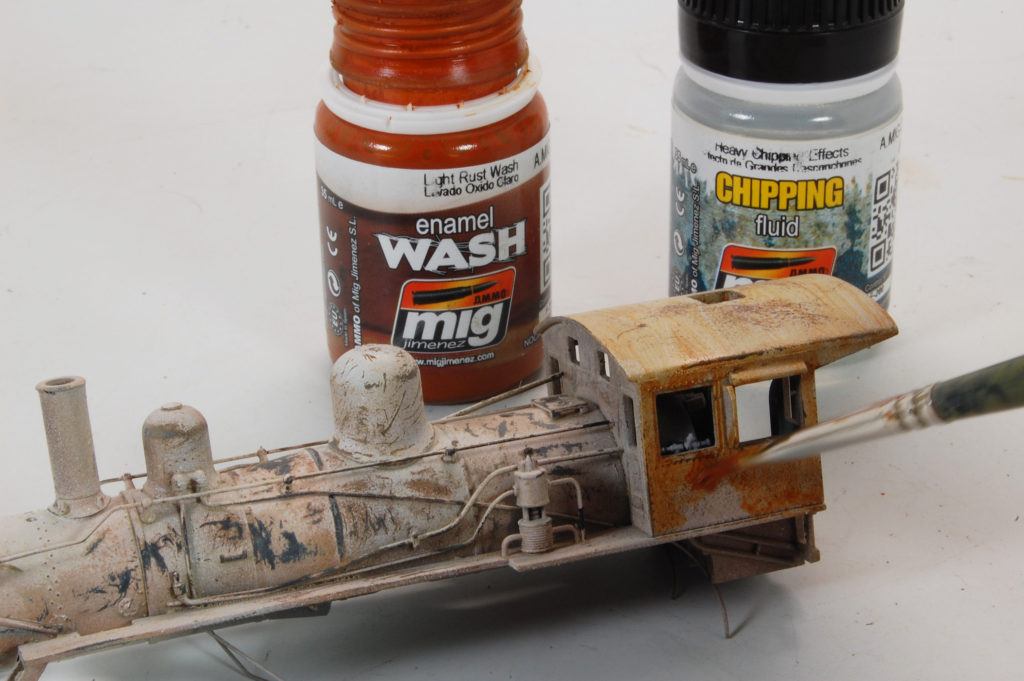
I decided to enhance the pinkish appearance by adding a light, uneven layer of AMMO Crystal Red. My thought is that by using these transparent colors I can deepen the color without sacrificing the shading that I’ve already created with the base. I continue with the idea of adding slight color variations by adding bluish colored shading, along with a little extra fading using a mix of red and white colors. Now, taking water and brush to the Chipping Fluid to scrub off most of the recent layers of translucent colors. Even with most of the colors removed there remains just enough of the colors behind to provide a bit of pattern and texture to the surface. The end result of all of these layers of paint and scrubbing is that now I have a “road map” of patterns, colors, and textures that I can now work to enhance. To begin, I paint areas of white and light grey to portray oxidation stains.
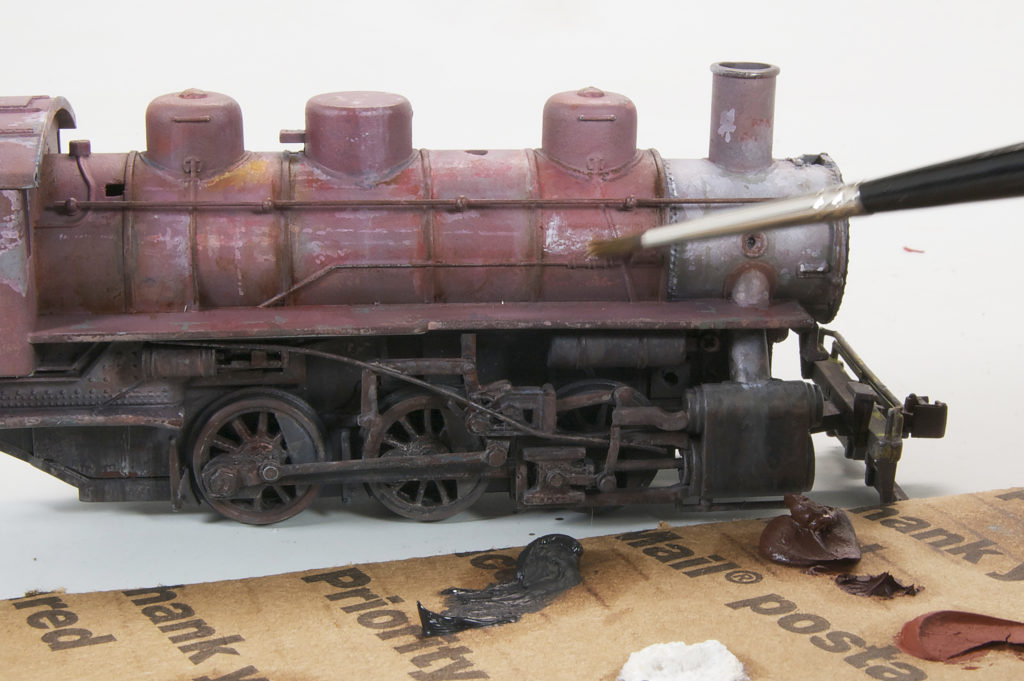
To this point I have been using acrylic colors exclusively, now I continue the same process of adding spots of color – lighter colored oxidation and light rust colors – using artist’s oils. The artist’s oils are added, but not necessarily blended away, leaving another layer of uneven color 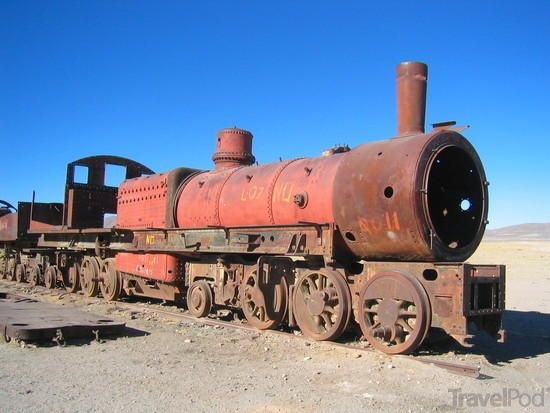 patterns and textures. Generally, it’s not a good idea to apply acrylic paints over-top of enamel or oil-based paints, as the water-based paints will tend to bead up and not adhere to the surfaces. However, if the surfaces are first washed with clean water it will allow you to return to using acrylics. And so, after some cleaning with water the acrylic paints came back into use so as to further enhance the areas of corrosion and oxidation. This process of back and forth, adding oils, enamels and acrylics are somewhat typical of my workflow as I work toward the finish.
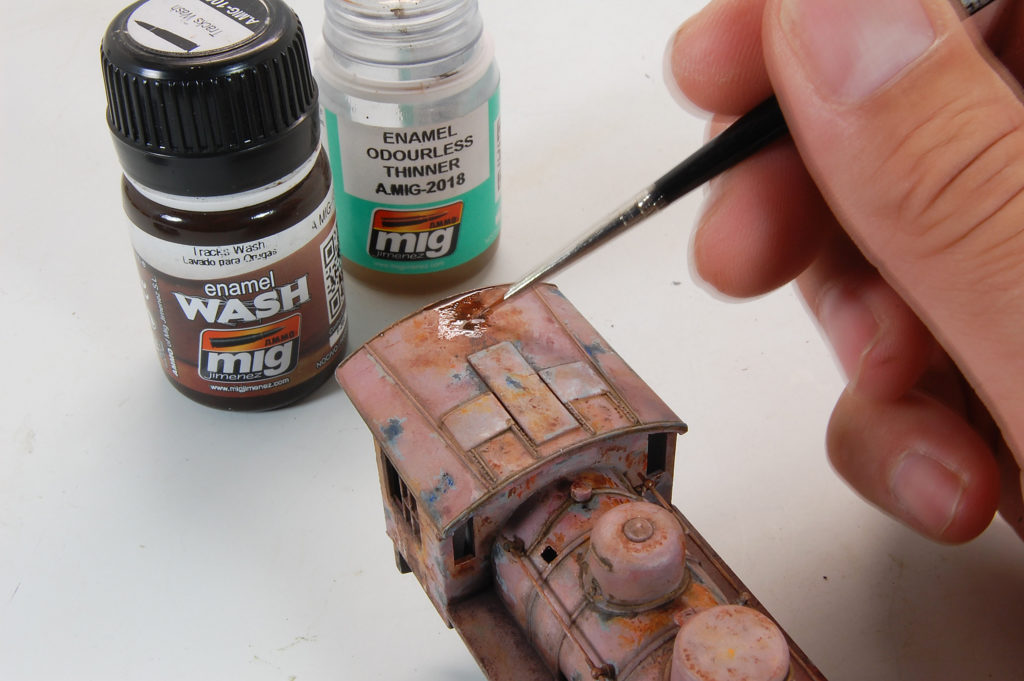
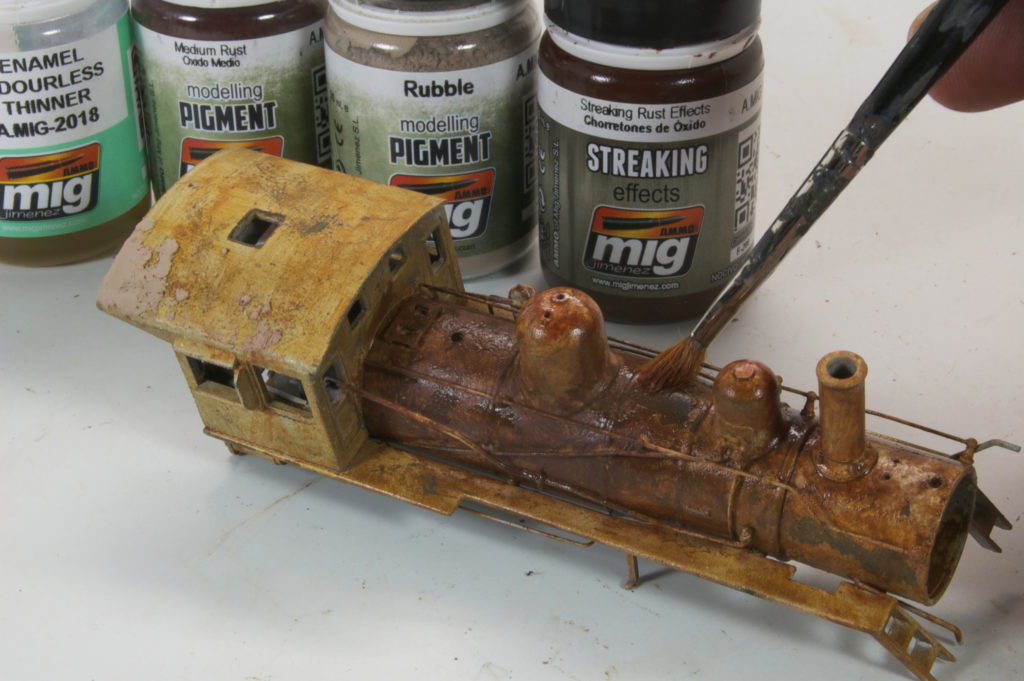
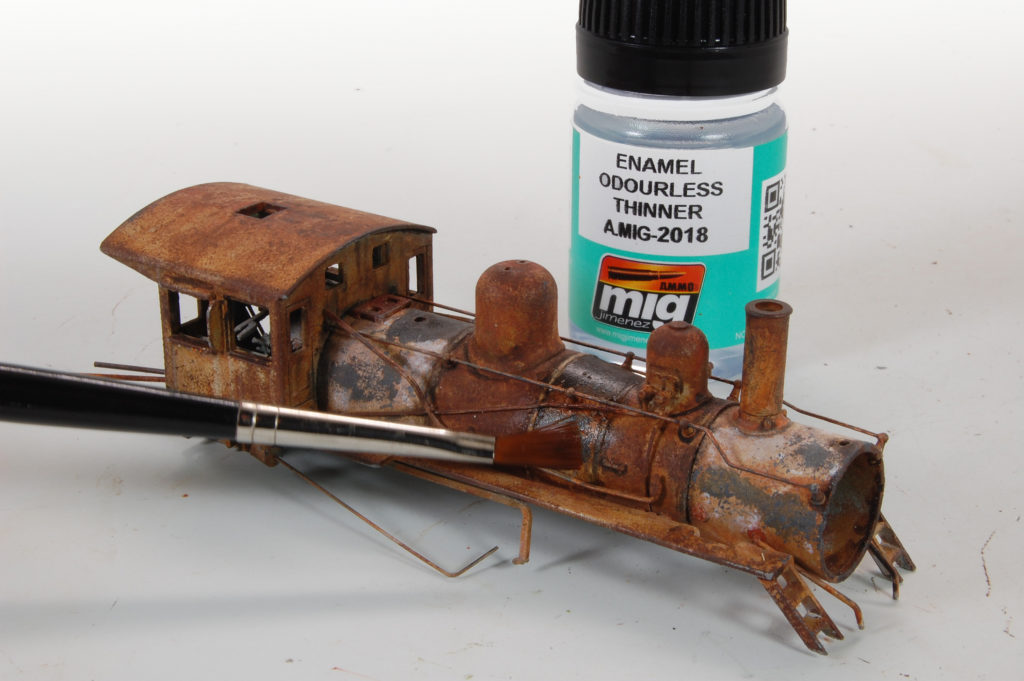
Returning to the oils, I prepare the surface by moistening with enamel thinner and them small dots of rust-colored oil paints are placed into the pool of thinner and allowed to dissolve and melt over the surface in areas that I wish to show rust deposits. 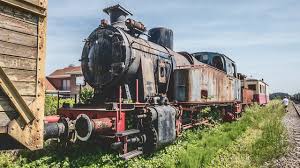 As I mentioned earlier, I am not one to be limited in my choice of products as I routinely combine artist’s oils along with enamel products to create effects. In this case, the Tracks Wash color provides a nice, dark purple/brown color that adds depth to brighter colors. Not one to be shy I also dip into the PLW and Filters as their thinner consistencies are nice as they allow for easy profiling of the surface features. Just a drop near an edge or corner and let the capillary action to flow the liquid around the details.
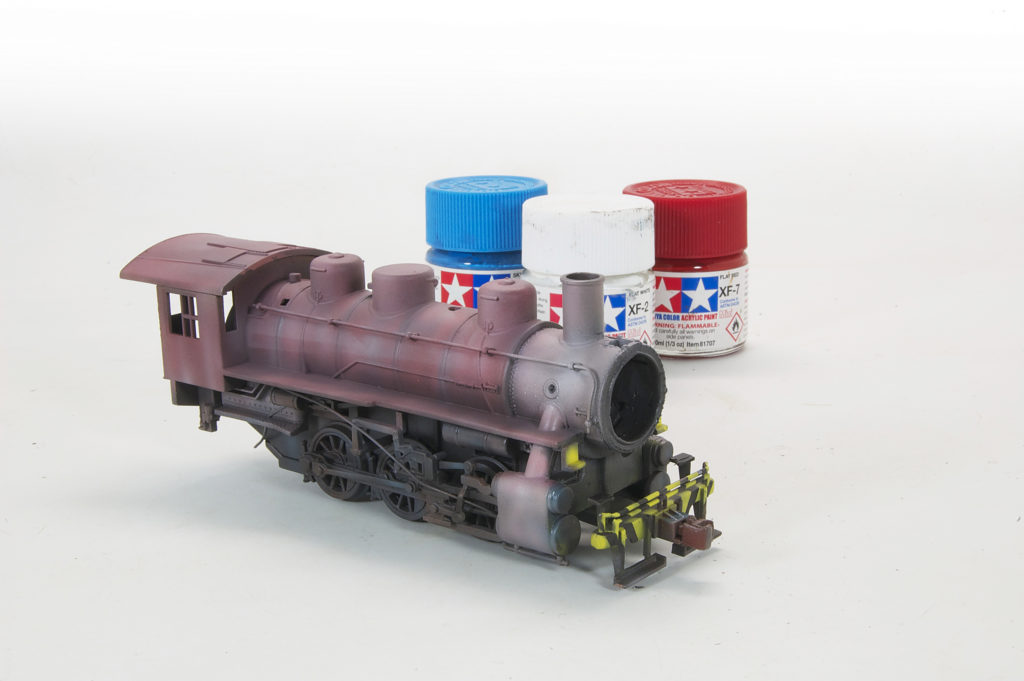
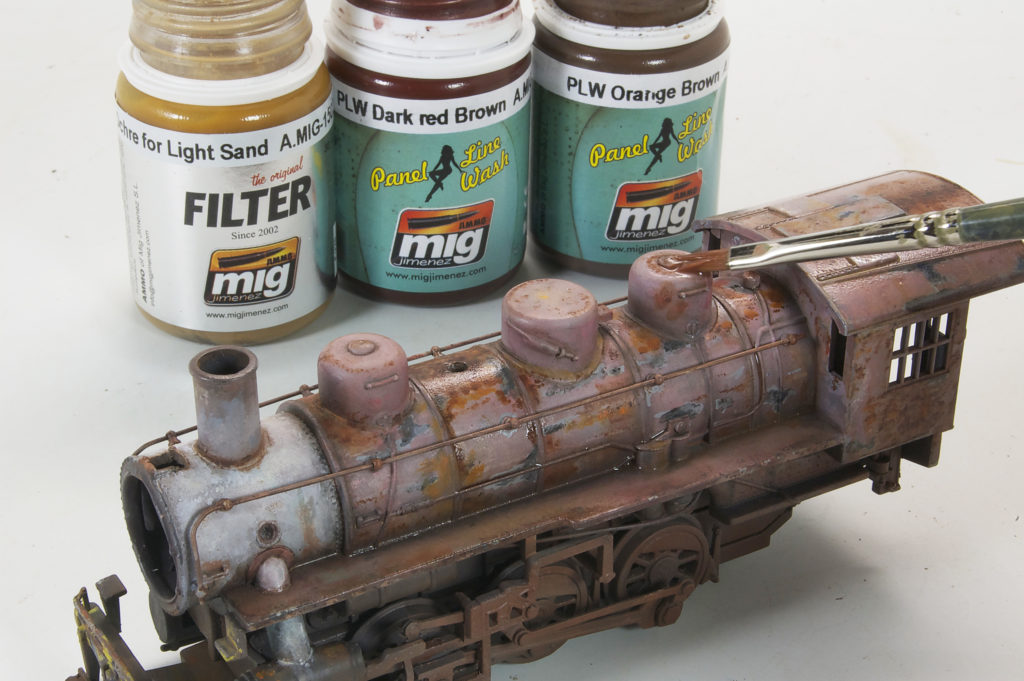
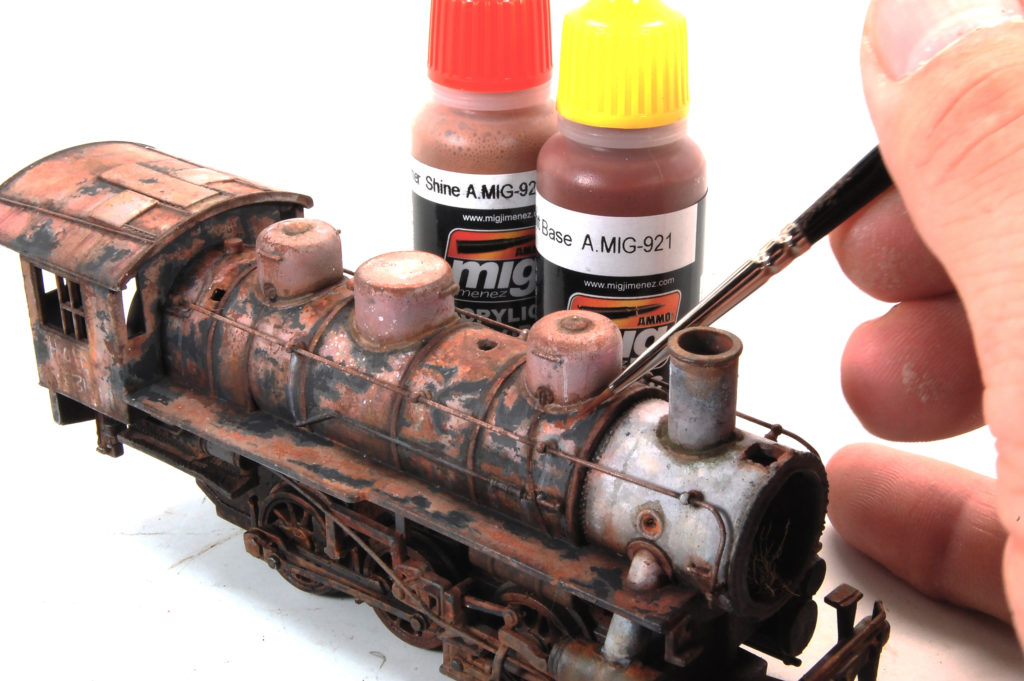
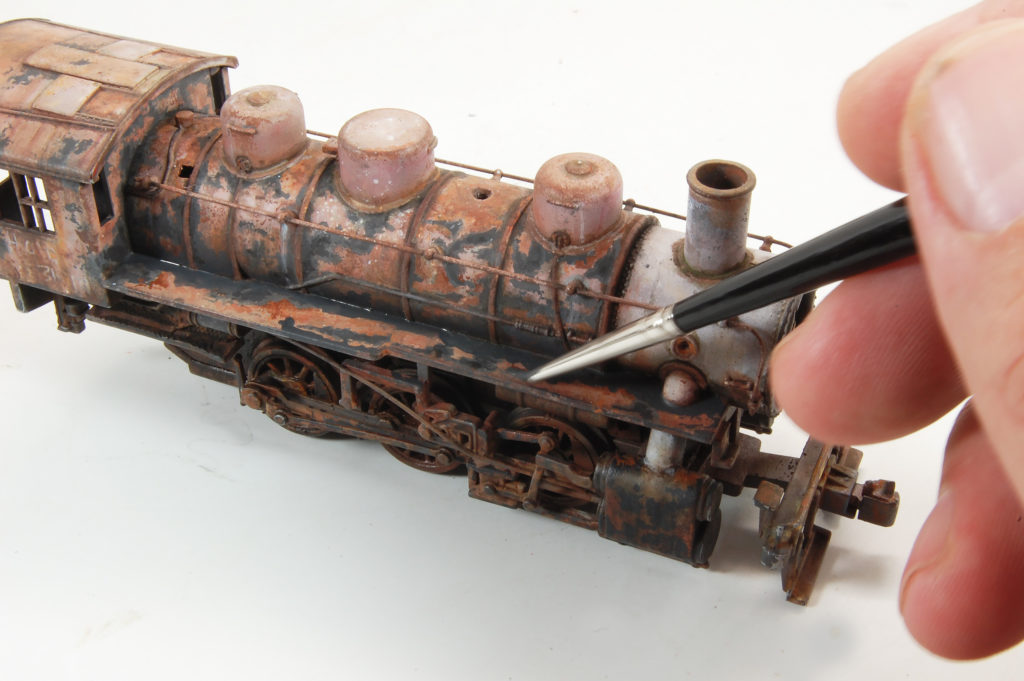
As the few photos indicate, it was at about now that I began to wonder if my experiment with a pink, oxidized finish was misplaced as I wasn’t quite capturing my intent for a boneyard relic; I would need to regain some of the contrast and definition that seemed to be missing. My plan of action was to bring the rusted areas into sharper focus, and for this, I again turned to the acrylic paints. I expanded the remnants of the “black” as well – using dark grey in order to remain consistent with the overall faded and oxidized finish. Finally, I flooded the surfaces with enamel thinner and then deposited tiny specks of rust-colored pigments onto the wet surfaces. These tiny particles dissolve in the thinner, and once dry, leave behind small highlights of colors and textures.

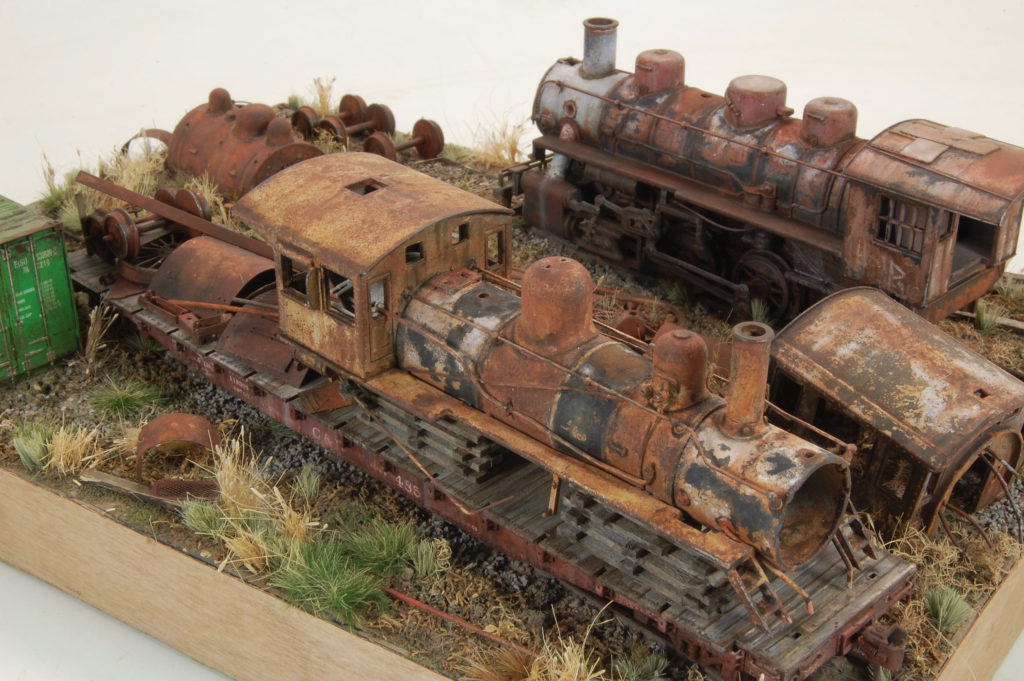
The more I worked on the engine the more I really began to think about making a scene and decided that I would need to finish a few more items to go into the scene – not the least being another locomotive. So, once again, I found a suitable HO scale model to sacrifice. Although the basic processes are the same between the two trains, I also wanted each to have some individuality. Again, based on references, I apply a base rust color and stripes of white to the engine and then coat with Chipping Fluid. 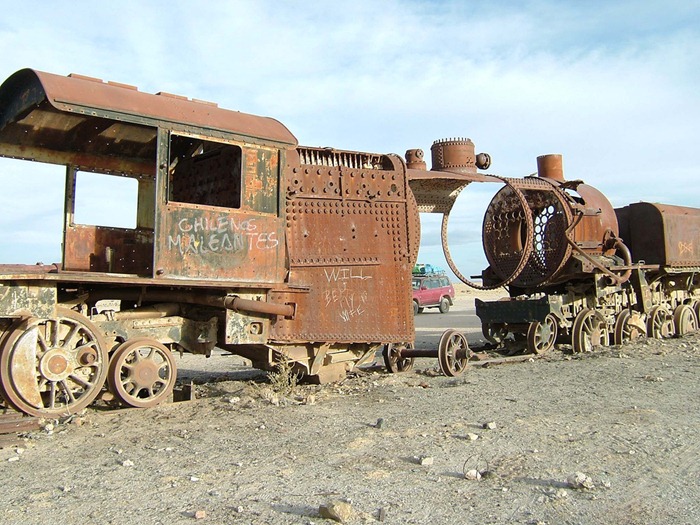 The engine is airbrushed in an overall layer of acrylic white and allowed to dry. Then, the chipping fluid is activated using a stiff brush and water, scrubbing and chipping the white color and providing an interesting texture map. Now, same as before, I apply rust colored enamel effects over the entire surface, transforming the distressed white into an oxidized, rusted appearance. I also continue the use of enamel Rust Effects with pigments, brushing the thick mixture onto certain areas of the locomotive. Once dry, the pigments provide a nice grainy texture to the surface. Finally, using reference photos as an example, areas of rust and pigments are removed using a brush dampened with thinner – revealing broad bands of the white and black base colors.

Building the Graveyard
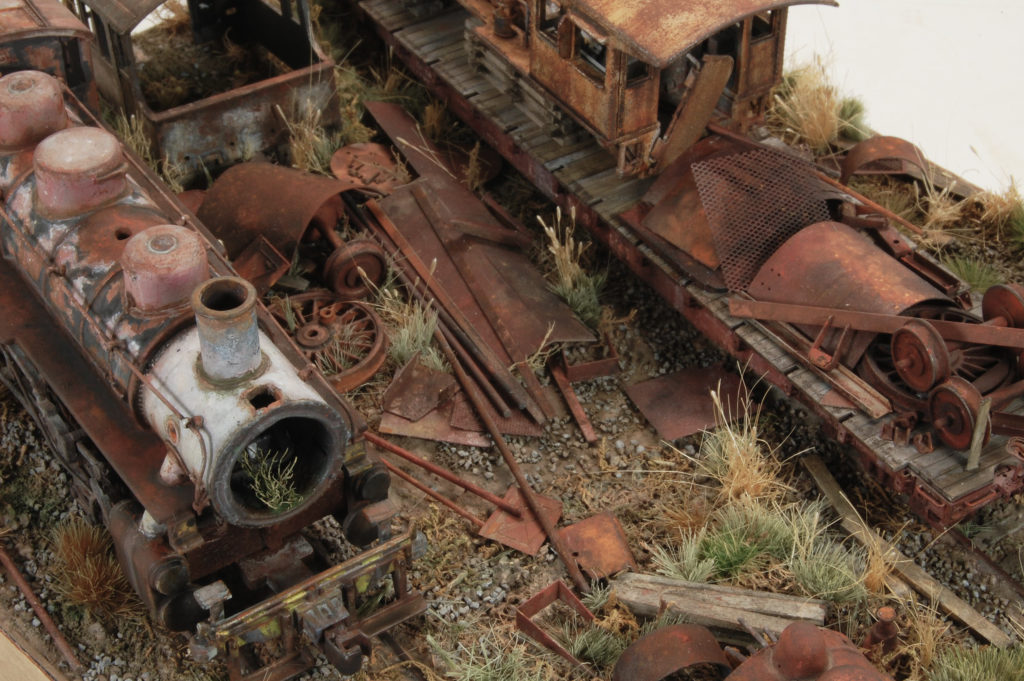
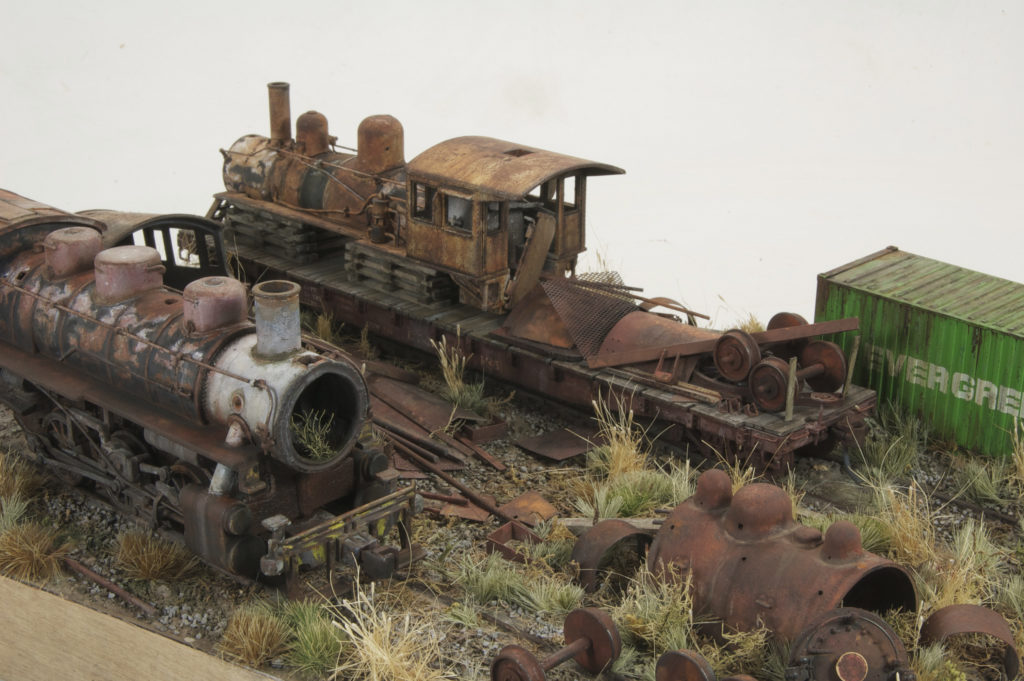
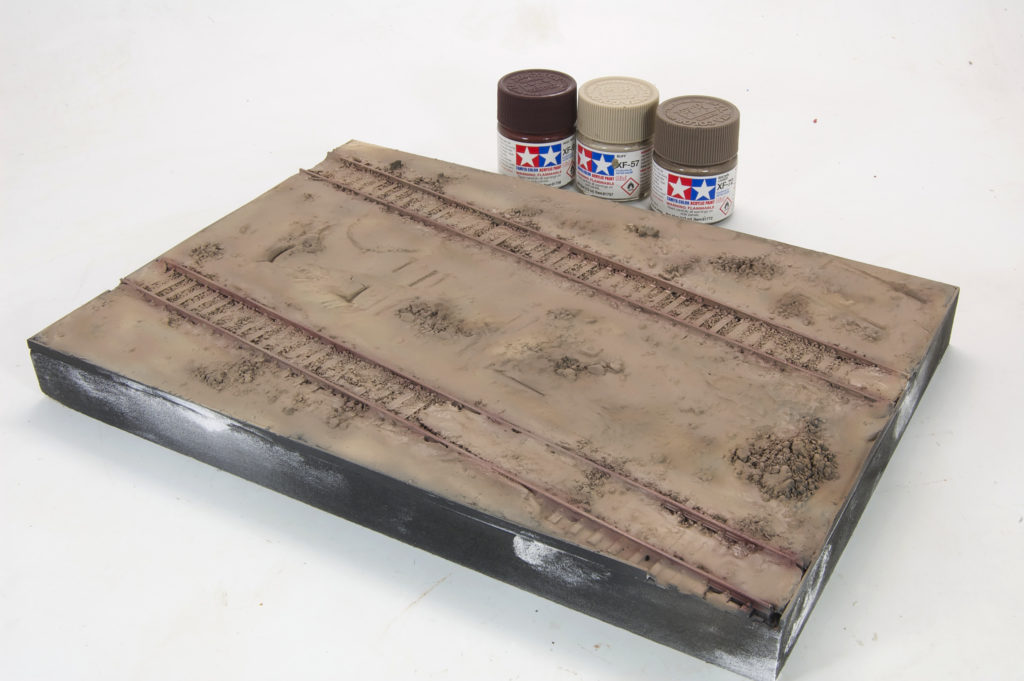
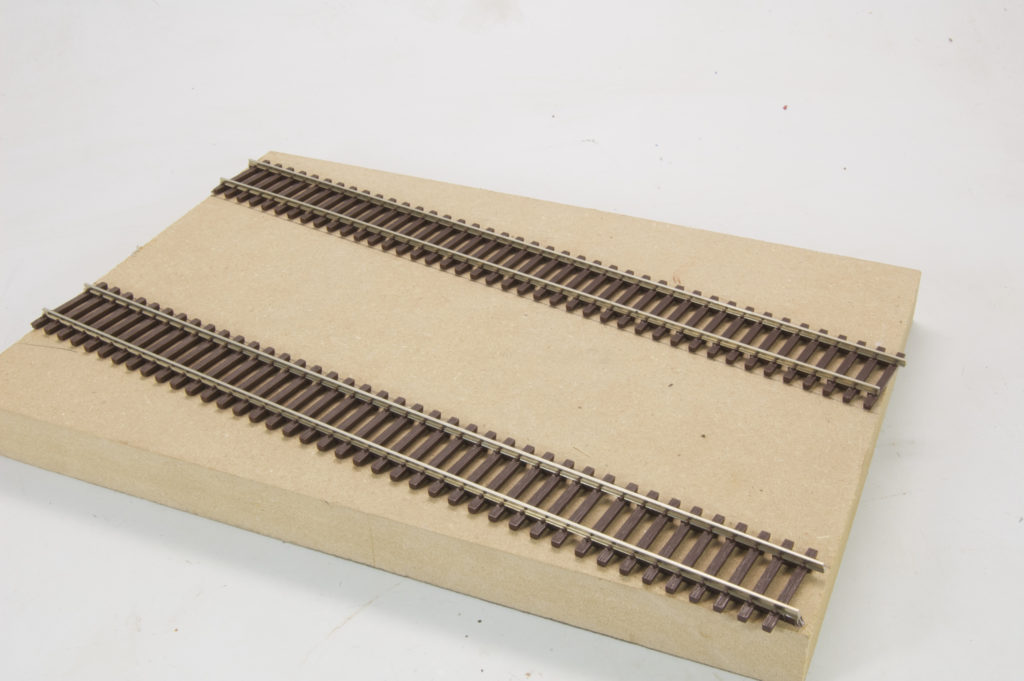
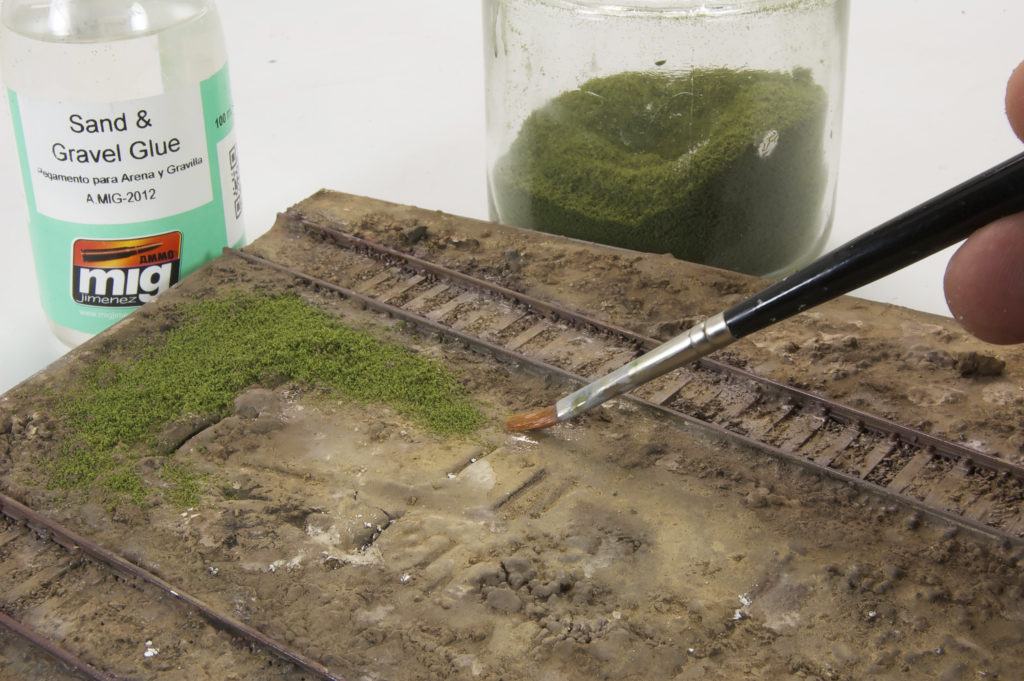
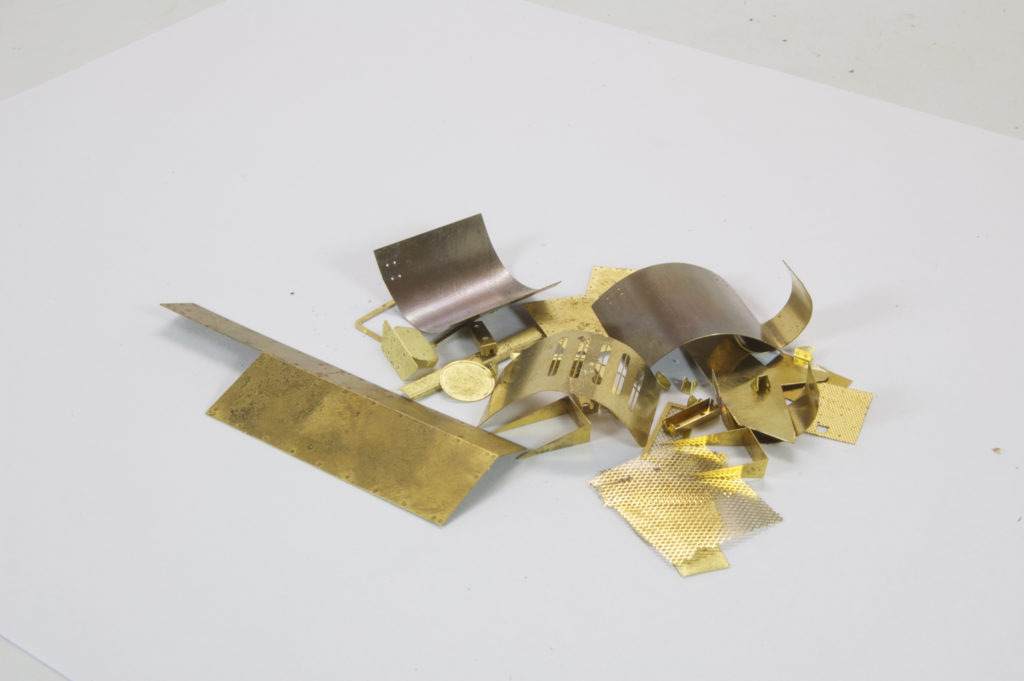
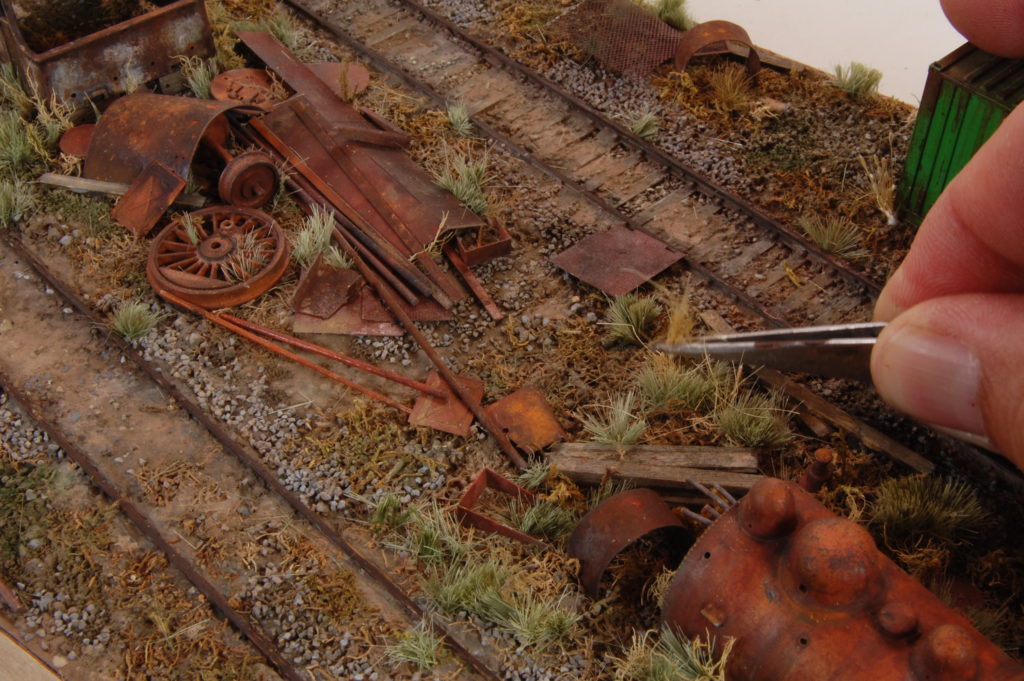
The base begins by laying sections of HO scale tracks onto a wooden base. The ground texture is applied (plaster and gravel) and then painted in earth-toned acrylic paints and pigments. I then add grass and other ground elements to the scene; using AMMO Gravel and Sand Glue as the adhesive. Miscellaneous salvage parts and rail yard clutter are made from scrap photo-etch. The photo etch is painted in a similar manner as the locomotives – rusty base colors, chipping and finally the addition of washes and pigments. Soon, the base takes shape, layer by layer. As each new element is added to the scene I will continue to add refinements – adding grass, painting rocks, or perhaps a light wash to bring out a certain detail. This process continues until I am satisfied and feel that the scene is finished.
The End of the Line