
Where the Streets Have No Name
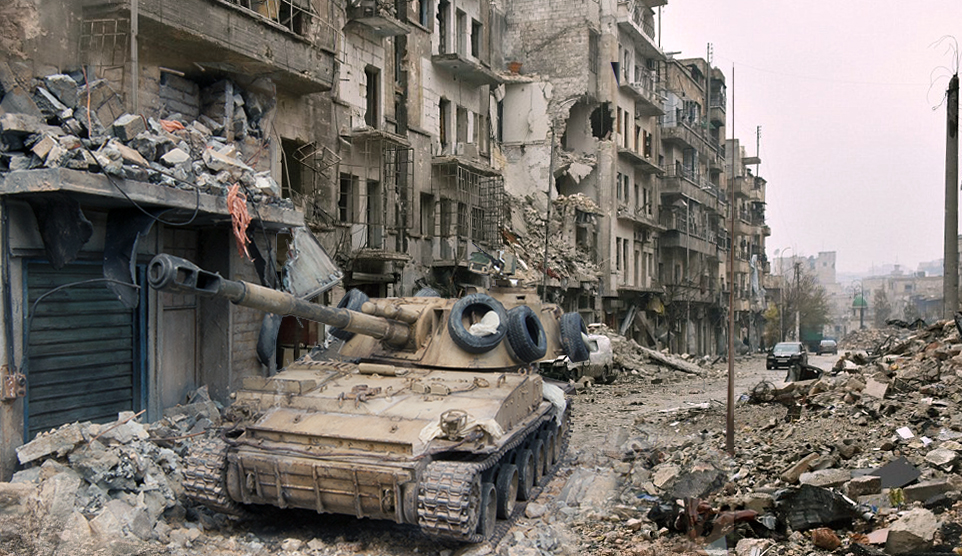
 As military modelers we often throw around the phrase; “living in the golden age of modeling”. And while it is certainly true that the variety and quality of the kits that are now available are mind-blowing, perhaps a more accurate term might be “accessibility”, meaning, that our access to real-life and real-time “inspiration” (for lack of a better term) is now unprecedented. The world is at our fingertips by simply logging into our Facebook feed, watching a YouTube video or by joining any one of the many specialized groups, we are provided with unfiltered access to world events. I wouldn’t imagine that when Trumpeter released the Russian 2S3 Akatsiya in 2013, they had any idea that these vehicles recent “claim to fame” would be in the deadly, close-quarter urban battlefields of Syria. However, here it is – from the pictures and YouTube videos coming out of Syria that I found inspiration for my take on this Russian-built heavy hitter.
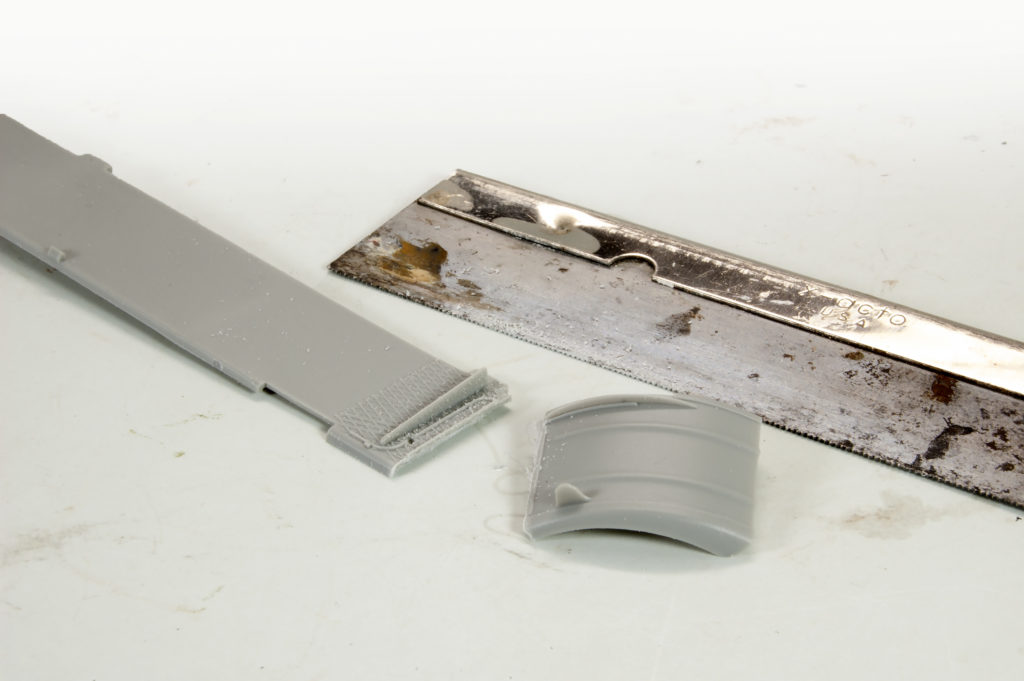
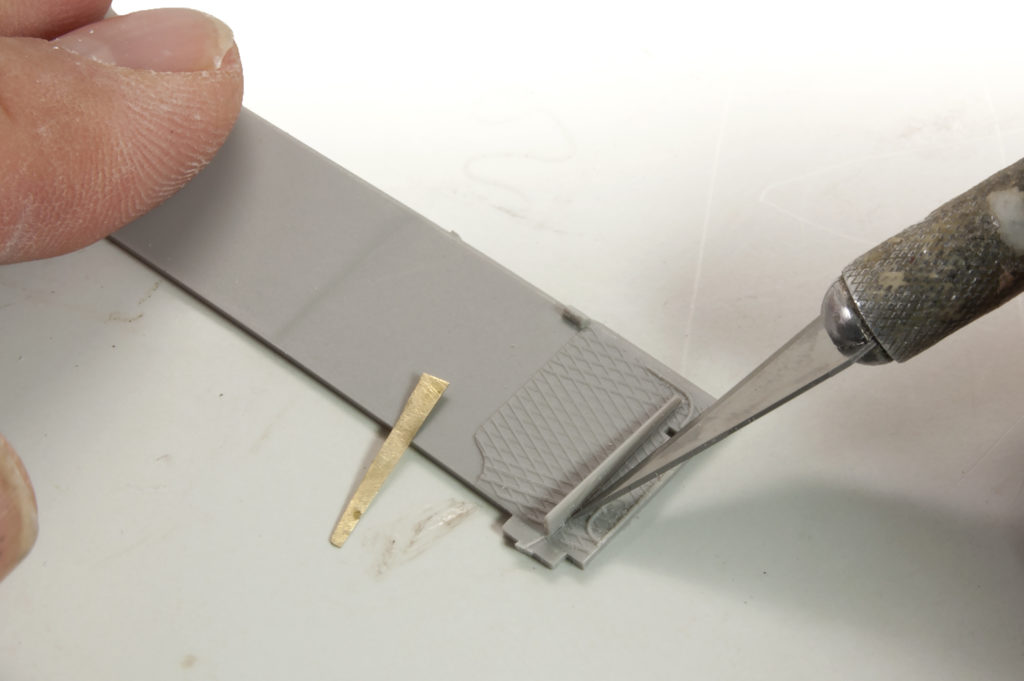
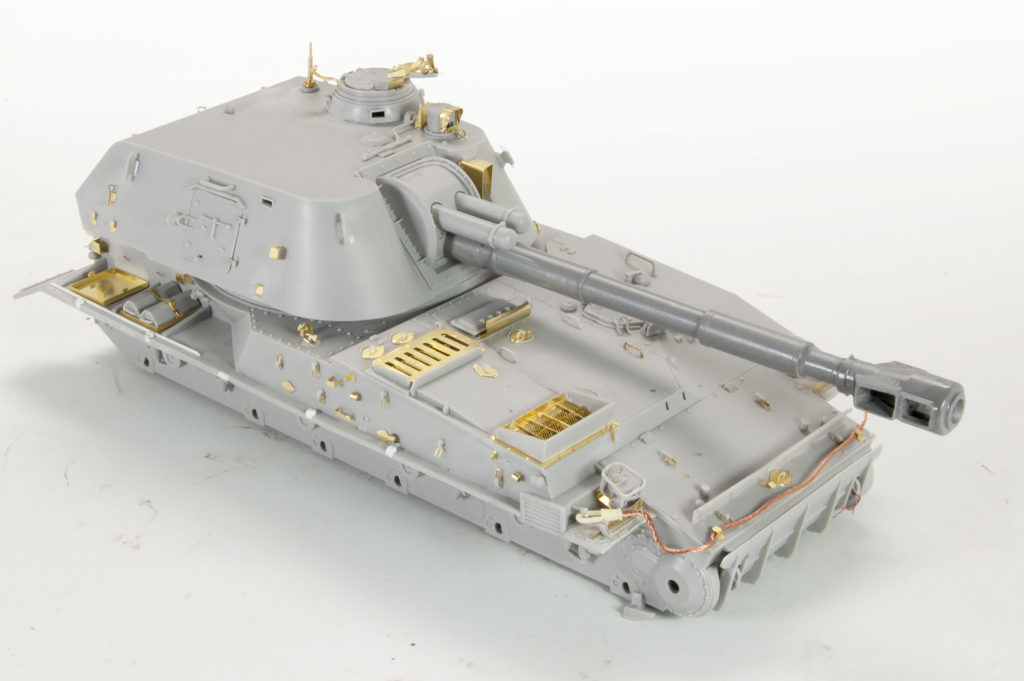
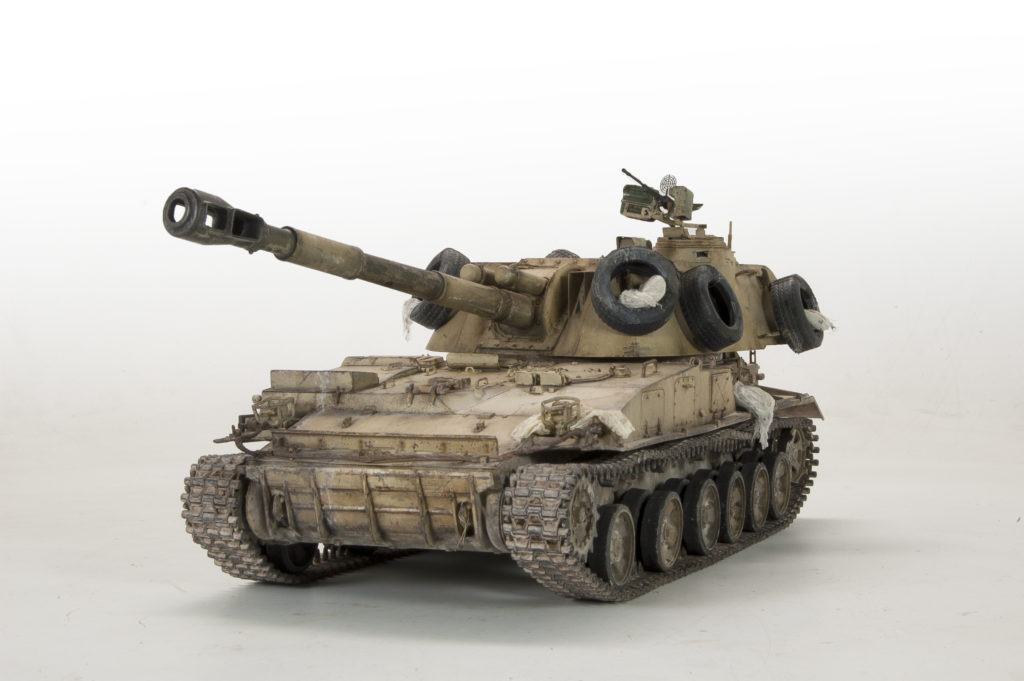
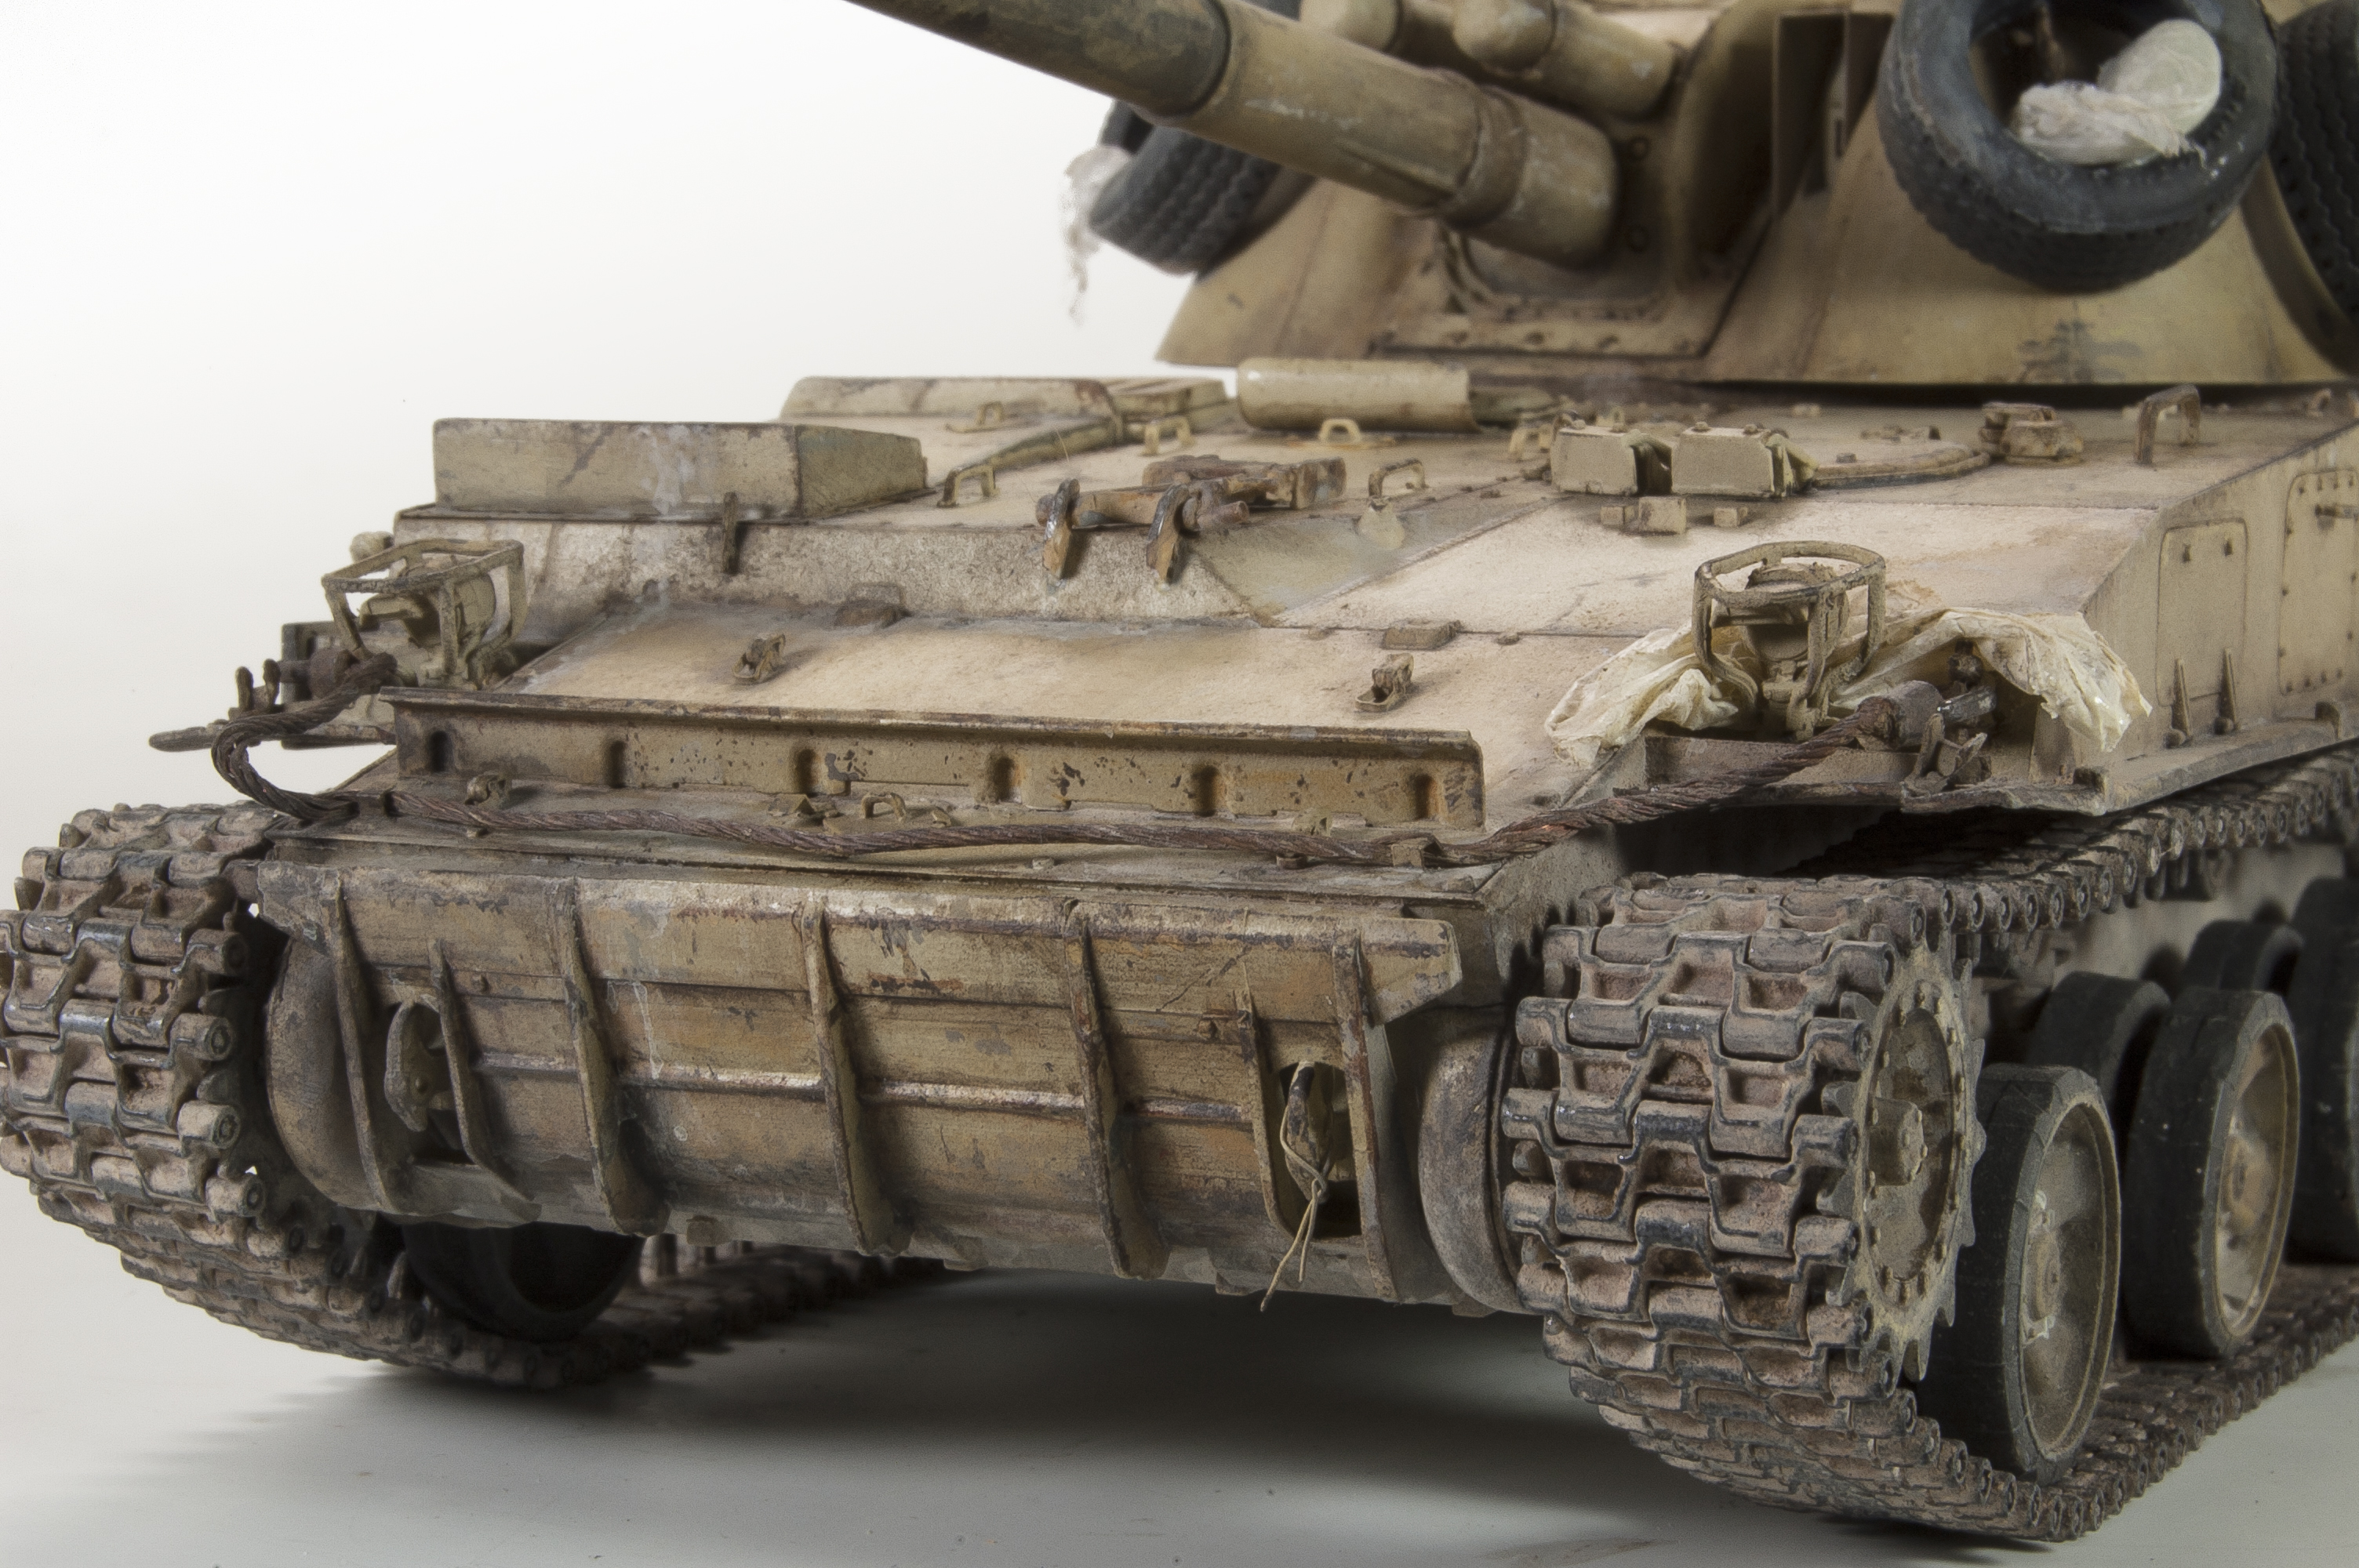
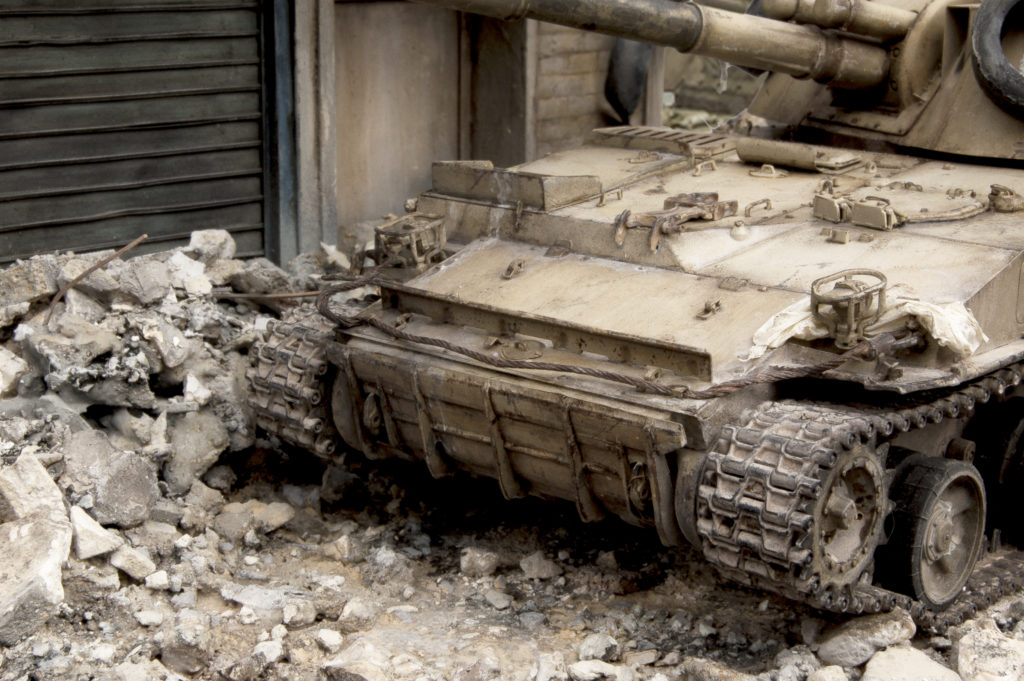
There is no doubt that the everything within Syria is taking a beating; from the population caught in the middle of the fighting, their homes – and, of course, the vehicles that cause the destruction. From the outset, I knew that severe wear and damage would need to be included in this 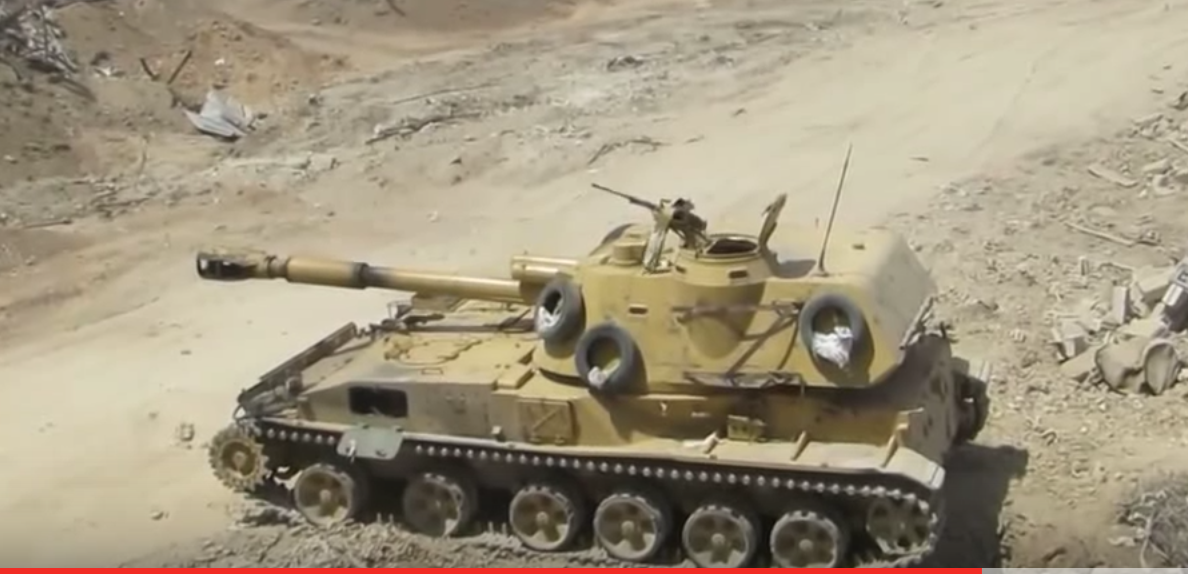 model. To begin, the mud-guards on either side were cut from the fenders – and since nothing looks like bent metal better than bent metal, I remove the thicker plastic fender braces and replace them with hand-formed brass parts. Voyager Photoetch upgrade parts are also included in other areas. As you can see, my construction of the S23 is basically straight from the box. The small additions provided by the Voyager photoetch upgrade are clearly visible and provide just the right amount of finesse and scale to the surface fittings. You might also notice a few subtle enhancements that were done using Evergreen stock.
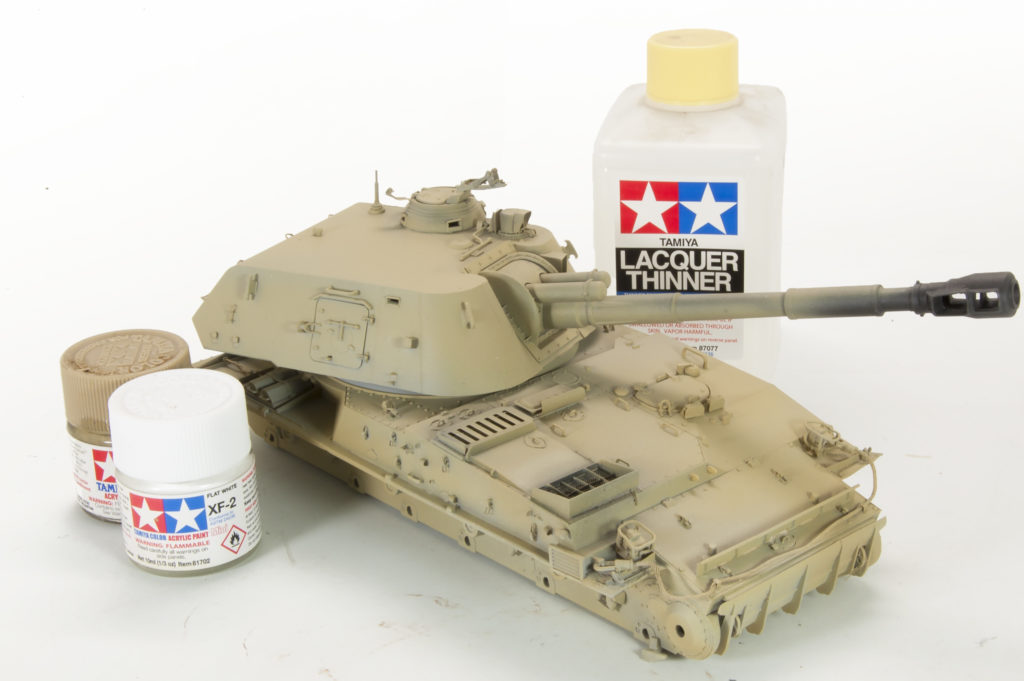
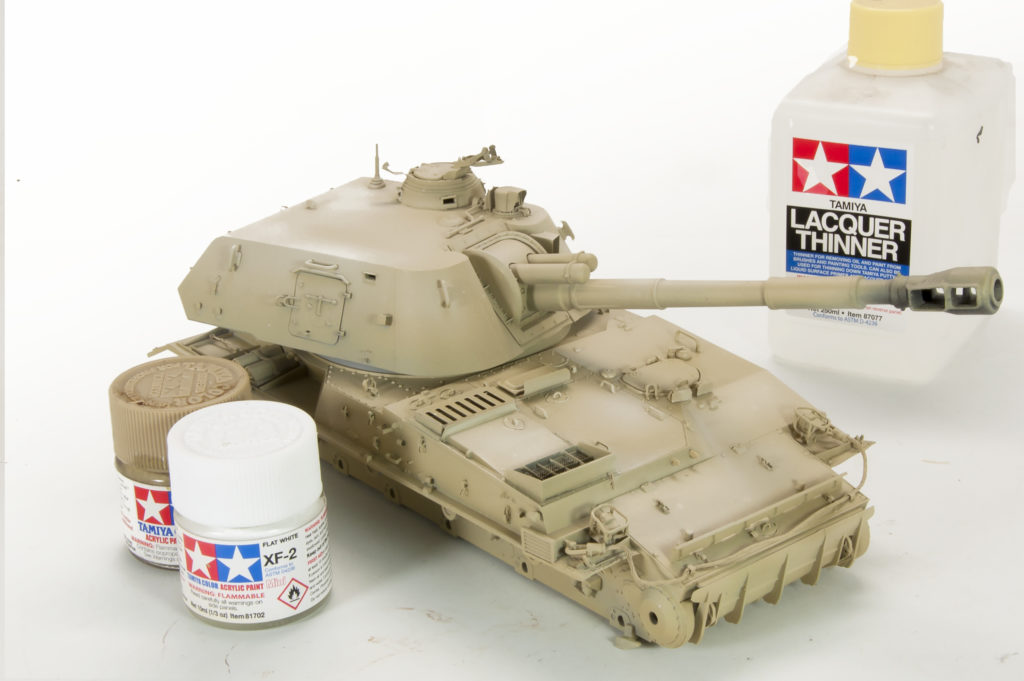
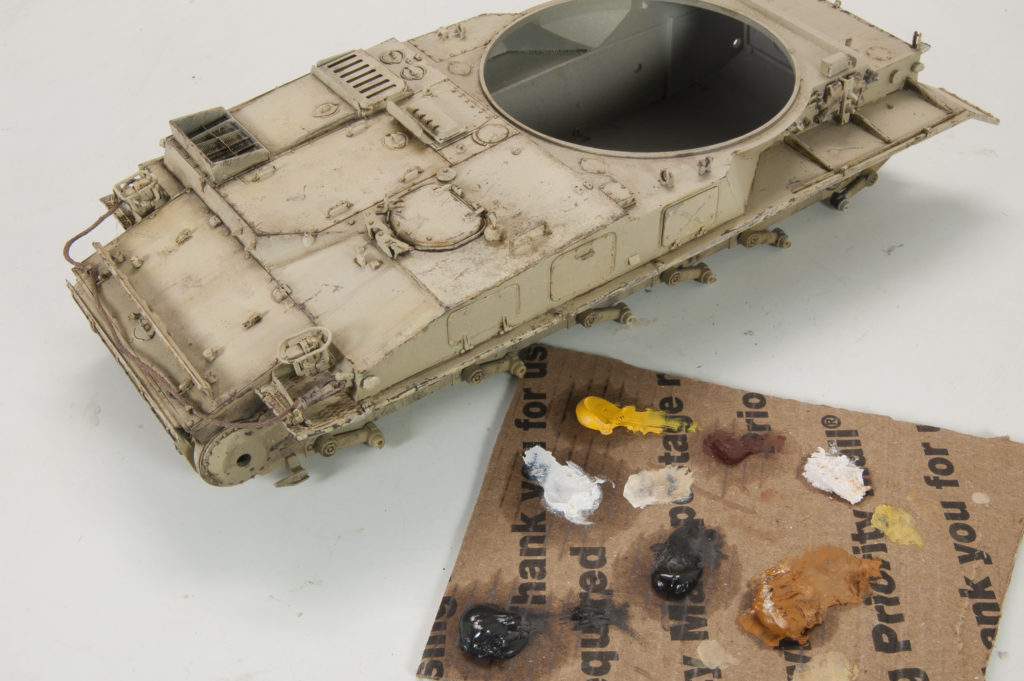
My painting of the base layers is provided using Tamiya colors, thinned by a small amount with their own lacquer thinner. As is my usual method, the coverage is not necessarily uniformed, that is, I am ok with allowing some of the primer base shading to show through. In other areas, the coverage is much more complete. I feel that this “random” base coverage helps to inspire my painting and allows for those “happy accidents” to occur. Working with “old school” methods! In a world before “Modulation”, a touch of white is added to the base color and then applied to certain panels, edges and surface details to create volume and/or highlights. It’s all very loose; my only intention is to aid in interset and add subtle variation to the final finish.
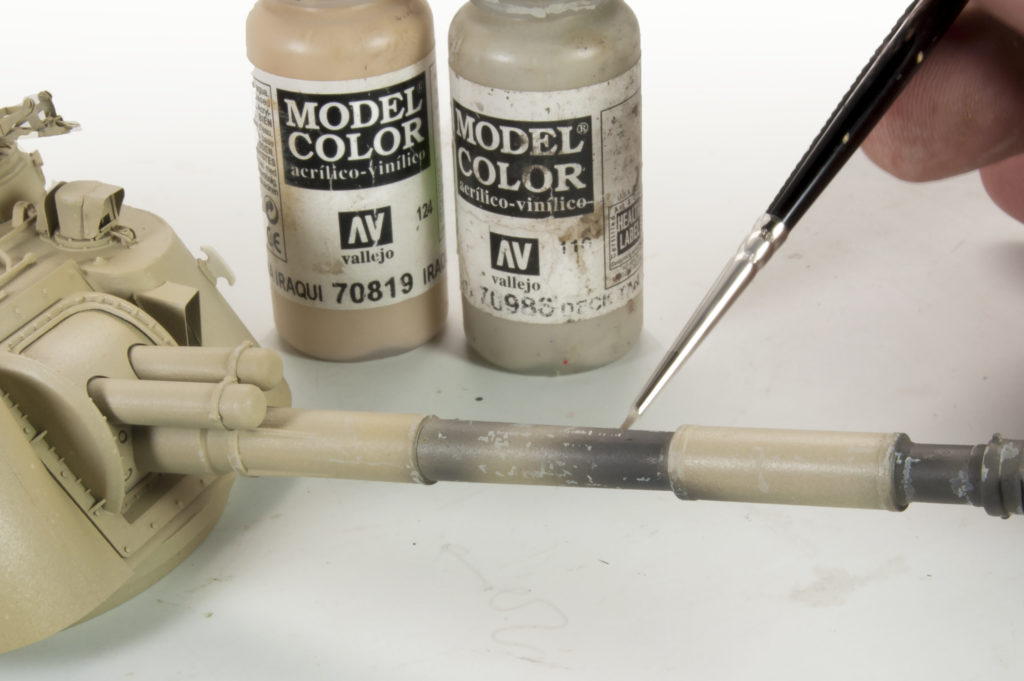
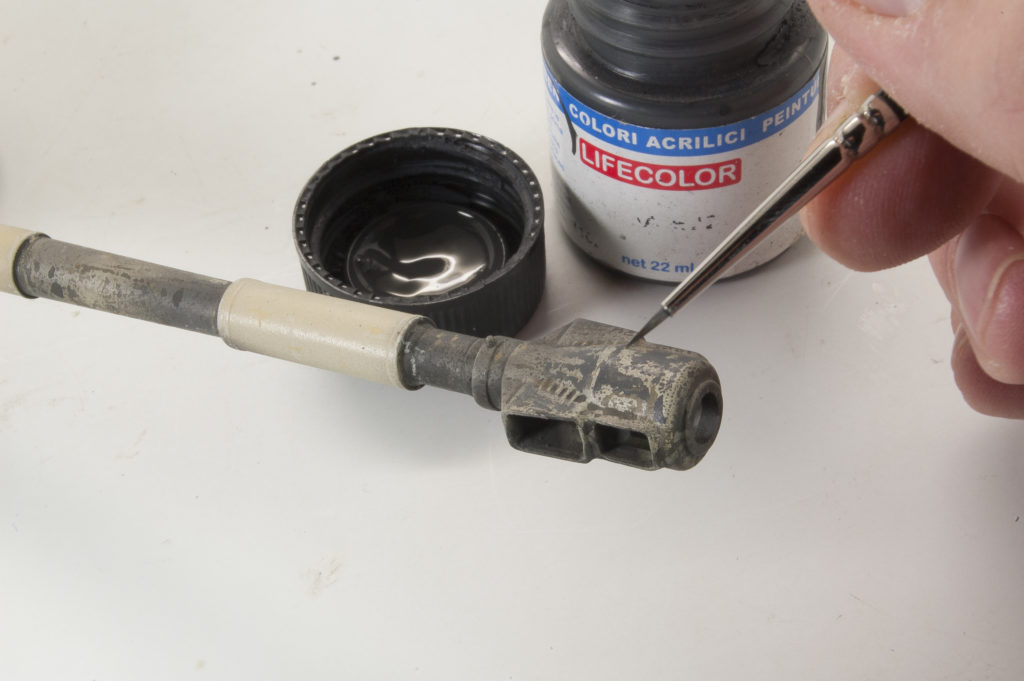
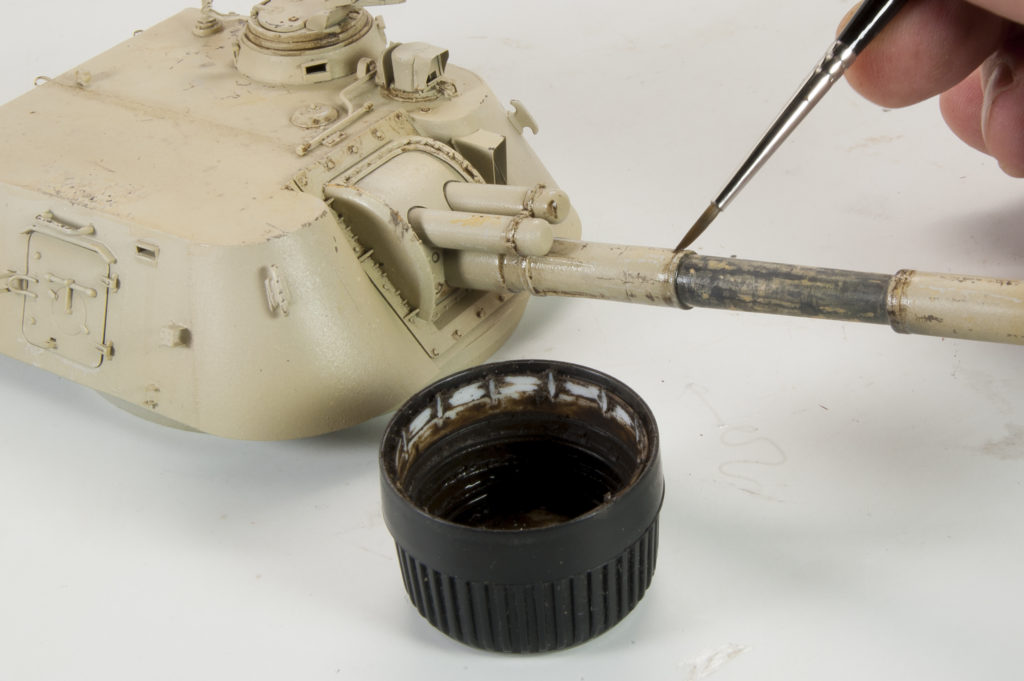
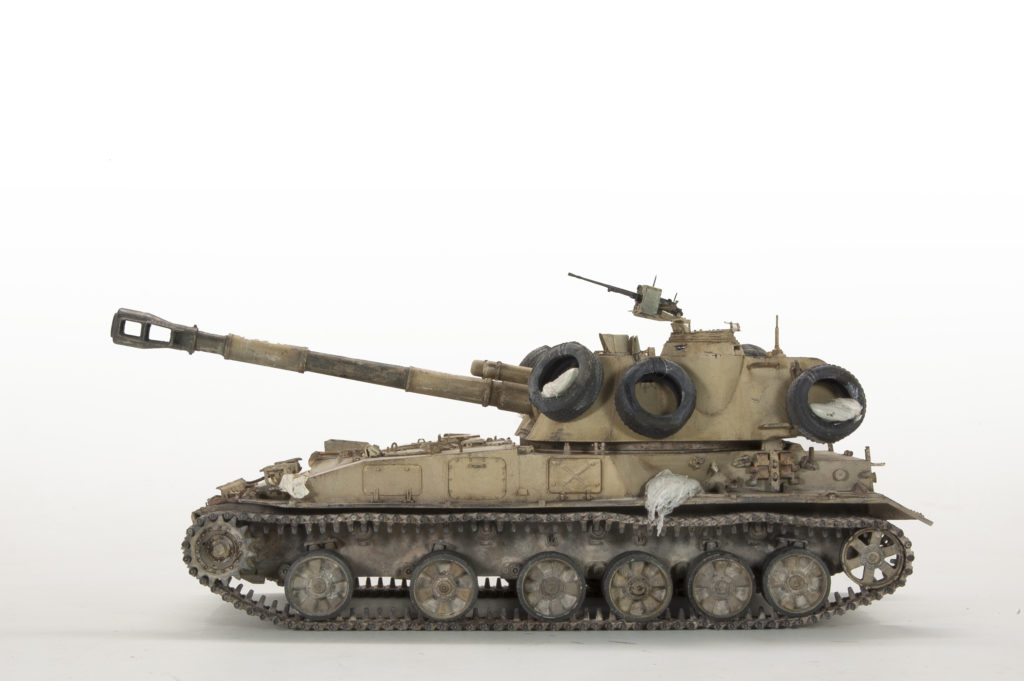
Looking at reference materials I noticed that most (if not all) of the 2S3 barrels have severe discoloration and wear, this, I felt, would be an ideal focal point of the model. I begin by airbrushing a dark grey to certain areas of the barrel to give the base for the discoloration. Fine scratches and marks are added with a fine tipped brush. I continue working on the barrel, layer-by-fine-layer. It’s important to not get too tied into any particular painting sequence, rather I find that it’s best to allow the visual cues and intuition guide me through the process. Often, I will add a few light color acrylic scratches, followed by an enamel wash and then followed by another round of acrylic chips. Again, it should be about the results, not a prescribed sequence.
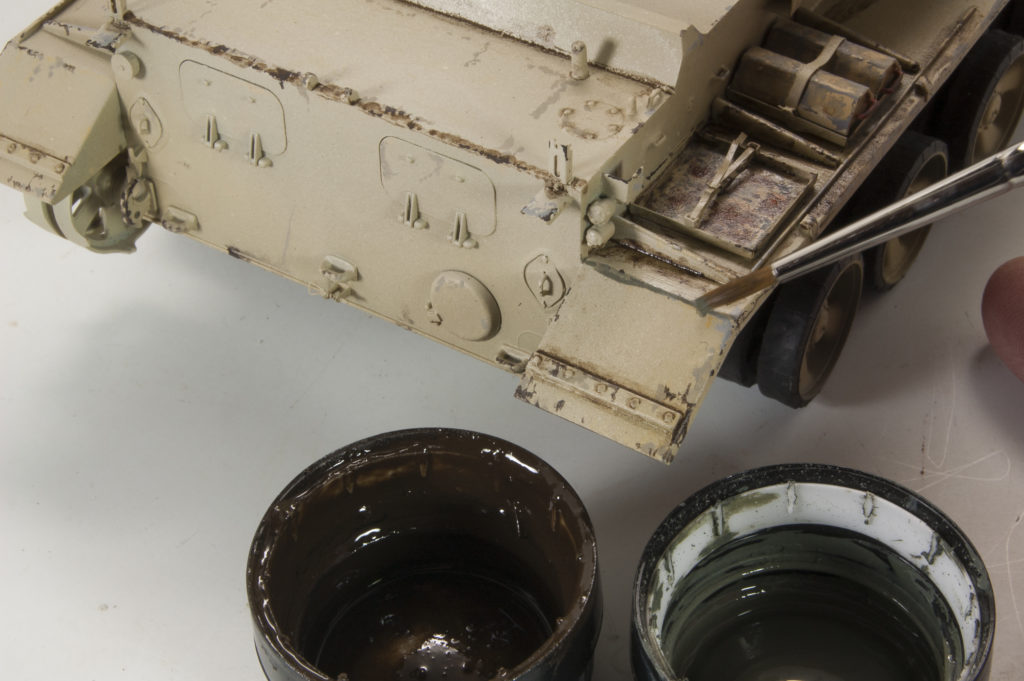
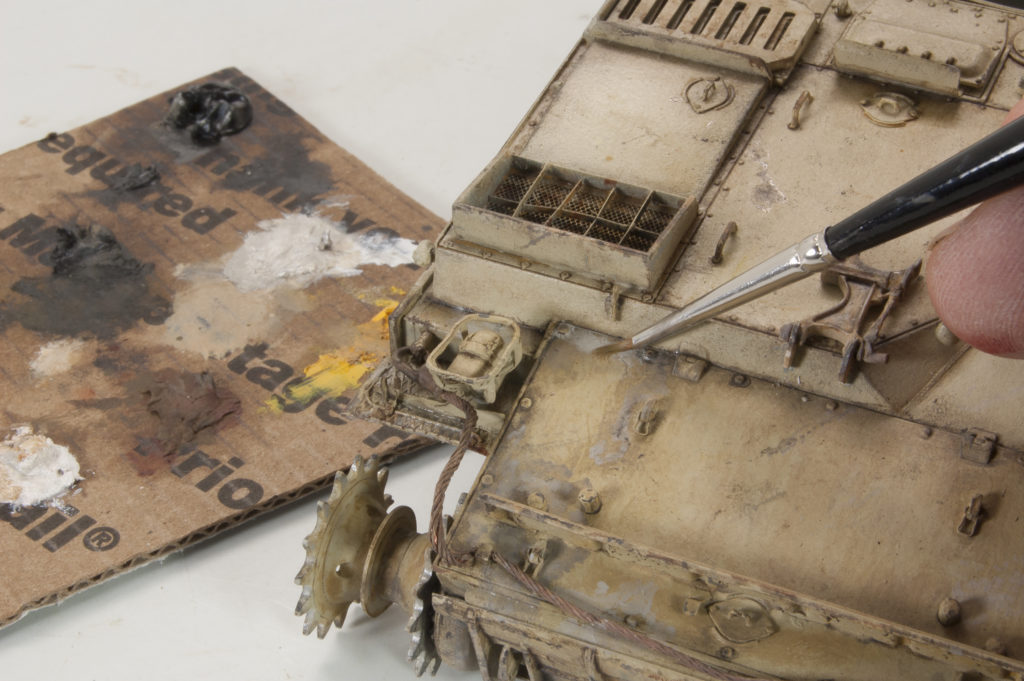
The initial work on the barrel has set the overall tone, now it’s time to balance the effort with the rest of the vehicle. I add a light-brown toned enamel wash to some of the surface features in order to help establish the details, depth, and volume. This process of adding washes to surface elements is repeated over the entire vehicle – and repeated, and repeated. In this particular case, on the fender, I add a blue-grey tone along the top edges in order to establish a tone that conveys the idea of worn paint. I feel that the real magic is in the artist’s oils and how they are able to add depth and variance to the finish. At this early stage, the oils are used to help define the individual panels, add some shading and provide “chromatic richness” to the overall base color. Working with the oils continues. With the shapes and shadows defined, my work with the oils evolves towards weathering. Areas of dust are established and stains are realized. Something of note is that I very rarely add any rust tones at all, and those that I do are very limited and only added as a final step.
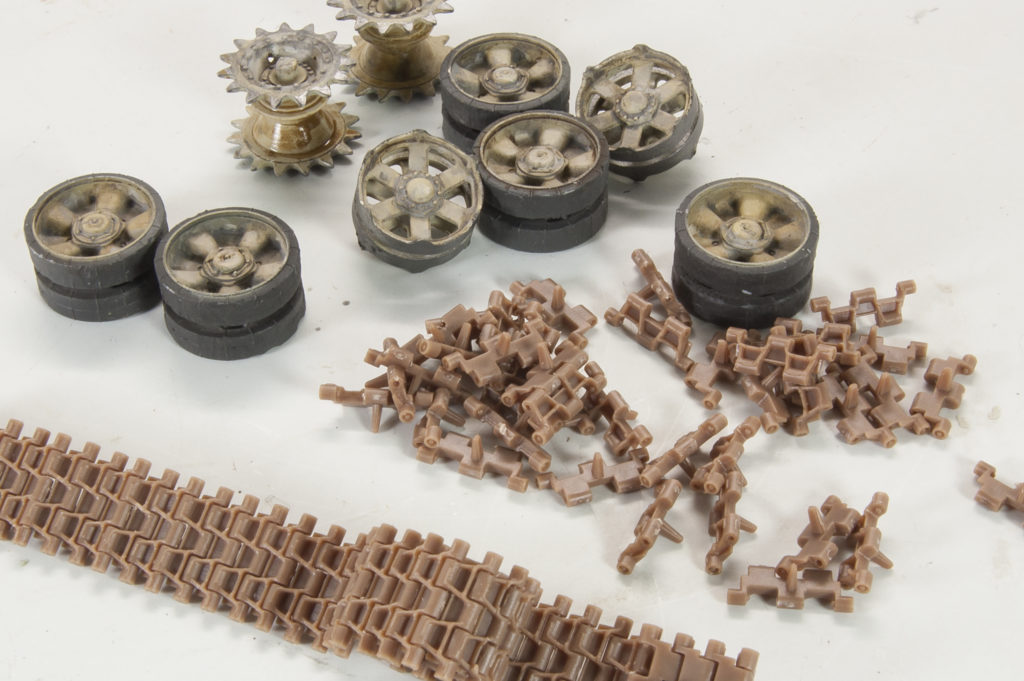
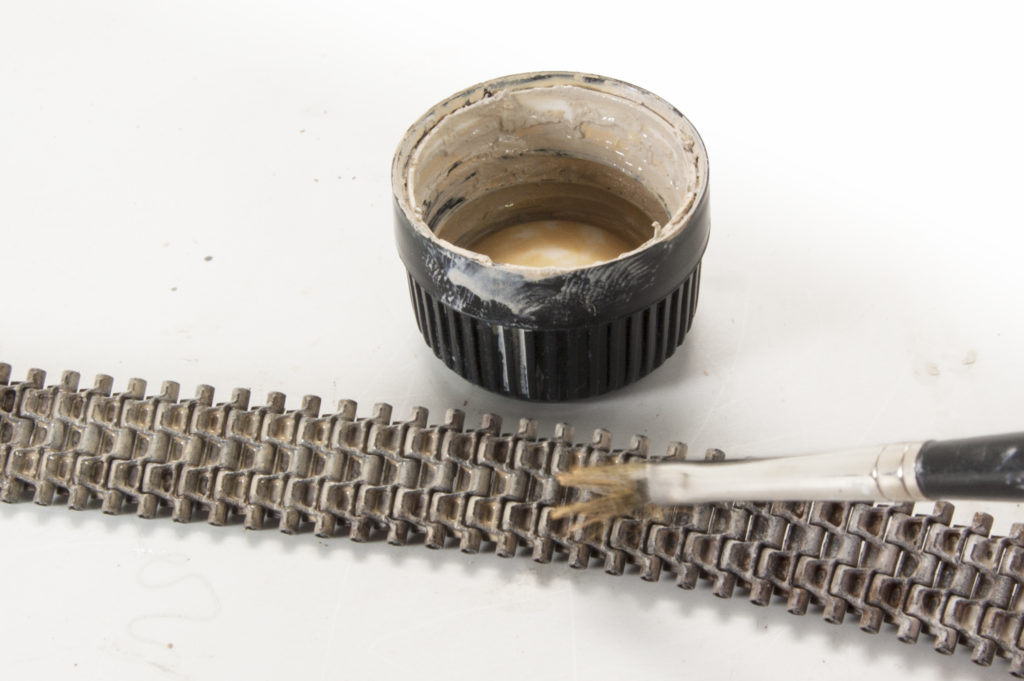
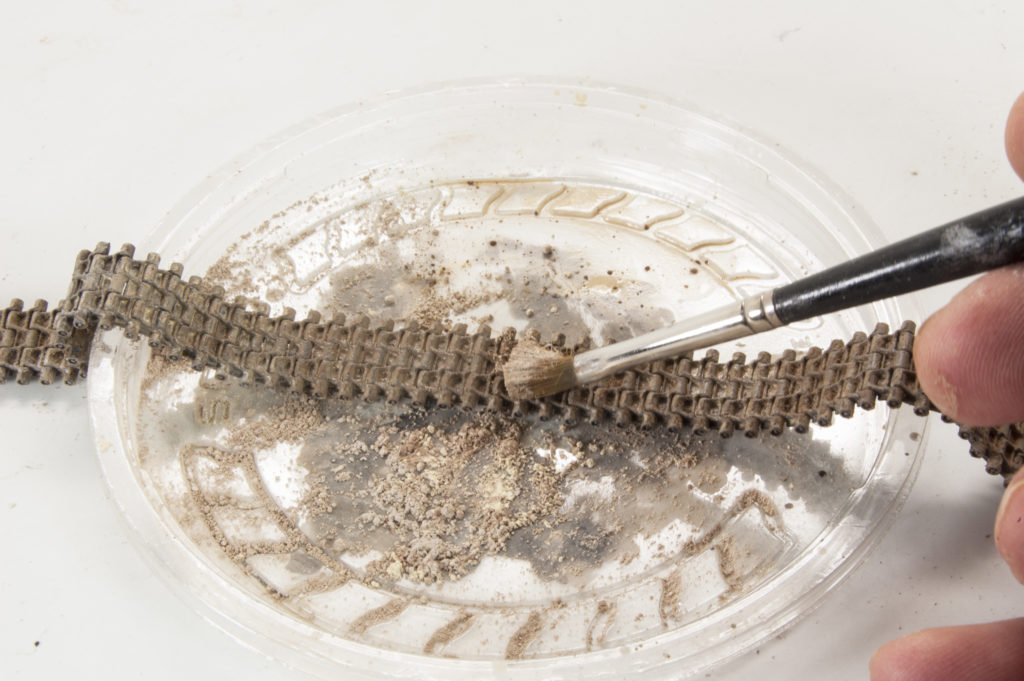

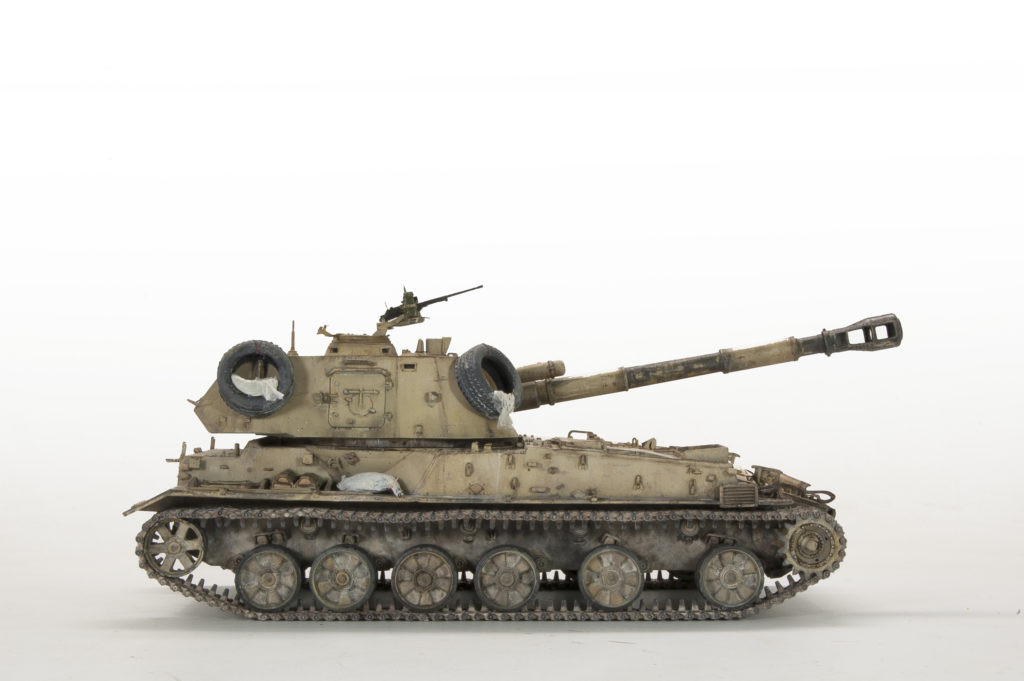
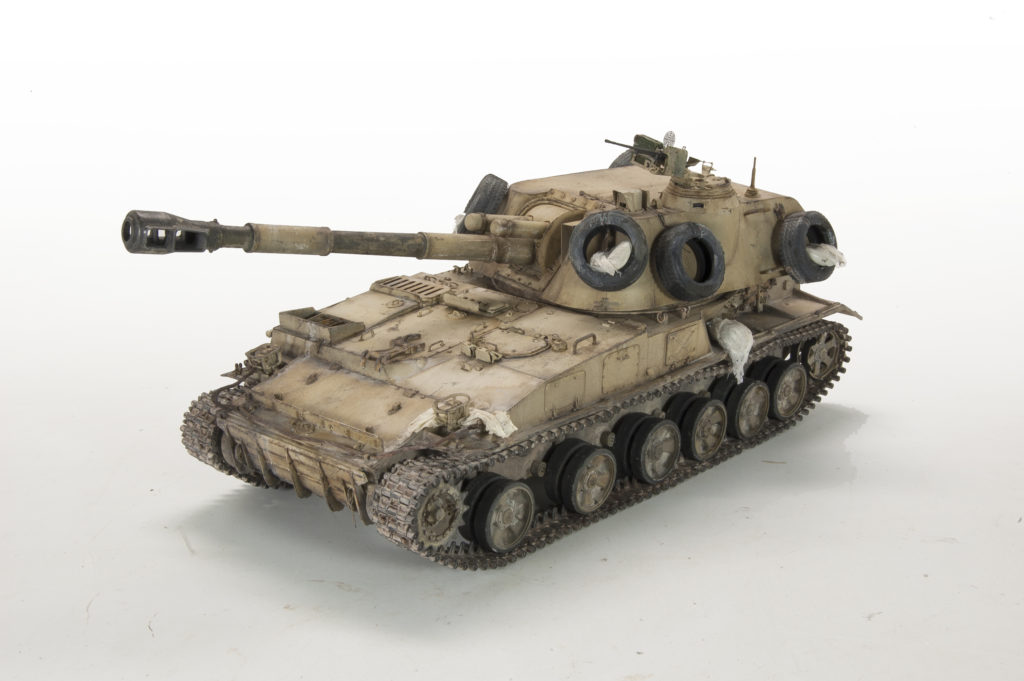
What would be a tank without tracks? Since the oils take longer to dry (24-48hrs), I decide to use this drying time to work on assembling the tracks and painting of the road wheels. Not that it is always the first thing that you might notice, but I did take some time to knick-up the rubber on the road wheels in order to help convey the sense of wear and damage. 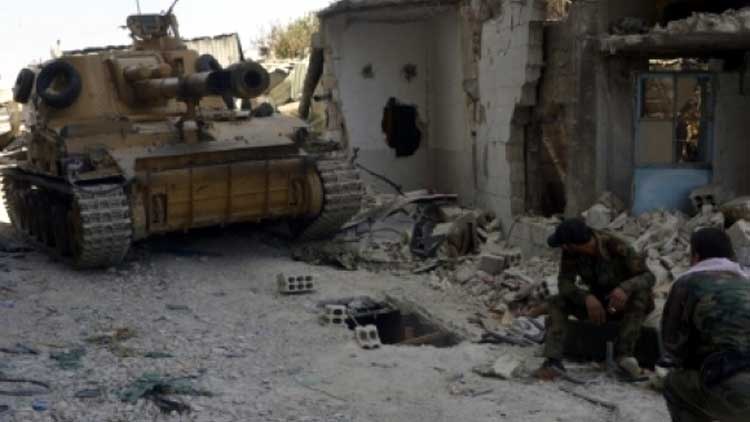 Enamel washes are used to add the base dust color to the tracks. This is followed by a dusting of pigments onto the still damp enamel base. Once dry, this combination of paint and pigments is durable and realistic. If I’m going to be honest here I really have no idea why these armored vehicles hang tires upon their sides, it looks cool – yes – but I really question their effectiveness against incoming rounds. Regardless, my references show tires with sandbags hanging on the side armor and that is what I did. The rubber tires from Meng and are hung using thin wire. The sandbags are made from thin plastic filled with putty.
Where the Streets Have No Name
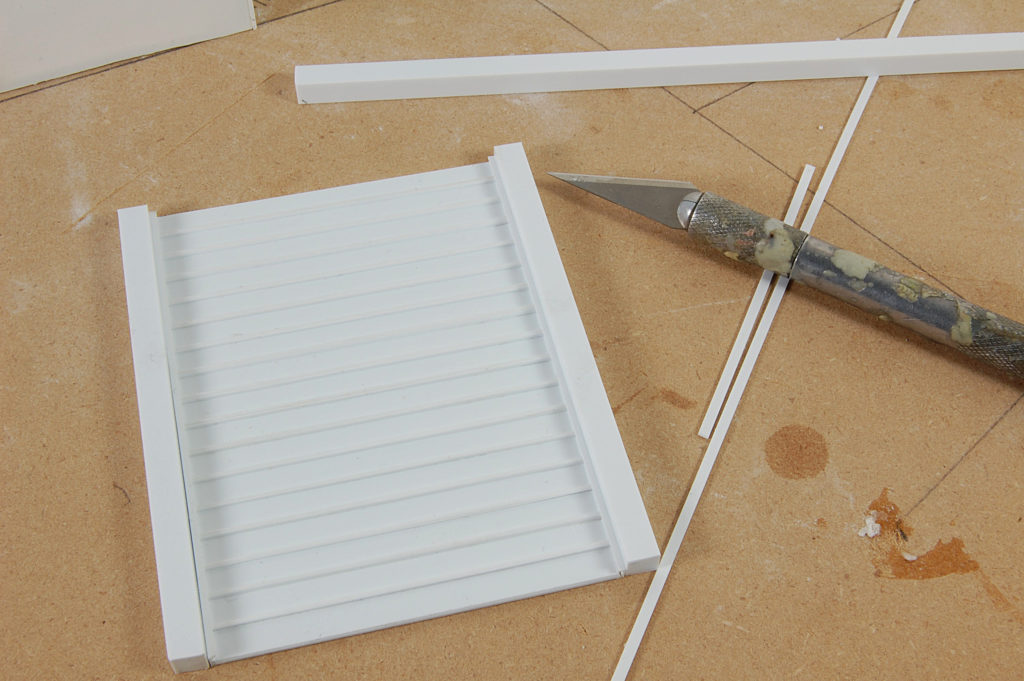
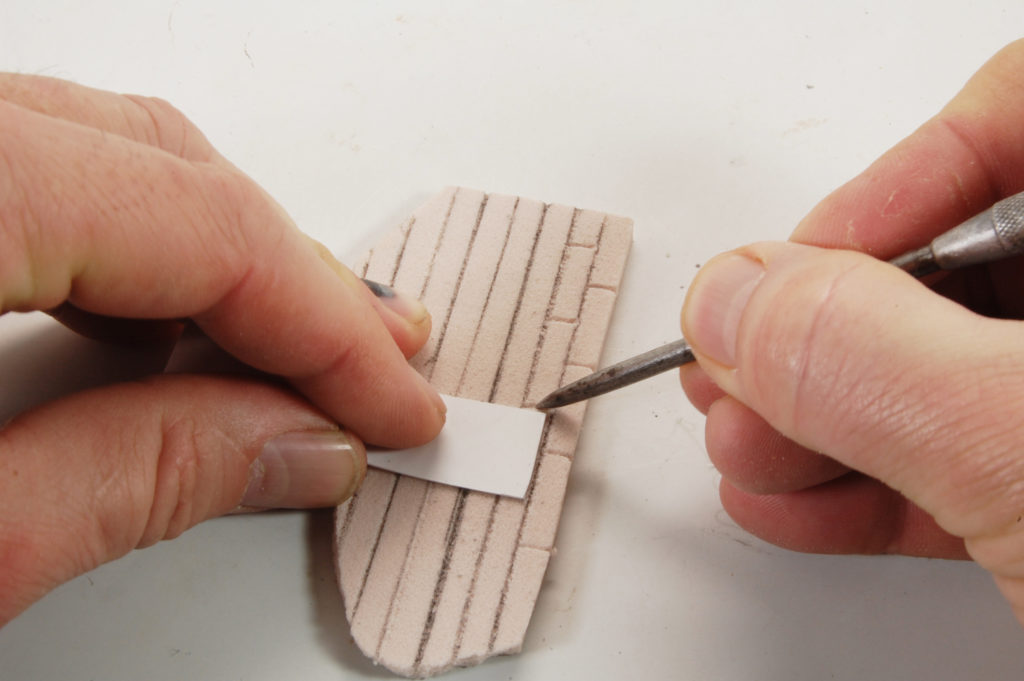
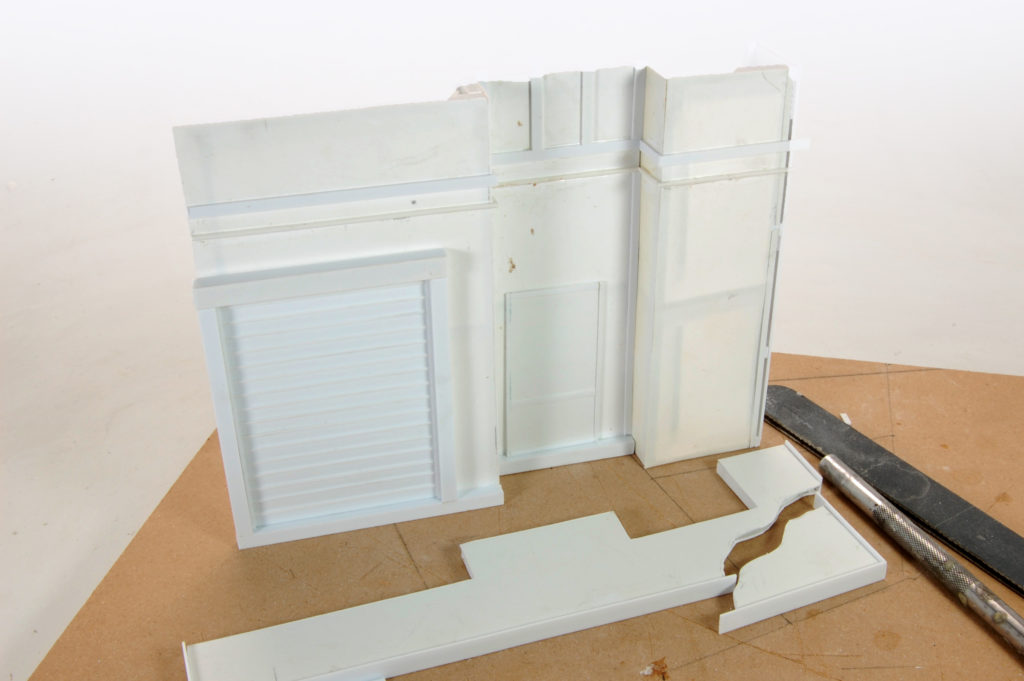
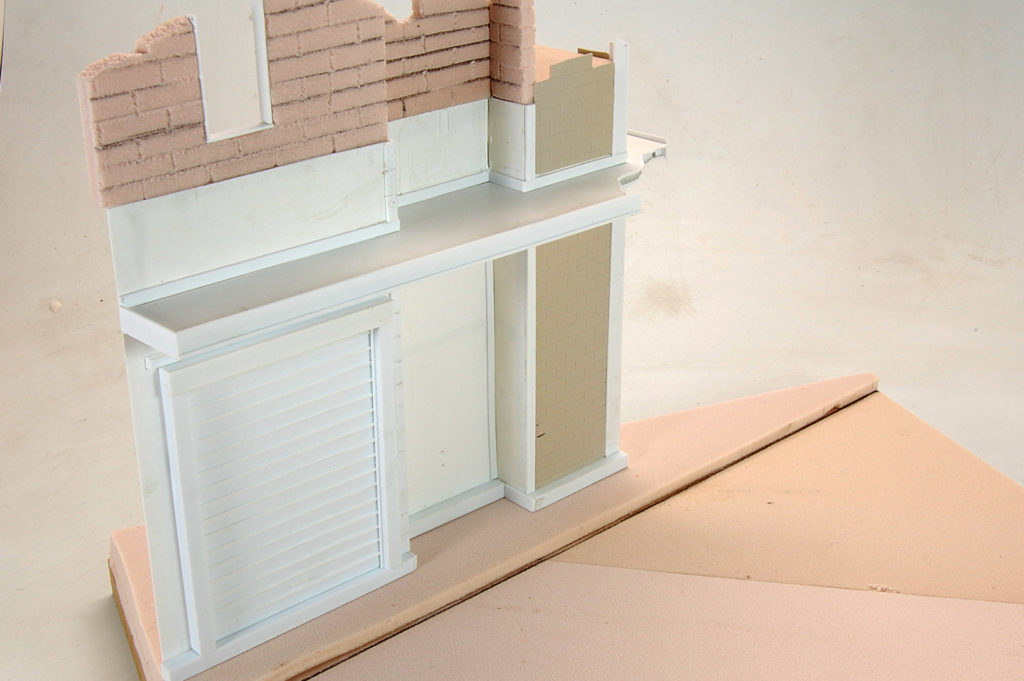
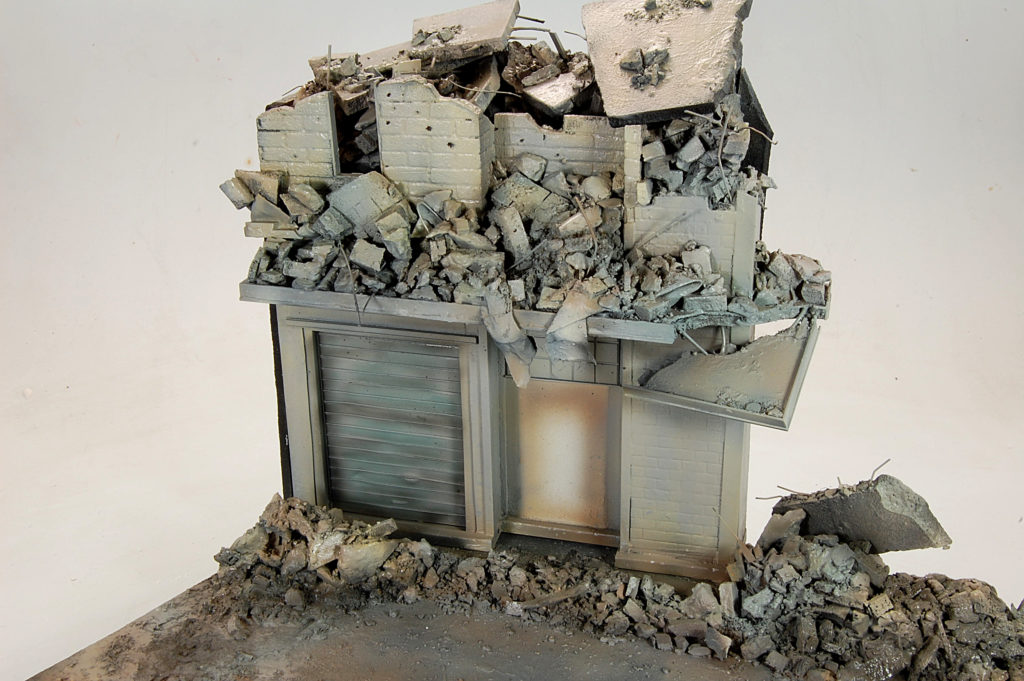
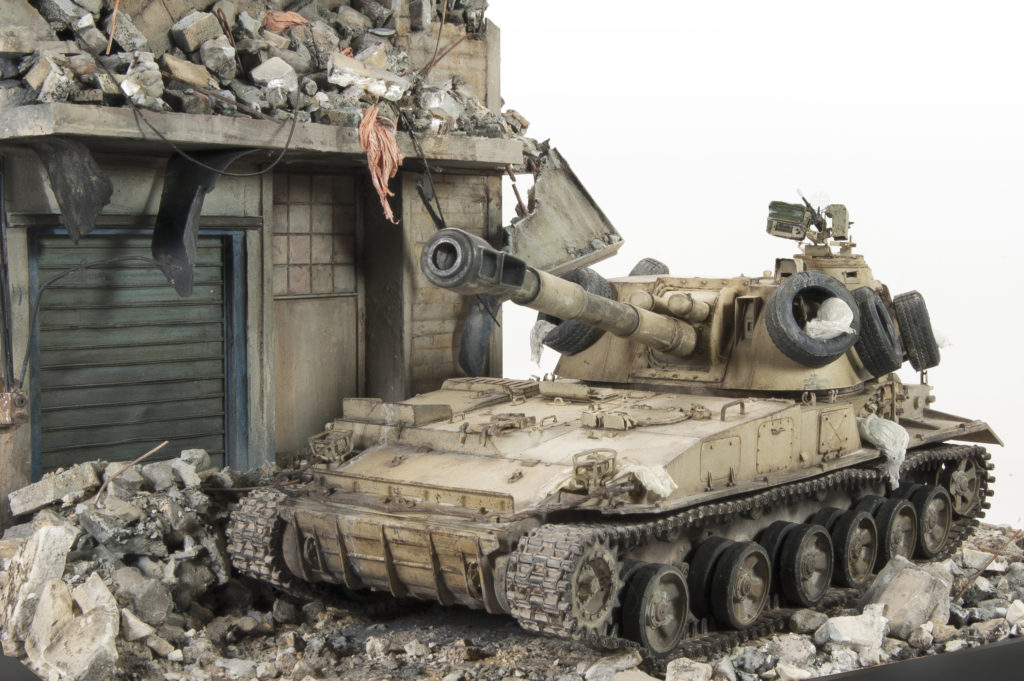
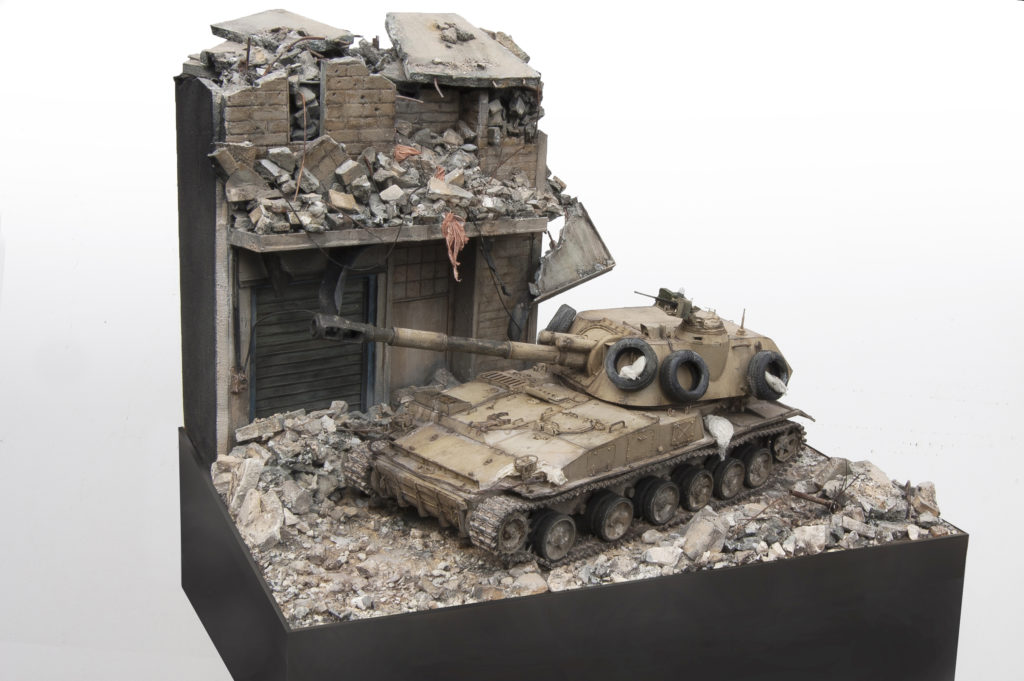
At this point I thought I might be done with this project, however, Kristof had different ideas. He asked if I might be able to place the 2S3 onto a simple base? Sure thing…so here we go! To begin, I built a roll-up door from plastic strip. Keeping an eye on references, the building begins to take shape. A rough layout is drawn onto the baseboard and the building is constructed using plastic stock. At this point, I remembered that other modelers have had good results using foam board. As it just so happens, in my work with this type material every day. I bring some ¼ inch, 12# urethane board home and I scribe some block texture into the panels. I add the foam carved sections to the tops of the walls. This material has a bit of a texture to it that provides for a wonderful stone, or concrete appearance. The roadway and sidewalks were also created using this same urethane material.
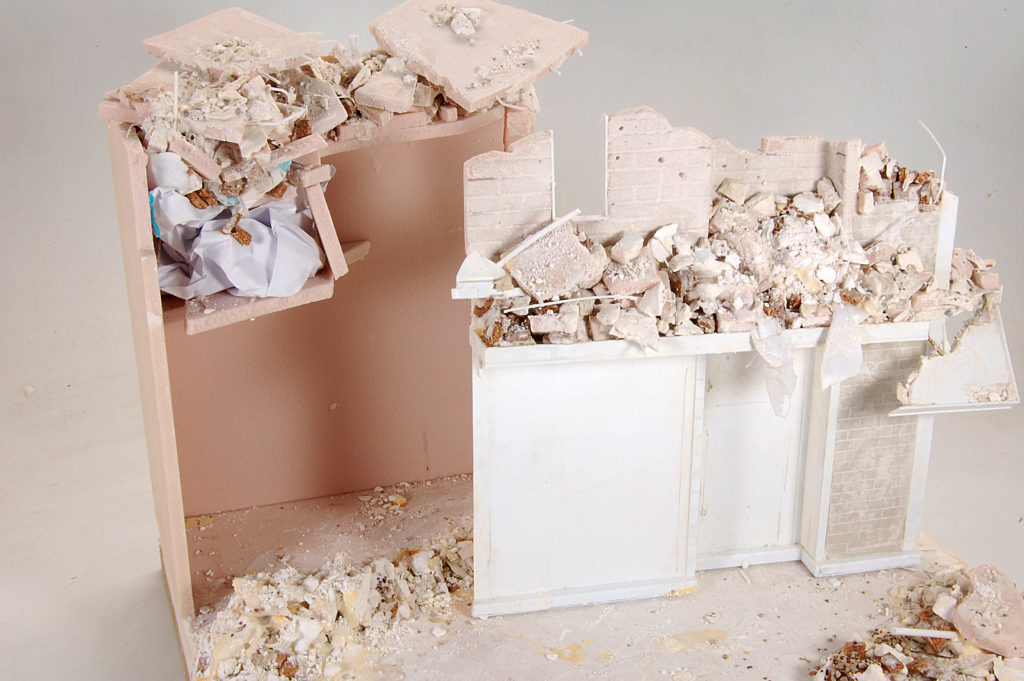
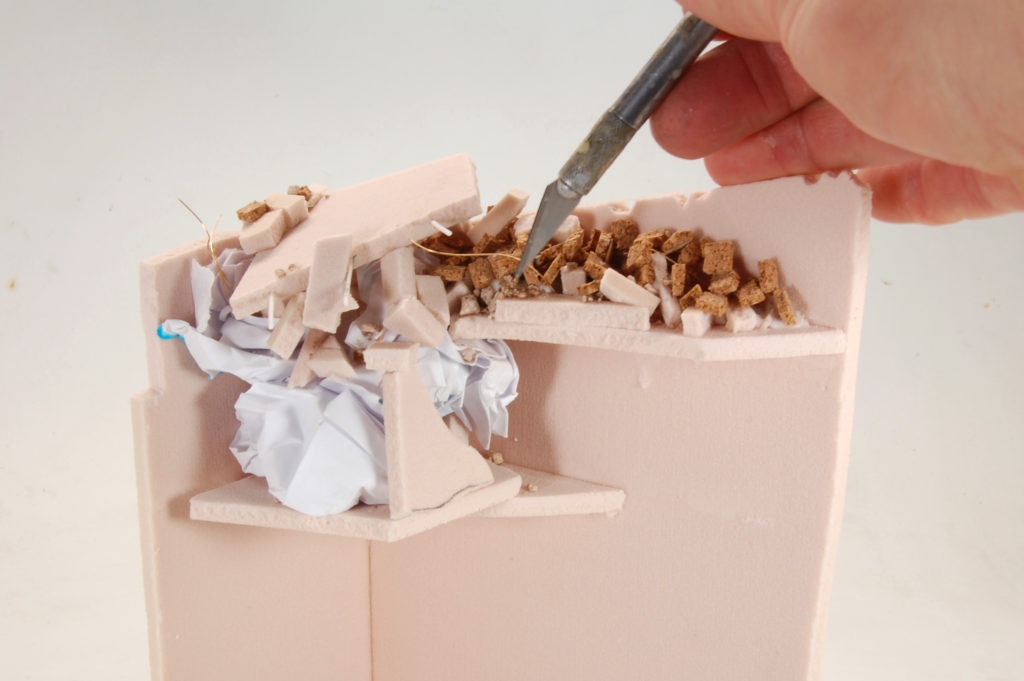
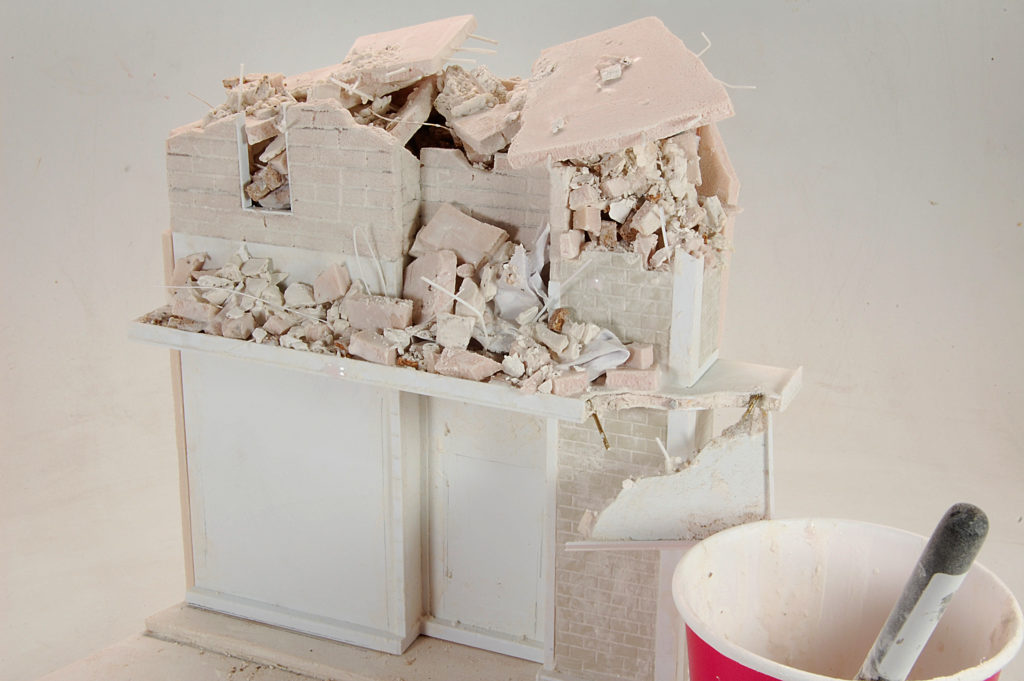
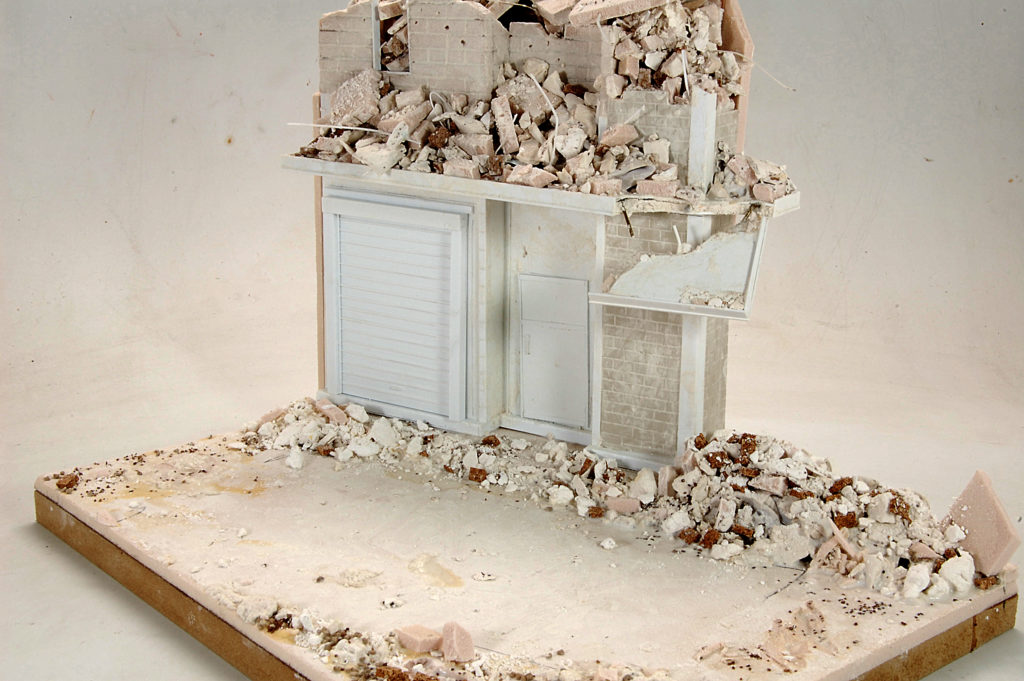
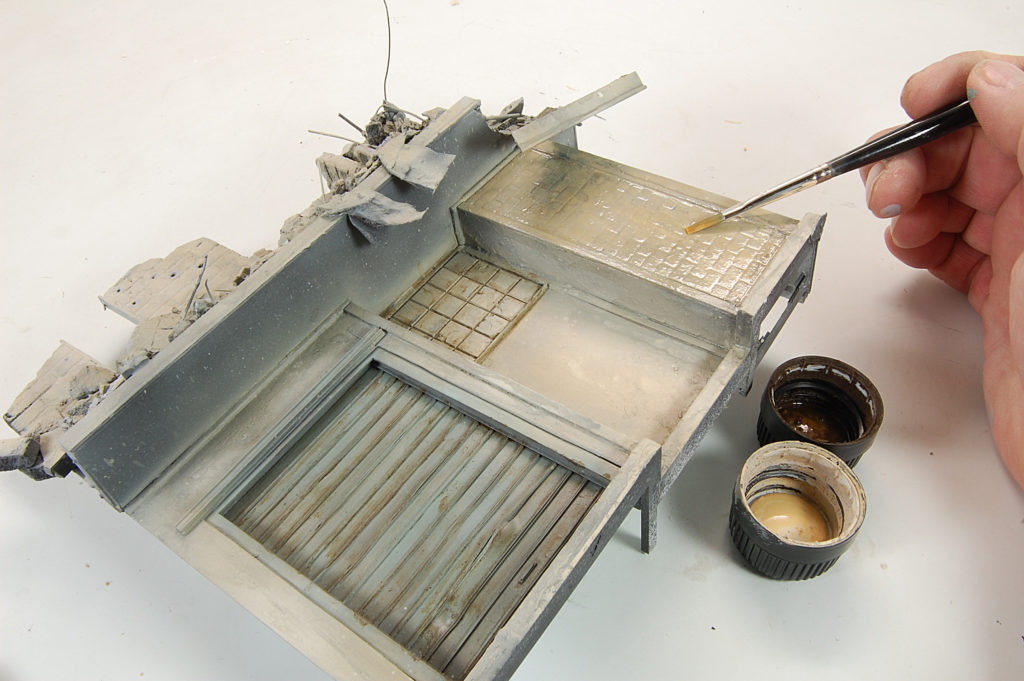
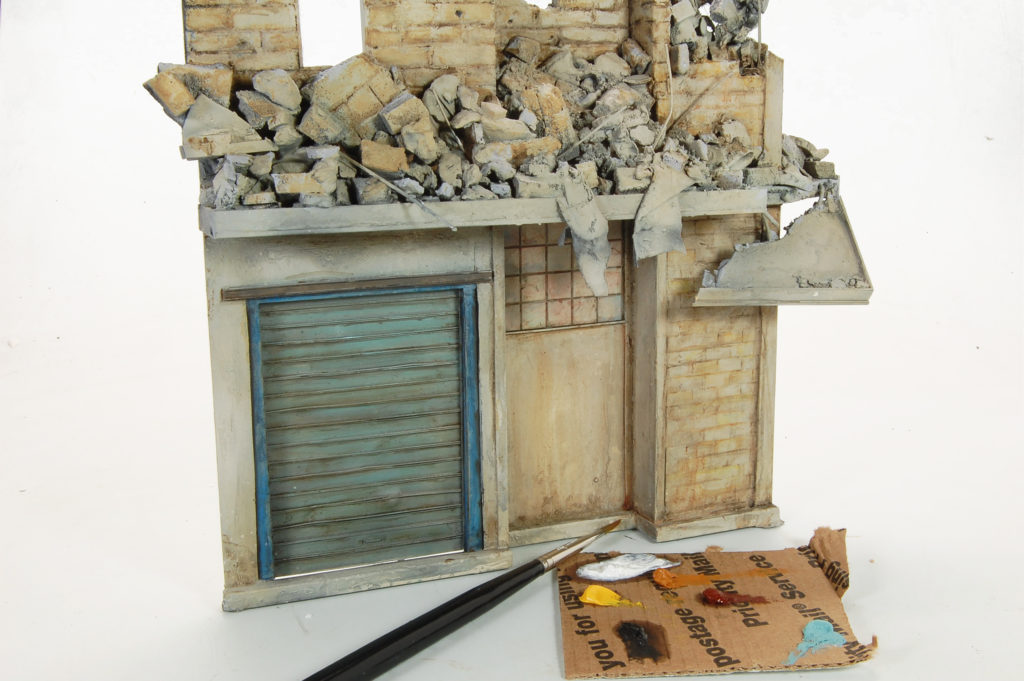
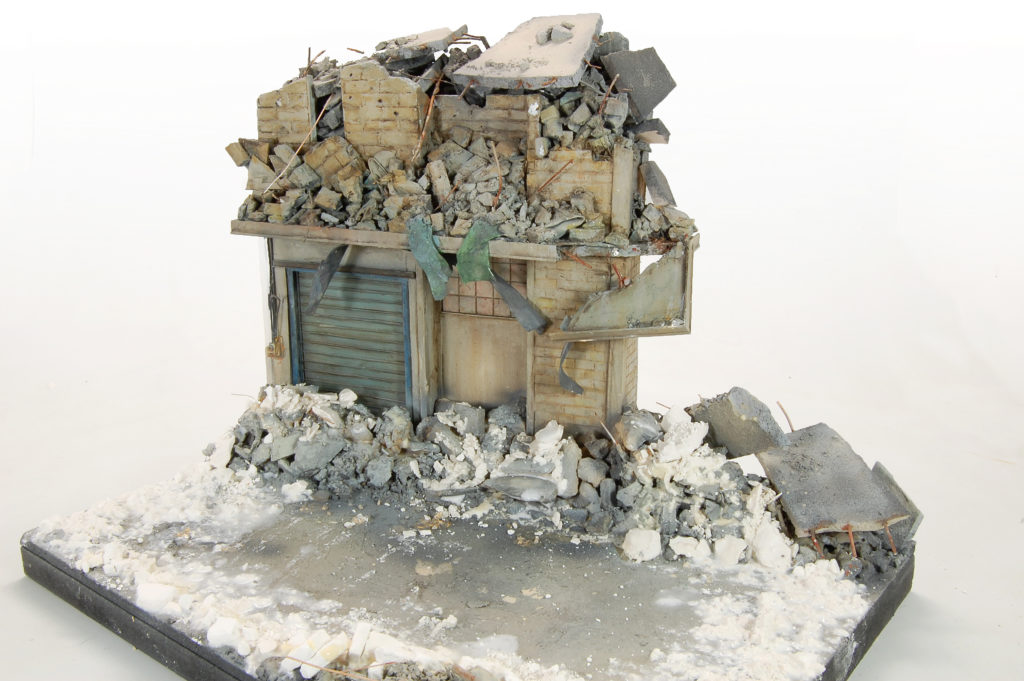
And now for the rubble! I built elevated platforms onto the back wall so that I could more easily fill the space, giving the illusion of a lot of rubble without my needing to fill-up the large, empty volume. The rubble consists or pieces of foam, broken bits of plaster, cork bricks and even crumpled paper. The rubble is held in place using a mixture of white glue and plaster, thinned with water. The white glue does the bonding, while the plaster adds a little texture to the surfaces. Piles of rubble are also added to the base using the same materials and gluing process as described above. Adding rubble is a continuing process, generally, the more the better – just look at any reference and you’ll see that there is no lack of debris. During the construction of the building, I was mindful of the need to paint the structure and base. In order to help with the painting, I kept the front facade a separate piece from the rear wall and base. I started by airbrushing the initial base colors and shading to the building and base and then apply enamel washes in order to help establish definition, depth and color interest. You can see how leaving the façade separate makes this job much easier! And finally, artist’s oils are used to refine the colors. As mentioned above, adding rubble is a continuing process. At this point I permanently secure the front façade onto the base, allowing me to create the stacks of rubble against the walls. I continue to add rubble in others areas as well. All of this new rubble will be painted, weathered and blended into the final scene until everything is tied together.
Parting Shots
![]()