Staghound T17E1
 There are few American weapons built during the Second World War which did not serve with the US Armed Forces in some way, shape or form. Even the P-63 Kingcobra had a number of aircraft serve as gunnery trainers. (There are others, such as the Martin Maryland and Baltimore, but those were designed for overseas sales and little used by the USAAF.)
The Staghound armored car is one of the few that was built and accepted for service with the US Army, but never used or wanted by them and thus nearly 100% of its considerable production run went to the Commonwealth for use as a heavy armored car. The US Army instead opted for the lighter M8 6 x 6 Armored Car and its companion M20 6 x 6 Armored Utility Car as they fit the US Army model for cavalry scouting vehicles. The US Army considered reconnaissance more important than combat, whereas the Commonwealth doctrine saw heavy armored cars used to engage light targets and provide infantry support.
![]()
![]()
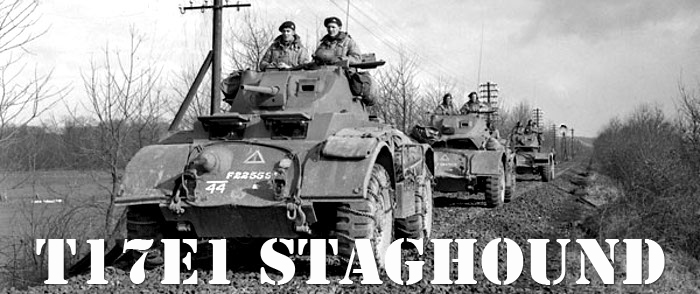
The Staghound began as a 1941 US concept for a medium to heavy armored car, and was the 4 x 4 GM (Chevrolet) contender as the T17E1 versus a 6 x 6 vehicle dubbed the T17 from Ford. The T17E1 was determined to be the winner, but as it weighed nearly 14 tons (or more than the M3 light tank) it was considered as a “wheeled tank” by the Ordnance Board in November 1942. The British, thus far unable to come up with a suitable heavy armored car design, liked what they saw and while under test order 2000 of them in February 1942. Overall, the British order ran to 2,687 Staghound armored cars and 789 Staghound AA vehicles (T17E2) with an open turret and twin M2HB .50 caliber machine guns. These were delivered between October 1942 and December 1943.
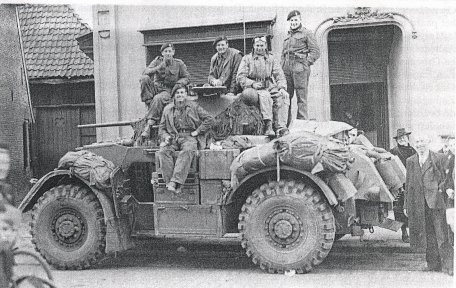 As is usually the case this project began with me spending a good deal of time gathering references and photographs on the Staghound. It did not take long for me to realize that there was a wealth of excellent period photographs, as well as numerous walk around references available to the modeler. I bookmarked a few reference sites on my computer and printed a few choice photographs for my workbench; ready to begin.
The Bronco kit of the T17E1 Staghound MK.I consists of 295 parts in olive drab plastic, 17 clear plastic parts, two etched frets and a metal 37mm barrel, seven markings options and a 9 page instruction sheet. The assembly begins with the lower hull sides where the modeler is asked to attach the numerous small fittings and details. The instructions are presented in the form of large, exploded diagrams whereby the parts are called out by number with an arrow showing the location point. These diagrams are fairly busy so a little bit of care is advised to make sure that you have indeed done all the necessary work before proceeding to the next

|

|

|

|

|
diagram. I did find it interesting that certain suspension linkages found on both the front and rear are designated as optional items. I suppose the manufacturer felt that they would remain unseen behind the large tires. I chose to assemble these items and am glad that I did as that area can be seen even behind the large tires and they do enhance the busy appearance of the underside. I chose to replace the kit tires with a Royal Models reference as they appeared to have slightly better detail. Be sure to note that the front and rear hubs have a different pattern, the instructions show the proper configuration.
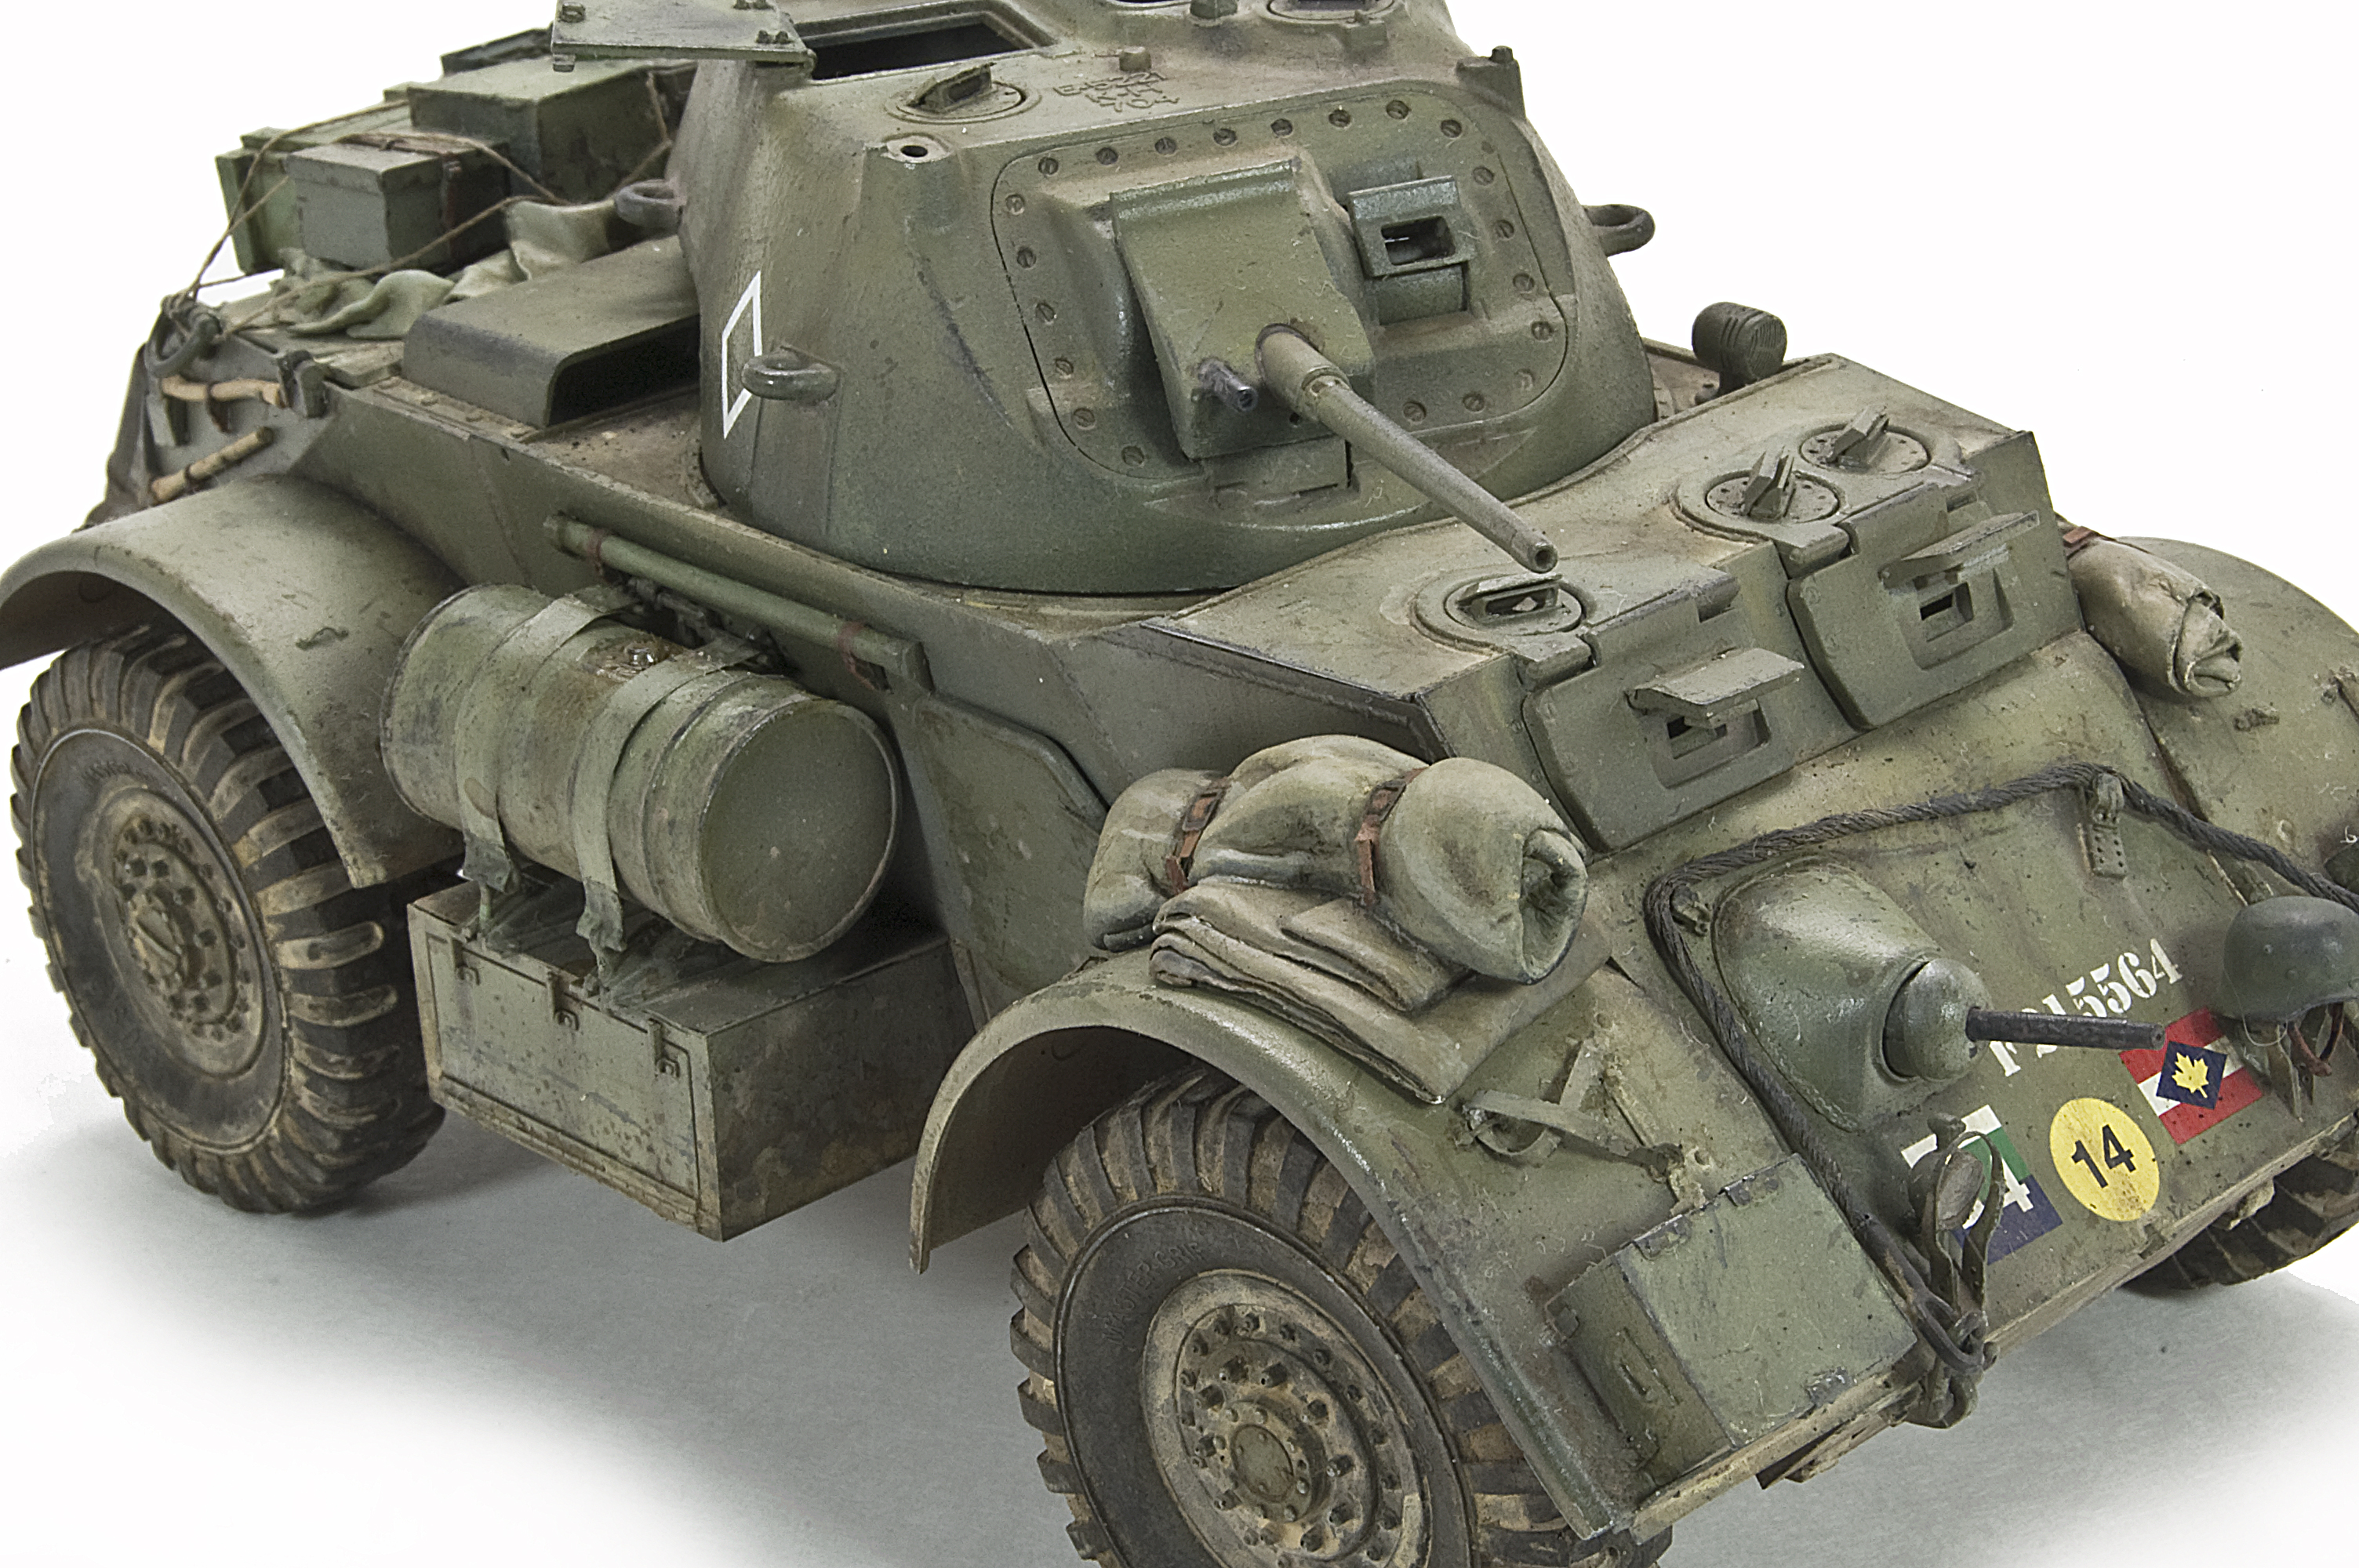
One defining feature of the Staghound is the large auxiliary fuel tanks carried on either side of the hull. References show a number of field configurations regarding the use of these external tanks with many crews opting to use this space for additional external stowage. I chose to use both tanks on my vehicle which then led to quite a bit of putty and sanding to fill the seams. The retaining straps are provided as a photo etch item which can easily be made to shape by wrapping them around the drum itself. The attachment points, or brackets are somewhat fiddly as you are asked to fold over the end of the photo etch strap around piece of stretched sprue; once assembled, however, the tanks and straps certainly look the part.
Moving on to the front glacis plate I substituted the kit .30 caliber bow machine gun for a finer detailed DML Generation 2 found in my spare box. Very nice pair of etched brush guards are provided for the front lights. As a bonus, sprue D contains a small a small jig for bending the etched light guards to the proper shape which proved to be very handy indeed. The fit of the glacis to the hull section and drivers plates was very precise and did not require any filling. The drivers’ compartment is enhanced by separate front hatches and vision ports that allow the option of being portrayed open or closed. The periscopes are multi-piece affairs that allow them to be rotated and positioned as you choose.
Finishing of the lower hull includes the attachment of the large fenders and mirrors. The fenders have a number of location tabs for various stowed items such as extra fuel cans. I decided to fill and sand these points flush as I planned to be using the Legend Staghound Stowage set along with scratch items. I added some small tie-downs to various points on the fenders using photo etch found in my spare parts box. I debated on using the very nice, but delicate mirrors to the point of actually fitting them on the fenders for a short time, but in the end I decided to portray my be sans mirrors as was the practice on many period vehicles.
Moving on up to the turret I decided to first give it a slightly rougher cast texture by accentuating the seam along the rear of the turret using a thin strip of Evergreen strip roughed up with my hobby knife. I then applied Mr. Surfacer 1000 to the entire turret surface using an old brush with a dabbing motion. The turret crew hatches have separate hinge detail and excellent detail on both sides of the hatches allowing the modeler to position them either open or closed.. Other details added to the turret roof are the separate clear periscopes with separate mounting again allowing this to be positioned at any angle as well as the separate mortar smoke bomb thrower on the right side. There is the searchlight with separate mounting post and the aerial mountings and AA.30cal mounting post on the rear. Here again on both the anti-aircraft and the coaxial machine guns I chose to replace the kit .30 caliber gun with a DML Gen2 offering. The mounts for the AA .30 caliber gun was also replaced by photo etch from my spare box.
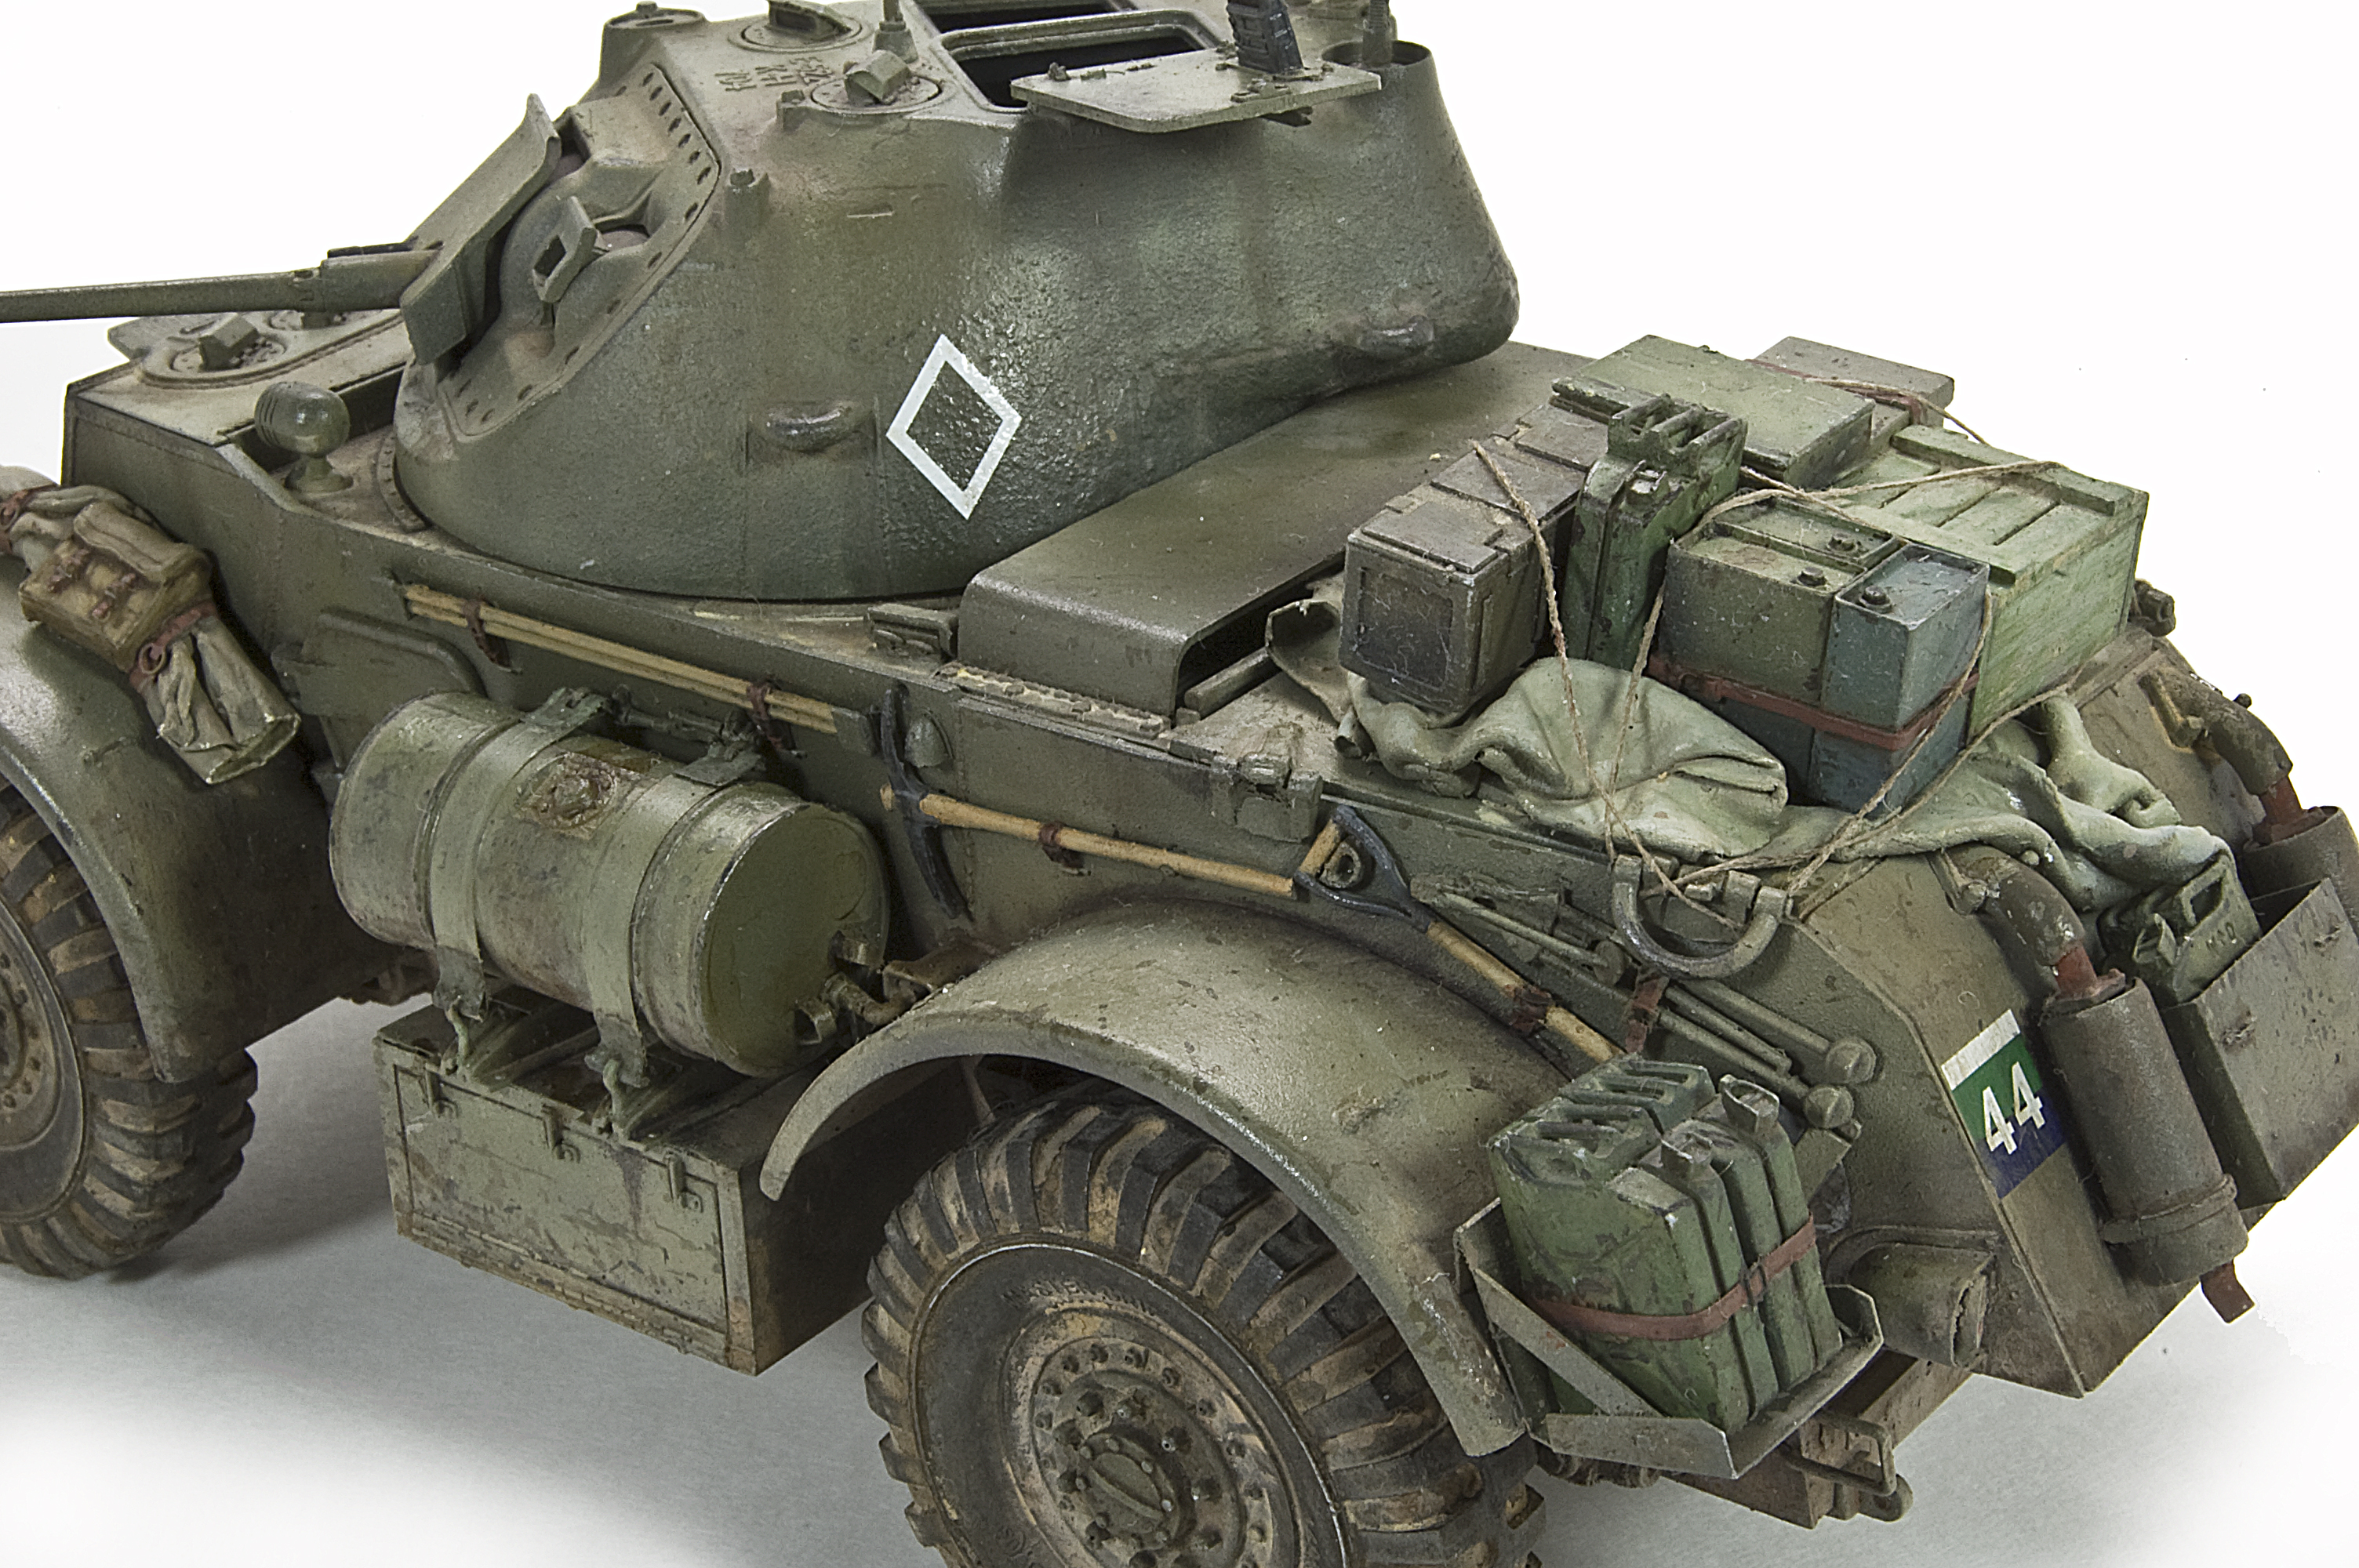
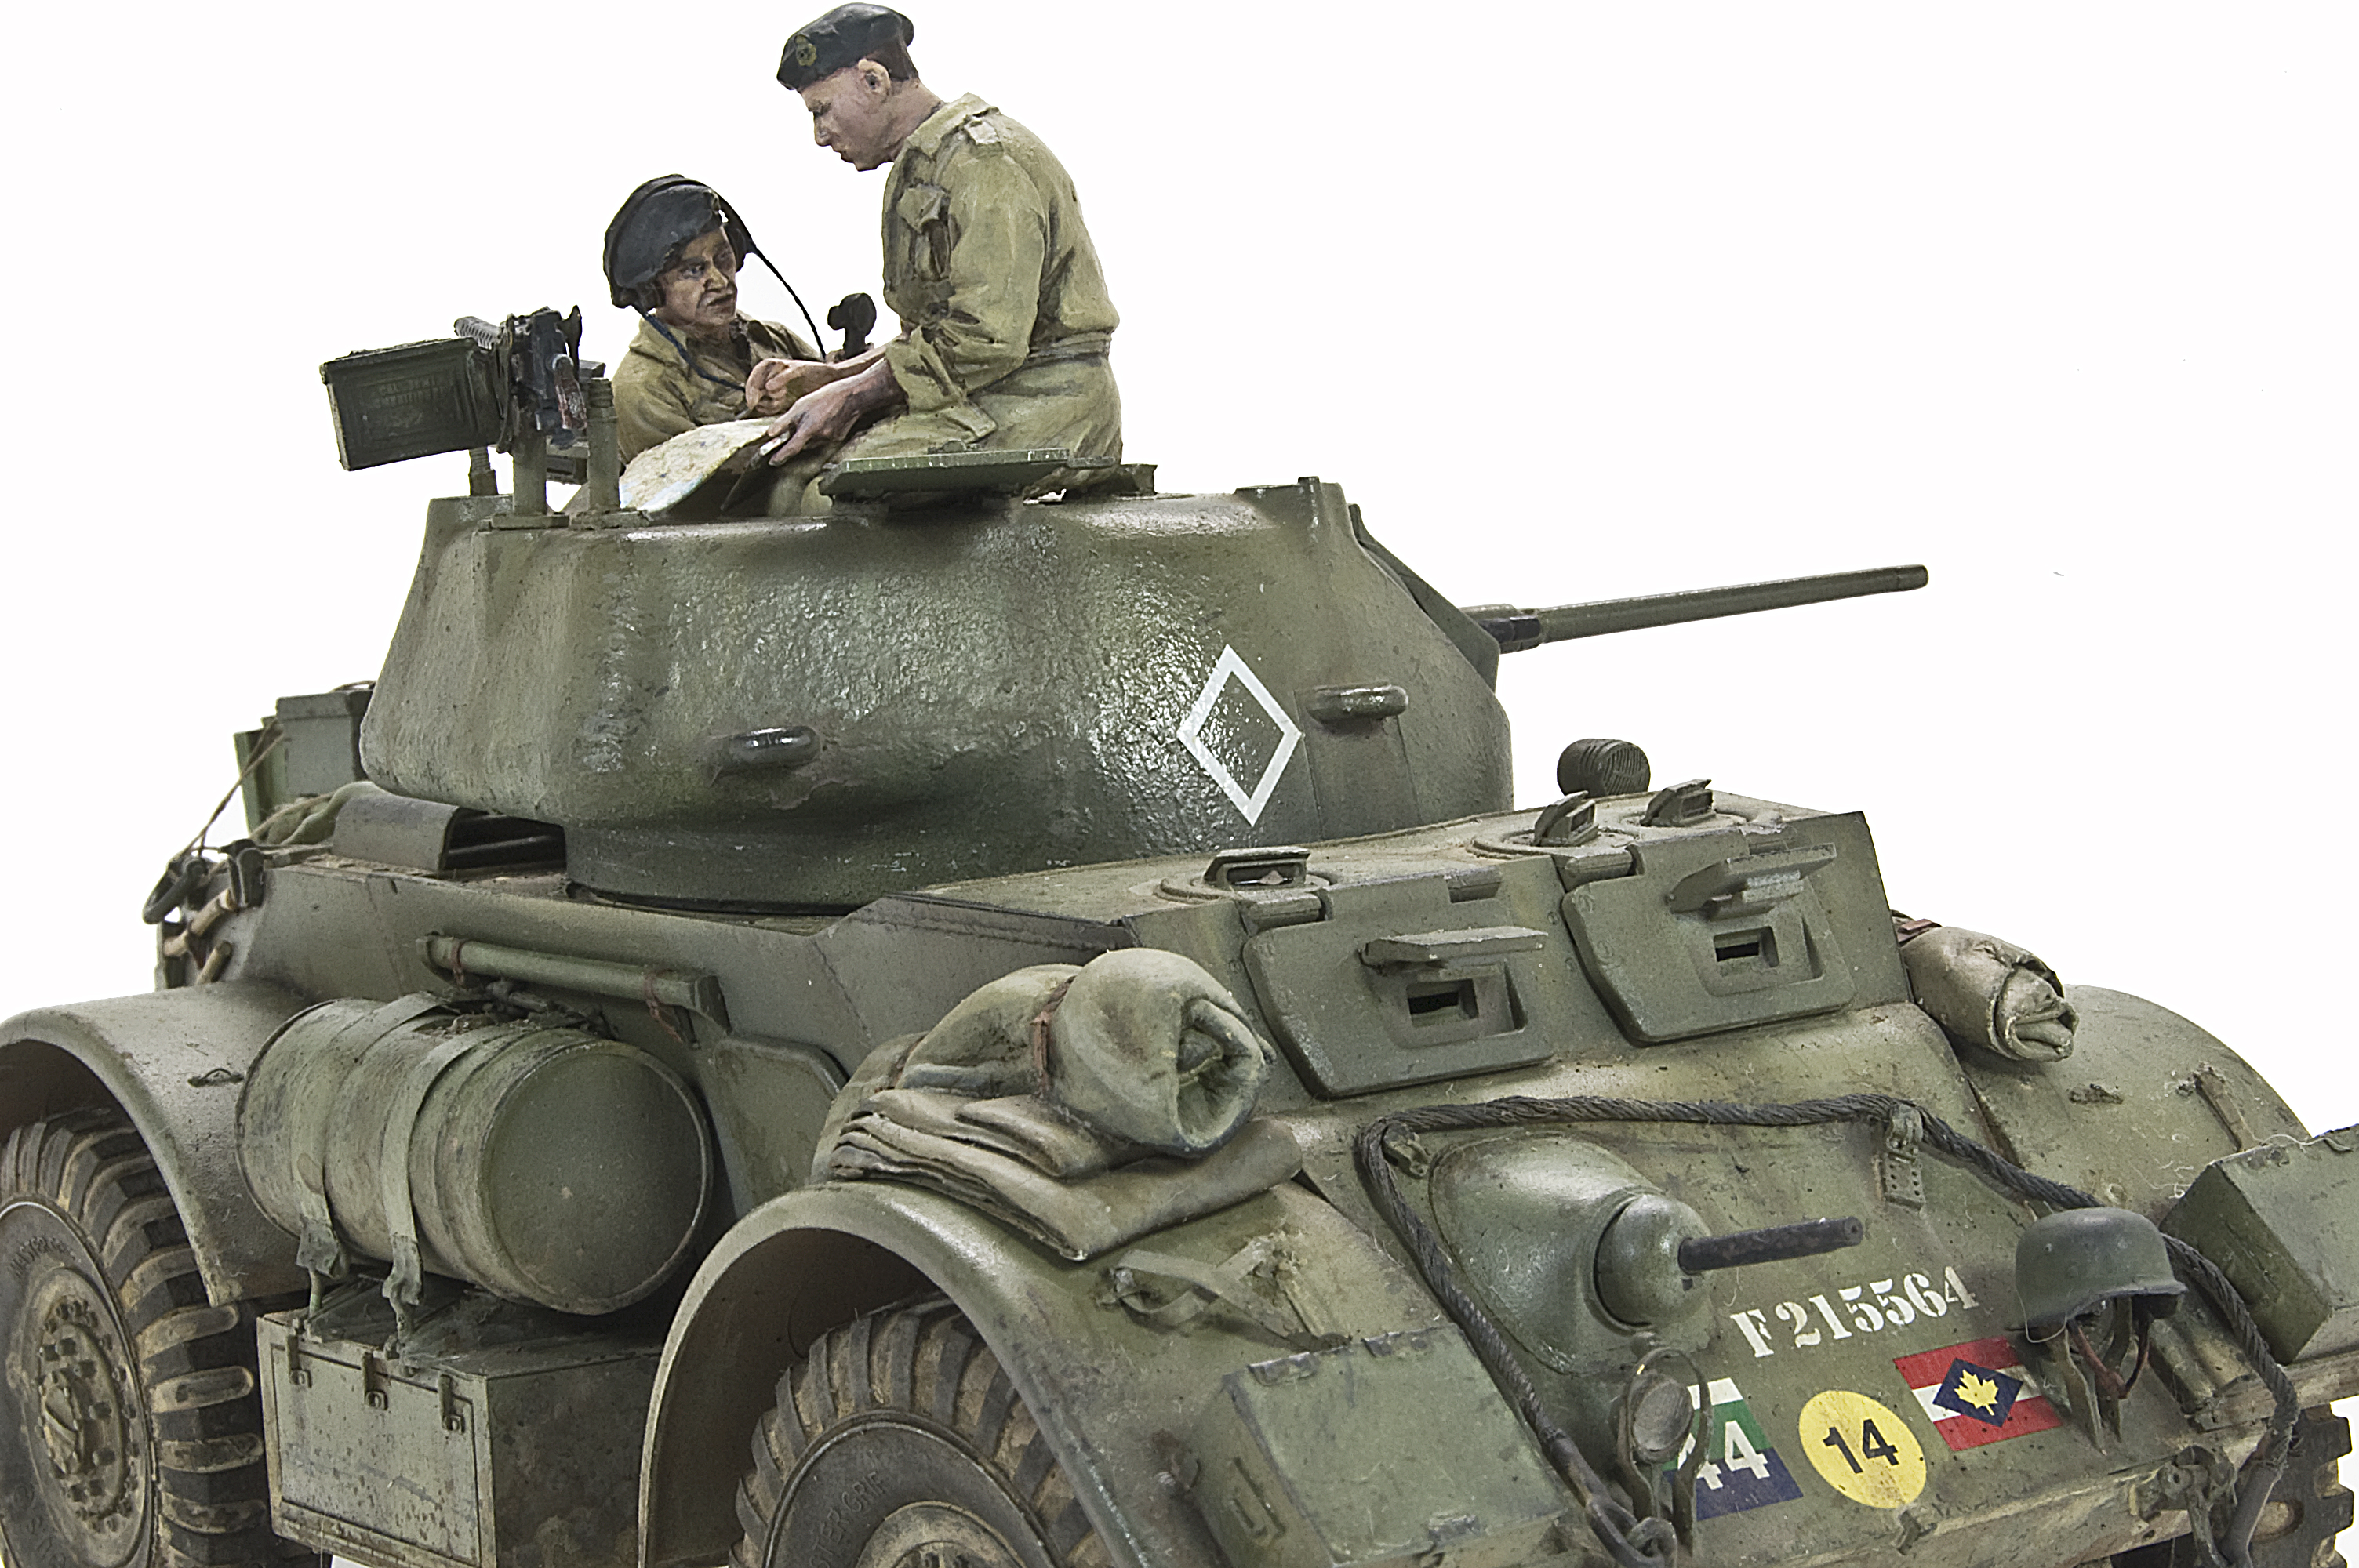
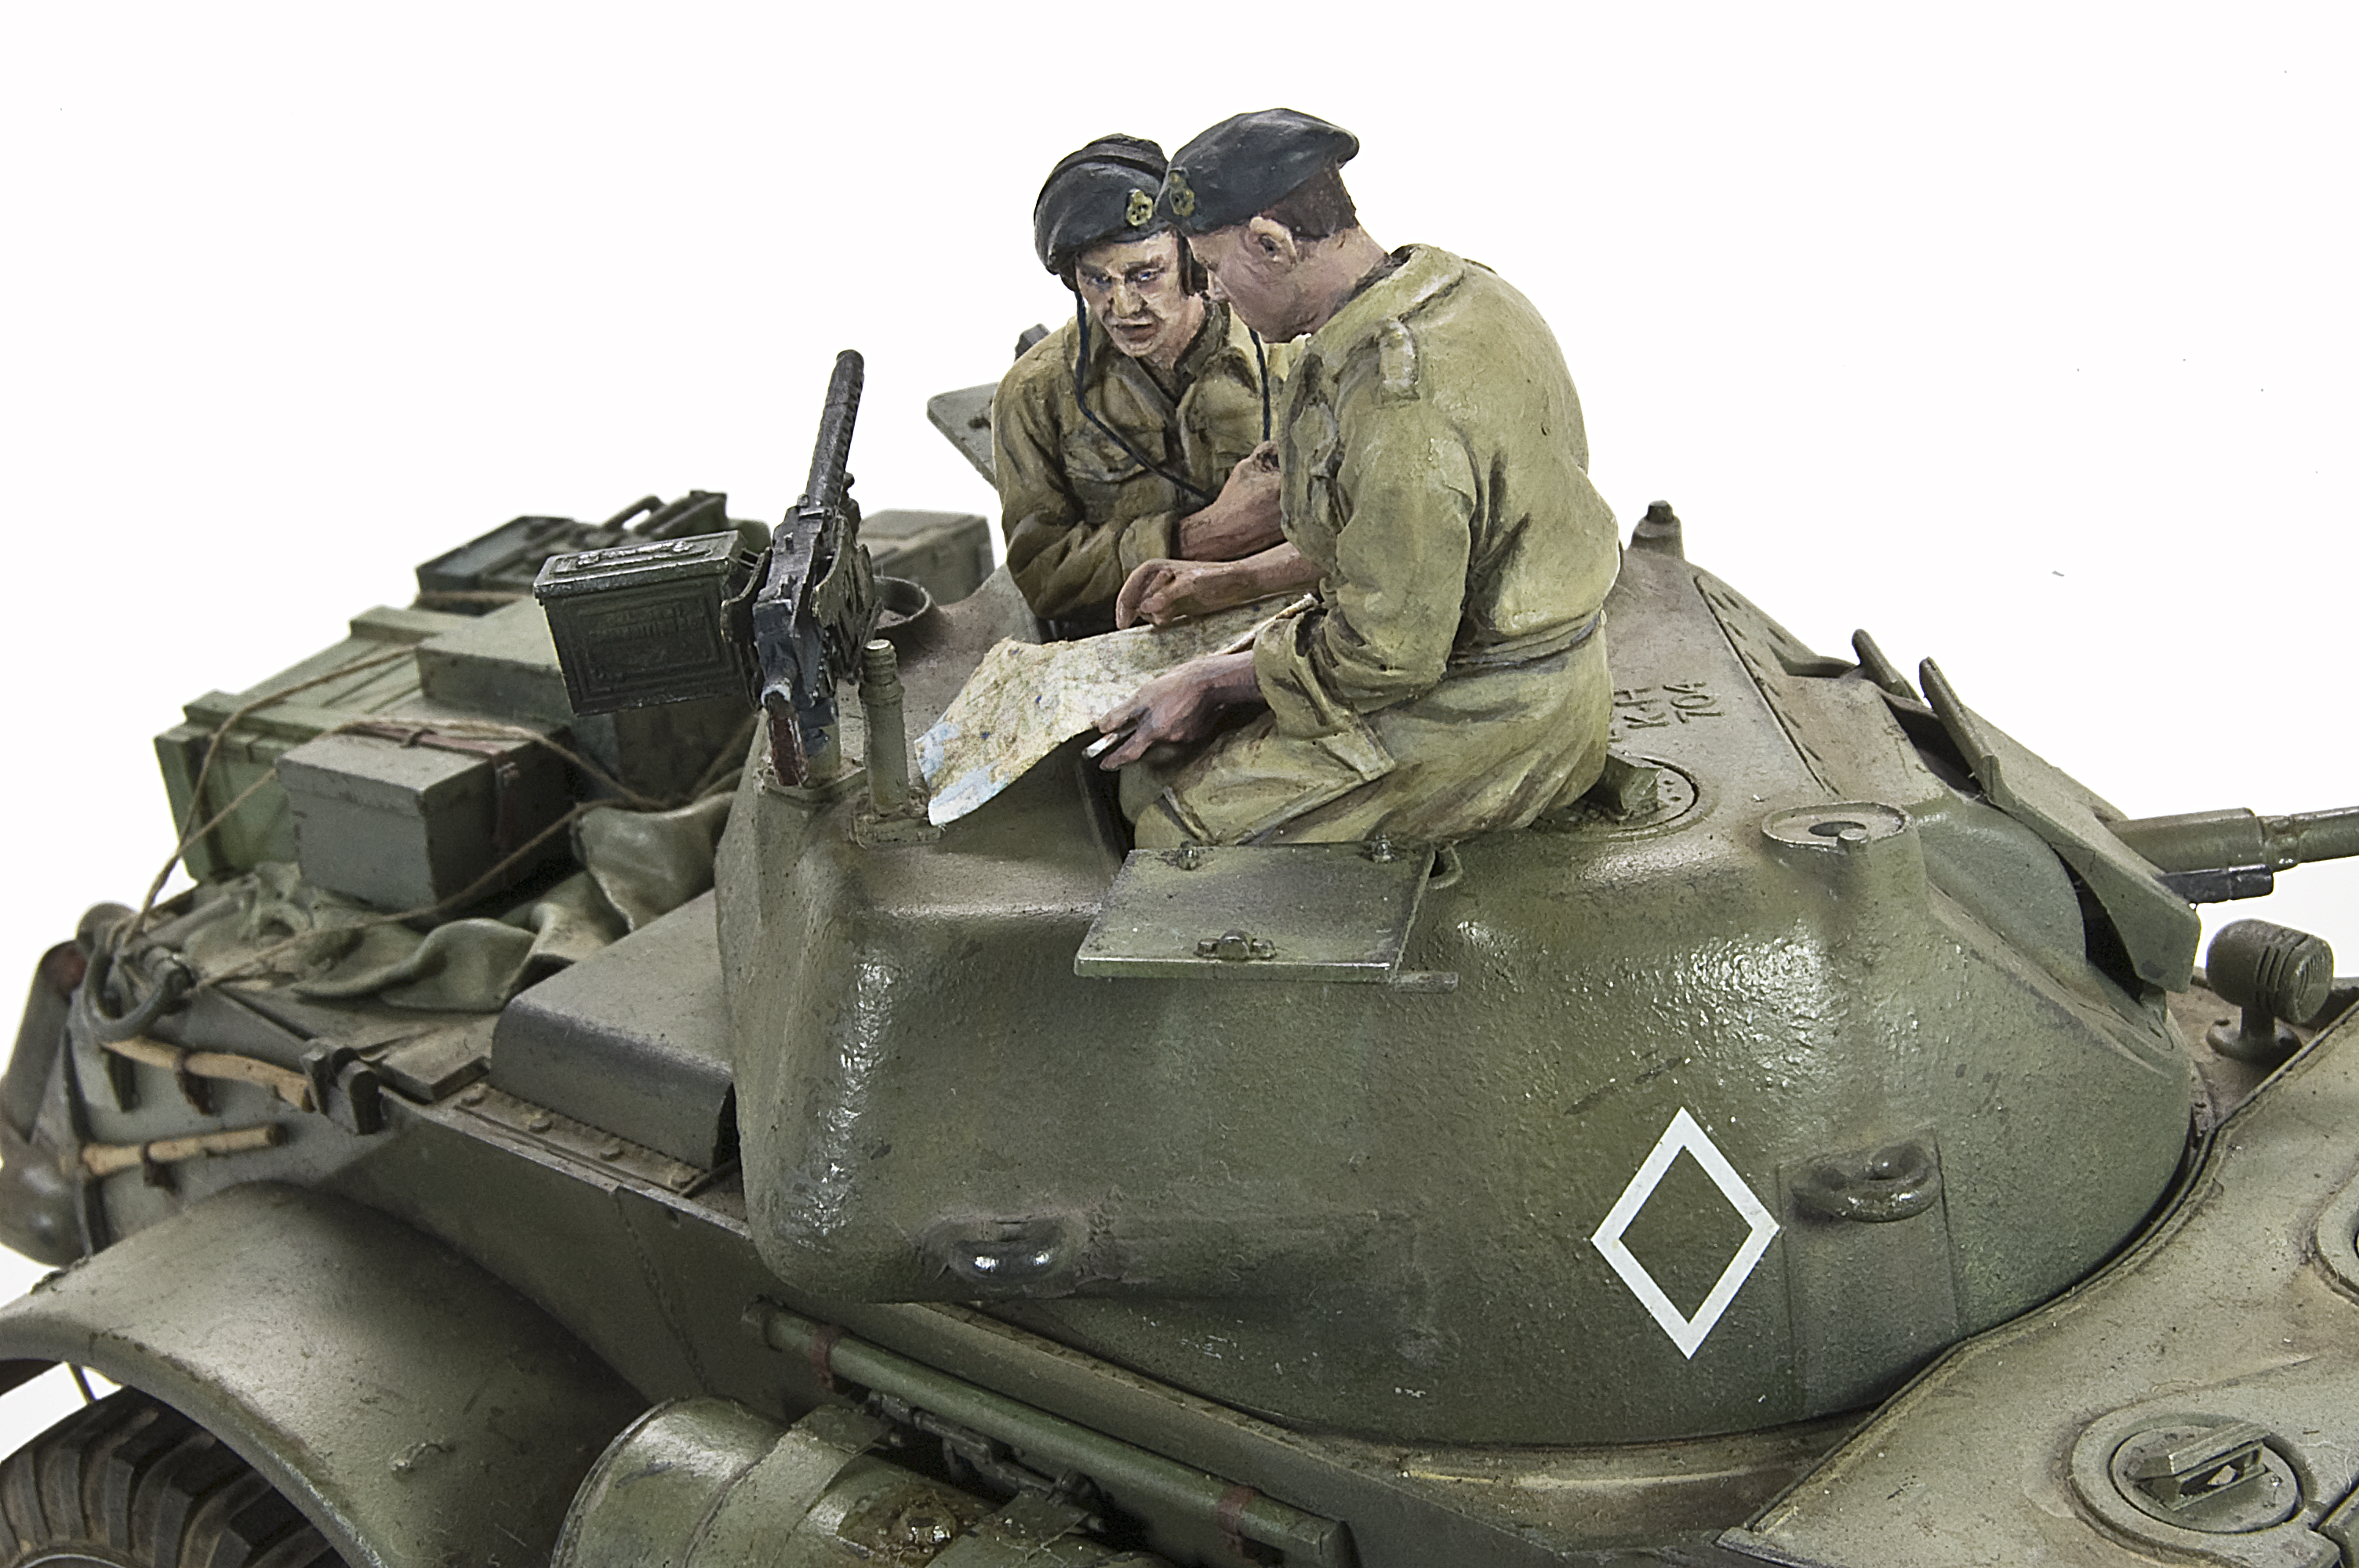
 In my opinion no respectable Staghound would be presented with out the requisite on-board stowage and clutter. Looking at period photographs it seems remarkable that much fighting could have been accomplished at all though the clutter of personal items lashed to the sides of these buggies. I made good use Staghound Stowage set from Legend for the various boxes, crates, and containers that inhabit the engine deck. I built the two stowage boxes for the front fenders and a small Jerry can rack for the left rear fender. The nicely details jerry cans also are included within this Legend set. When it came to the blankets and tarpaulins I choose to sculpt them myself from Milliput. Actually sculpting is probably the wrong descriptor as what I do roll-out very thin sheets of the Milliput using my knife handle over a sheet of glass. I lightly sprinkle the surface with baby power which prevents it from sticking and also makes my work area smell baby-bottom fresh. When the Milliput sheets are sufficiently thinned I simply cut to the desired size using a sharp blade and then role to shape. I generally try to leave an interesting wrinkle or loose flap open to give the bundle added interest. To finish, I cut thin strips of tracing paper to make the straps and small photo etch for the buckles. Once the Milliput bundles are in place, other stowage items can be pushed into the surface to create a very natural, flowing appearance. The large blankets on the engine deck, along with the rolled items on the front fenders were created using this method. To complete the lived-in appearance I found a pair of beautifully sculpted chaps from the Nemrod range to occupy my vehicle.
Painting begins with a undercoat of Mr. Surfacer 1000 which serves to unify the various construction materials and also provides a very durable base for the painting and weathering steps ahead. First color is added using Tamiya XF-13 J.A. Green thinned with a few drops of Tamiya lacquer thinner to produce the preshade of the shadow areas and panel lines. For the overall base color I used Vallejo Model Color acrylics because I find this range easier to mix the colors to the desired shades I have in mind. The overall color is a mix of 887 Brown Violet and 882 Middlstone. Highlights were accomplished by adding 012 German Yellow and White in order to lighten the base color. Dust and dirt shades were added to the underside, the lower hull and around the fenders using a light airbrush spray of Vallejo grey and tan colors along with Tamiya XF-57 Buff.

|

|

|

|
Wear and weathering begins by an initial application of scratches and chips with Vallejo Brown Violet and a very fine brush. It’s important that scratches be kept small and in context with reality. That said, on first look these first marks may seem too dark and numerous, but much of this initial layer will fade away during the subsequent weathering. A light acrylic filter followed using very, very thinned Vallejo 883 German Camo Bright Green and 709 Buff. The proportions of these colors changed form time to time while working the different areas of the vehicle from very green to almost all buff. These filters have a very subtle effect on changing the base colors while also creating depth to the finish.
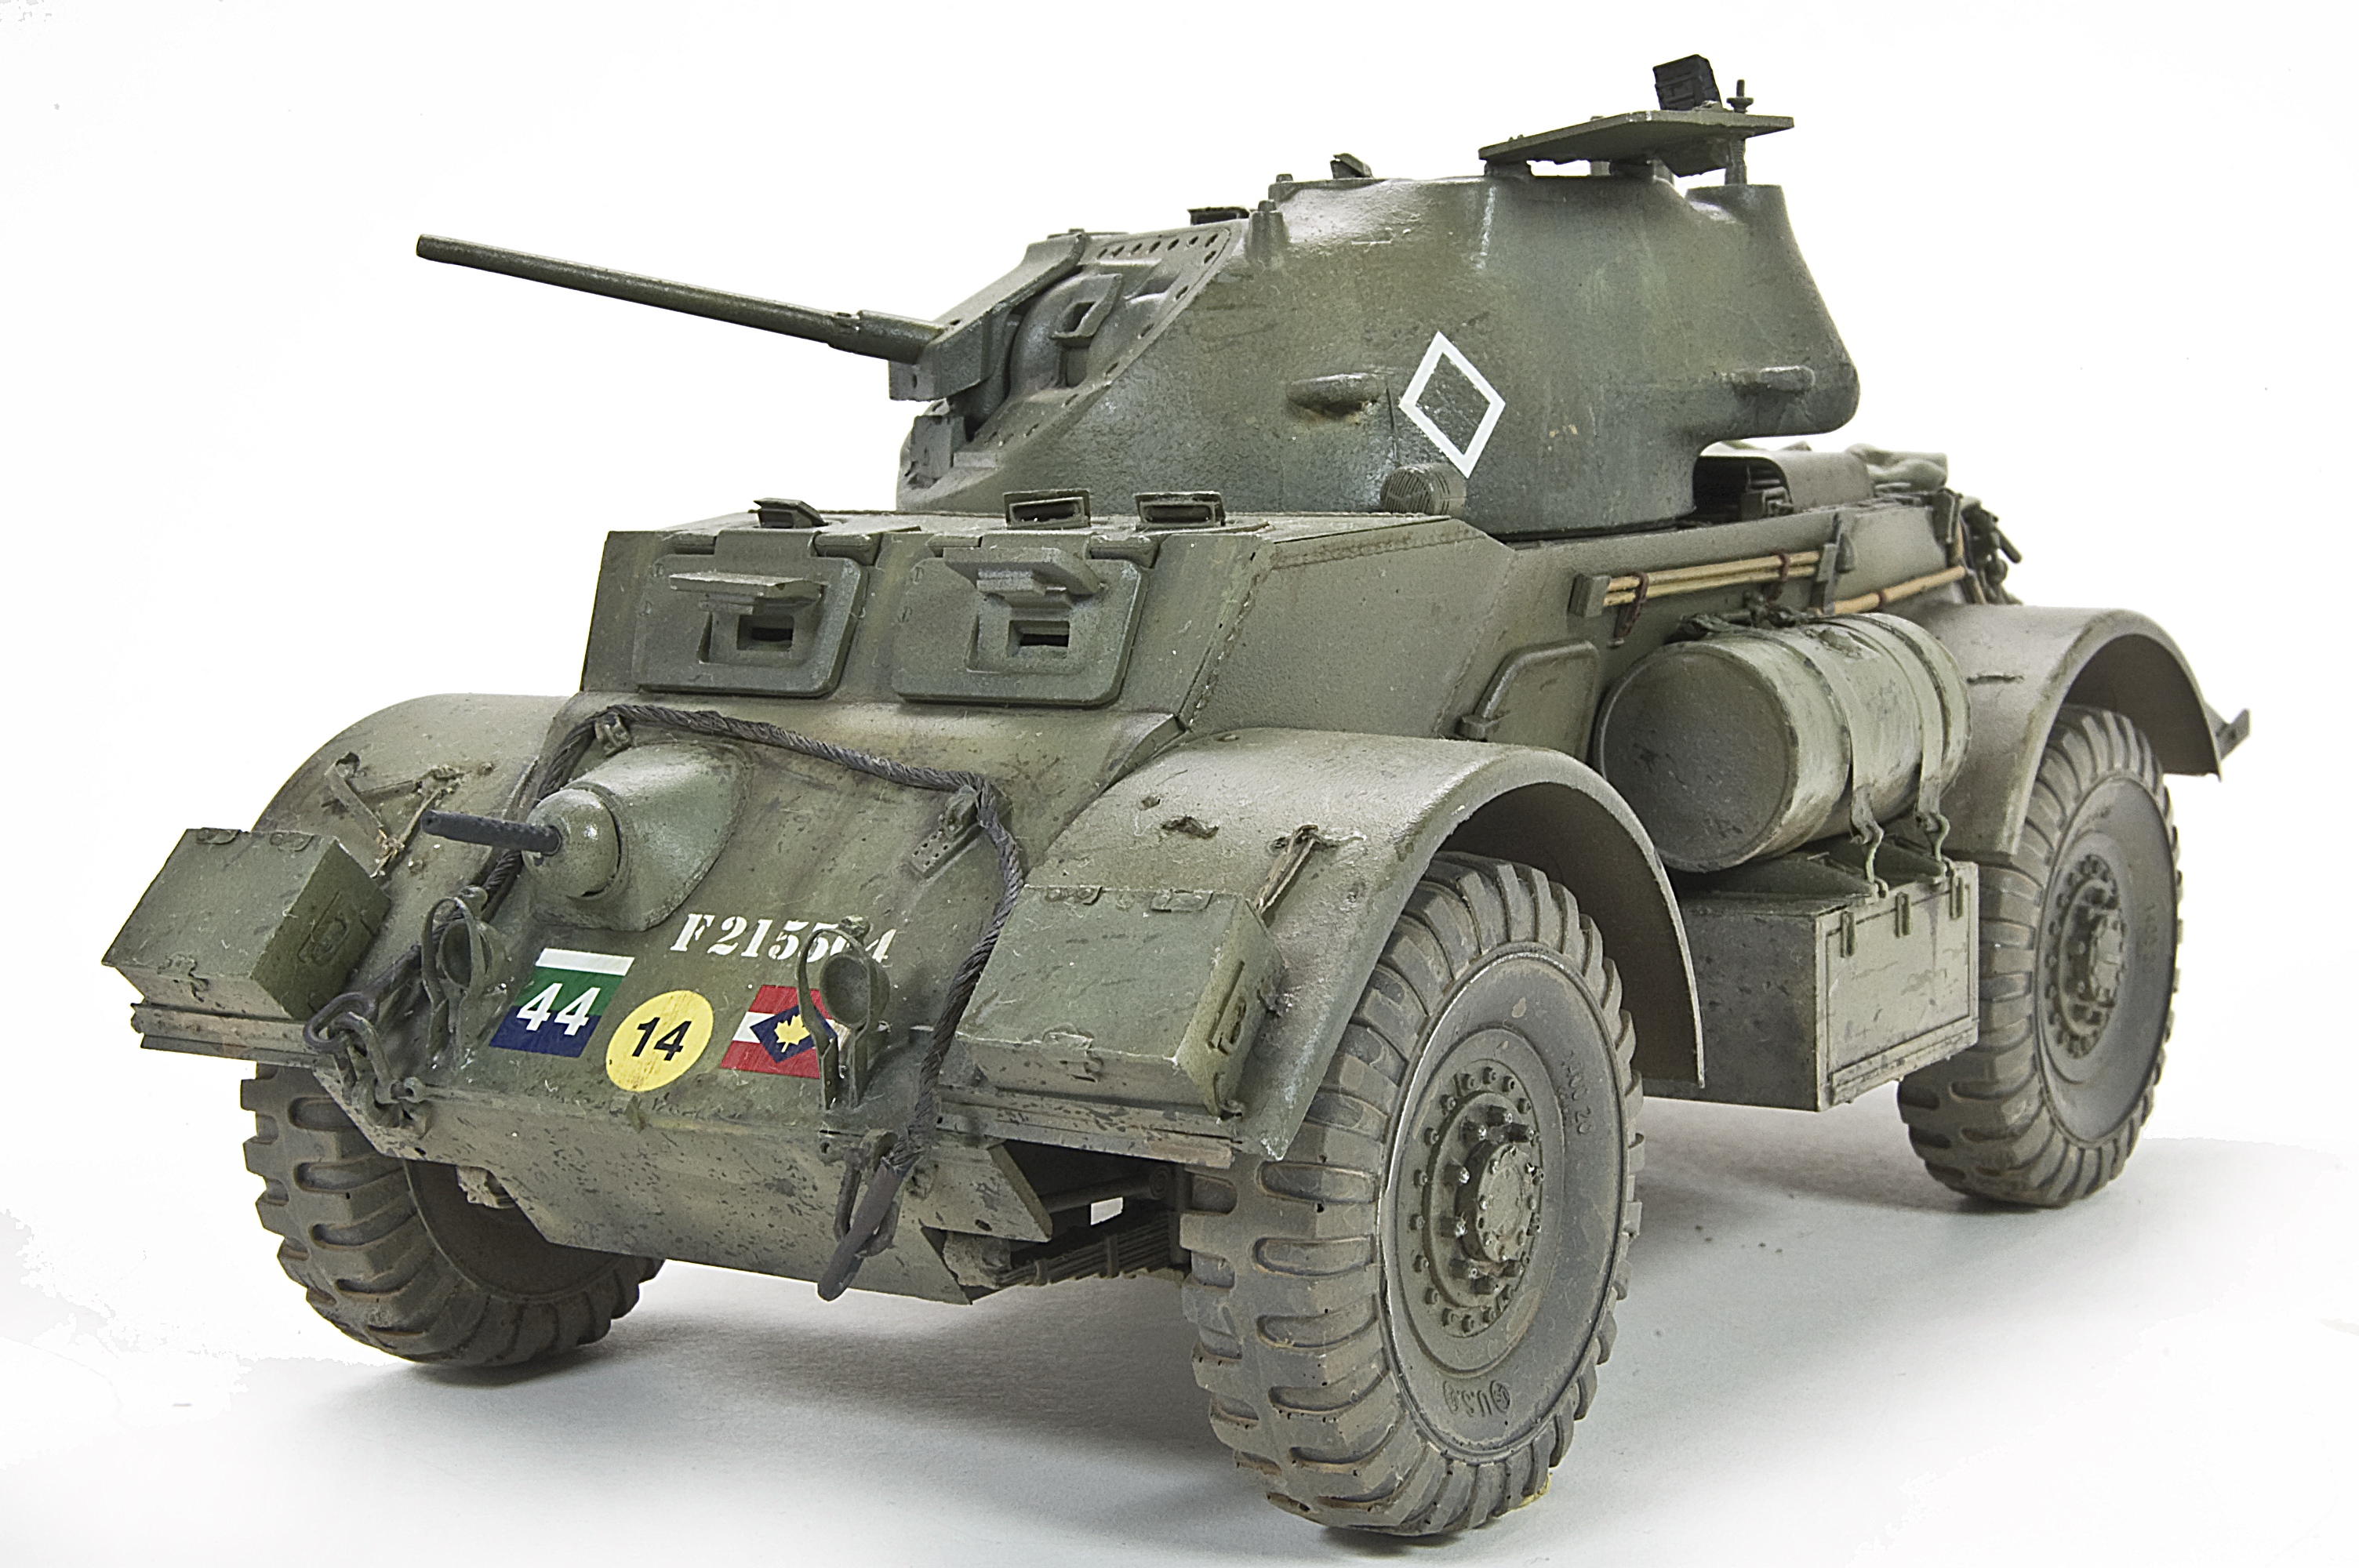
 After finishing the first filters I applied a general light layer of Future floor polish to seal the base work and also prepare the surfaces for the markings. During the preparation and research for this project I had found a number of photograph and references showing vehicles of the 12th Manitoba Dragoons so I was pleased to see the references for this unit was included on the decal sheet. The decals went on very easily and settled well, though I added a small touch of Microscale Micro Sol for added insurance. After the decals had set and dried I sealed them with another light misting of Future floor polish.
I find the hard, glossy surface produced by the clear coat to be ideal for paint fading as done by using small dots of artist oils. For this vehicle I mixed a bright shade of green to be used along with yellow ochre and white straight from the tube. My procedure is to first dampen the surface using odorless turpeniod and then apply the small dots in a somewhat random pattern over a small area. With a soft, wide brush I then work the colors into the surface until nearly all traces of color are gone. At this point it is important to allow the surface to dry completely as the colors will return and intensify as it dries. Once this step has dried it is possible to do another application if desired.

|

|

|

|

|

|
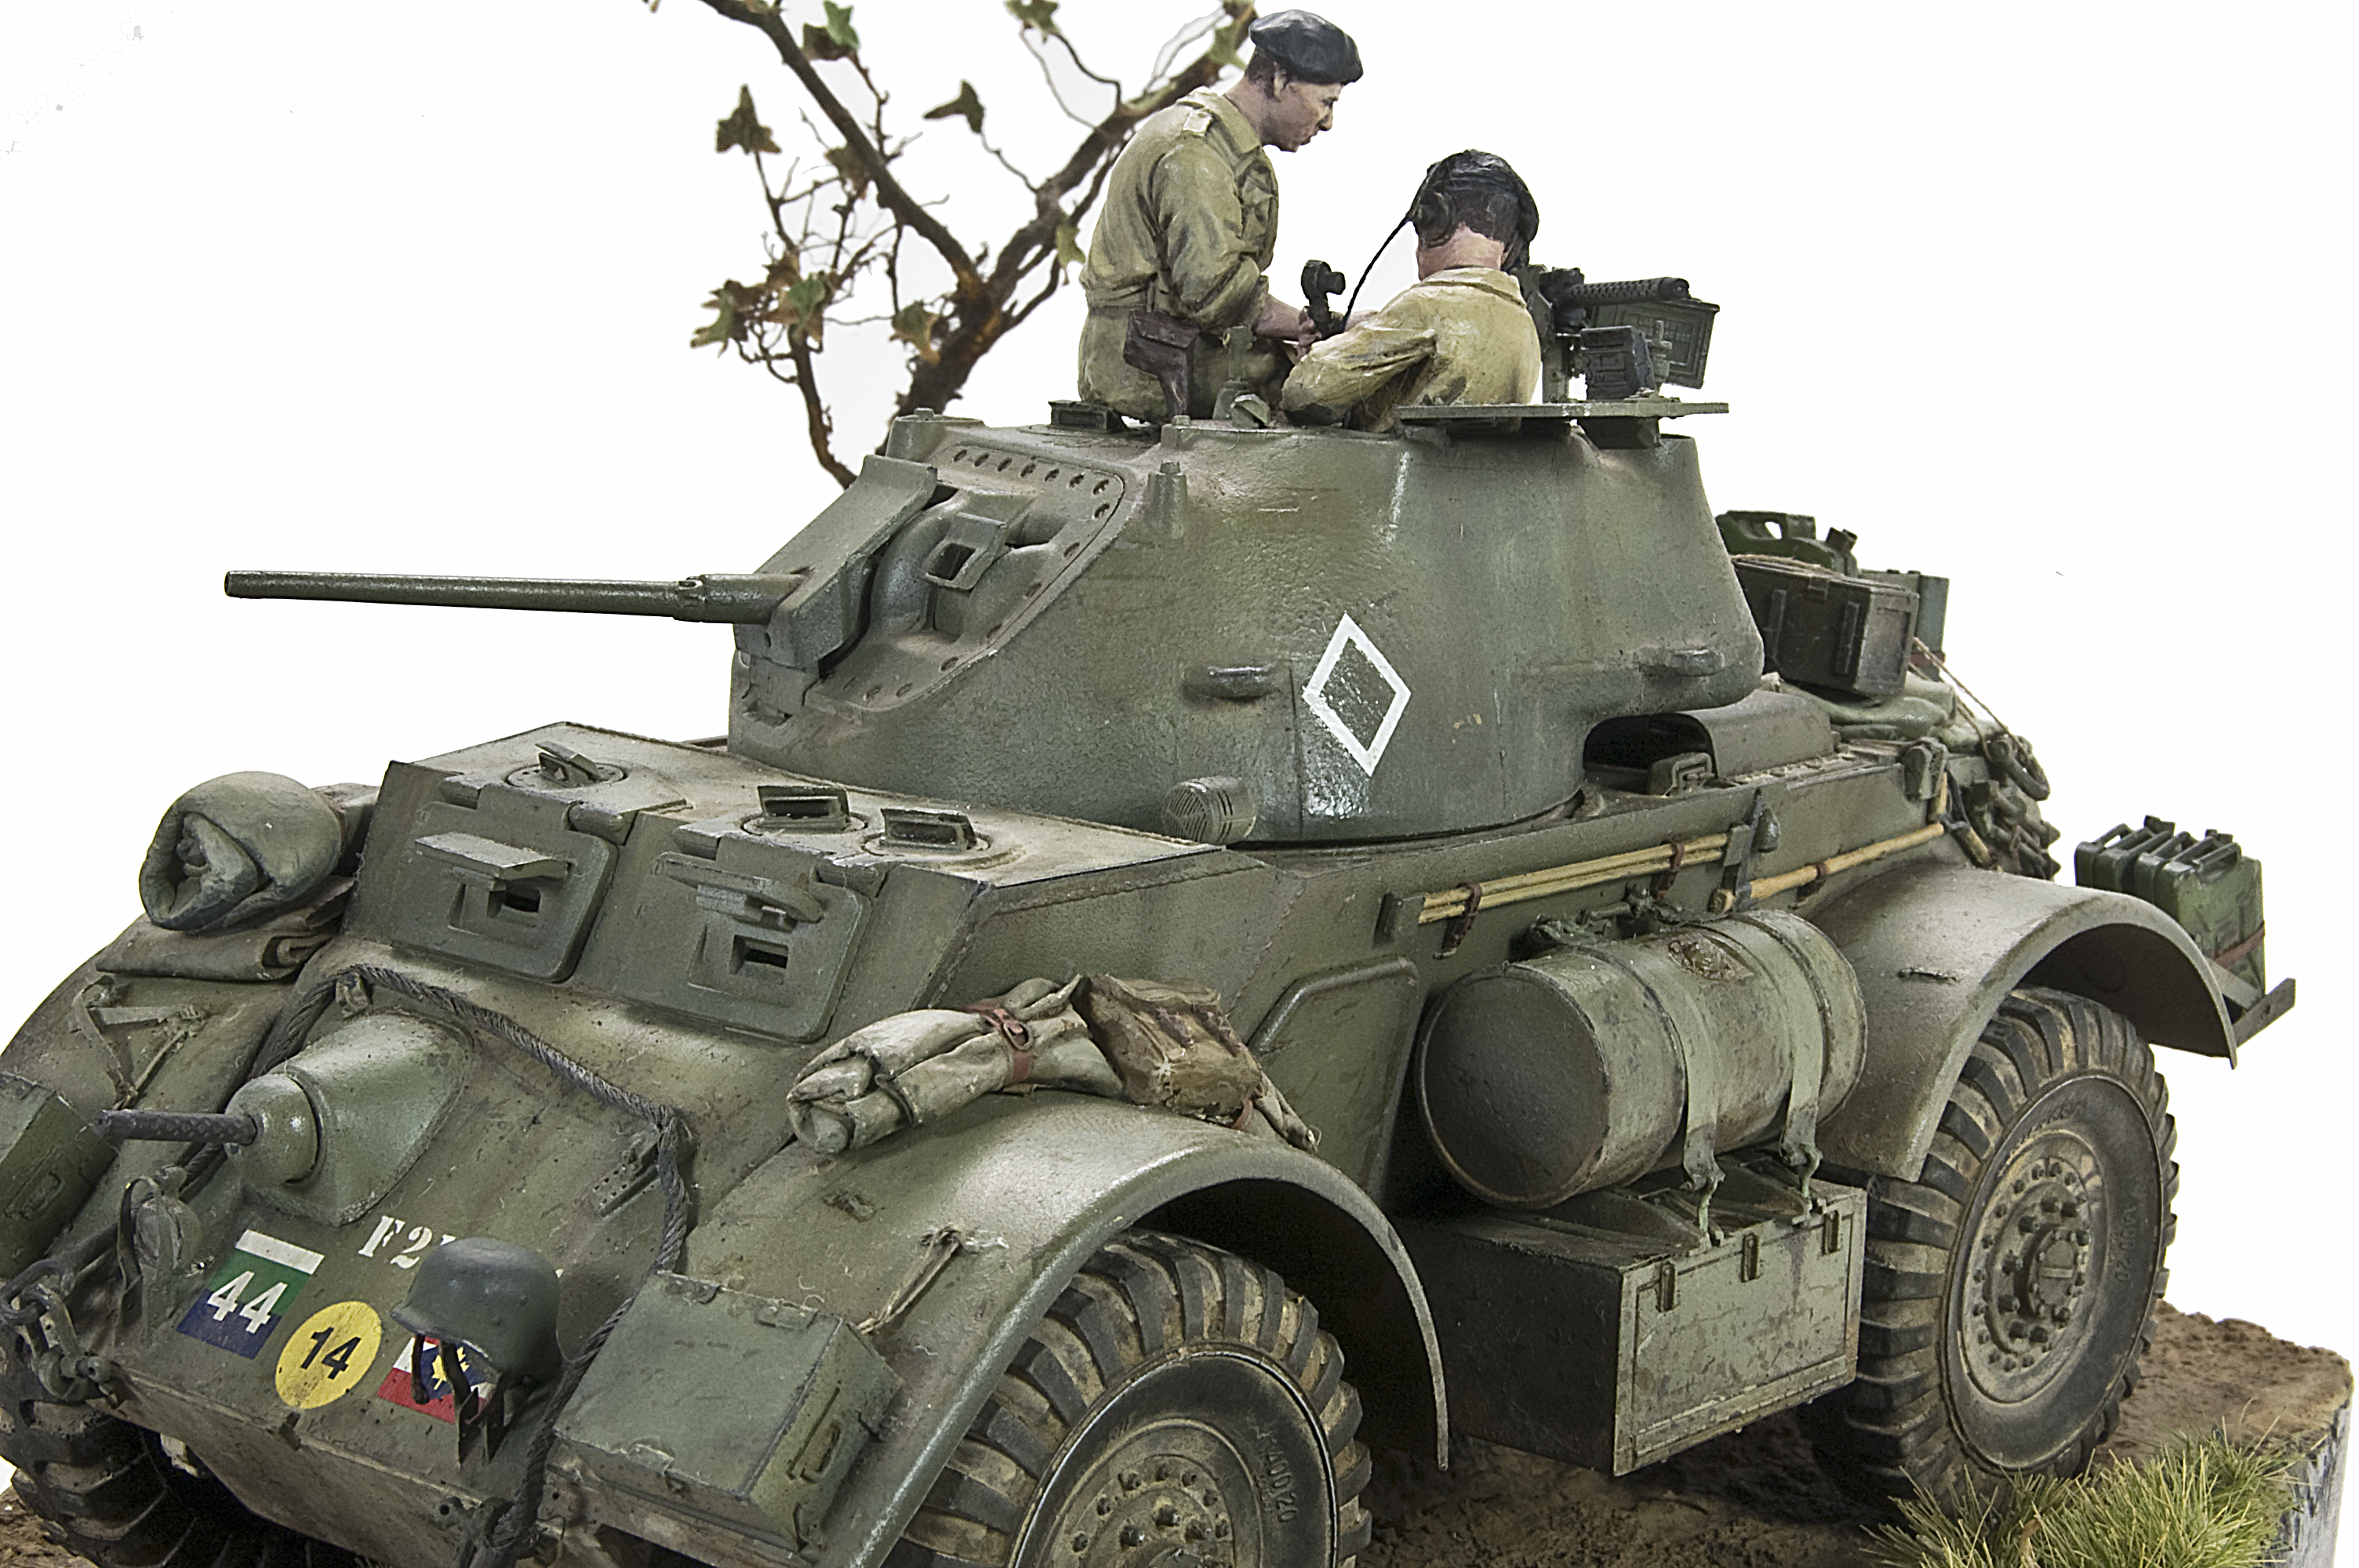
I think it worth noting at this stage, and only after this small bit of weathering, the vehicle has taken on a “real” presence. Some of the earlier scratches and scrapes have faded completely, while others appear deep into the finish. I noticed that many vehicles, particularly allied vehicles, they are not all finished to a dull matte, but rather exhibit a certain polished sheen; this is a look that I am trying to replicate. The earlier Future coat had left the vehicle very shinny indeed, however, after a little work with the acrylic filters and the artist oils the high gloss finish has somewhat toned down. By practicing careful restraint with the artist oils and the subsequent pigments, I was able to maintain a nice level of luster that I was hoping for.. I believe that the end result is a pleasing, realistic metal sheen that is often seen on vehicles.. The Staghound’s finish is beginning to really show depth and weight.
After the dot filters had completely dried it was now time to get down and dirty. I have only recently begun using MIG Productions 502 Abteilung artist’s oils, but I am quickly making them an often used tool. Using artist oils is slow work and cannot be rushed, but the results are well worth the time and effort. The colors I used on this project 502 Abteilung Light Mud and Dark Mud colors straight from the tube and blended. With the oils I worked my way around the vehicle dabbing and blending the paints into the corners and cracks where dirt and grime would naturally accumulate. From these corners I then slowly expand these areas to include the surface areas and panels; applying heavier accumulations, streaks and stains. Once completed these areas provide an excellent color platform for applying further weathering. Speaking of further weathering next step was the application of some MIG Productions pigments. I almost always apply my pigments wet, having first dissolved them in odorless turpeniod. In much the same manner as the artist oils I begin in the corners and other likely dirty build-up areas then work outward. If you choose to apply the pigments wet it is important to allow them to dry as their appearance will change considerably. For any given project I will limit my choices to 3-4 pigment colors to maintain color consistency but I do constantly vary their mix and concentration as I proceed. I find that these variances in tones and textures help create depth and interest on the final presentation. It is also important to note that each application layer of pigments color is very thin, allowing for a gradual build-up of the effects. From time to time I may permanently set certain layers with MIG Productions Fixer so that I can continue to work an area without disturbing the underlying effects. Nearing the end of the pigments sessions I generally reapply pin washes in certain locations to re-establish any details lost to the pigments. Additional stains and spills are made a mess on the auxiliary fuel tanks using Titan brand Asphalt along with 502 Abteilung Red Primer artist oil near the filling caps and left to run over the sides of the tanks.
As mentioned earlier I made use Staghound Stowage set from Legend for the boxes and crates. When considering the placement of stowage I always be sure to keep in mind what is reasonable by not defying the laws of gravity by having items that simply float over the vehicle surface. After a little trial and error I had my “pile” of gear. Under the gear I sculpted a tarp which helped fill the surface voids allowing the boxes and crates to really look settled in place. The onboard gear was painted using a variety of Vallejo Model Color paints. I find it a particularly unique challenge to paint, and make visually interesting, single color vehicles and stowage. In this case, I wanted to maintain the overall “drab” theme and not use a bright color splash. My solution was to first give the entire load an overall spray of Vallejo’s Brown Violet; this would be the color that tied it all together. Then, using a brush, I picked out the individual items using different filters based upon the Brown Violet base. For instance, add a little German Camo Bright Green to the mix and wash over the Jerry cans, or add a little Prussian blue to the mix to highlight a container.
       |