
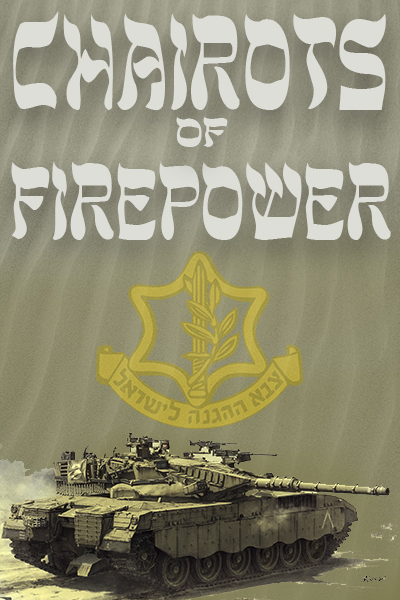
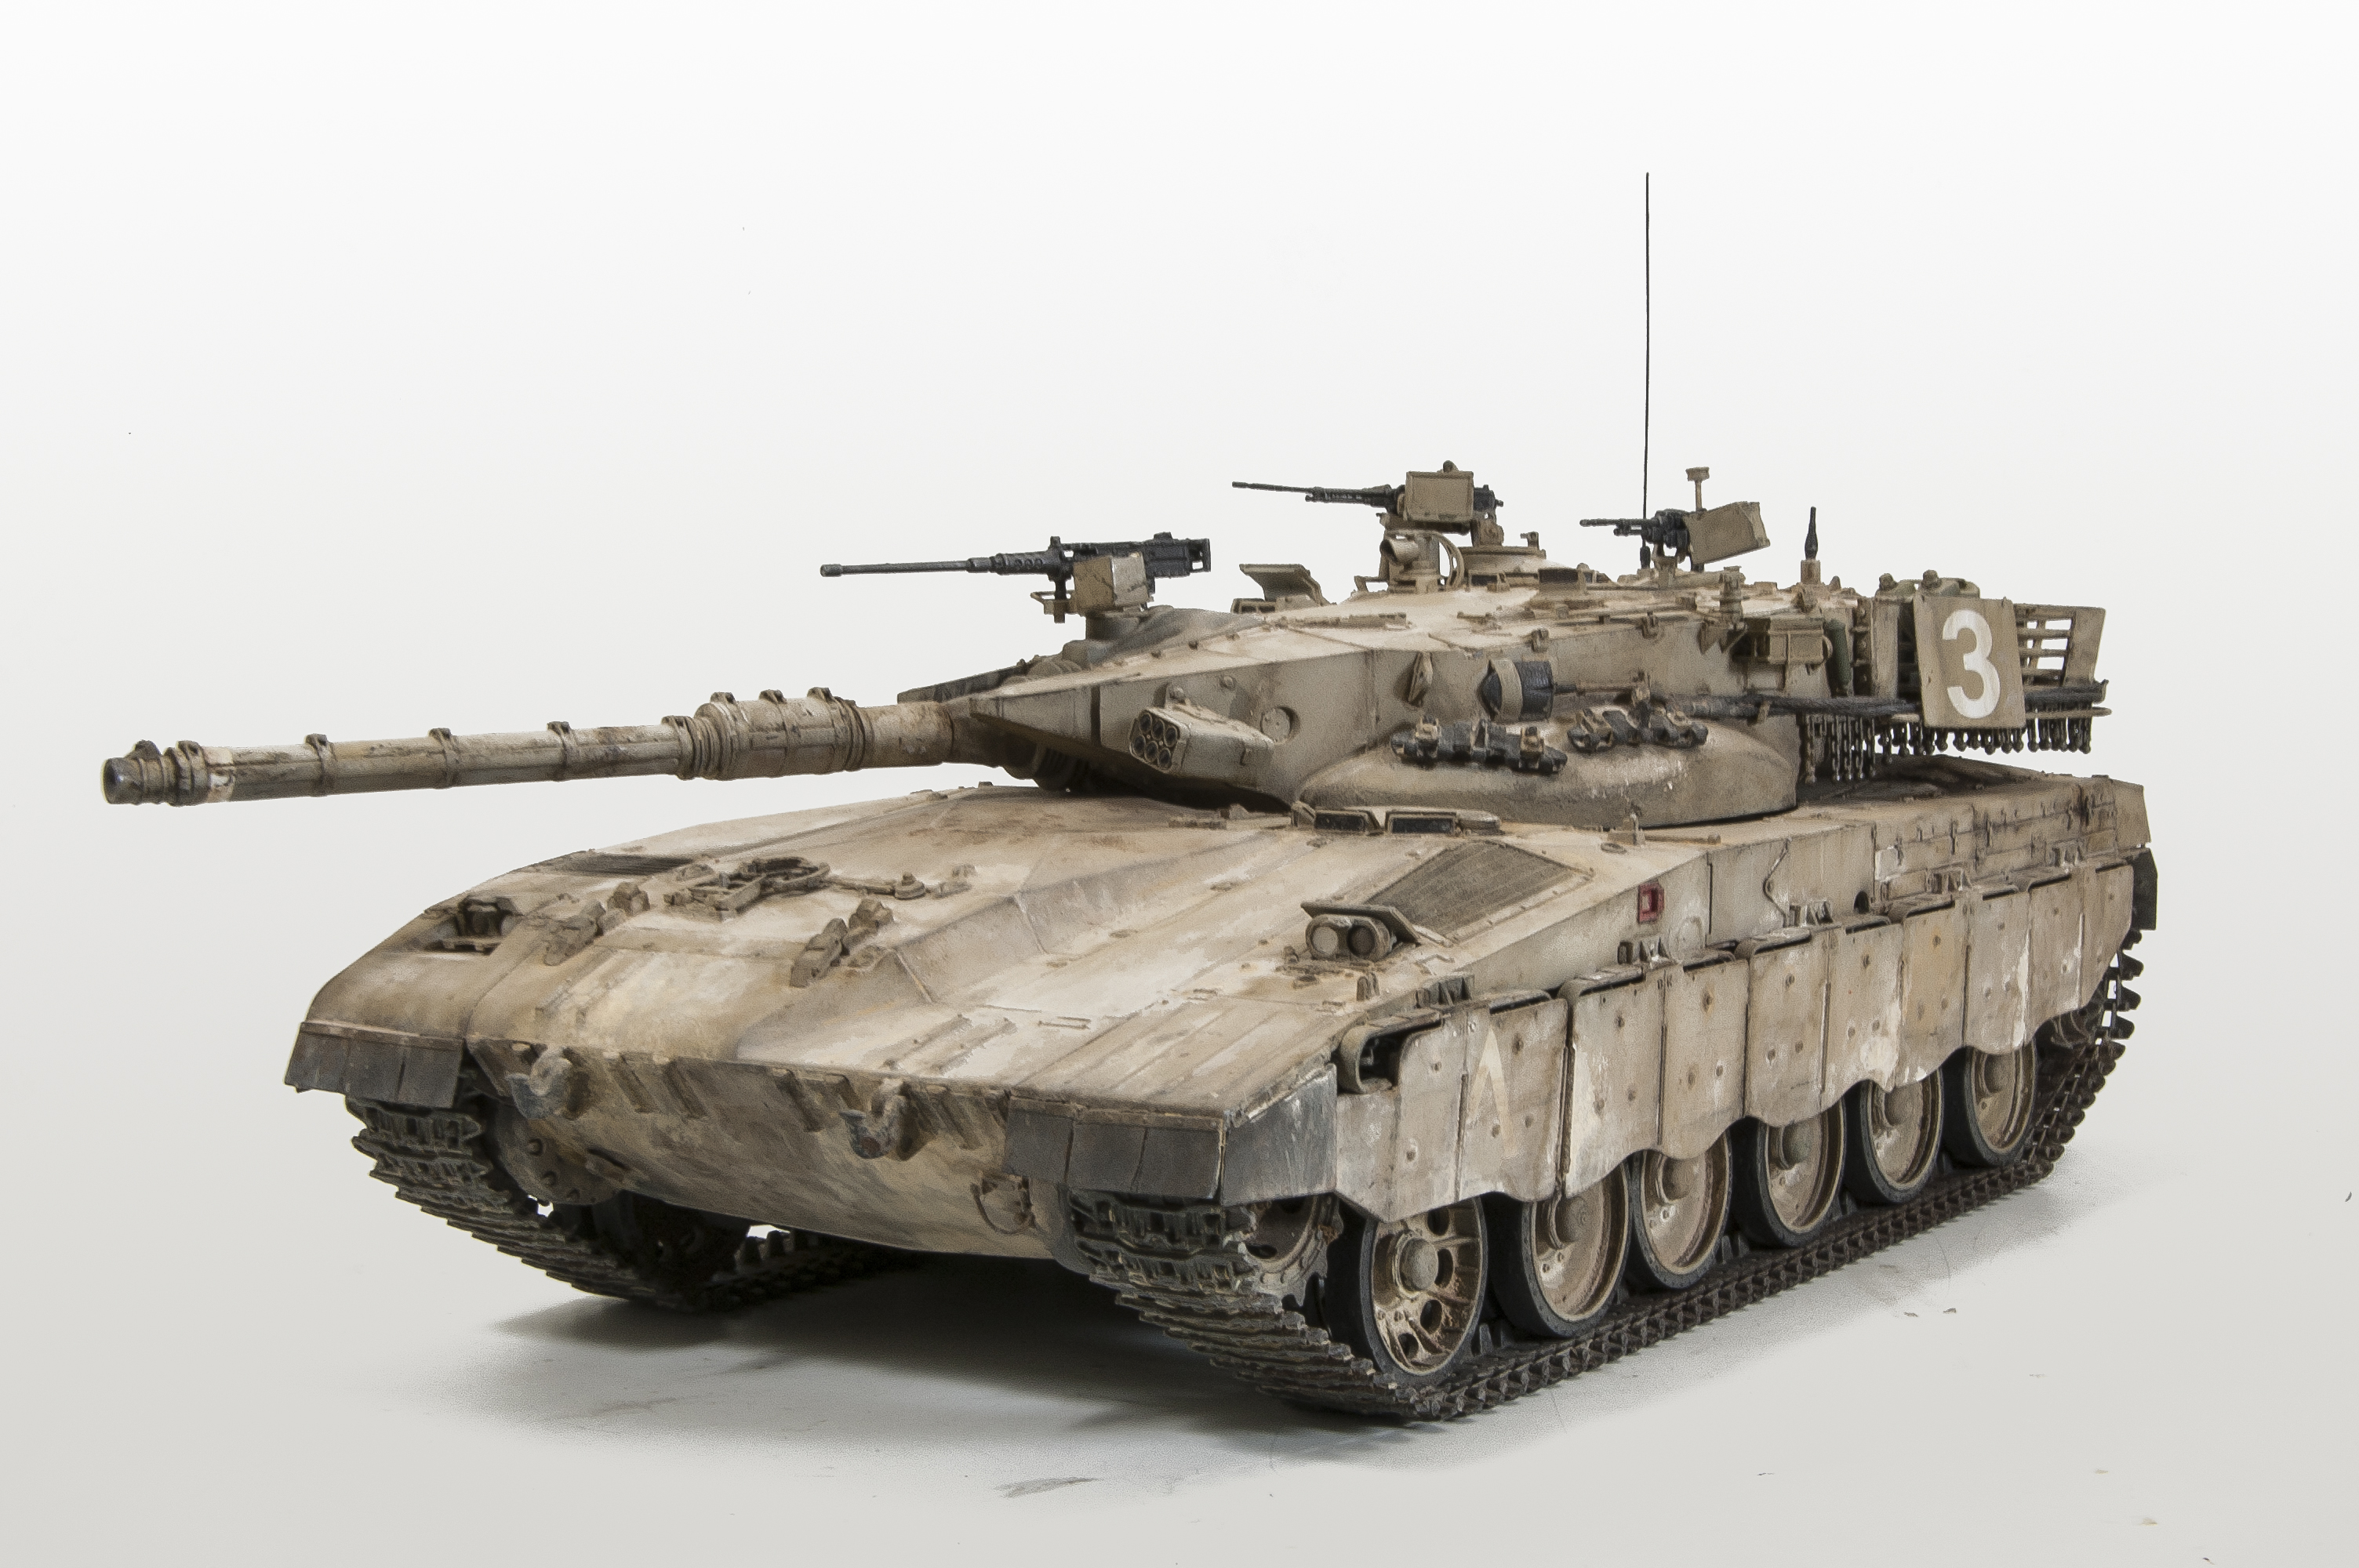
 The Merkava or ”Chariot” is Israel’s first domestically designed and produced main battle tank. It was developed in the late 1970’s after Israel was unable to procure the British Chieftain. Incorporating the lessons learned by the IDF during their past wars.
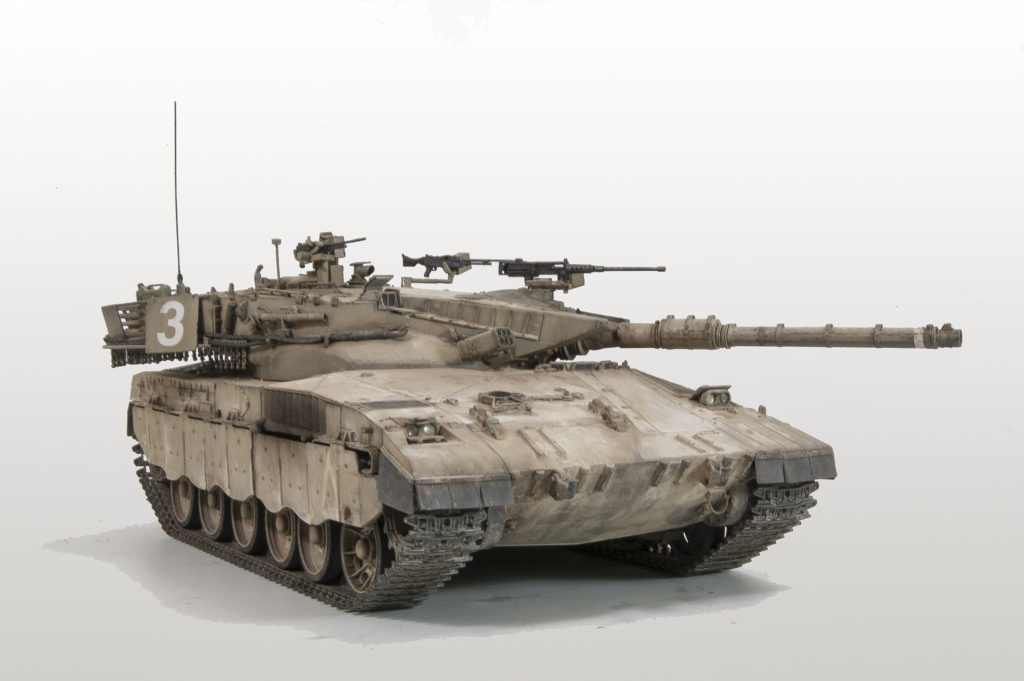
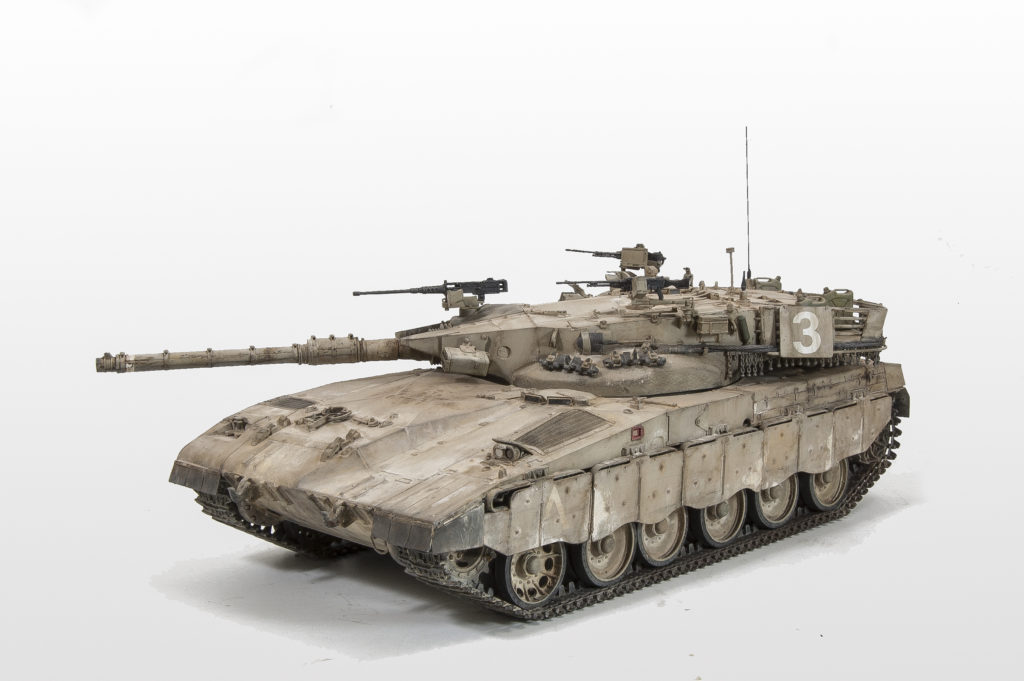
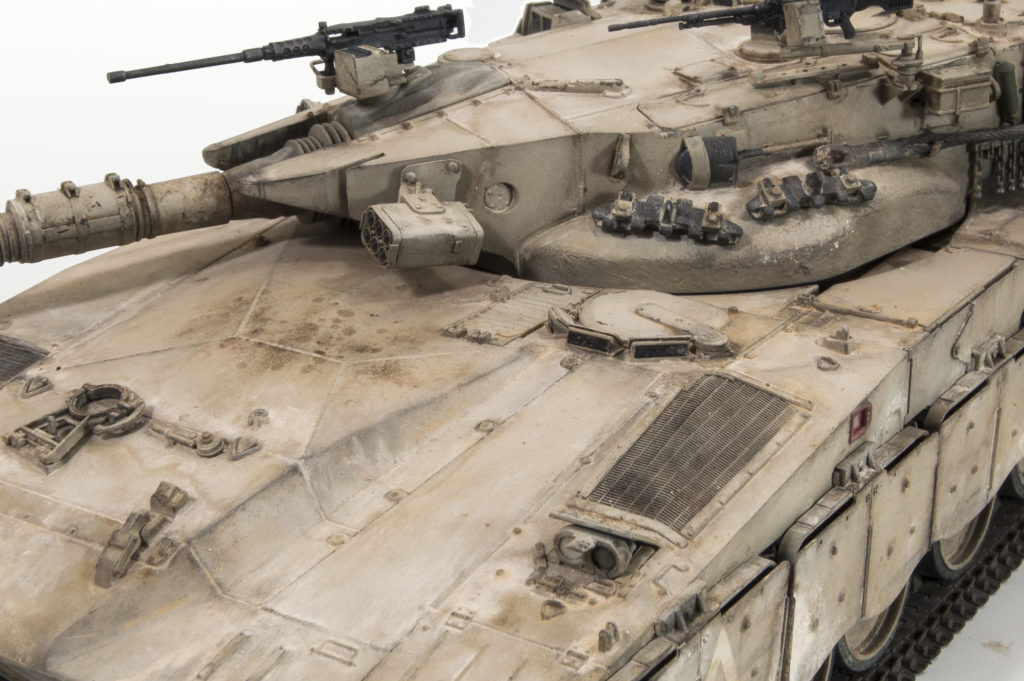
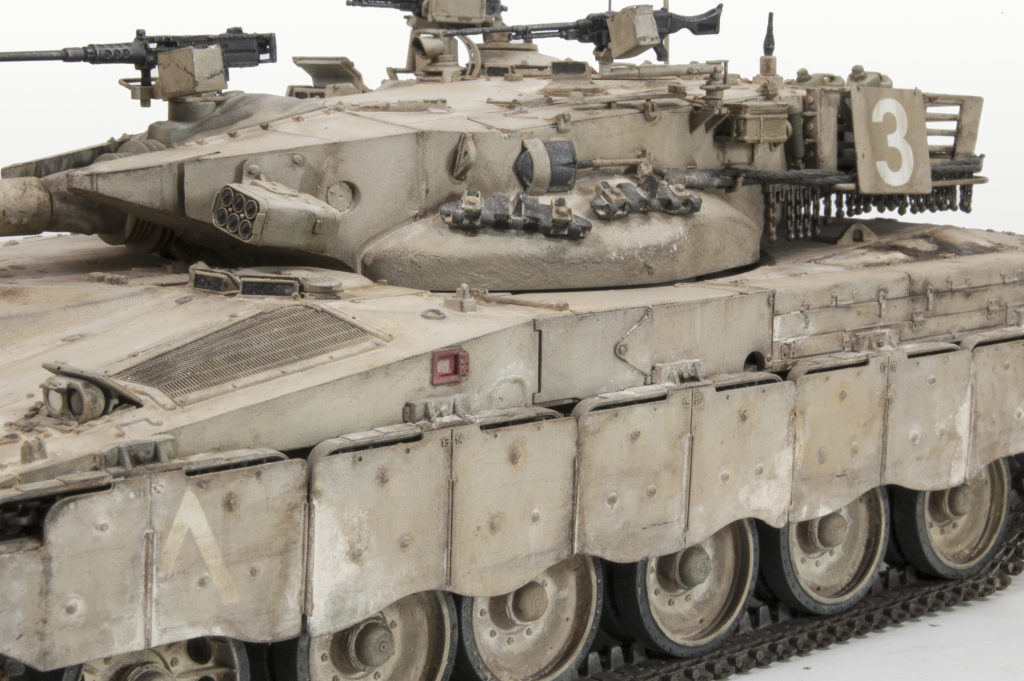
The Merkava was first used in combat during the 1982 Lebanon War, where Israel deployed 180 units. The wartime experience brought to light some vehicle shortcomings. These shortcomings were noted and adjustments were designed into the MkII production models. The Mk.I tanks were retrofitted with some of the new Mk.II features – such as the installation of chain netting to the rear of the turret in order to eliminate a shot trap. The results became known as the Mk.I Hybrid, which is the subject of this article.
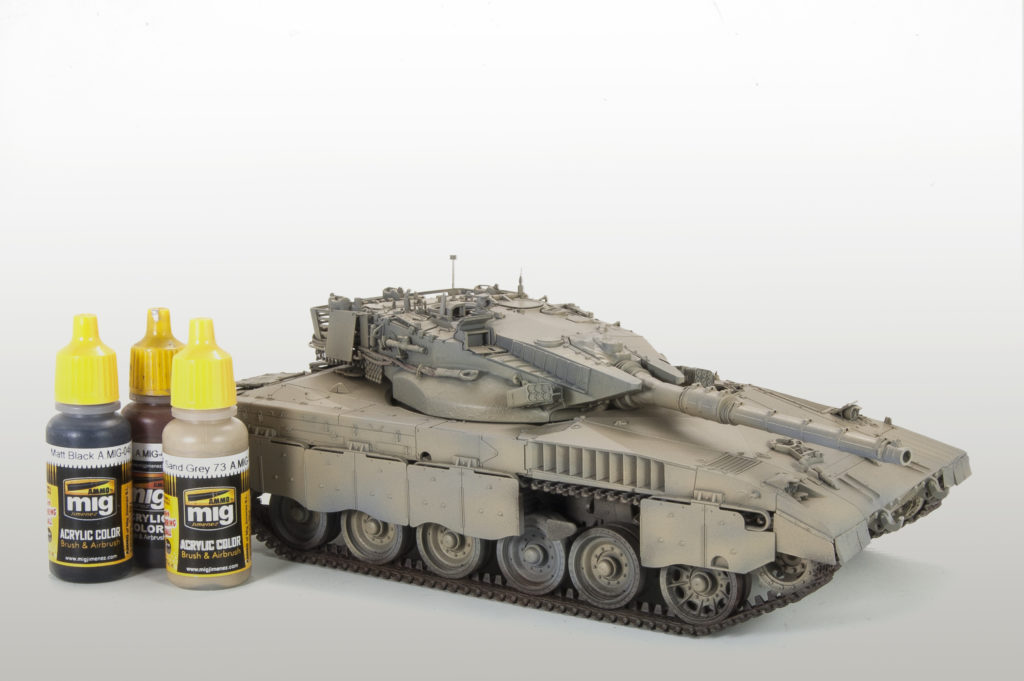
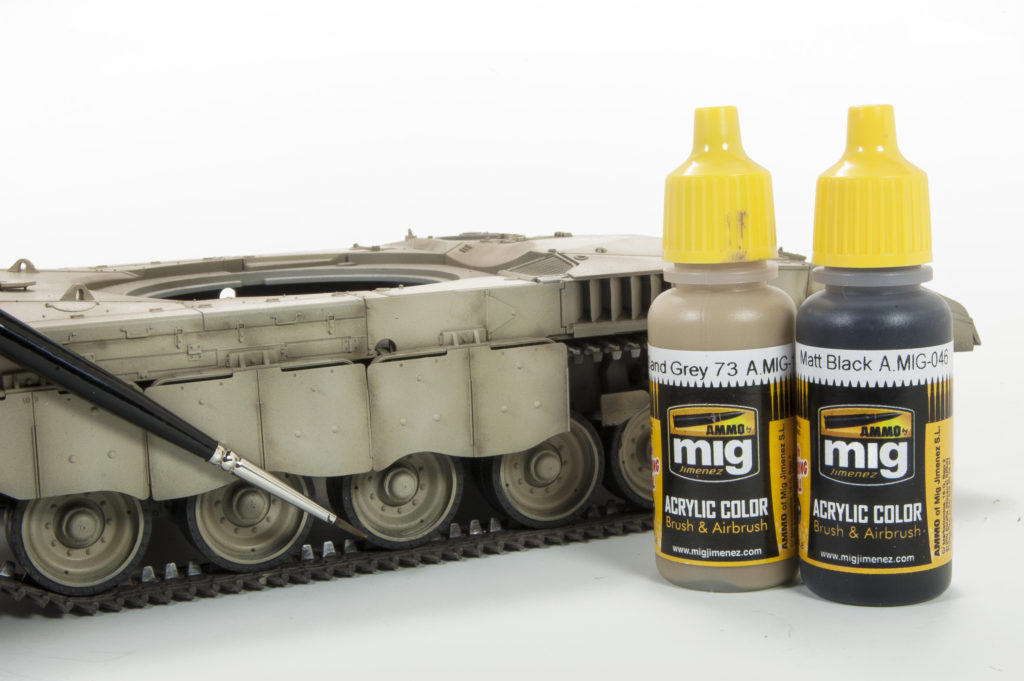
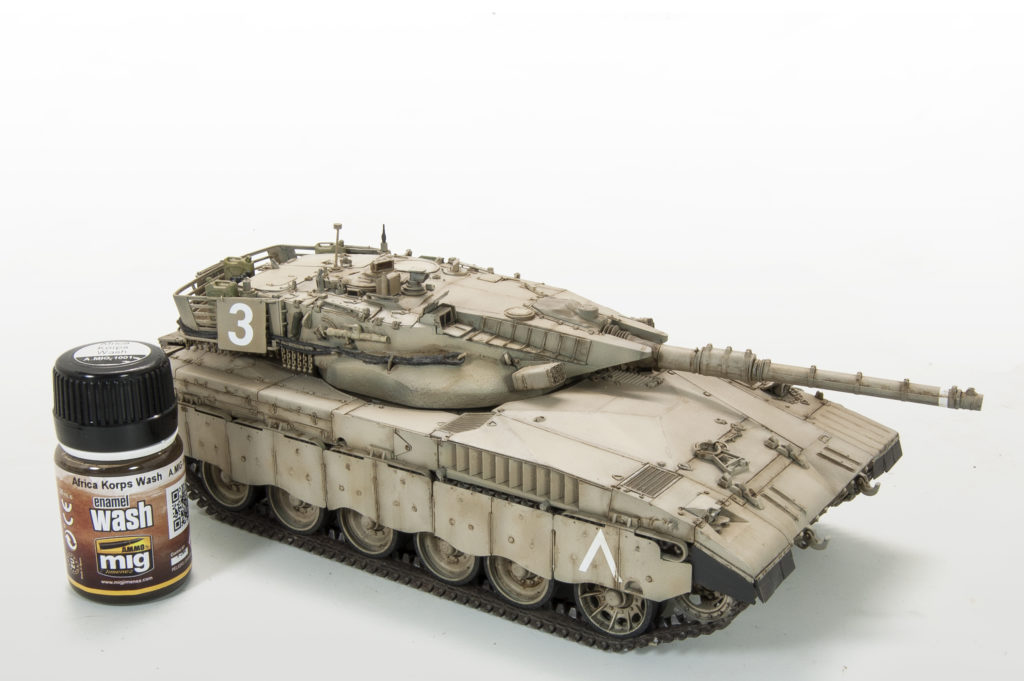
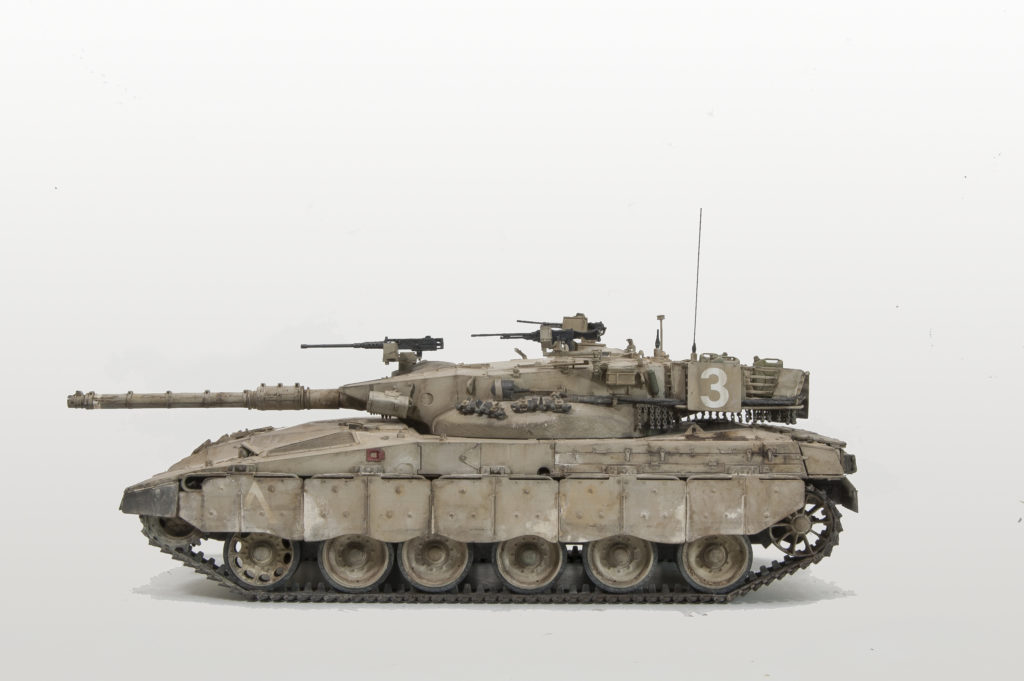
There has, and continues to be a lot of discussion as to the colors of the IDF forces. Vehicles can be seen in colors ranging from light sand/grey to dark grey/green colors. Much of the variance can be explained by the period of service, with paint schemes changing over time. Of course, use and environmental factors such as sun faded paint and dusty surfaces also play a role in the debate. Speaking of dusty surfaces, IDF vehicles are certainly at the top of the list as far weathering opportunities with forces operating in all types of environments, from urban centers, muddy fields, snow-capped mountains or rock-strewn deserts there is no lack of inspiration. This vehicle is painted in the brown/grey tones of IDF Sand Grey ’73. While an attractive color, I find working with light, or sand colored vehicles to be particularly challenging. As I view it there are basically two challenges; the first being how to make a mono-tone scheme look interesting, the second being how to successfully showcase light colored sand and dusty weathering over a lighter colored base color. Let’s get started!
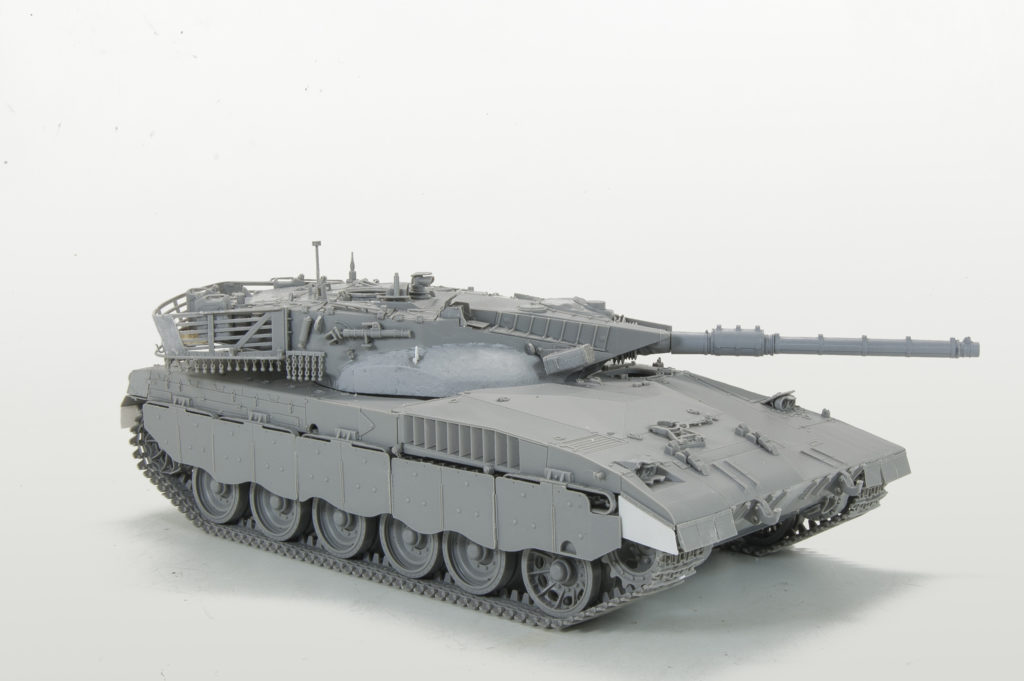
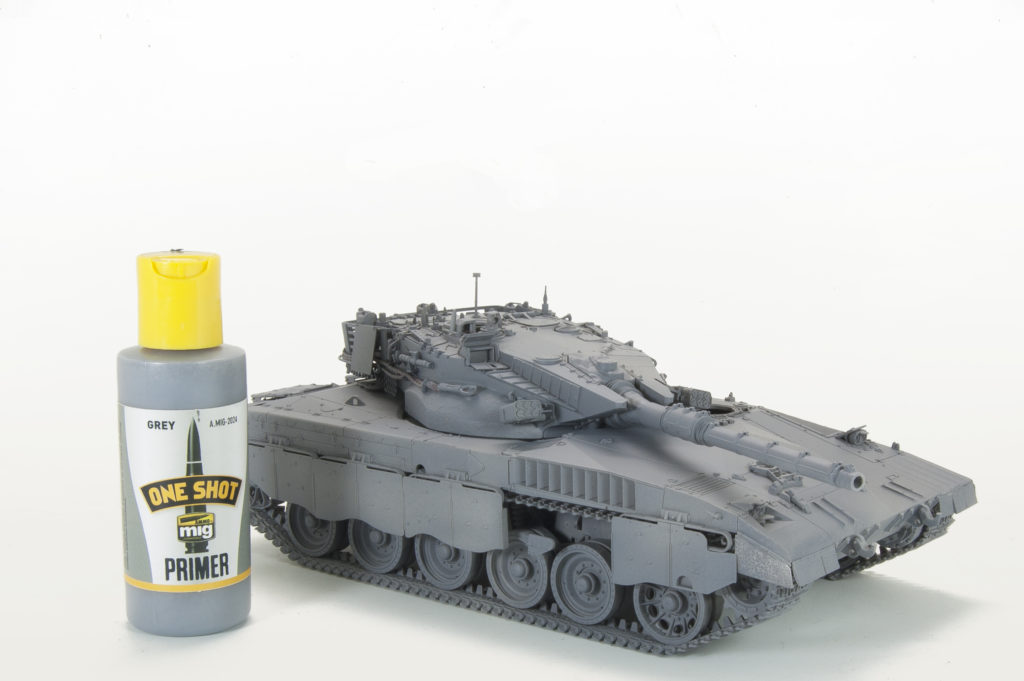
What a mean looking machine! The Merkava kit was built nearly straight from the box, with only a few slight modifications – namely being the use of thin cardstock to replace some of the rubber fender parts and little additional cast texture on the turret by dabbing Mr. Surfacer 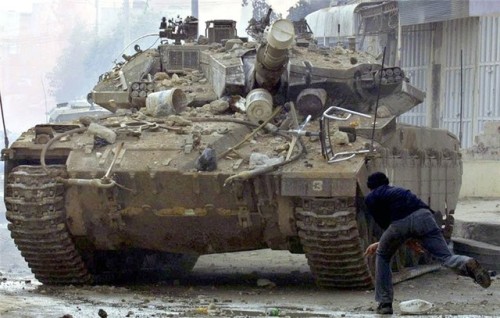 500. Painting begins with an overall spray of One Shot grey primer. Not only does the primer create a unifying surface for the paint to adhere to, but being that this is a sandable primer the One Shot is particularly nice to work with when fixing small surface blemishes or imperfections.
The overall base color for this Merkava is provided using A.MIG-132, Real IDF Sand Grey ’73. As is my usual style the initial paint coverage is non-uniformed, appearing botchy, or cloudy, in appearance with areas of the grey primer still showing. This I do intentionally as a basis of providing visual interest to the mono-toned paint finish. At this stage, the coverage is still too incomplete and just doesn’t look right. Additional light sprays of the base color will soften these harsh contrasts while still leaving interesting, subtle color variations. Borrowing a bit of the pre-shading technique from the airplane folks, I continue by adding just a touch of A.MIG-046 Matt Black to the IDF Sand Grey color. This HIGHLY THINNED mixture is sprayed along panel lines and surface features in order to provide a little more definition (and interest) to the light Sand finish. The same Matt Black color is also applied by brush to the rubber portions of the road wheels and fenders. The base color continues to be enriched by applying additional light layers of the sand color, with each layer having been given a slightly different tint. As before, I continue the same idea of non-complete coverage and cloud patterns. As you can see here the process has resulted in an interesting and complex “mono-tone” scheme.

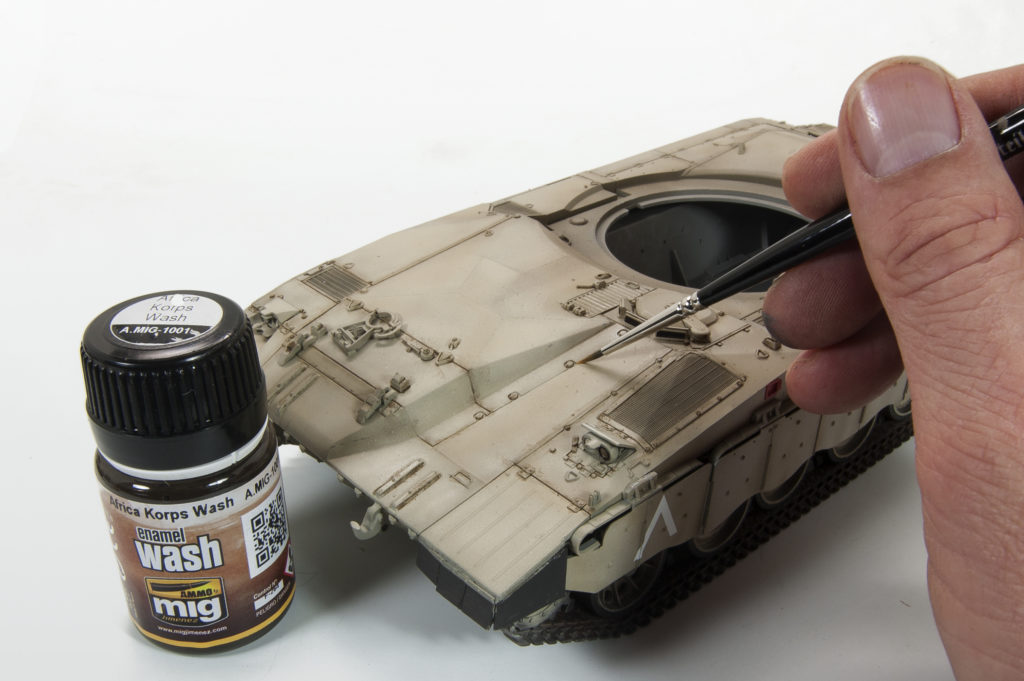
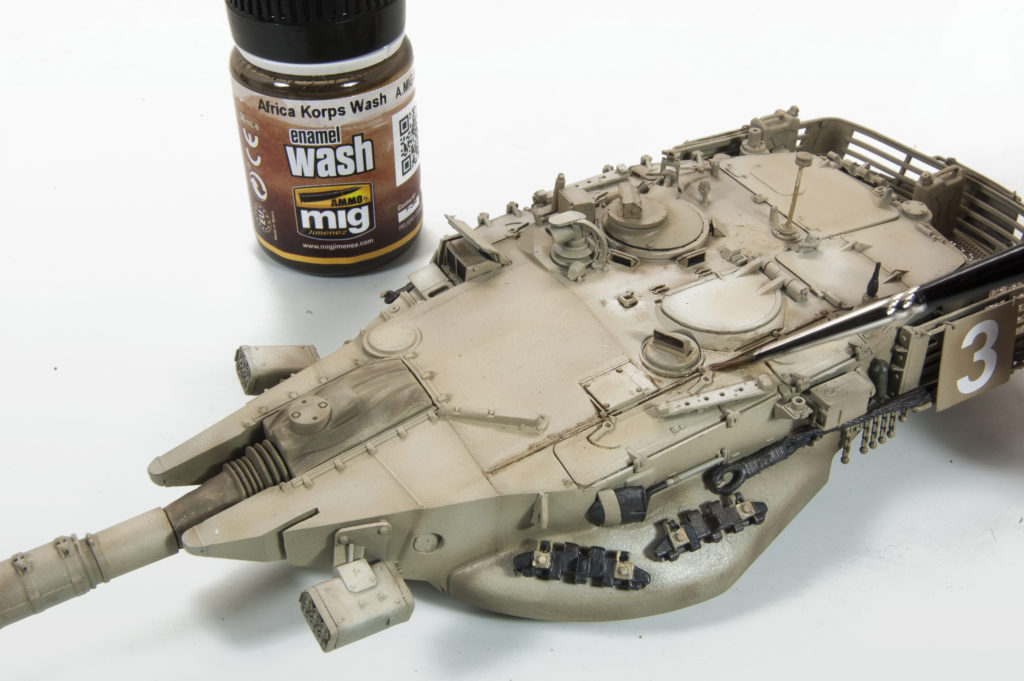
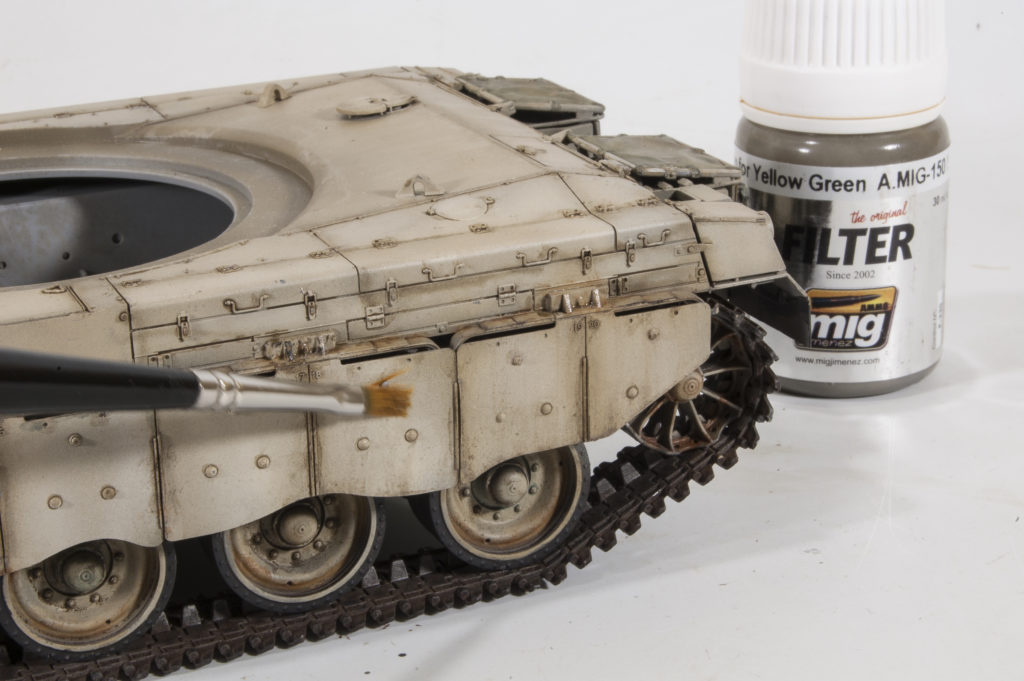
Once again I profile the surface features and panel lines using the light brown enamel color A.MIG-1001, Africa Korps Wash. The application technique I use here is a precise pin-wash, delivering the color only where intended. Any excess material or stains are cleaned using a clean, soft brush moistened with odorless thinner. This same process of using enamel wash to profile the surface details is carried- out over every part of the vehicle. Not only does this process add depth and definition to the finish, but it also serves as a foundation weathering effects that will follow. The sand color has just enough tonal variation to catch 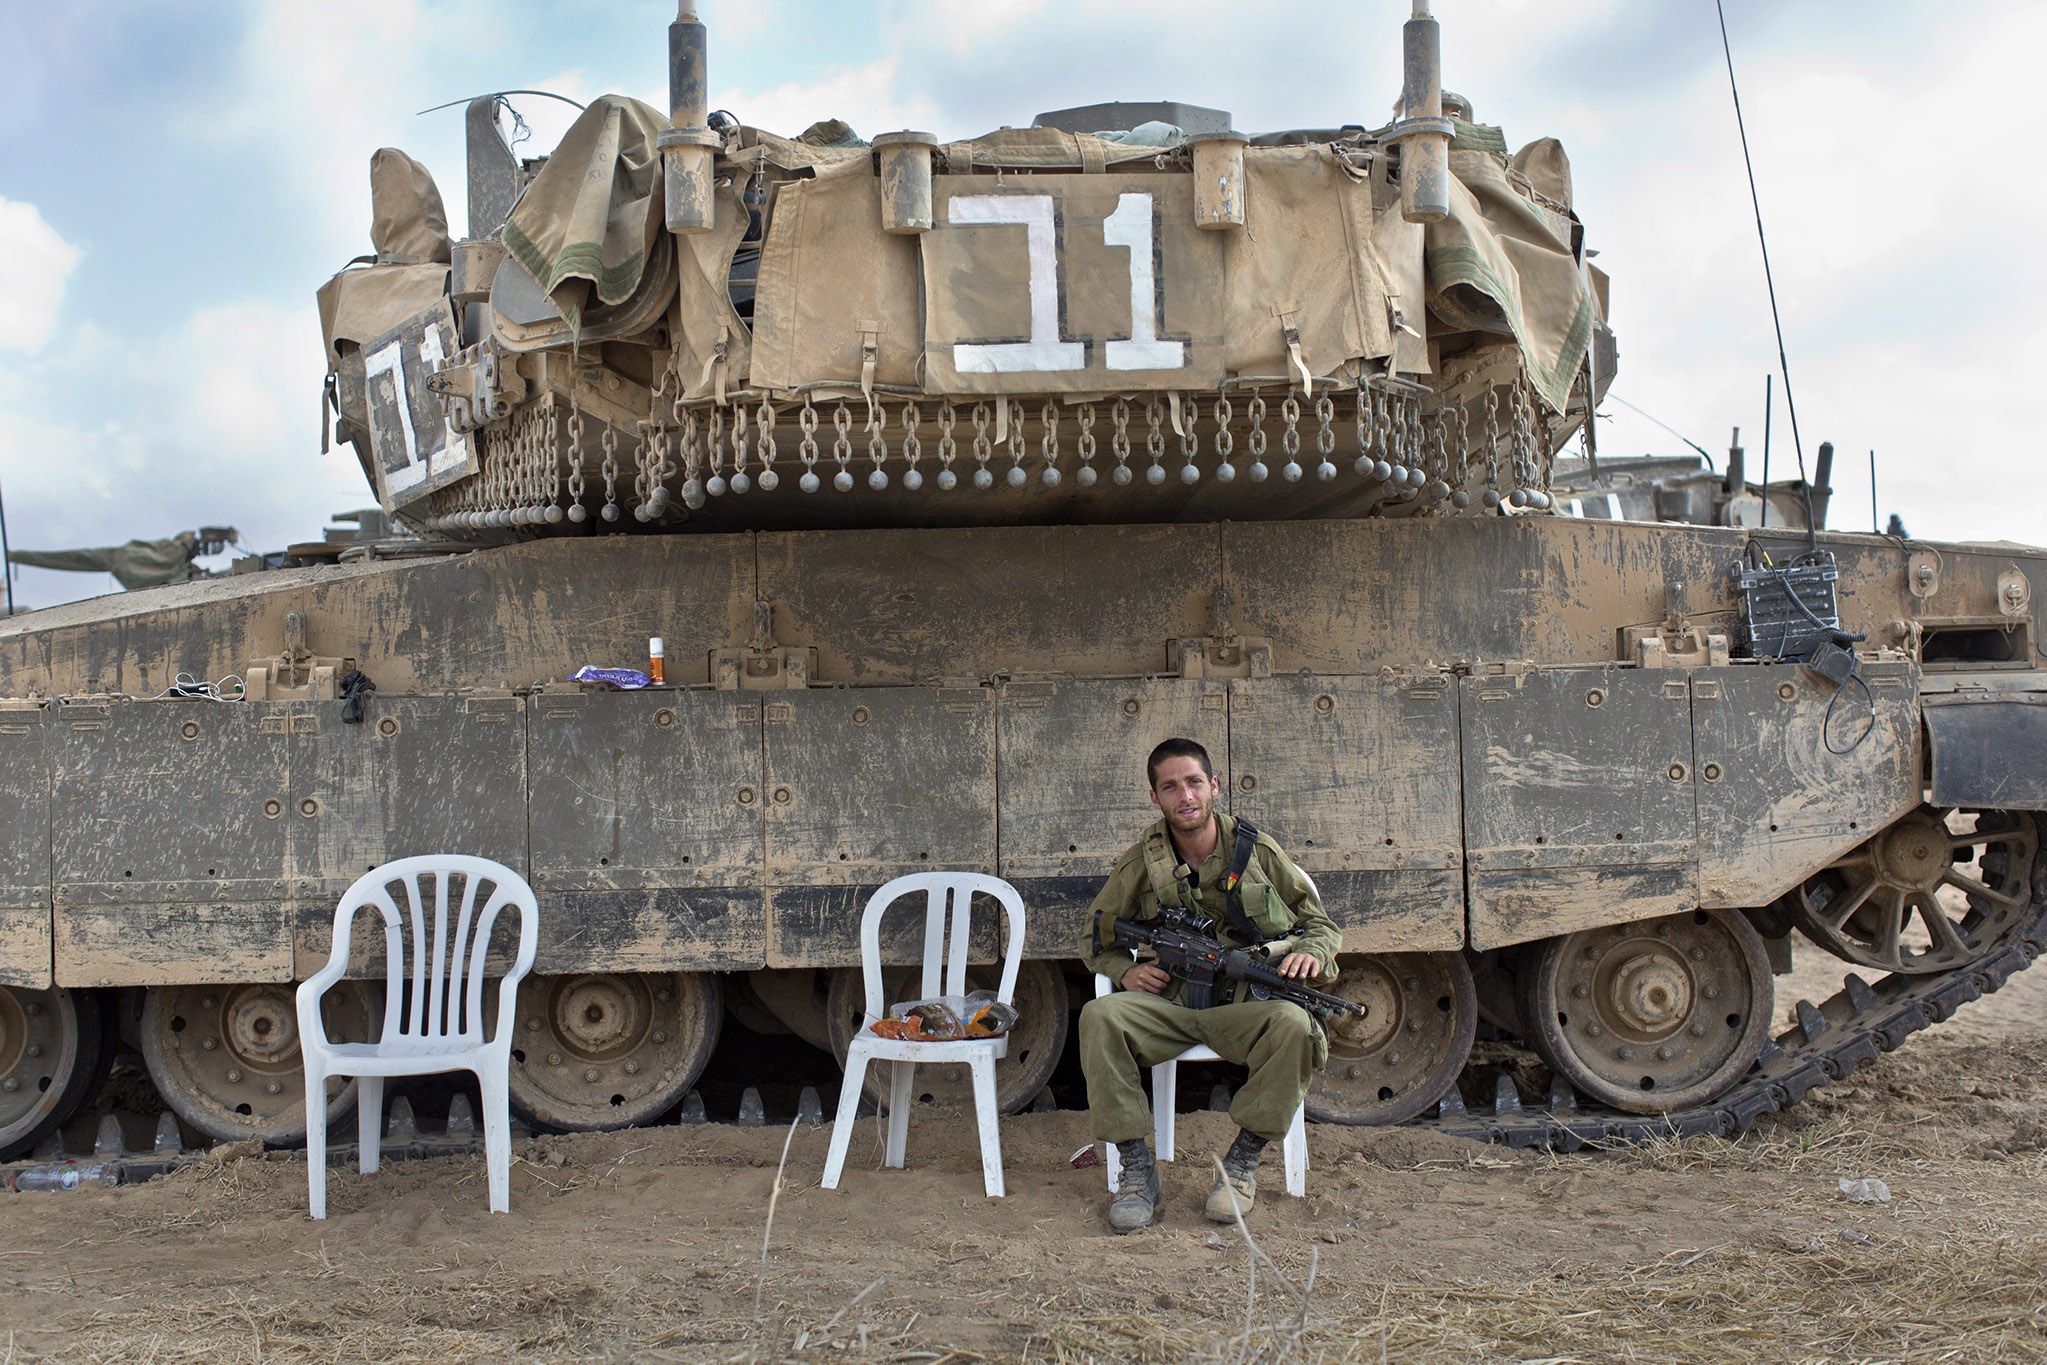 the eye without being overly dramatic. The darker enamel pin-wash is a necessary part of the process by providing depth definition to the shapes of the vehicle. Moving along, my next step is to apply a light application of filter A.MIG-1507 Tan for Yellow Green to certain areas of the vehicle. I follow the same principals as with the painting, purposefully varied the coverage of the filter, with certain panels receiving complete coverage while others receiving only a highly thinned application or no application at all. Again, the purpose of varying the application is to create subtle shifts in the tone and colors and thus increasing the visual interest of the viewer.
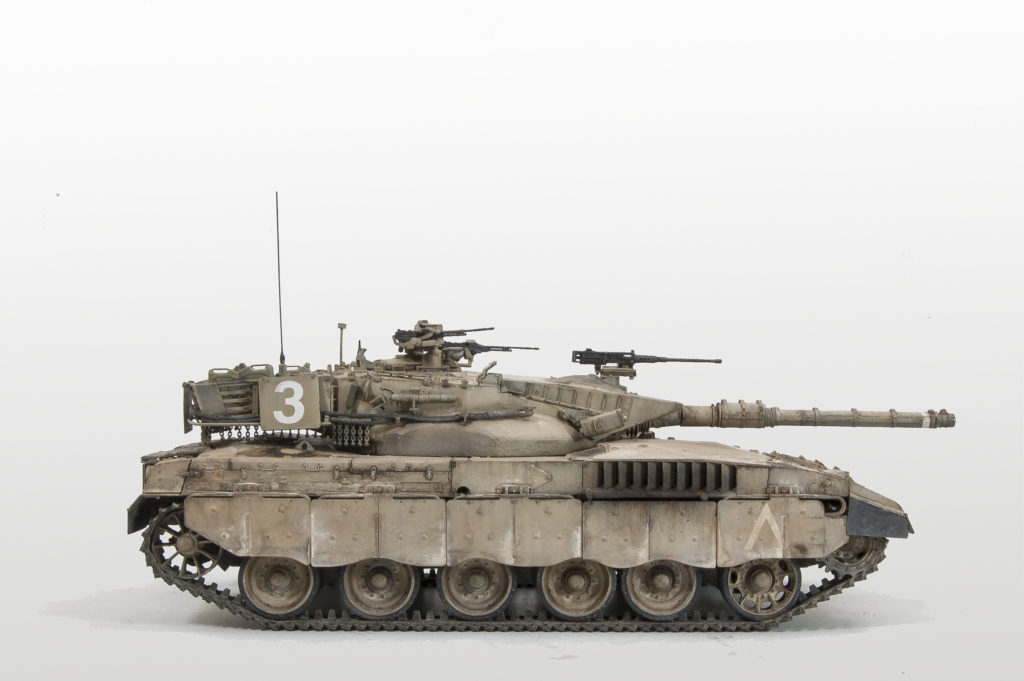
With the base color(s) firmly established it’s time to move onto what I term the “organic” weathering stages – those being the addition of effects related to the environment (dirt, mud, rain, dust, scratches….etc.). If you haven’t already done so, this is the time to settle upon the type of environment that the vehicle operated, and more importantly the final vision that you are working toward. For instance, did the vehicle operate in Europe or the Middle East, will it be wet or dry, muddy or dusty, factory fresh or derelict? 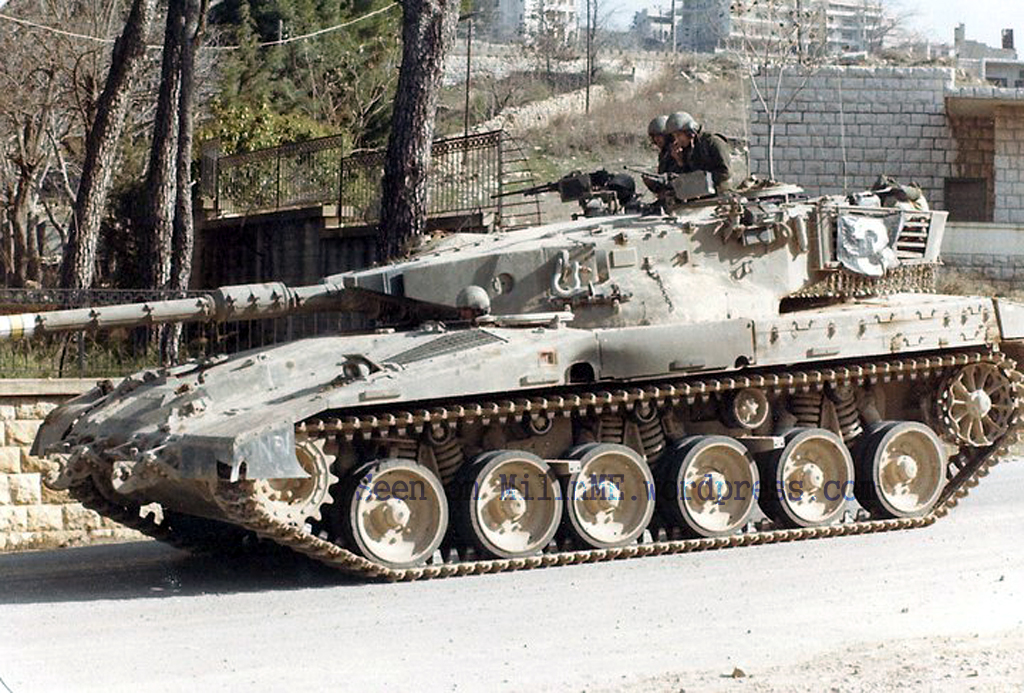 Once I have answered these questions, I can then choose the appropriate materials and application methods. In this case, I have chosen to portray a vehicle as if it is currently deployed and operational. To me, this means that there will be some wear in terms of scratches, but mostly I will be concentrating on creating a dusty, grimy appearance – something appropriate to a vehicle serving a long deployment. Luckily, there are numerous reference photos showing just this type of situation.
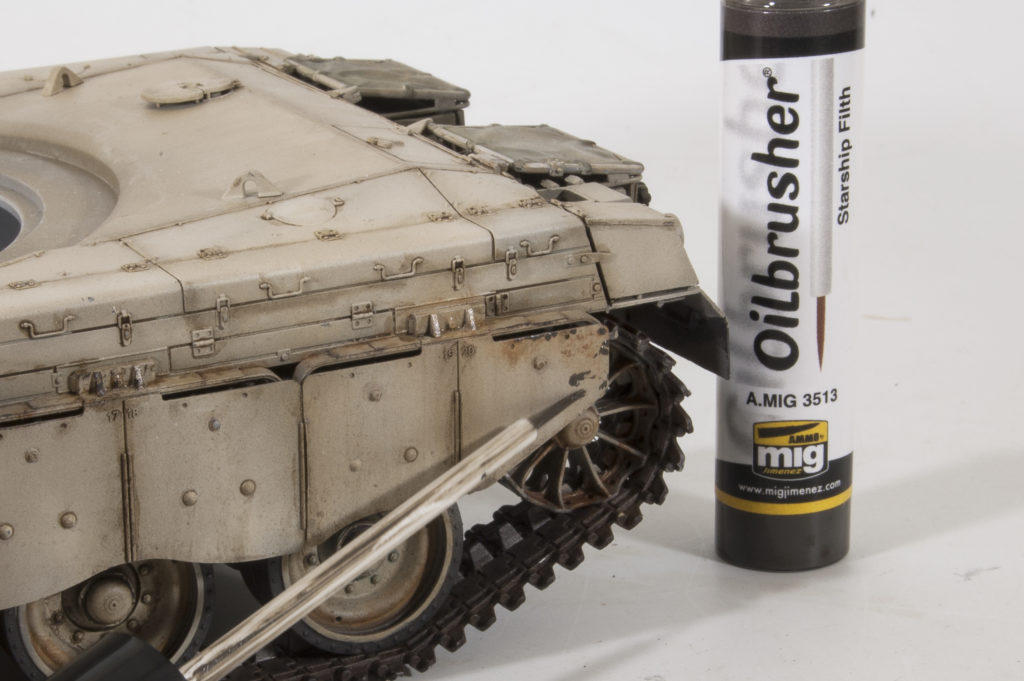
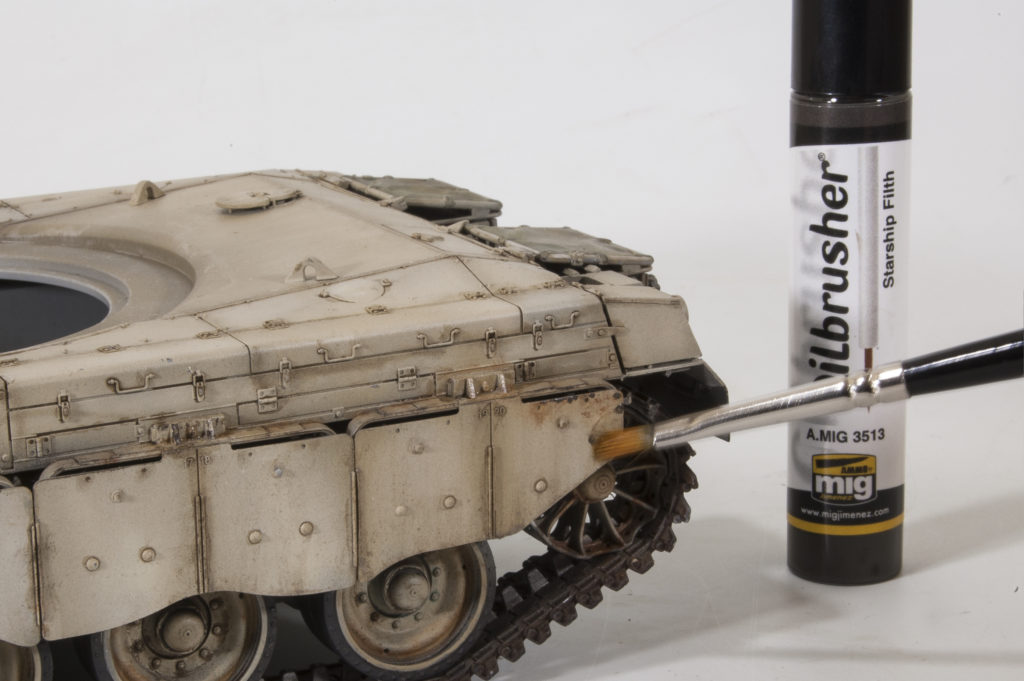
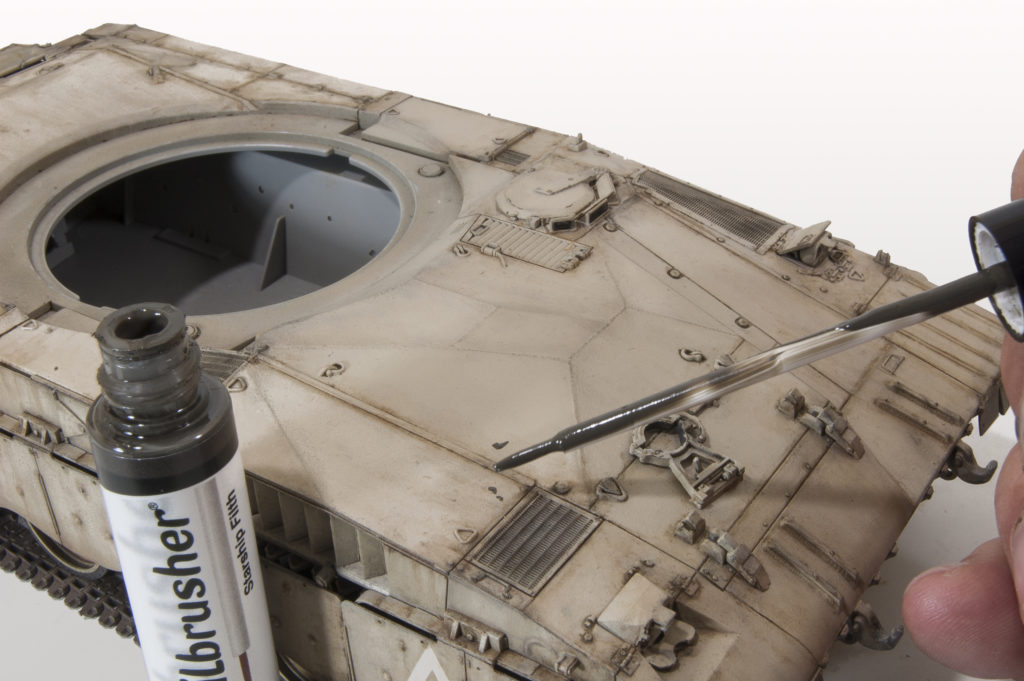
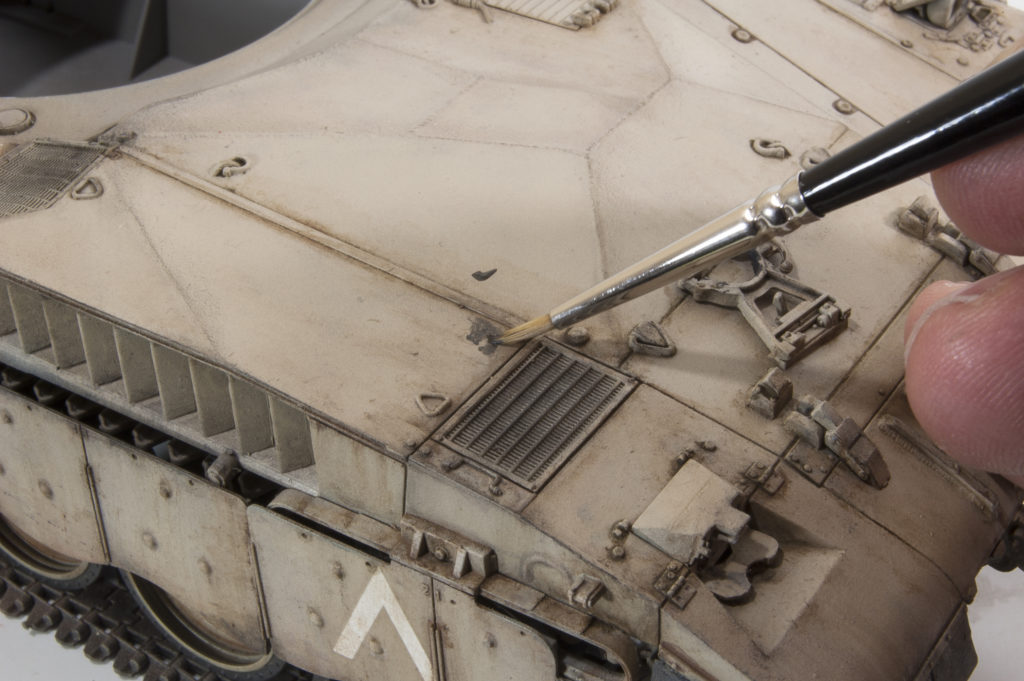
In this next series of photos, you can see how I am applying A.MIG-3513 Starship Filth Oilbrusher color to provide a foundation upon which I can later apply the lighter dusty effects. This is an important step and one that took me some time to understand. Let me try to explain. Creating light colored dusty effects on a light colored vehicle has been a long-time challenge for me, either the effects couldn’t be seen or it looked like my vehicle was bombed in a cake baking factory. By contrast, adding mud or dust to a dark-colored vehicle seemed easier and looked better. Yep, that was the key – contrast. In order for the lighter colored dusty effects to be visible on the lighter vehicle, I would need to create some contrast! In this case, the Oilbrusher color Starship Filth provides the dark base, or contrasting color, upon which I can later apply the lighter dust effect. I use the Oilbrusher colors much the same as any artist’s oil – by first pre-moistening the surface with thinner and then applying small dabs of paint. While the Oilbrusher does come with it’s own application brush, I chose to use my regular paintbrushes when working the paints as I feel I have better control. I used this same color applied with dry-brush technique to “highlight” the vehicle’s edges and surface features in order to simulate wear and add definition.
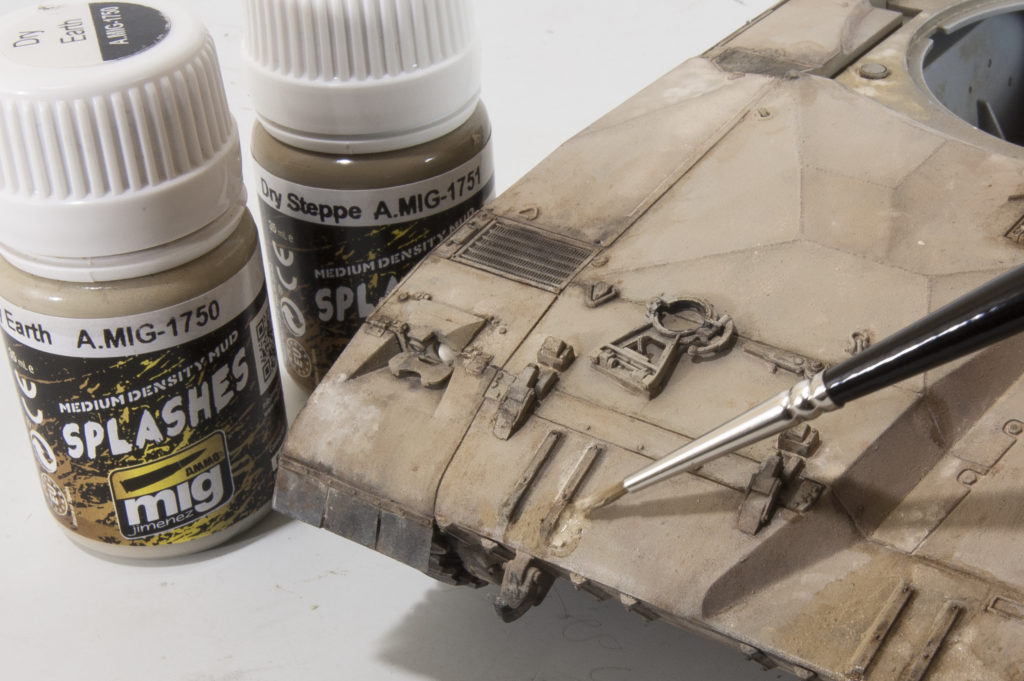
Again, looking at my references I noticed that while certainly dusty, many operational vehicles also had quite substantial accumulations of crusty, caked-on dirt/dust in certain areas. This looked cool and certainly caught my attention, but how to do it? I found part of the answer by playing around with the AMMO Splashes Effects. These paints are unique in that they have a type of filler, or binder within that promotes 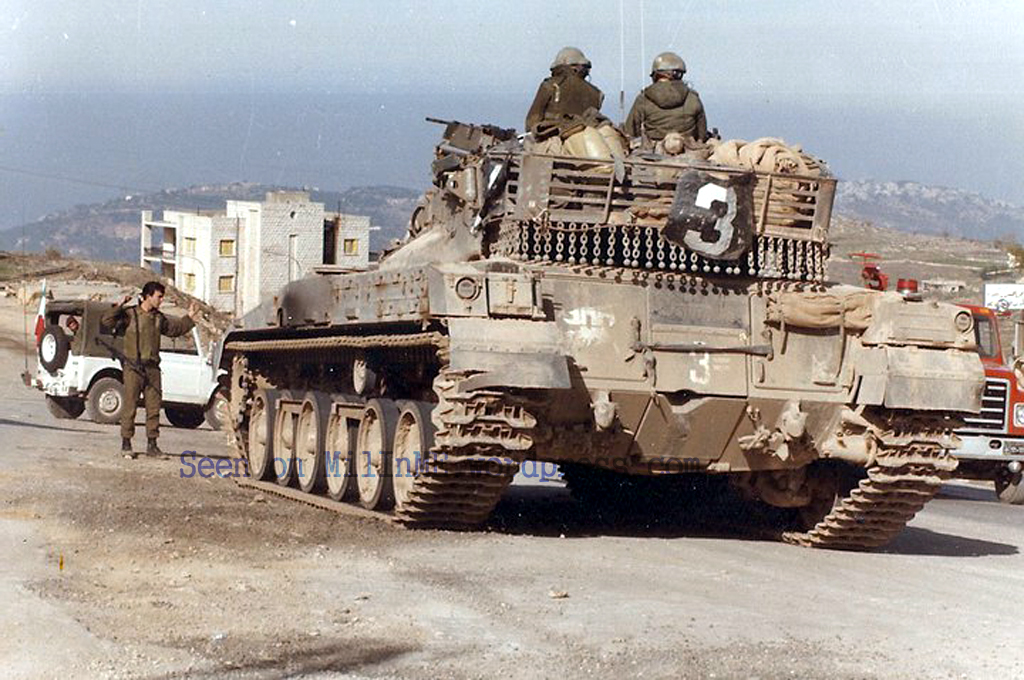 thicker accumulations – think of them as paints mixed with a paste. Generally, they are applied by either flicking the paints off of a brush or blowing the paint from a brush using the airbrush. While either of these techniques can create very interesting and realistic effects, they lack the precision that I required. However, I found that I was able to thin these effects using odorless thinner to varying consistencies and then apply them using a small brush. In this case lightly thinned paint was applied (repeatedly) in areas that I wished to show the greatest accumulations, highly thinned paint is used to demonstrate lighter accumulations. In all cases, either highly thinned or thick, once dry the Splashes effects provided me with the extra texture and grittiness that I was looking for. In other areas, dusty effects were created using more traditional methods, in this case by a light application of A.MIG-3523 Dust Earth. Again, dots of paint are applied onto a pre-moistened surface and then worked using a traditional brush. As before differences in effect can be achieved by the amount of thinner used – including nice feathered edges and/or wind-swept effects.

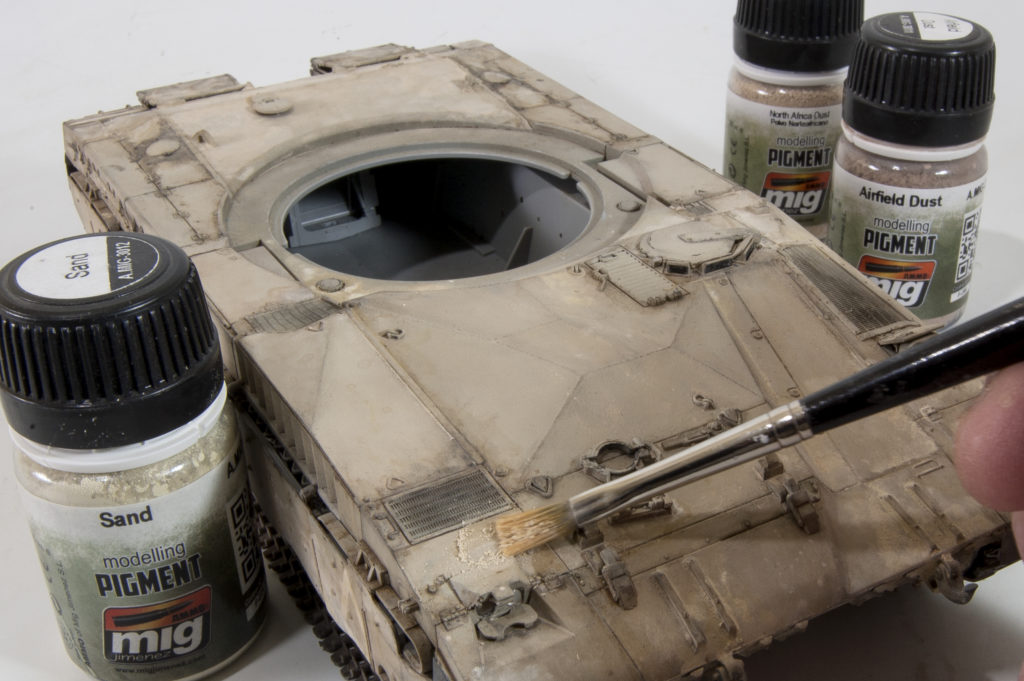
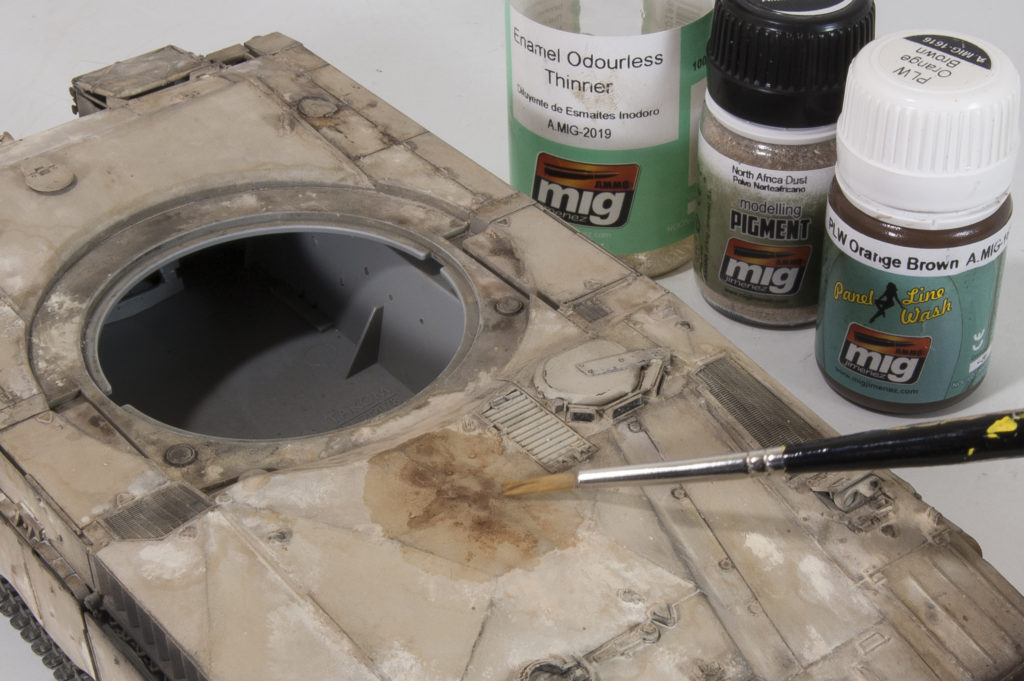
It is also possible to take the traditional application of oils a step in a different direction. While the paint is still wet I tap in pigments, blowing off the excess. Once dry the paint acts as an adhesive, or fixer, for the pigments. This process can be repeated if heavier accumulations are desired, or the pigment colors changed (or blended) to create added interest or effect. For instance, darker colors might be applied first over a larger area, followed by narrower applications of a lighter color. This will give the appearance of moist earth overall, with smaller areas of drying dirt. Merkava – Again, looking at references a good number of vehicles have quite significant fuel stains – a super nice feature!!! For me, creating fuel stains is always a cumulative process of different materials and layers. This photo shows the primary effects I used to create these stains, however, also know that I used drops of Track Wash and varying oil colors as well. Basically, I just keep playing with it until it looks right!
Speaking of stains, references also show a common area of staining on top of the front hull. While I don’t know for certain what’s the cause of these stains (they appear to be oily), my guess is that from the main gun – either a 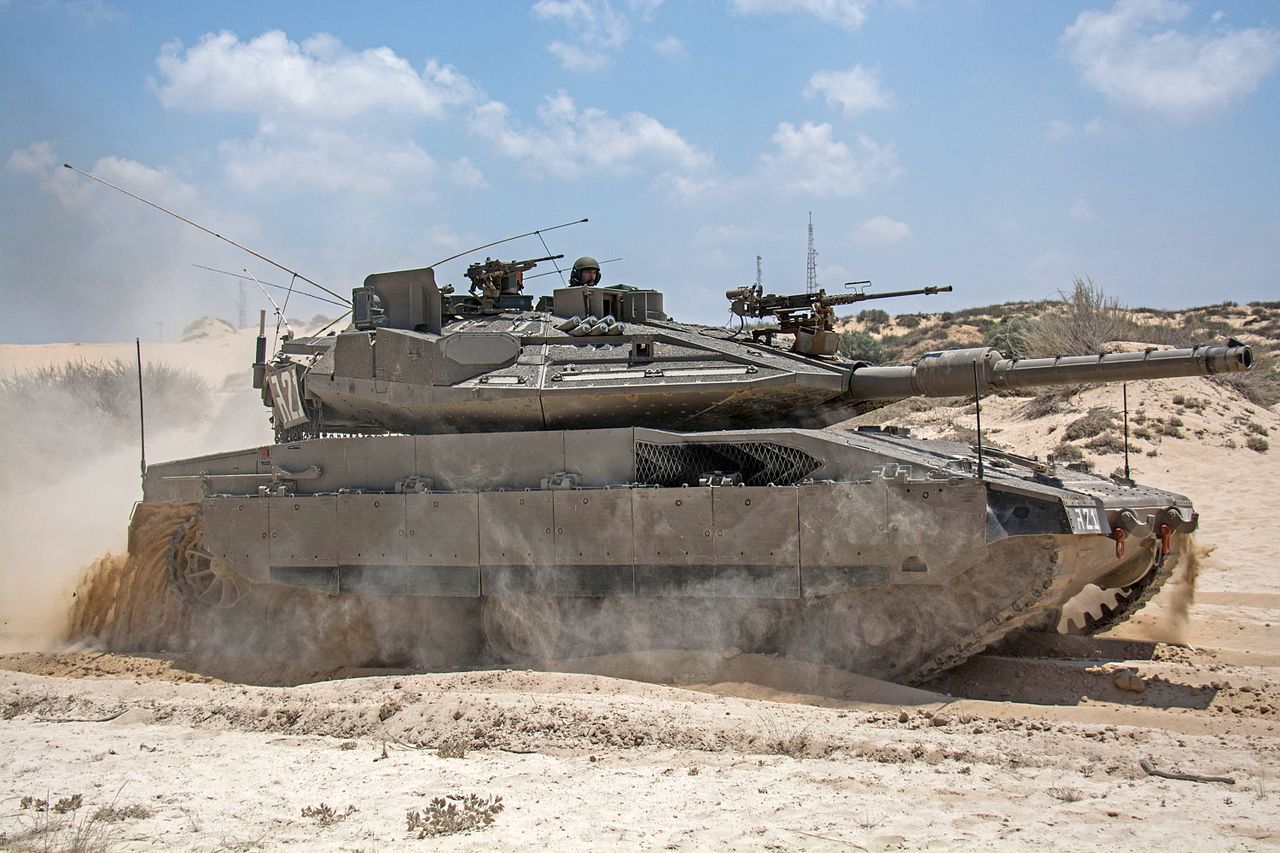 result of maintenance or firing. Again, some of the materials used are displayed in the photo but know that this was again another of those back-n-forth processes until I found the look I wanted.
Also of note is that in certain photos there is an unnatural look or harshness of the dust effects. Often when I am doing the weathering, I am just positive that I have just ruined the model – as some of the photos clearly show it just looks…..well, not good. This is when I need to take a deep breath and remember that it is a process and trust that things will come together in the end. In this case, the next steps of the process were to add more of the dust effects in certain places, blend or feather in others and remove in others. The point is don’t panic. I always need to remind myself of this and simply press on.

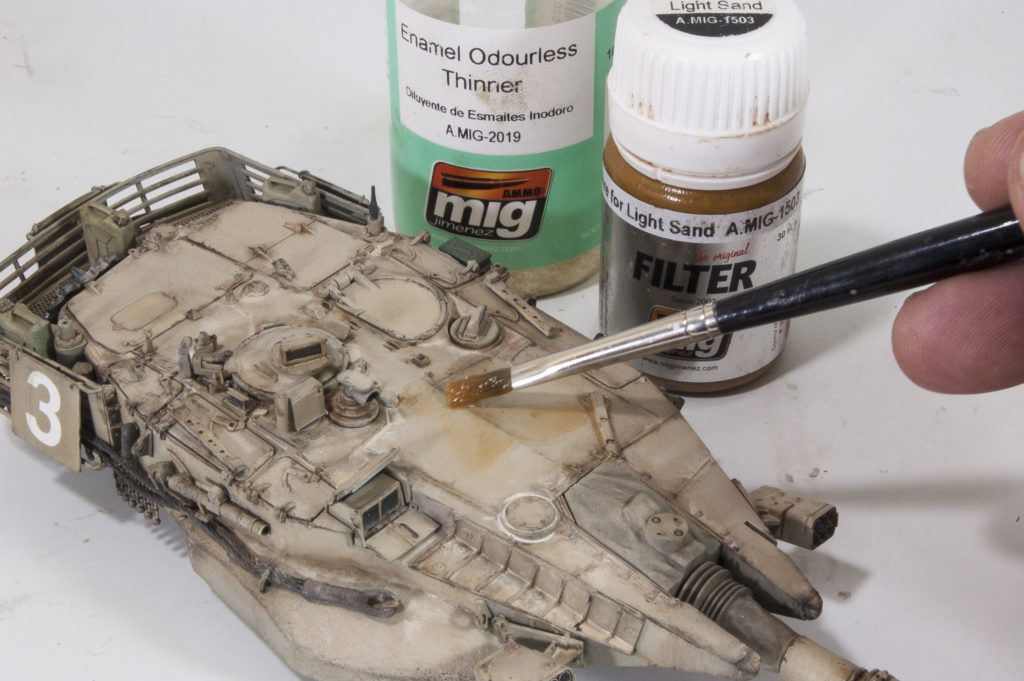
The question then becomes, “how do you know when you are done?” For me, I seem to get to a point where either I have run out of ideas and things to do. I begin to take a more critical look with an eye on the final results, rather than the next step. It’s at this point that I work to refine the small details, clean-up any unwanted stains or misplaced effects, etc. In this particular case, I got to a point of feeling nearly finished with what to do next, but I still had a sense that it wasn’t quite tied together yet. I set the model aside for the evening and came back to it the next day. It was then it hit me that a final filter (overall) might do the trick. Again, looking at references I noted that a number of photos show that the dust on these vehicles has a distinctive orange tone. With that in mind, I held my breath and applied Ochre for Light Sand filter overall, including over the pigments and splashes effects. At first, I was sure that I had ruined the model this time, but as the filter dried the hard orange color softened and I was left with a nicely unified finish. Trust the process!!
![]()