
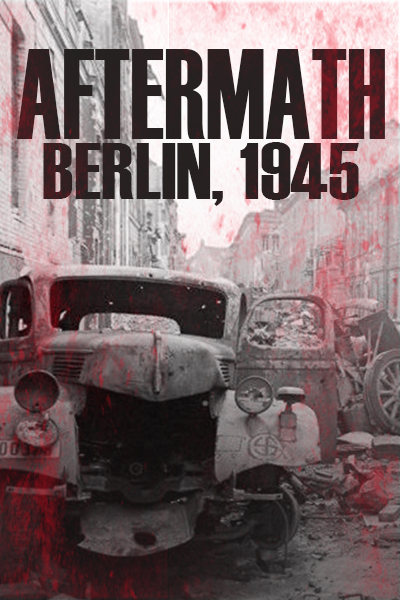
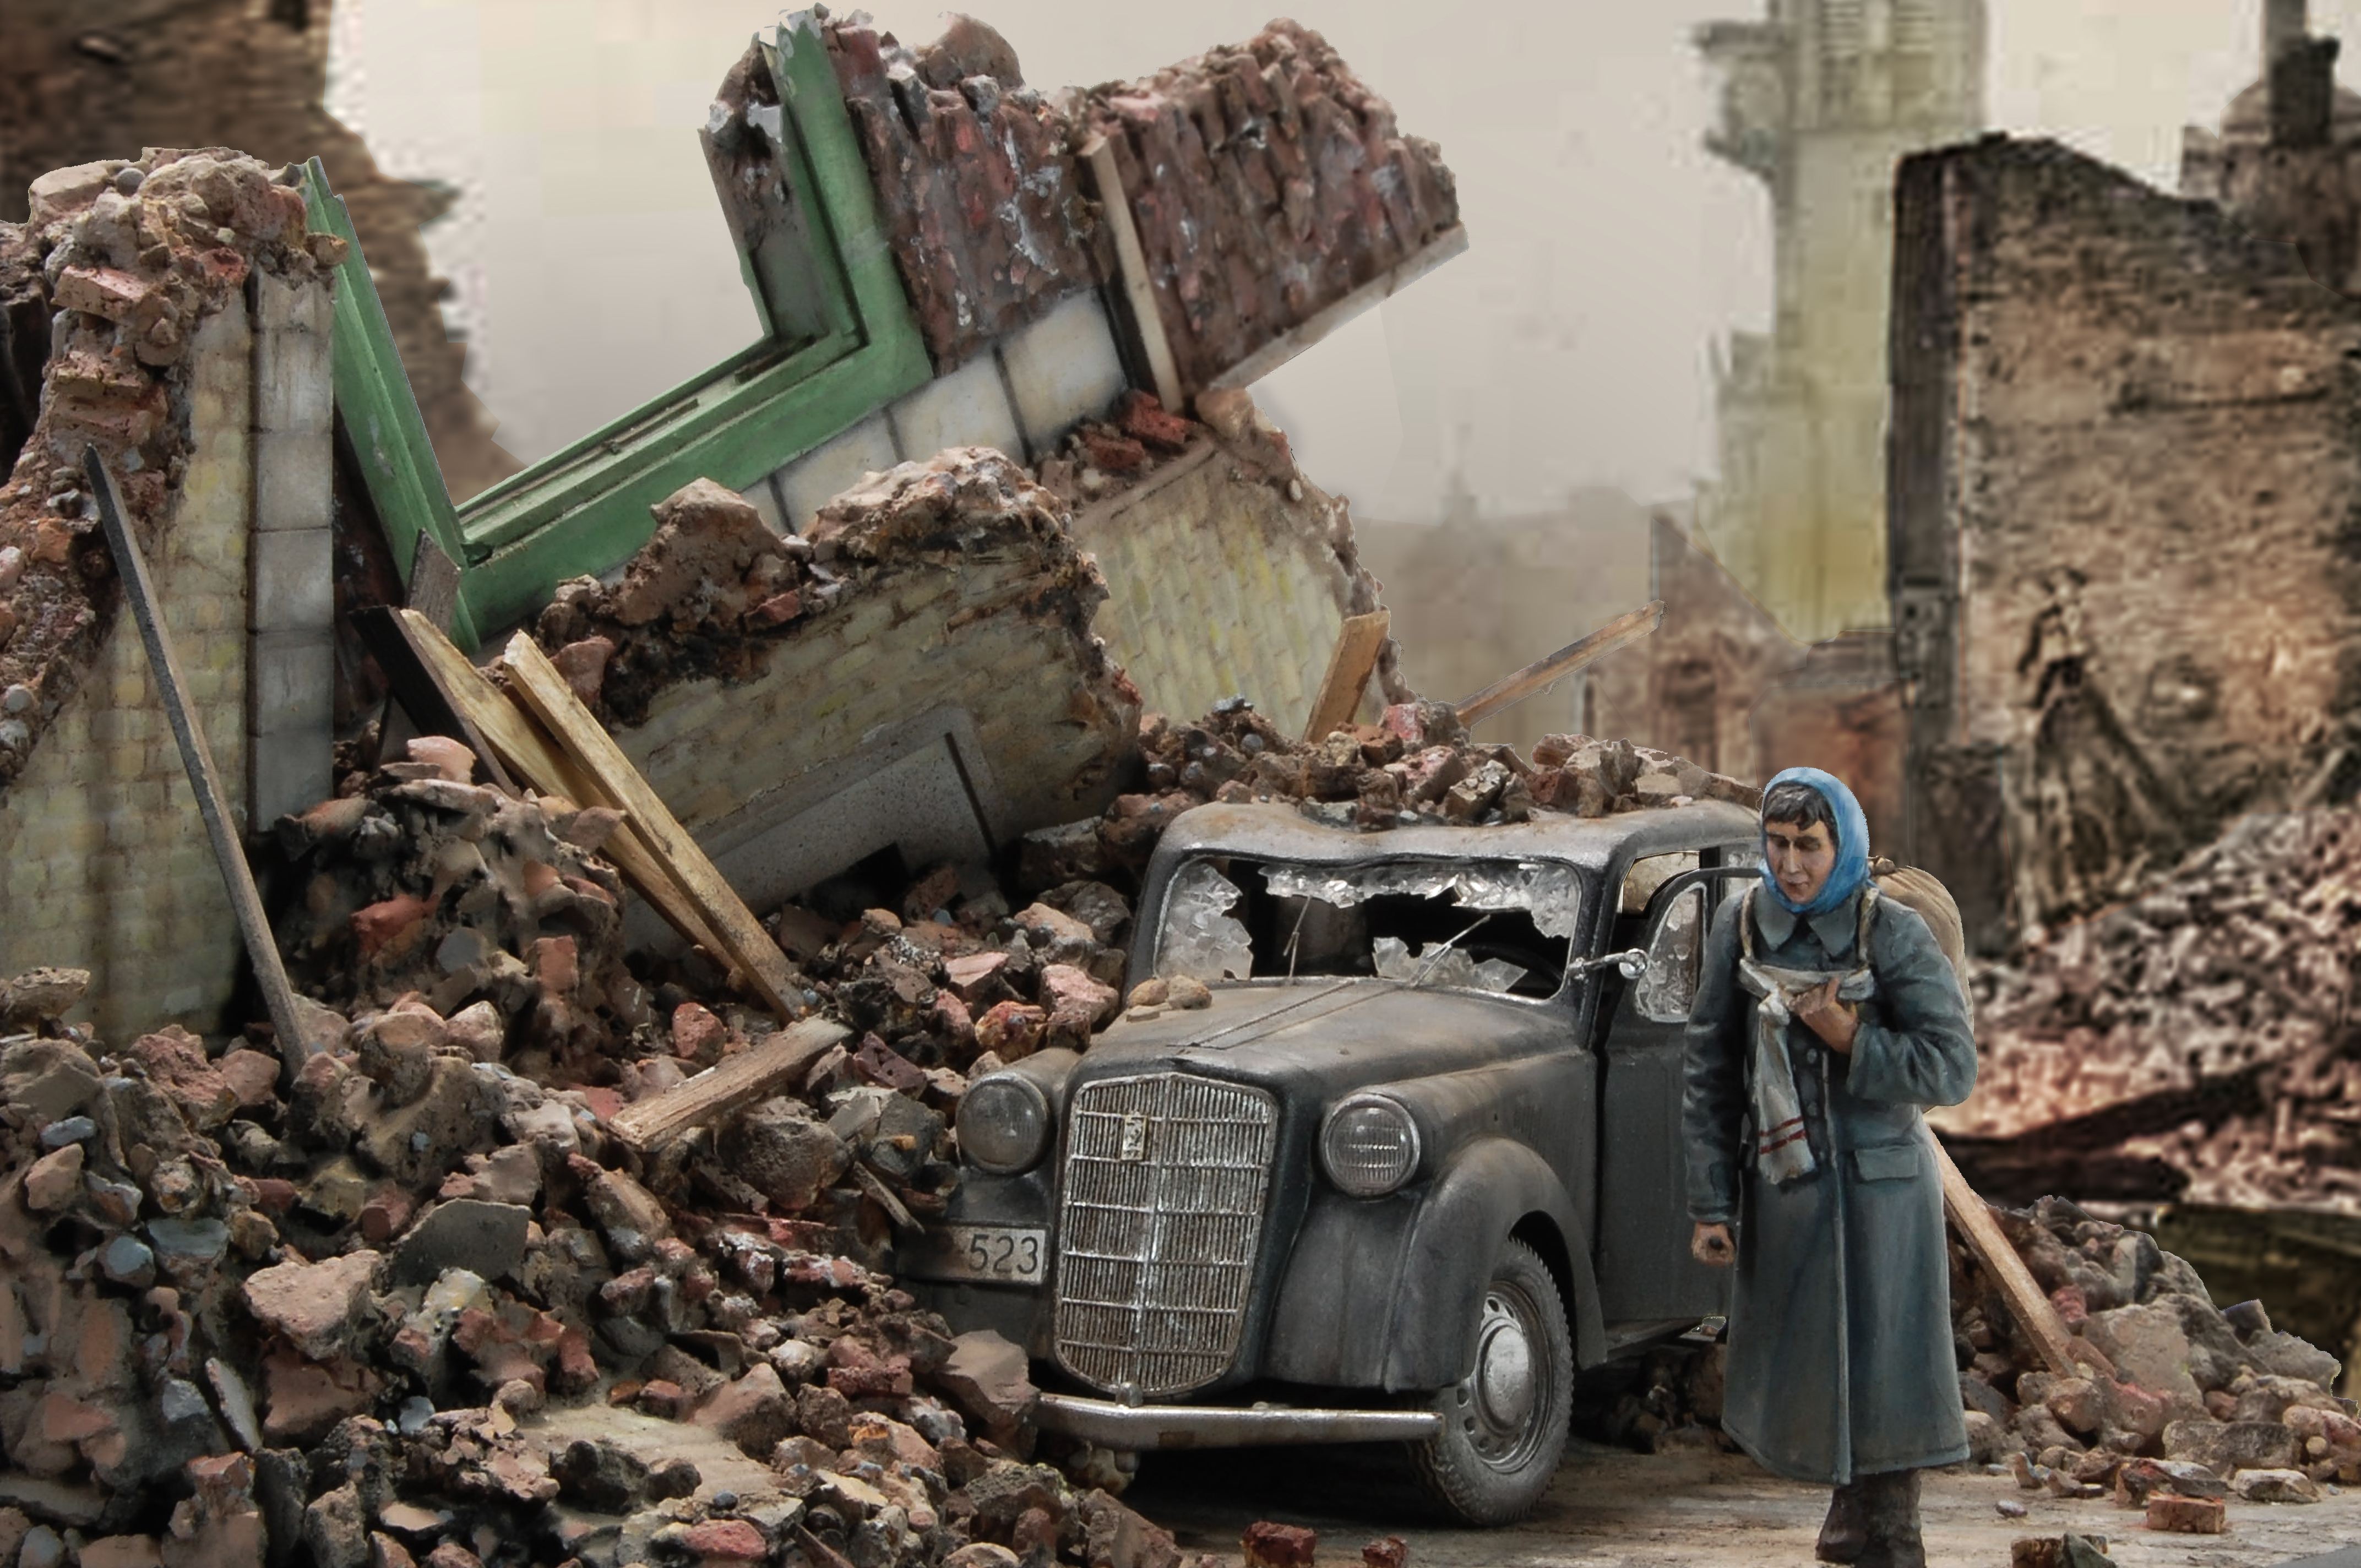
 The “all clear” sirens wail as the morning sun casts a diffused glow over the smoldering ruins of the shattered city. The Thousand Year Reich has become a wasteland; fear and desperation are the new realities for its citizens. From shelters and basements throughout Berlin, those fortunate enough to survive the past nights’ air raid return to their routine of existence in this desolate wasteland.
This scene portrays Berlin as it might have been in the closing days of the war – or perhaps just after the war has ended. The Battle for Berlin ended on May 2, 1945, and whether this  scene takes place before or after that date is really a difference without a distinction for the inhabitants of the city. For them, their reality is the desperate hopelessness of defeat. Aftermath.
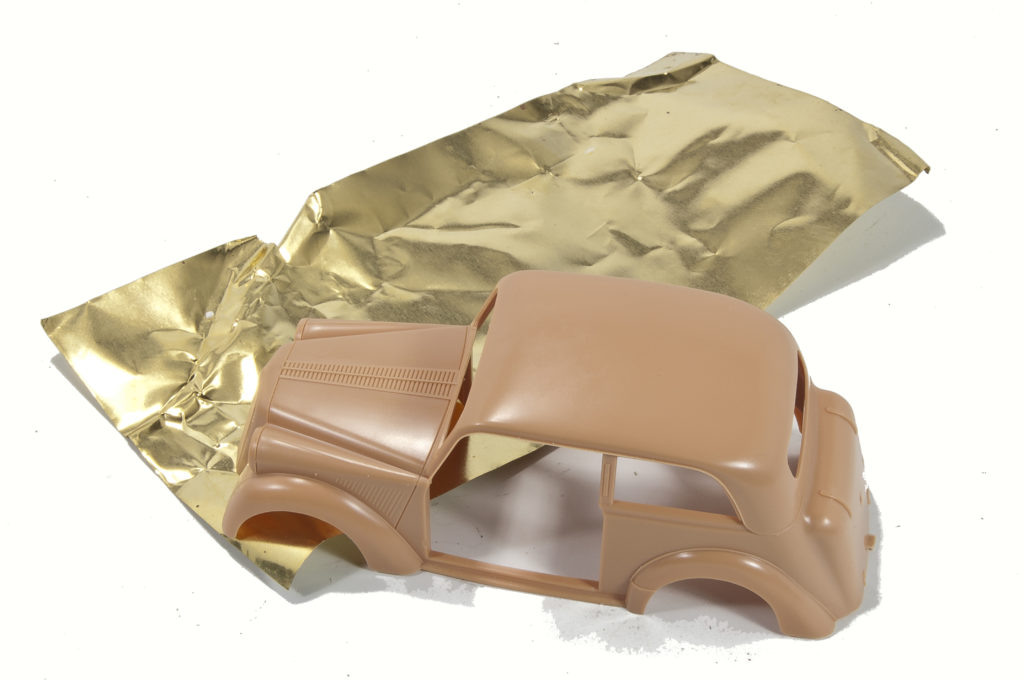
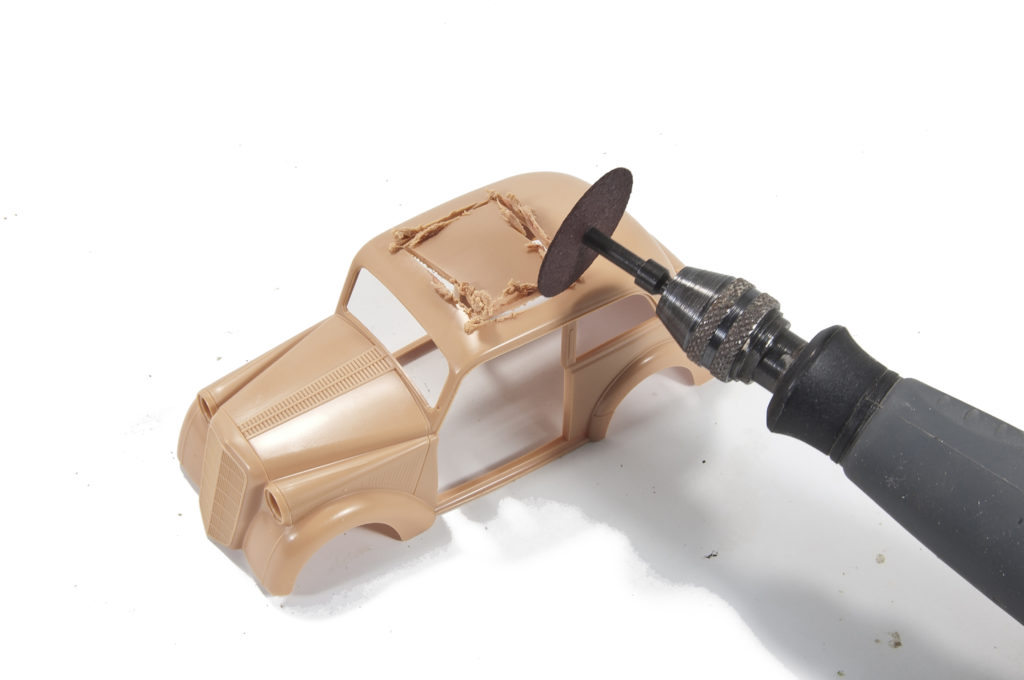
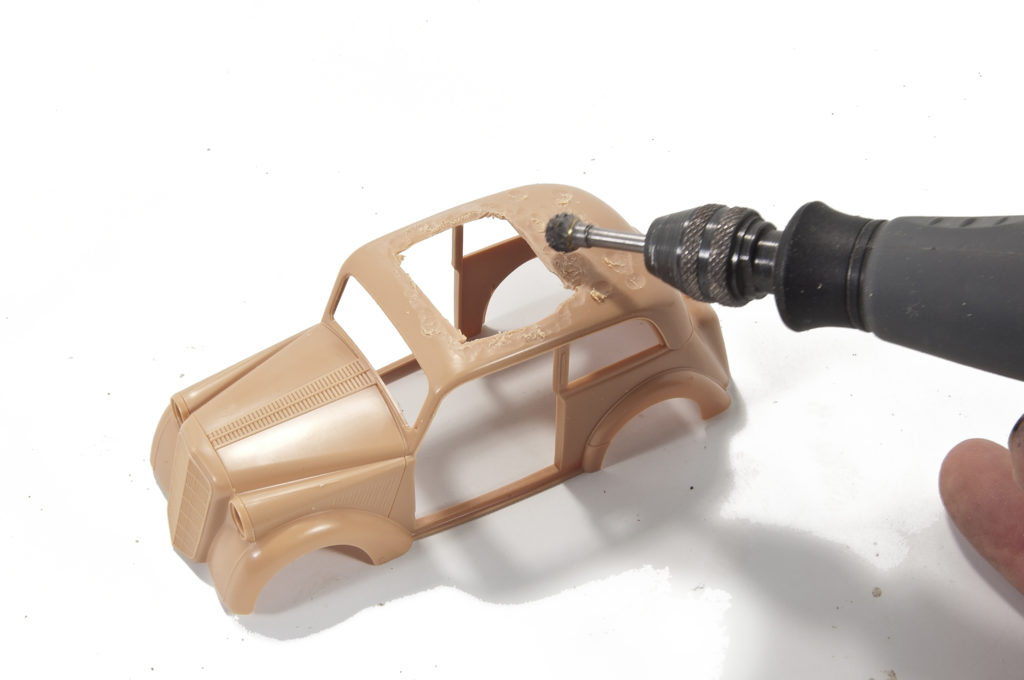
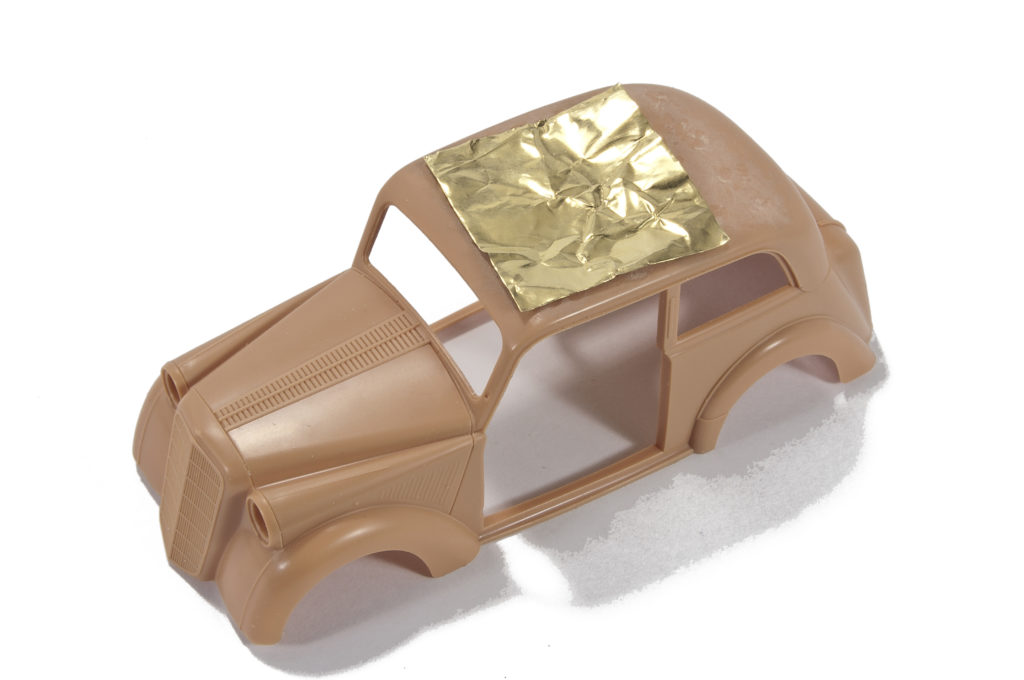
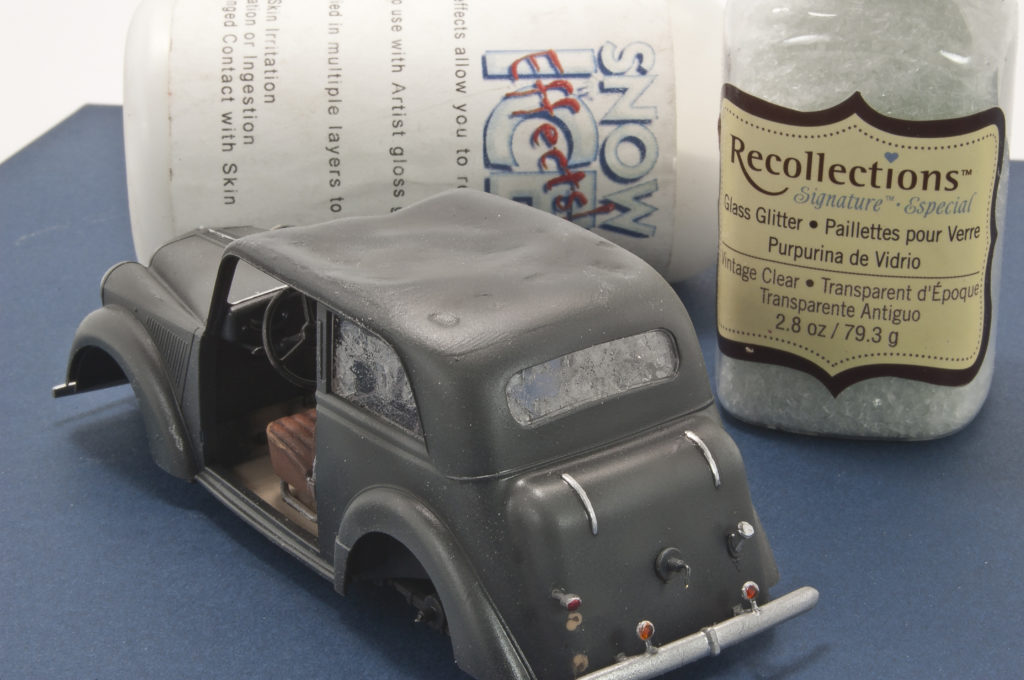
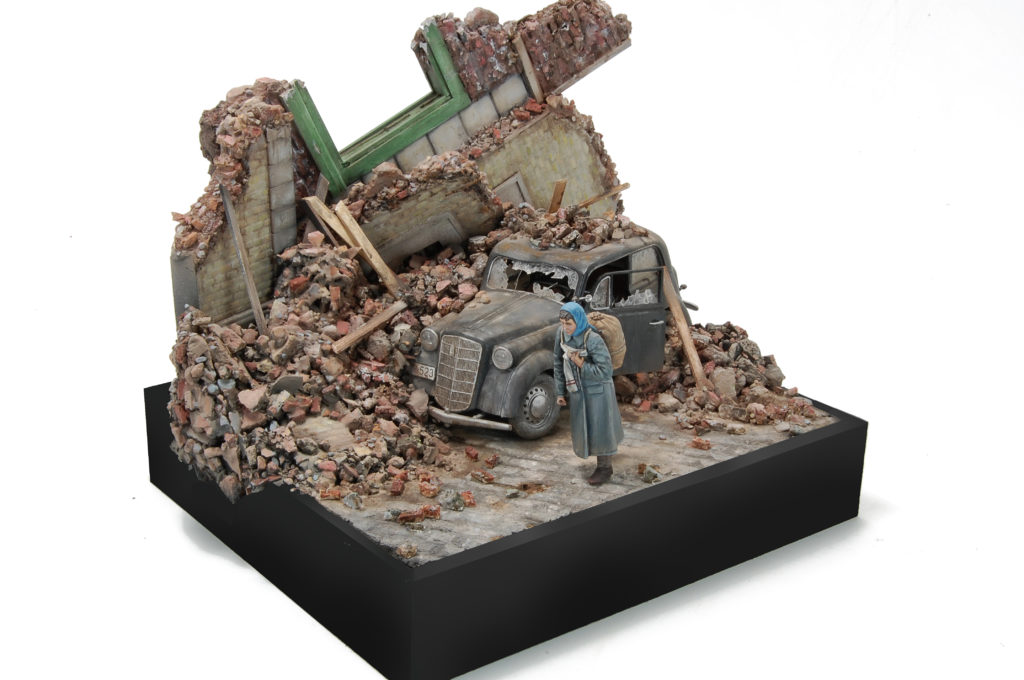
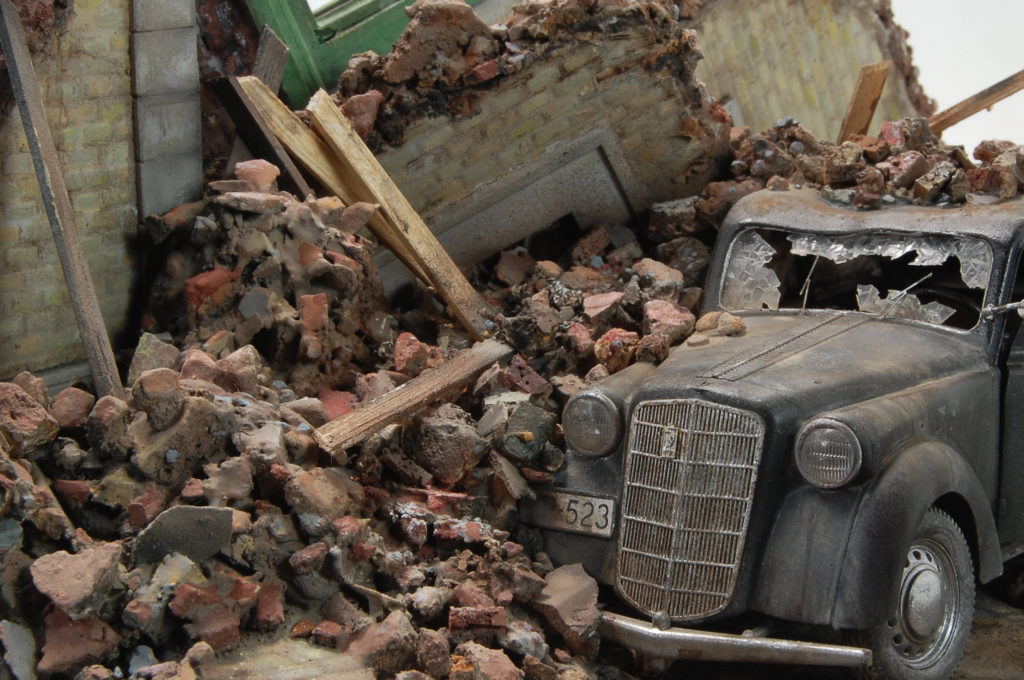
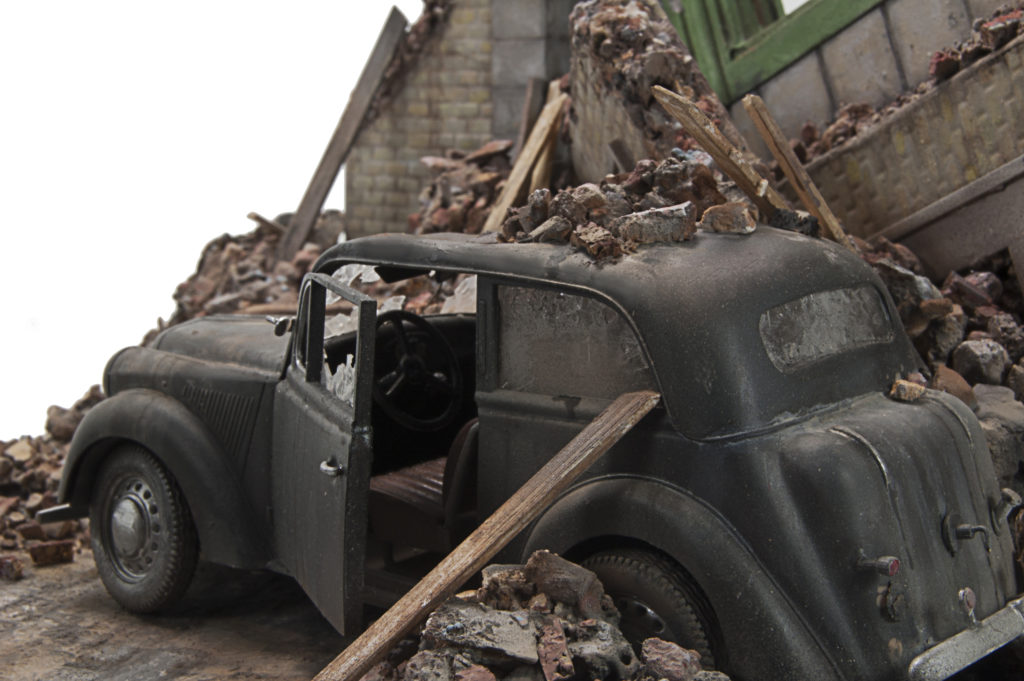
The Saloon Car from Bronco will be one of the focal points of this small Berlin vignette. To better convey the wreckage caused by the bombing, I want to show a portion of the car’s roof crushed by the fallen rubble and so in order to do this, I’ll replace an area of the plastic roof with a thin brass sheet. The plastic is removed using the cutting wheel on my Dremel tool and then the rough edges are cleaned-up and a few extra “dents” are added to the plastic.
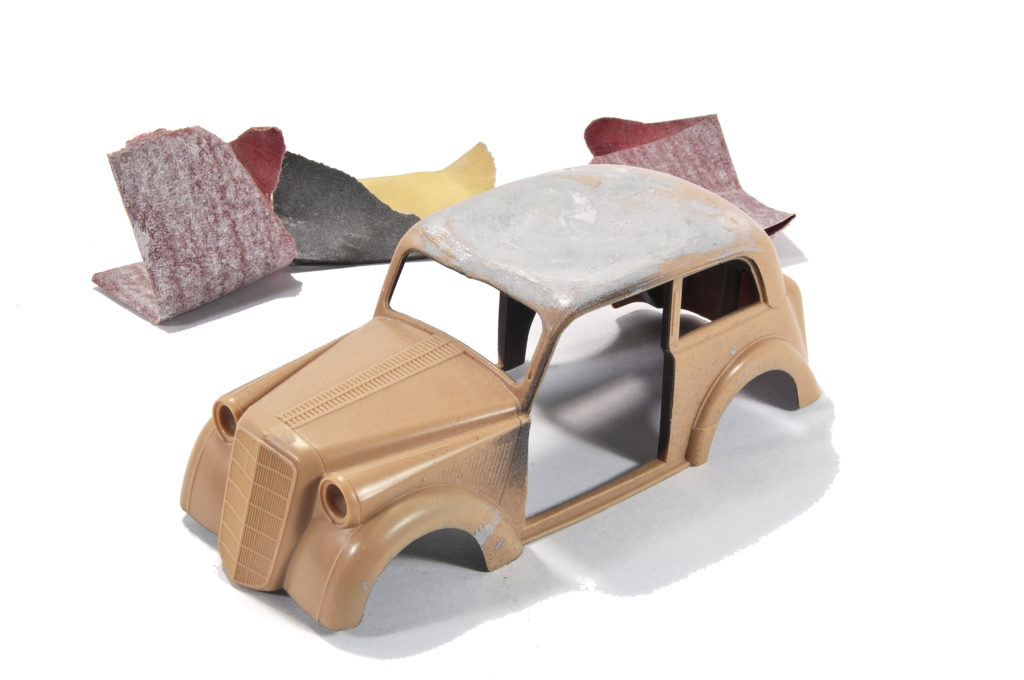
A small square of the sheet brass is sized and cut to shape to fit into the cut hole, and then glued to the interior side of the roof so as to make the blending of the two surfaces easier. Now begins the back-n-forth process of adding Mr. Surfacer as filler, blending the damaged roof with the remaining plastic portions with repeated sanding and filling.
Broken Glass
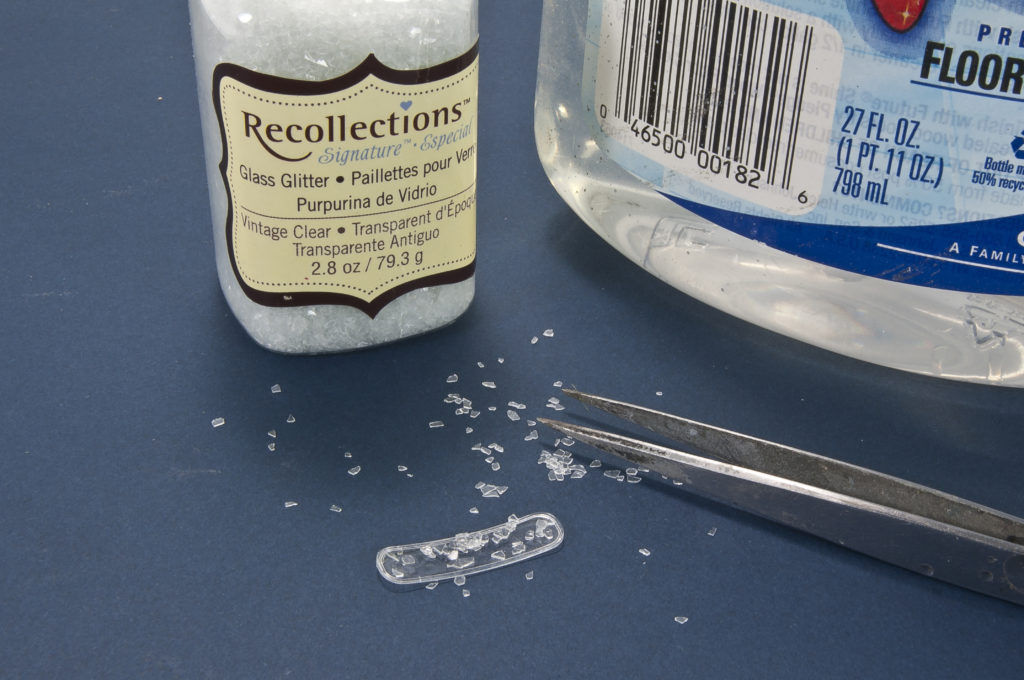
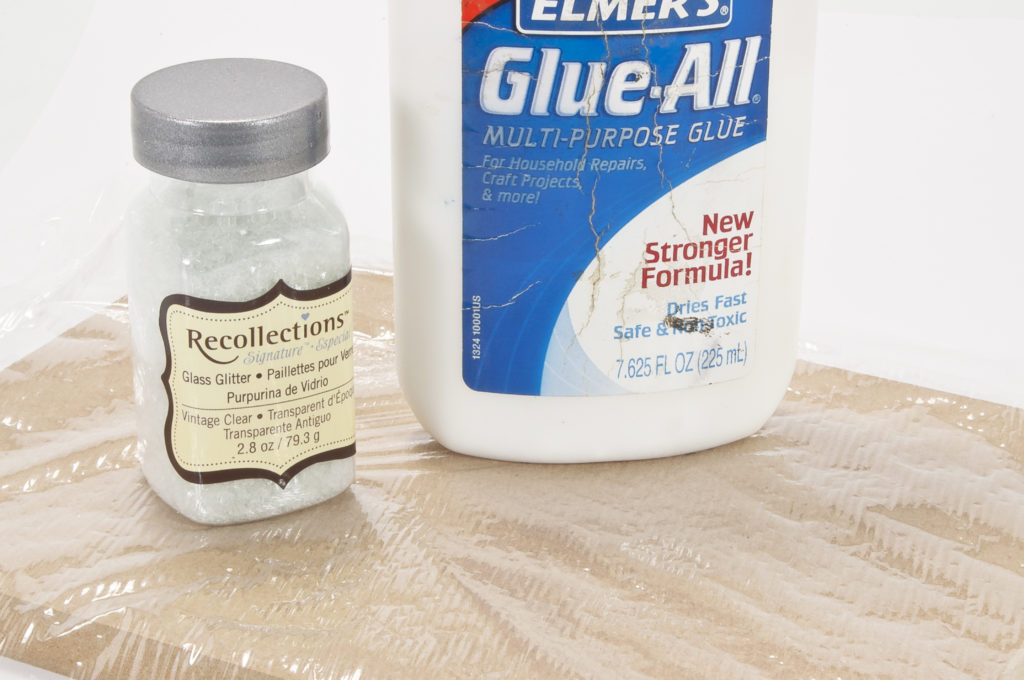
Now for the tricky part. I wanted to show the windows of the car broken and shattered, however, most of my previous efforts have been less than satisfactory and usually involved scribing scratches on the clear parts or cracking the clear parts. For this model, I decided to experiment and found a couple of different solutions using the same products. I began by brushing Future floor polish onto the interior side of the rear window, and then sprinkled Glass Glitter (found at the local craft store) onto the surface. While the Future was still damp, I sprinkled a light dusting of snow effects to create a slightly cloudy appearance. Once the Future polish had completely dried the “shattered” windows were installed into the car.
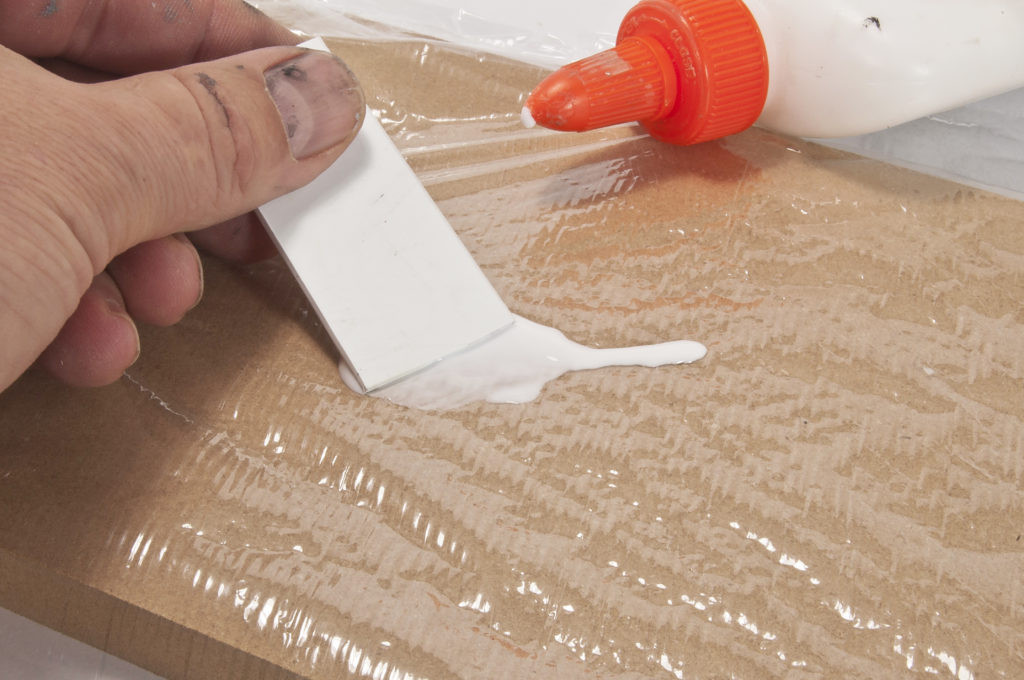
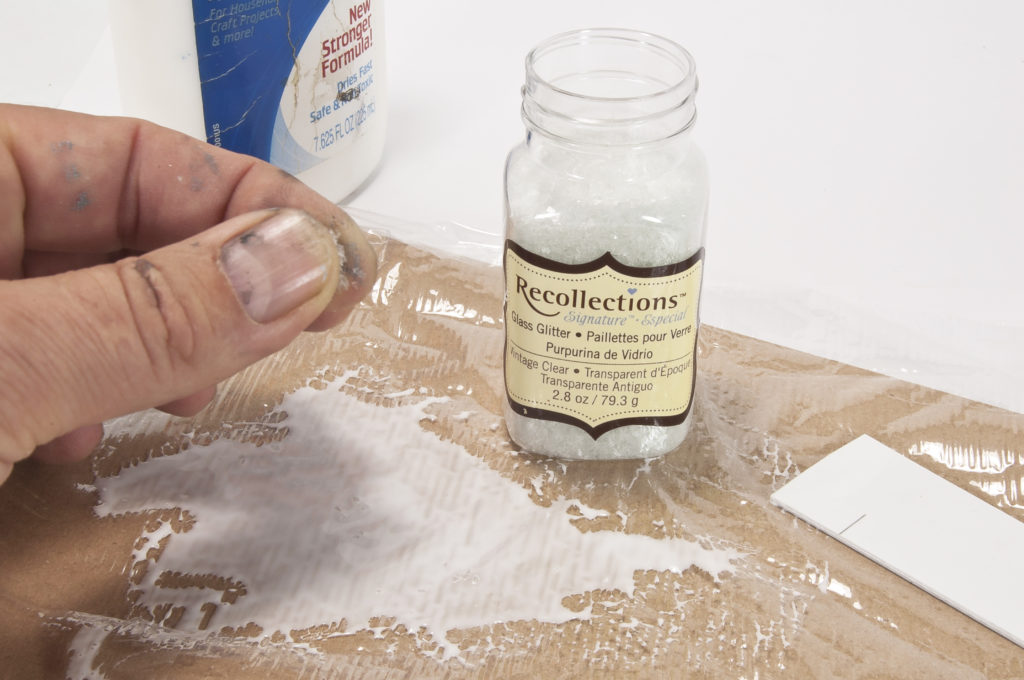
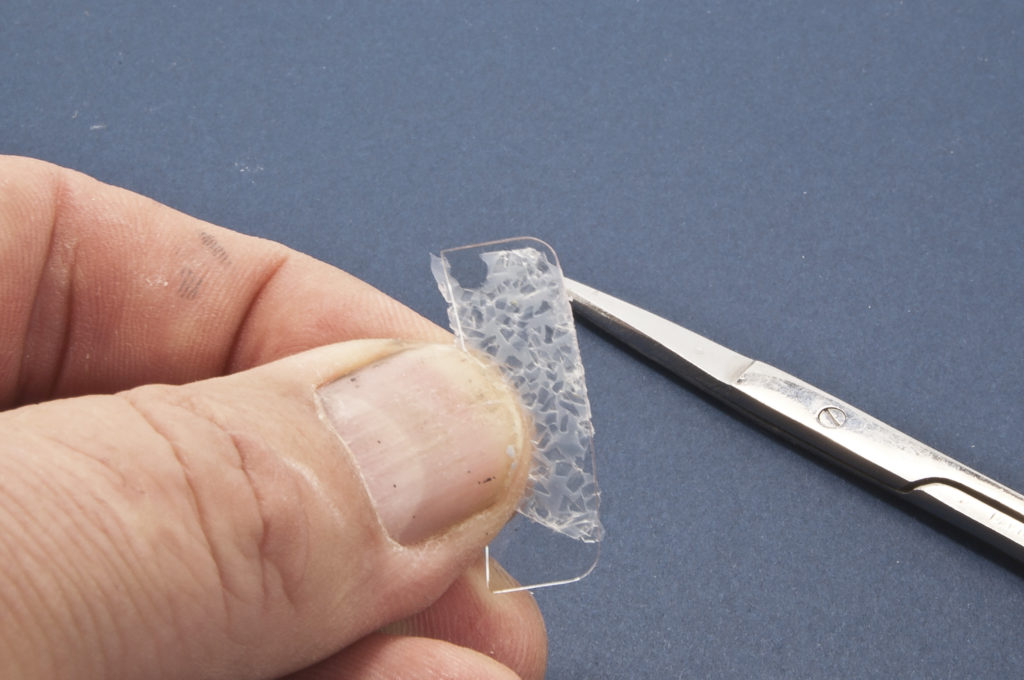
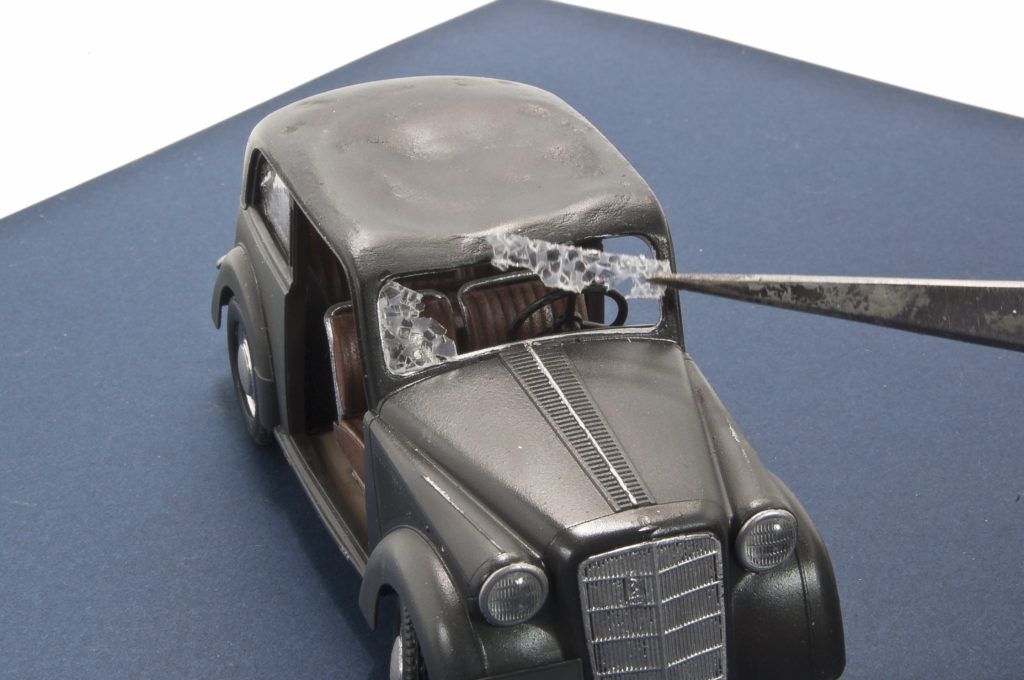
For the front windscreen, I wanted a different appearance – the window totally broken out. To do this, I decided to use the same Glass Glitter to replicate the broken glass, but instead of simply gluing it onto the clear parts, I went about creating a “new” broken windshield.  To begin, I laid a sheet of plastic wrap onto my work surface, spreading white glue to a thin layer onto the plastic wrap. Once again I sprinkled the Glass Glitter, this time onto the thin layer of white glue, and then the glue was left to dry for a couple of hours. Once the glue has dried I peeled a layer off from the plastic wrap and then cut the “new” windshield to shape using the kit part as a template. Sections of the fractured window are then glued into place, again using the white glue as it dries clear. Broken glass is also added to the side-door windows.
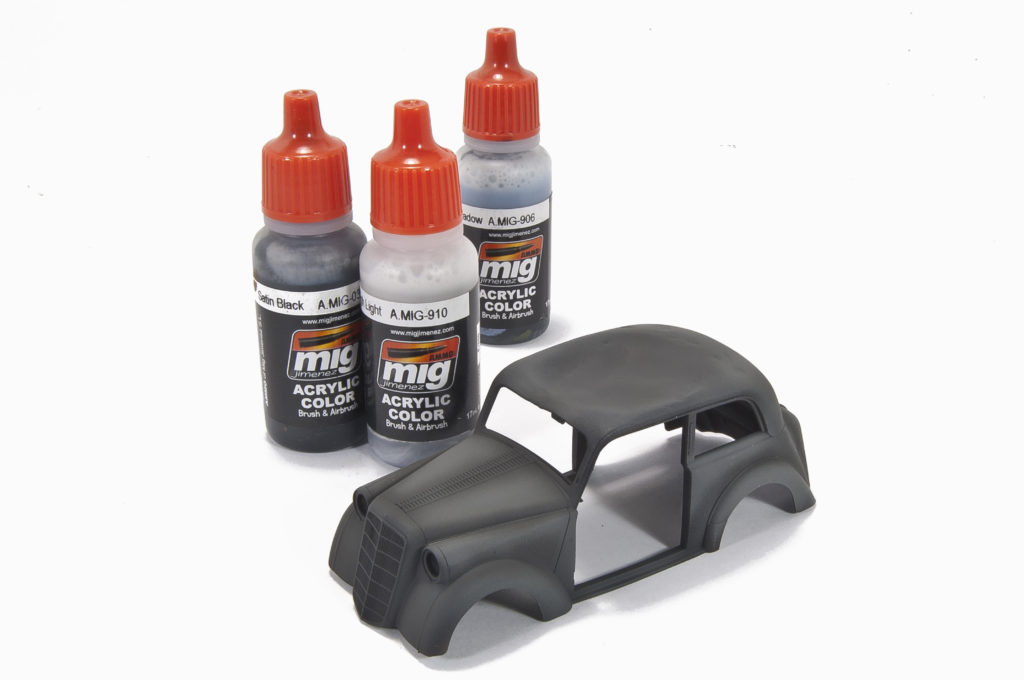
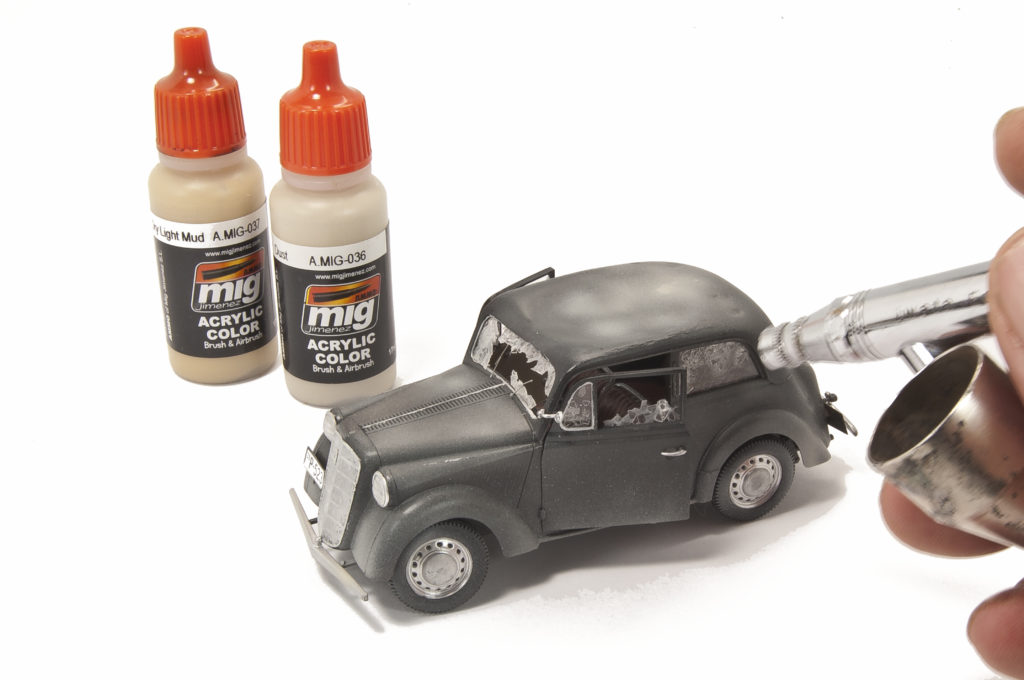
Before setting the car aside to work on the diorama base, I airbrushed a light foundation of dust using the light tan colored acrylic paints. I will work more on the weathering of the car a little later as the scene is completed.
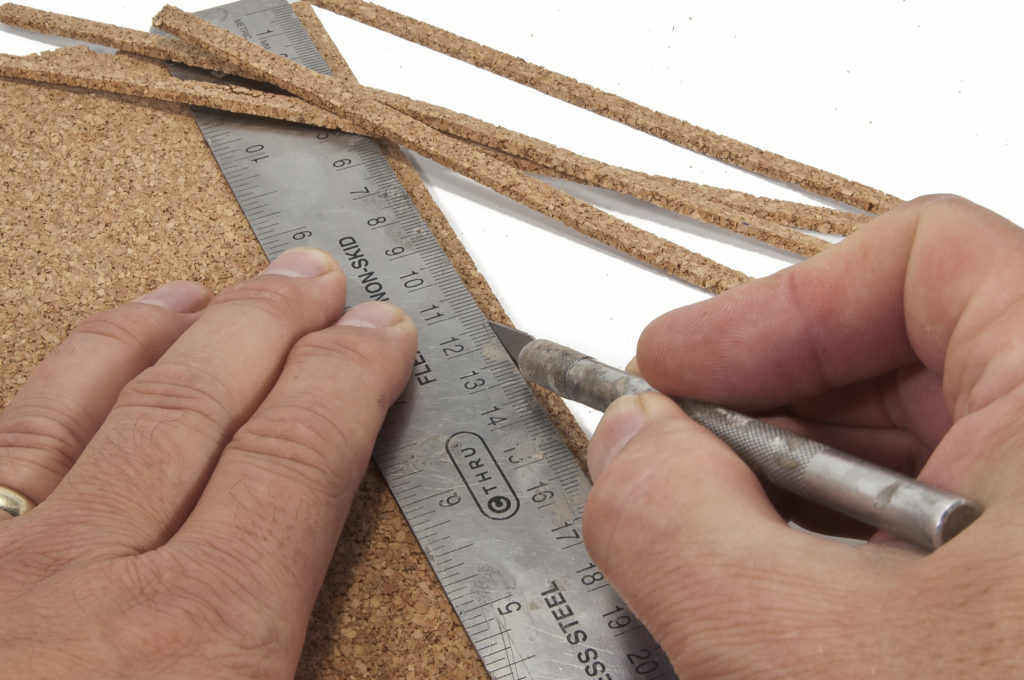
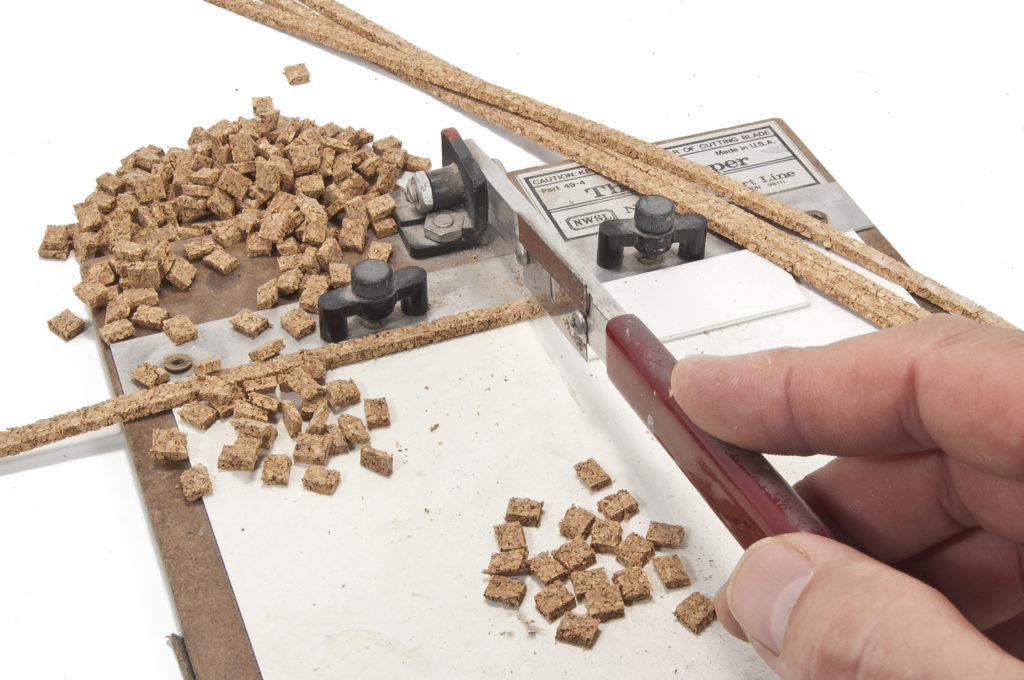
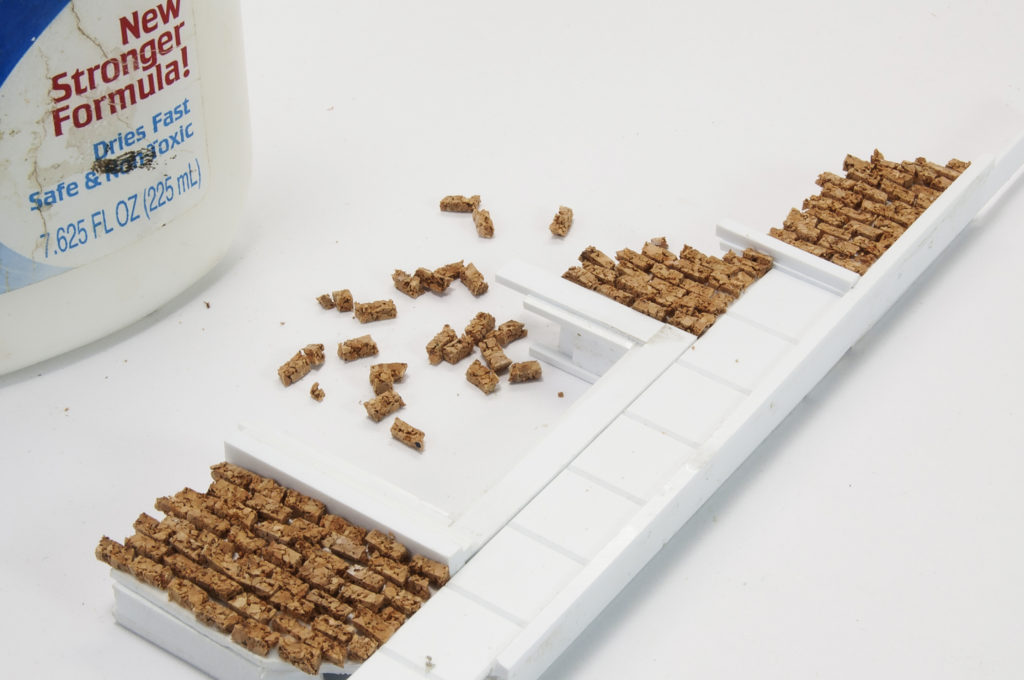
Now I begin working on the small, urban scene. Although I have a pretty good idea of the final layout there are still a few elements that I haven’t quite settled on at this point. Not too worry, just get started and it will come together – right? One thing that I know for sure is that I will need are a lot of cobblestones for the street. I begin by making long strips from thin cork material, cutting them into uniformed lengths using The Chopper – a very handy tool for doing this type of work.
Cobblestones & Bricks
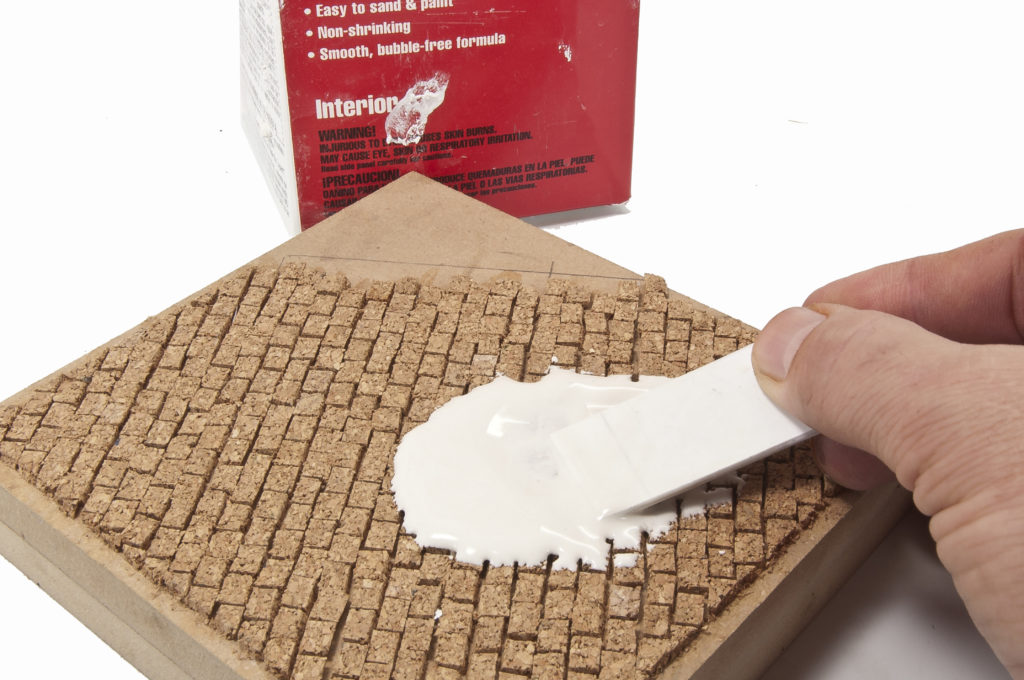
The baseboard is selected for its size and then a rough grid pattern is drawn out for a guide. The Cobblestones are glued to the wooden base using white glue, the drafting tools aid in the alignment. Once the cobblestones are set and glued in place, mortar (made from plaster) is spread over the cobblestones and into the cracks. The entire area is covered and then set aside to dry.

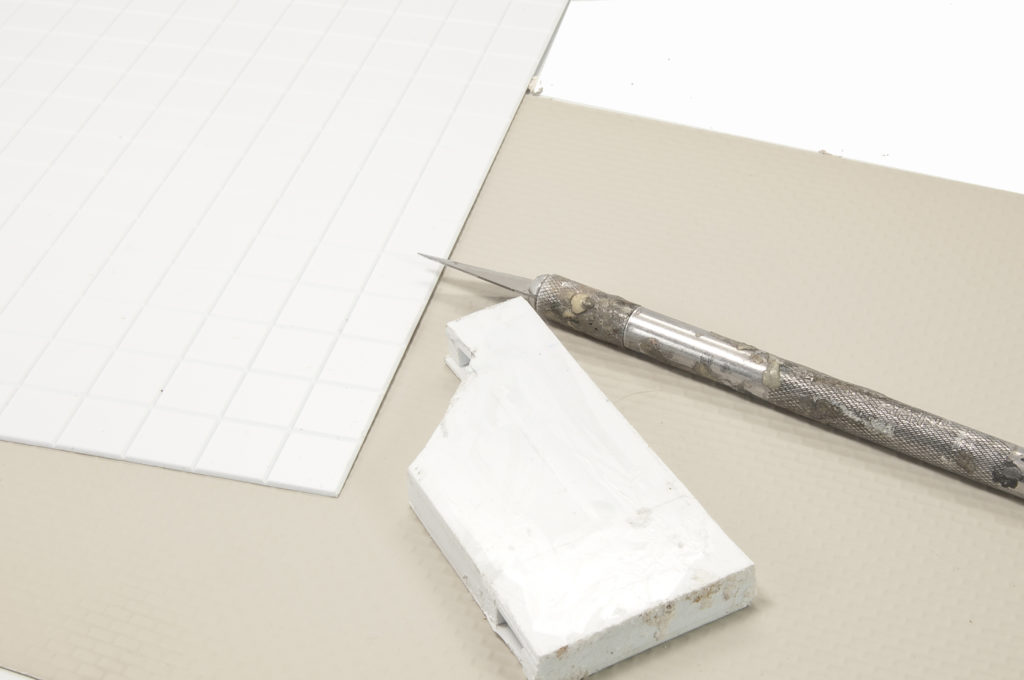
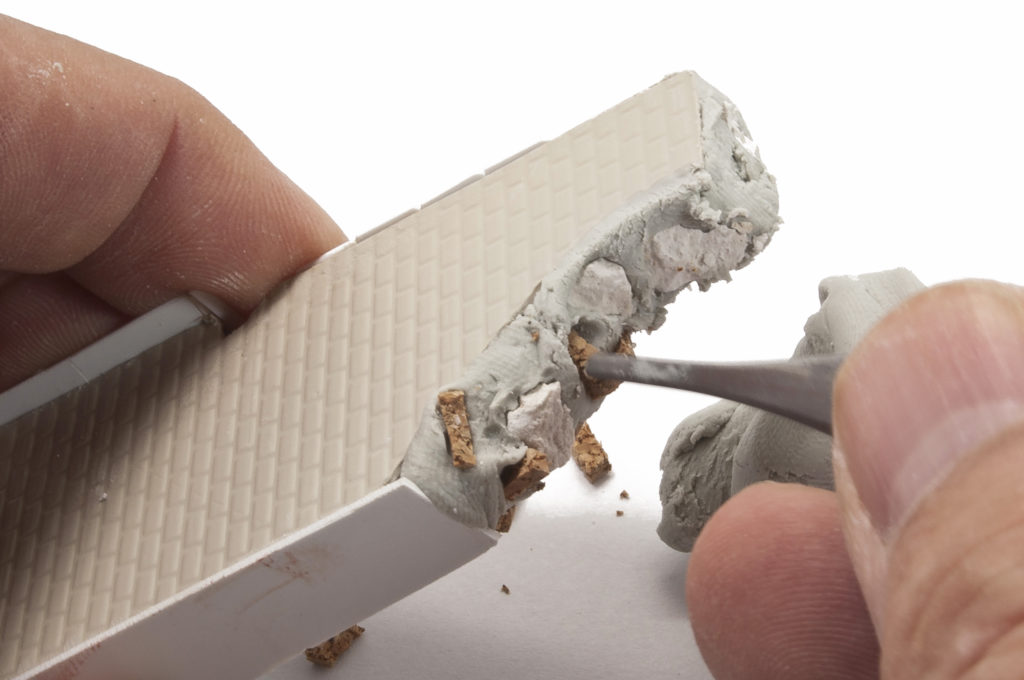
As you will see, the building ruins are really no more than small sections of walls that give the impression of complete buildings and ruins. To aid in the exterior detailing I made use of brick-patterned sheets of Evergreen plastic. This particular section will receive some of these squares to mimic larger cornerstones. Bricks were added to the face, again using patterned sheets of plastic. The broken mortar is created by pressing cork brick and bits of broken plaster into Magic Sculpt.
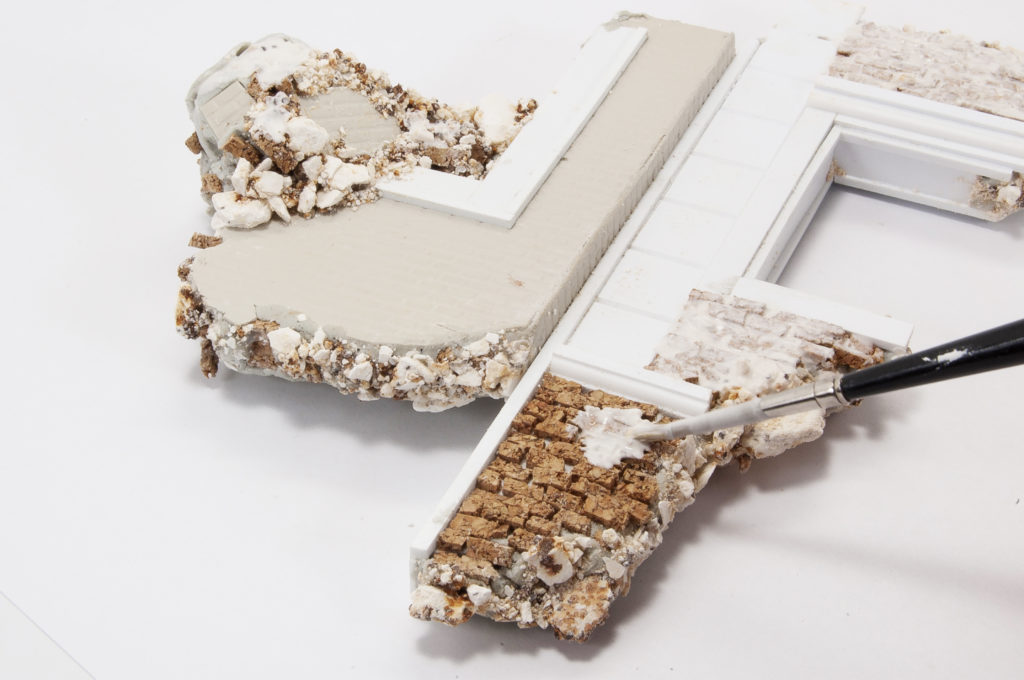
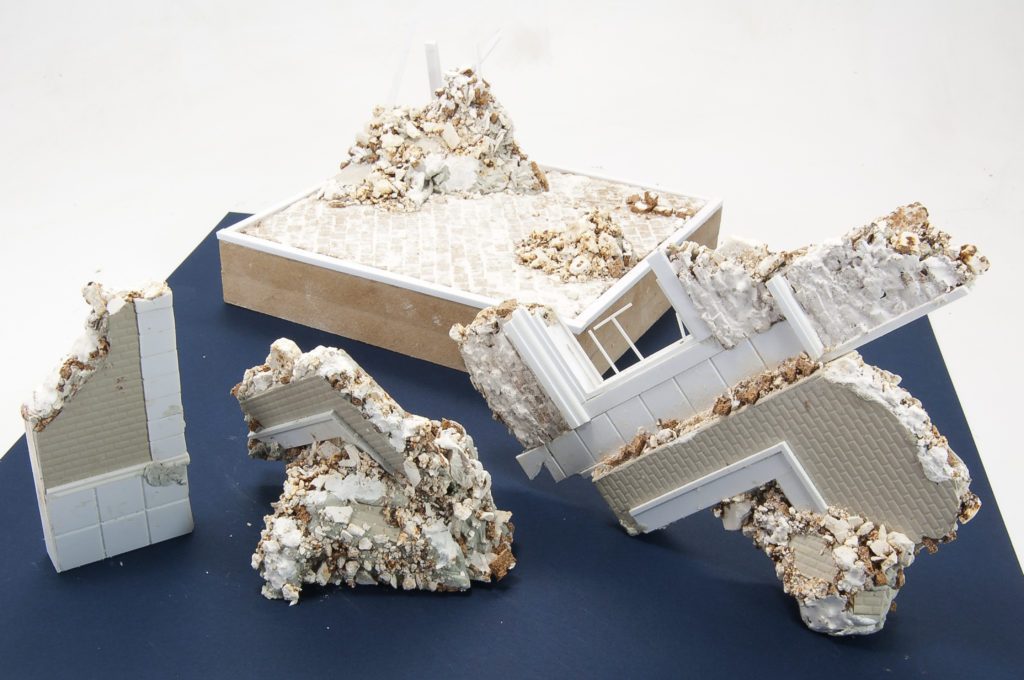
To add some variety to the scene a second type of surface was fabricated by laying cork “bricks” for the facade rather than relying only on the patterned sheets. Plastic strips are 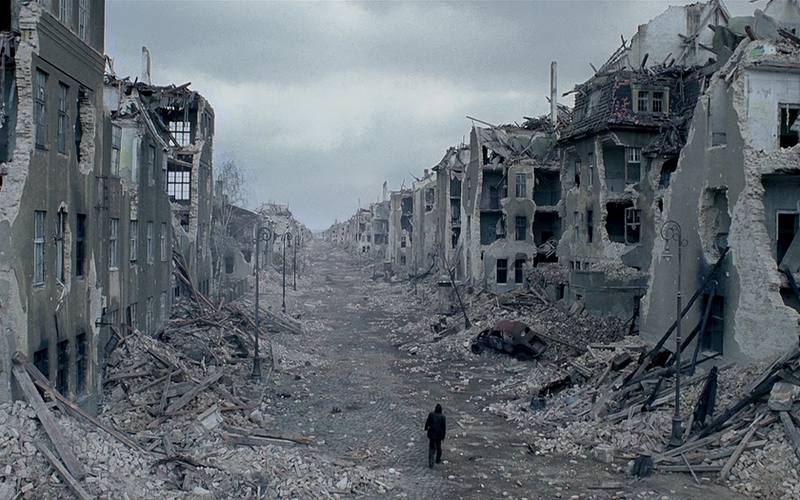 used to create the window casing trim details. As with the street, thinned plaster brick mortar is applied over and between the cork brick, the broken edges of the walls are detailed using bits of plaster and cork pressed into the Magic Sculpt. Slowly but surely the full scope of the “city” comes into being. In the background are the small base of the street and a pile of rubble already in place. In the foreground are the building sections or component pieces. I intentionally made these smaller sections as I figured it would be easier to paint and finish.
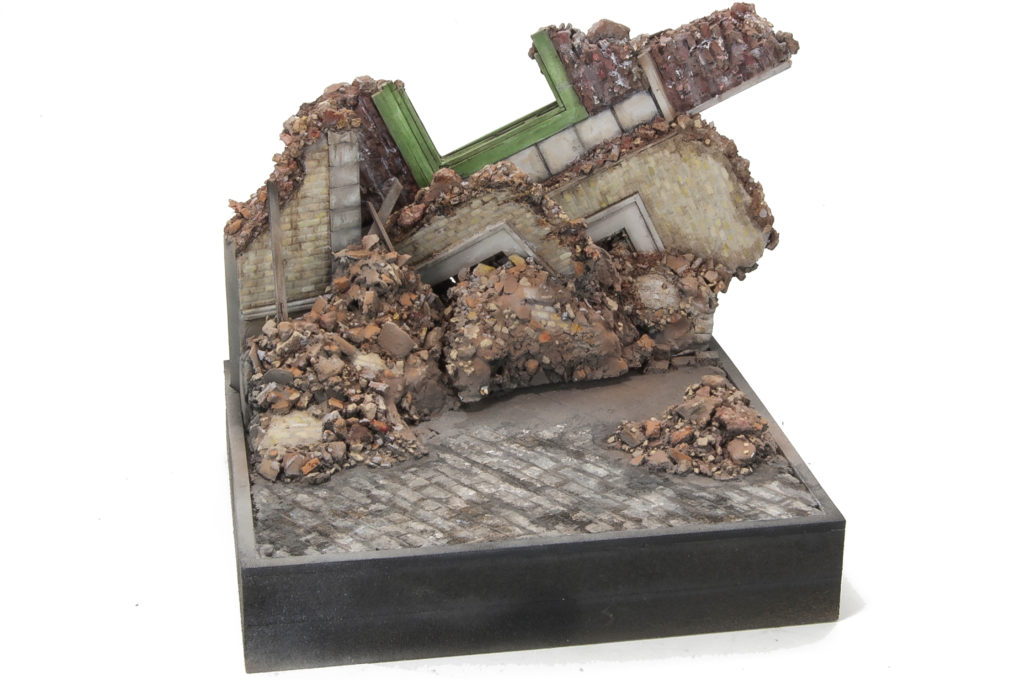
The Colors of Chaos
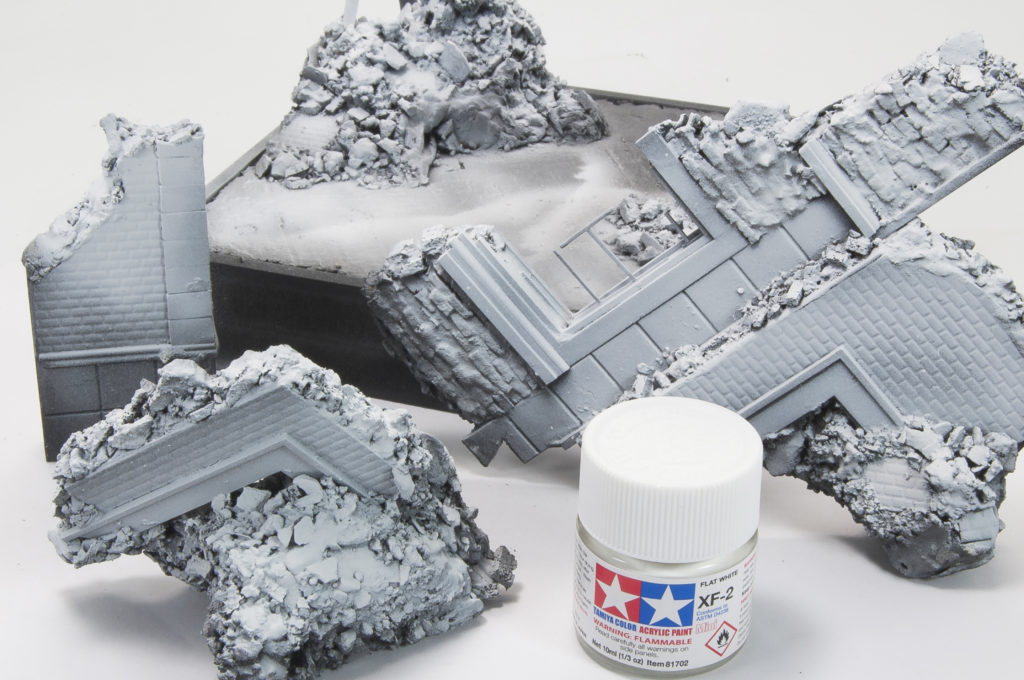
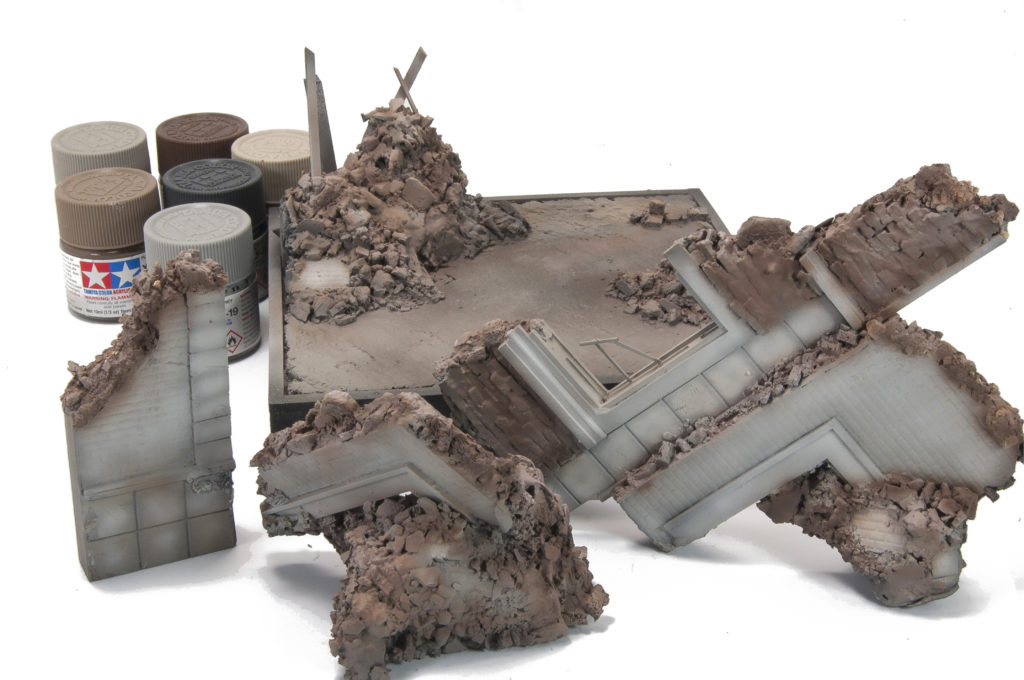
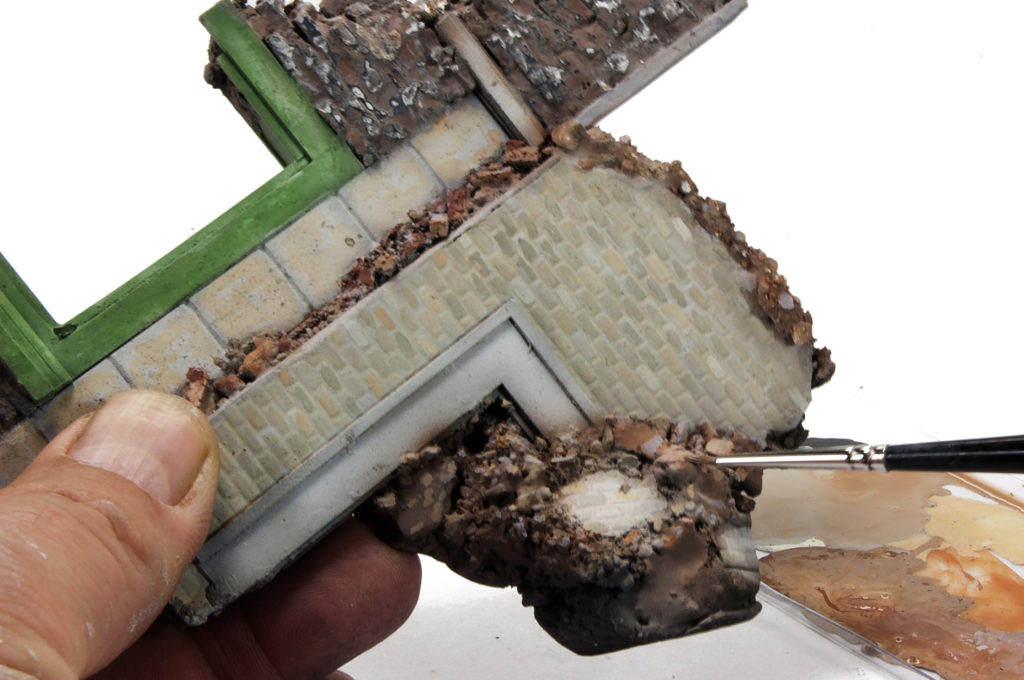
Speaking of painting – here we go! All of the surfaces are given a coating of black primer to provide deep shadows and cover any areas that I might miss when painting. But, of course, painting over the black primer would be difficult, so a layer of white was then sprayed overall. Notice that I have intentionally avoided full coverage of the black which results create interesting shadows and highlights across the surfaces.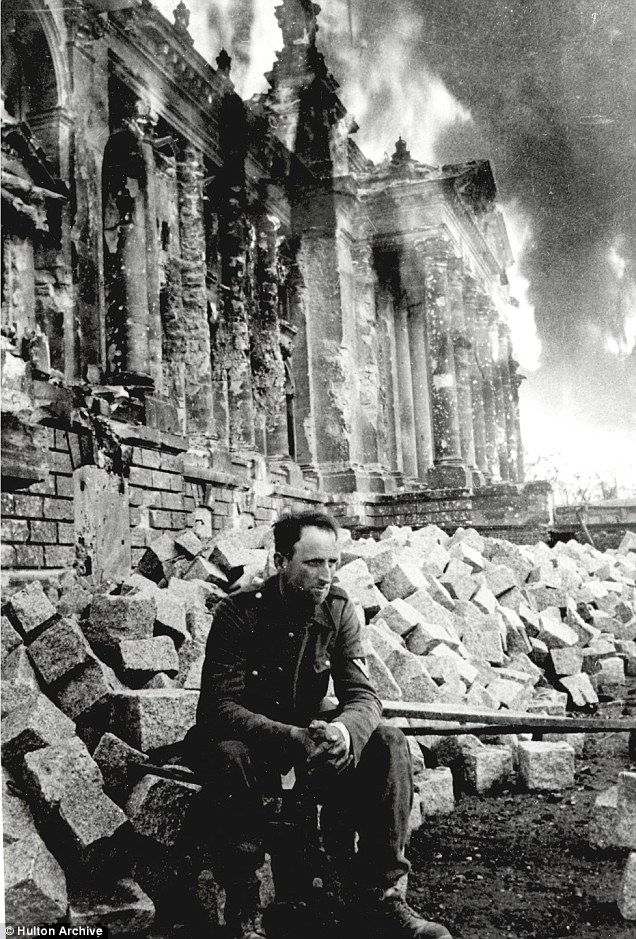 I used an assortment of Tamiya acrylic colors for the base colors of brick and concrete. Again, notice that the paint coverage is not complete as I will use this variance to my advantage as I work through the finishing. Then individual bricks and details are painted by hand using a fine tipped brush.
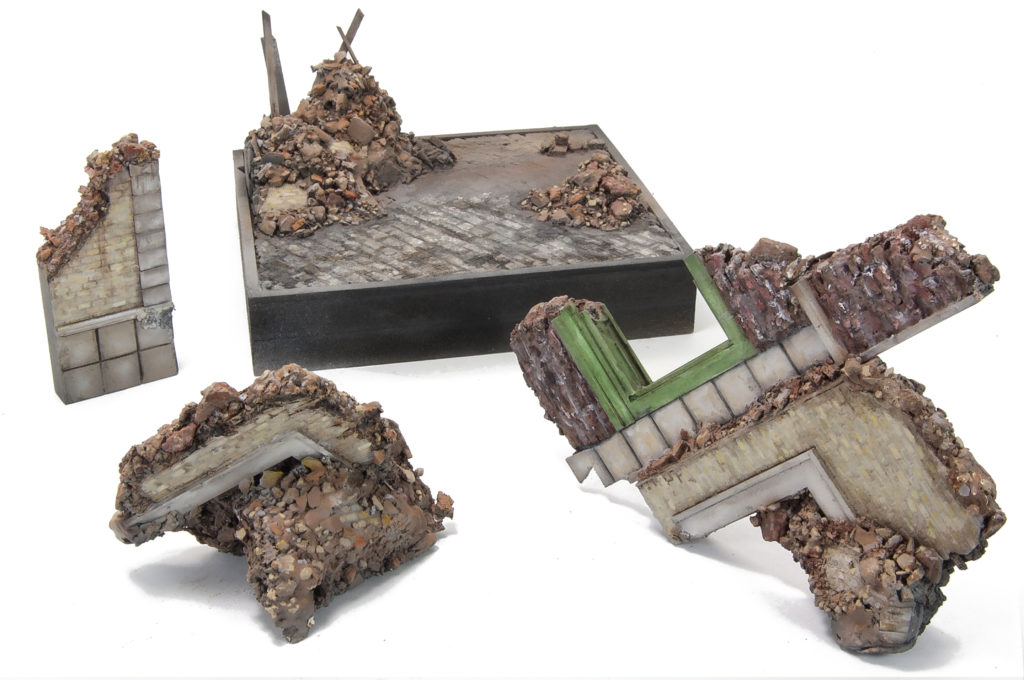
Once I have the building components painted I can now go ahead and affix them to the base. You can see how they were constructed to interlock together with only small areas, or seams that need to to be touched up so that everything looks unified. As you can imagine, painting all of this in sections was much easier than the alternative. More rubble and clutter is added to the scene, especially in those areas where the building sections come together to help camouflage the seam sections. All of this new rubble is carefully painted with the airbrush and hand brush to blend it in with the existing debris. The pile of rubble on the roof of the car makes it obvious how the windows came to be broken out!
Finally, enamel weathering effects are used throughout the scene, the rubble and the car, to add a dusty and grimy appearance. This step also helps to tone done some of the brightness of the acrylic painted rubble and unify the appearance overall. In a similar manner, pigments are applied throughout the scene to aid in the dusty appearance. This particular shade of pigment, Airfield Dust, is very good at providing a terracotta color to the debris.
![]()
Dear modellers,
I am enthusiastic about you modelling skills and I am also a modeller.
May I ask you:
Have anyone of you ever measured an original track link of a BT 5 or 7?
I would be very pleased with you answer,
thank you.
Best wishes from Reinhard, Germany
I have not measured the track links. Thanks for your comments.