
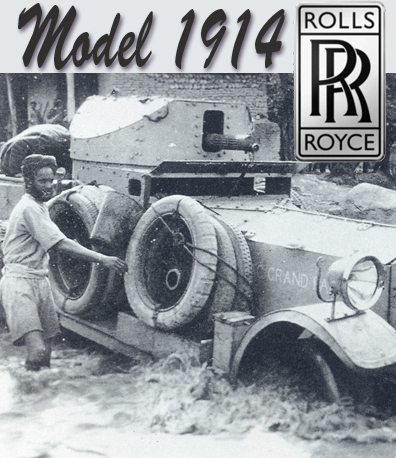
 The Armored Car stemmed from a 1914 report that Belgian soldiers were using an armor-plated Minerva sedan car to raid the German Army. Inspired by this knowledge, Rolls-Royce quickly armored an assortment of Rolls-Royce Silver Ghosts donated by private citizens. The cars were shielded with 3/8” thick armor plate, fitted with dual rear axles and two machine guns, with 3,000 rounds of ammunition. They carried a crew of three and despite their crudeness (and four ton weight), could reliably maintain 60 mph on dirt roads, thanks to the seven-liter, six-cylinder engine.
Each car had a five-foot steel machine gun turret, with an open wooden platform behind it. The hood was armor-plated and the vulnerable radiator shielded by two armored doors, which could be closed by the driver. The driver sat on the mattress-covered floor, leaning against a canvas sling, looking through a narrow slit. The only other alteration was to install 13 leaf springs in front and 15 leaf springs at the rear, for the added weight.
![]()
What’s Under the Hood?
Wow! Wow! Wow!
This was my first thought upon opening the box, feeling this sense of being somewhat overwhelmed. To begin, I took a glance at the instruction book as this is quite the impressive 40 page publication.
On opening the box and top layer of bubble wrap I found the kit building instructions, 5 small plastic bags and 2 lengths of brass rod, underneath the next layer were 3 further larger bags containing the wheel parts and engine/axel parts and underneath that 1 further bag with fenders and some body parts. Sitting separately were the chassis frame, tilt, turret and panels and a jig to assist in the making of the wheels. Finally, nestled at the bottom of the box are large frets of photo etch for the spoke wheels, the rear step, and rear and front and rear mudguard supports.
Gentlemen, Start your Engines

|

|

|

|

|

|

|

|

|

|

|

|

|

|

|

|

|

|

|

|

|

|
This is not my first experience building a kit from Resicast, but I am no less appreciative to their attention to a clear and logical instruction guide. The instruction booklet shows views of the assembly from multiple angles with each part clearly called out. The first stages of the construction consist of adding the numerous rods, support fittings to the underside of the chassis frame, along with the gear box, transmission, and axles. Looking forward in the instructions it appears that consideration is made for displaying the bonnet in either the open or closed position. At this point I have not yet decided whether to display the engine in the final presentation. However, using the supplied photographs as a guide I decided to add some basic wiring and detail to the engine and firewall. The front steering mechanism is a nice bit of engineering which allows the modeler to position the front tires.
Returning to the underside of the chassis just for a moment, the car has a pair of support bars that attach to the bottom of the frame. I’m not really sure the purposes of these are, though they appear to be some type of reinforcement or protective device. The bars are represented here using brass rod that is bent to shape following a pattern found in the instructions. The wire passes through a number of small support brackets and then attaches to the chassis. The small holes of the support brackets were a bit too small for the wire, requiring a quick pass with the mini drill to allow the brass wire to pass though the eyelet. Once I had the rod and brackets in place I returned to add just a small drop of CA to each joint for added strength. The rear cargo section and driving compartment area are presented as one, large cast piece with nicely patterned wooden planking as the flooring. The large, rear stowage lockers, rear gate, and mud flaps attach directly to this larger piece.
Turing the page of the instruction guide: “DELICATE STEP PROCEED SLOWLY and as follows:” This advisory, posted in bold letters sets the tone for the front fenders. The tricky part about the fenders is that they basically “float” to the sides of the vehicle suspended only by two small supports. The supports, in this case, are strips of photo etch which must be bent to shape and then attached to the chassis on one side, and underside of the fender on the other. Although the parts are fragile and the placement is fiddly, the instructions provide a number of photographs showing the assembly from varying angles along with a number of helpful tips printed in the margins. To the tops of the fenders are placed the small photo etch headlamp support brackets and lamps. To the rear of the lamps I added a small section of wire to represent the electrical connection.
The front engine compartment is cast as a single, large box onto which the small handles and fittings are attached. To the front are the armored doors which are fitted in a half-open position enabling views of the detailed radiator. Two large panels make up the “bonnet left and right” engine access hatches, which, if left in the open position afford excellent views of the engine. As you can see I chose to button my bonnet.
Topping the car is the large, round turret. Cast as a single piece the exterior of the turret is detailed with the top and rear hatches, as well as the flag pole which I replaced with brass rod. The interior is a spartan affair consisting mainly of the machine gun and housing brackets. The turret shell is attached to the turret ring which aligned perfectly with the main body of the car.
The final step of the assembly consists of the spoke wheels. I have to say that I was a little apprehensive about approaching these as they looked incredibly delicate and very complicated. Upon reviewing the instructions, however, I was relieved to see that Resicast has done an outstanding job in both engineering and instruction. The kit provides a mould, onto which the photo etch spokes are laid in between to two halves. By simply pressing the mould together a perfectly formed spoke wheel is shaped. At this point assembly is simply a matter of placing alternate spokes and spacers within the tire. A little care must be taken to recognize the differing width of the spacers and to the order in which they are place, but overall this is a very simple process.
Grey Ghost
I realized from the start of this project that when it came time for the painting and finishing I would need to break from some of my usual traditions. I did not feel that this vehicle would lend itself to the heavy weathering, chipping and wear that have grown routine in my work. In fact, this provided me the perfect opportunity to try some different ideas and to break out of my doldrums.
To begin, I sprayed a primer layer of Mr. Surfacer 1000 to unify the underlying construction and provide a solid base onto which I could begin the painting. I decided to tackle the wooded planking of the flooring first. Taking a cue from our friends who model WWI aircraft, I tried my hand at simulating the wooded tones and grain using a combination of acrylic and artists oil paints. I first spayed a base color using Vallejo Model Color Iraqi Sand, over which I applied very thin streaks of MIG Productions 502 Abteilung Wash Brown and Shadow Brown artist’s oils. A satisfactory first attempt, but I am anxious to practice this technique more as I have seen the excellent results achieved by others. The wooden area was then masked to protect it from the upcoming paintwork.

|

|

|

|

|

|
Pick a color! Looking at the available black & white period photographs it is difficult to determine the color of these vehicles. Information suggests that the RNAS cars were either painted an army green or a grey color. I did, however, have a very nice photograph of the marking as provided to me by a fellow modeler which proved very helpful. Finally, I decided that a classic Grey Ghost would be my choice for the vehicle’s color; I was ready to start.
To begin, I wanted to give added depth to the vehicle which began with an overall pre-shade color using Tamiya Nato Black. Over this I laid my base colors using Tamiya XF-66 Light Grey mixed with varying amounts of XF-2 Flat White for general panel color and highlights. Next, I turned to my Vallejo acrylic paints for adding depth and color interest. Panel lines, shadows, and highlights were sprayed on using Field Blue as my consistent base color into which I added varying amounts of 992 Neutral Grey and 951 White. The shaper demarcations of color tone were achieved by using a small piece of card stock as a masking tool. The rubber tires were painted using Vallejo 884 Stone Grey.
A light misting of Future acrylic polish followed to seal and prepares the paintwork for the decals. The decals are individual numbers and letter found in my stash, which matched very closely to the reference photo that I was using. Another light misting of Future to seal the decals and I was ready to proceed.
Breaking from my usual weathering traditions I skipped from adding chips or scuffs to the paintwork, rather wishing to preserve a kept appearance to the vehicle. I began the weathering process by applying dot filters of MIG Productions artist’s oils of Faded Navy Blue, Faded Grey, and Buff to the moistened surface. I followed this with numerous light pin wash applications into the panel lines and around the surface details. Again the colors that I used include the same grey and blue tones as I used before as I wished to accentuate the depth and create shadows to the overall grey colored body.
By this point I wanted to see how much of the weathering I could do using only the artist’s oils and filters; resisting the use of pigments. To dirty the vehicle I added MIG Productions Basic Earth to my color mix and applied this to the underside of the chassis, and inside the wheel wells. This same color, mixed with Light Mud was then used in areas over the upper surfaces to show accumulations of mud and grime. I varied the color mix from time to time, adding more or less Light Mud and by also adding small amounts of the Faded Navy Blue, Faded Grey, and Shadow Brown. Each application was done with a very light touch, and excess removed if necessary. To the left of the vehicle I chose leave off the spare tire, thus added a dirt ring where the tire might have been. A light touch using MIG Productions Filters helped to unify the weathering and added extra depth to the finish. Finally, I gave into the pigments and applied just a few light touches of MIG Productions pigments to the areas most prone to accumulate dirt and grime such as the running boards and around the wheels and tires.
Hit the Road
Nearing the end of the project, I decided that a small base was in order. The basic shape was created from a poured block of plaster. The raised sidewalk was created by gluing a piece of balsa wood then overlaying it with plastic styrene sheet. The cobble stone street was laid by cutting small shapes of plastic strip and then gluing each cobble stone to the street individually. The base was first sprayed with Krylon flat black, the color was added using a combination of Tamiya and Vallejo acrylic paints. Final weathering was done using MIG productions pigments and 502 Abteilung artists’ oils. The street lamp is also a MIG Productions item complete with photo etch brackets and a clear resin lamp.
Ride into the Sunset
A great subject and a great kit: In my mind this kit set the standard for all resin kits. More than once I had to remind myself that I was constructing a resin kit rather than injection; the fit was that good. Resicast has managed to make a complex assembly understandable and easy to execute. The forethought to include tools such as the jig for creating the perfect spoke wheels is highly commendable and speaks volumes to Resicast’s commitment to the modeler.