Tracing it’s beginnings to 1902, what began as the Tacheuchi Mining Company operating the Yusenji copper mine about 8 kilometers from Komatsu City later became the Komatsu Equipment Company in May, 1921.
In 1920, the mine ran into financial difficulties and ceased operations. At this time, the head of the mining company, Meitaro Tacheuchi, got together a group of investors to form Komatsu Manufacturing Company Ltd. Earlier, in 1911, an iron casting works had been built near Komatsu City and named Komatsu Ironworks. This ironworks was the foundation for Komatsu Manufacturing’s iron and steel casting. This same group was responsible for the manufacture of the first domestically produced Japanese vehicle, the DAT, which eventually became Datsun. Komatsu began crawler tractor production in 1932 with a copy of the Caterpillar 2-Ton crawler designated G25. In 1935, they released a copy of the Best 30, designated the G40.

In May 1937, the G40 was put up against a range of other tractor from other producers around the world in trials in Manchuria. The G40 out-performed all competitors but its gasoline engine was slightly less economical than the Cat RD4 which was its main competition. From these trials it was decided by the Japanese government that all agricultural tractors for Manchuria were to be diesel-fuelled. Komatsu began working on producing its own high-speed diesel engines. Their first diesel powered crawler was the G35, apparently released the same year.
|
|
|
|
|
|
|
|
|
|
|
|
|
|
|
|
|
|
|
|
Some years ago, what is believed to be the only surviving G35 was found on a farm near Griffith, New South Wales, Australia in working condition. It was shipped back to Japan where it now resides in a display of tractors at a Komatsu factory.
Rarely does a new release announcement catch my attention as did Tamiya’s recent Komatsu G40 Bulldozer. Perhaps it is just the little kid in me, but I am still fascinated when watching heavy equipment operating. And with all of these contemporary examples in use references for weathering are not hard to find. Upon opening the box I
am greeted by the little jewel inside – and I mean little. The built tractor measures approximately 2.5 inches long by 1.5 inches in height (6.3cm x 3.8cm) and a quick review of the parts show a high level of molding detail. The 7 step (yep, only 7 steps) instructions are in the familiar Tamiya format using exploded diagrams to show parts placement. Also included in the box is limited decal sheet, a metal IJN emblem, and supplemental sheet showing the dozer in period photographs.
The fit of this kit is flawless though-out, with little flash or seams to clean from the parts. Construction begins with the main chassis and engine hood and quickly moves to the underside where the suspension supports are added. The wheels and tracks are provided as a single piece, which look great and make assembly a breeze. The final step is the blade. The blade is a multi-part assembly which truly captures the feeling of weight of the real thing. The blade attaches to the dozer body along the lower sides and front arms with simple pins and slots. For ease of painting I would suggest leaving the blade separate and attaching once painting is completed.
Having planned to make this little dozer a forgotten relic of the long ago island campaigns I knew that I would need to perform a few alterations to make scene convincing. Thinking that the hydraulic hoses would probably have decayed and broken loose from their fittings I cut off the existing plastic hoses from the kit parts. These would be replaced by thin gauged solder and formed to hang loosely along the sides of the tractor. The driver seat would also need (lack of) attention to show similar aging and wear. Initially I had thought to totally replace the existing seat with a newly (de)constructed frame made from wire and scrap. Instead, being the somewhat lazy modeler that I am, I decided to try altering the kit part before scratching an entire new seat. I decided to take my pin drill and Xacto knife to carve and drill out varying sized holes and blemishes. To replicate the cushion springs I wound thin gauge wire to shape and glued them into the holes and blemishes. Around the edges I glued small patches of tissue paper to replicate the torn fabric. It turned out the solution was rather simple and I believe effectively replicates the look of a seat left out to the elements.
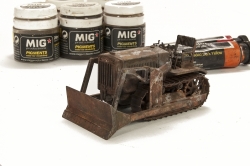
Layers, this is our word for the day. It turns out that painting a rusted relic involves quite a lot of planning and forethought – more that I had anticipated. In my opinion, an important component in this type of finish is the element of randomness that occurs from natural conditions. In looking at any example of heavily weathered equipment reveal a rainbow of colors and textures.
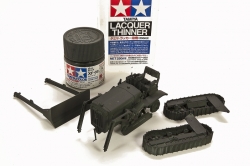
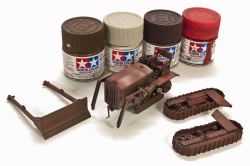
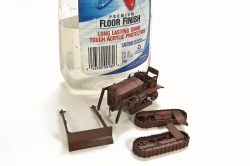
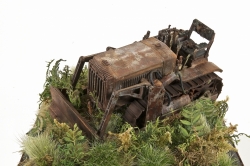
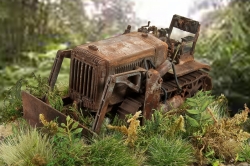
I began by giving the entire model an underlying color layer of Tamiya NATO Black to produce my deepest shadows. Over this I sprayed my rust layer of colors of Tamiya Hull Red, Red Brown, Deck Tan, and Clear Red. And, although ultimately this layer of color would be painted over, scrubbed, and generally abused during the weathering process I believe that even at this early stage it is important to add visual interest. From the photos you might notice that the color coverage is not uniform and that there are color variations over the surfaces. I then protected this layer with a light misting of Johnson’s Future acrylic floor polish.
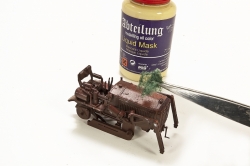
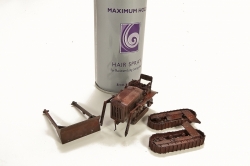
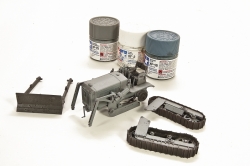
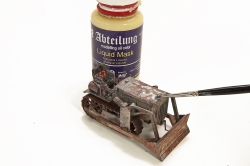
Let’s count the layers…shall we? Layer three comprised of small dabs of MIG Productions Liquid Mask applied with a Scotch Brite pad to create small, deep “rusty” nicks on the surface. Layer four is a visit to the beauty shop for a hairspray makeover. Next I applied the vehicles grey colors using Tamiya IJN Grey mixed with Flat White and Medium Blue. Again, these colors are applied with varying colors and consistency – layer five.
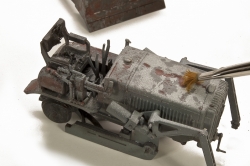
Addition and subtraction. The principal behind using the hairspray as an underlying layer is that when water is applied over the surface, certain areas of the hairspray will dissolve and lift off the overlying paint. A little scrubbing with a stiff brush is all that is needed to promote this effect. I tried to “enhance” this effect by combining it with the initial liquid masking layer. From the photos I hope that you see the difference in exposed layers from where the hairspray alone has removed paint layers and those areas where hairspray and liquid mask combined to create different effects. Layer Five minus Two?
At this point I am pleased with the resulting appearance, but there is more to do. I am planning on using artist’s oils and pigments in the latter stages, but I also want to preserve some of the more vibrant patches I have right now of the vehicles grey colors. To protect these I once again use MIG Productions Liquid Mask for a quick protective layer. Layer equals (five minus two) plus one.
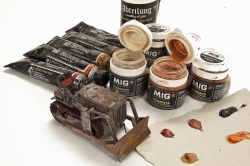
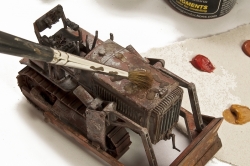
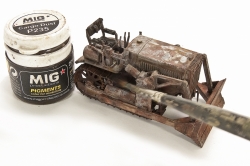
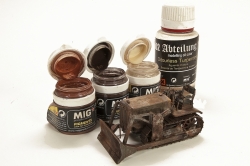
From this point forward layer counting becomes very complex as an almost simultaneous use of MIG Productions pigments and 502 Abteilung artist’s oils are used to add visual interest and complexity to the surfaces. One technique that I tried for the first time to good result was to lightly dab a color of artist’s oils onto the surface – Shadow Brown, German Ochre, Light Rust, Faded German Yellow – and then quickly dab dried pigment colors onto the wet oils. These ingredients mixed and dried to very convincing patinas. I also employed my usual approaches to weathering of using artist’s oils to help define certain shapes and contours with thin color applications. Shadows were defined using pin washes. In addition to dabbing the pigments onto the wet artist’s oils I also used my usual method of first dissolving them in turpentine and applying them with a small brush to certain areas. I like this method because it allows for greater control for placing the pigments exactly where intended. Layers, I ran out of fingers to count on!!
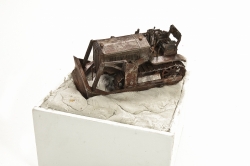
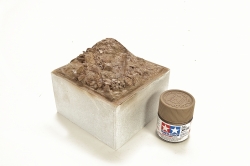
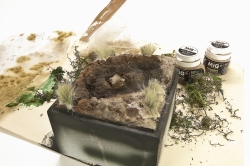
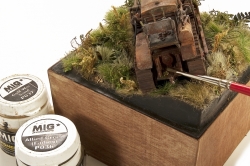
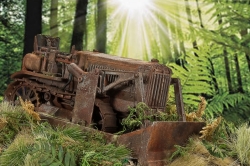
I am a big believer that even a simple scenic base is an important element in the telling of the story. For this story I wanted to show the passage of time as the jungle slowly encroaches and overtakes the forgotten dozer. To begin I made a simple 4”x4” cube to be used for the base platform. Over this I applied a rough layer of Apoxie Sculpt to make the basic ground contours including pressing the dozer into the putty to make sure that it really set into the scene. Once the putty had dried I built up the surfaces using Plaster of Paris and then painted the groundwork a base color of Tamiya Flat Earth. The majority of the vegetation is dried moss found at the local crafts store that I colored submersing in thinned acrylic paint baths of greens and yellows. Other plant life came from Silfor grass, Woodland Scenes, and few of the Kamizukuri laser cut paper leaves. Once the model has been placed on the scene I made the last weathering adjustments by adding some the effects of mossy build-up by dabbing a little bit of MIG Productions Allied Green and Gulf War Sand into certain recesses and corners of the dozer.
This is one of those projects that really brought a smile to my face. As I mentioned earlier I am a big fan of this type of subject matter and with construction comprising only 7 steps this kit makes for a perfect afternoon project; leaving plenty of time and energy to be devoted to the painting and finishing steps. Using layers, adding and subtracting, is a powerful technique to bring real life effects to our small scale world.
