
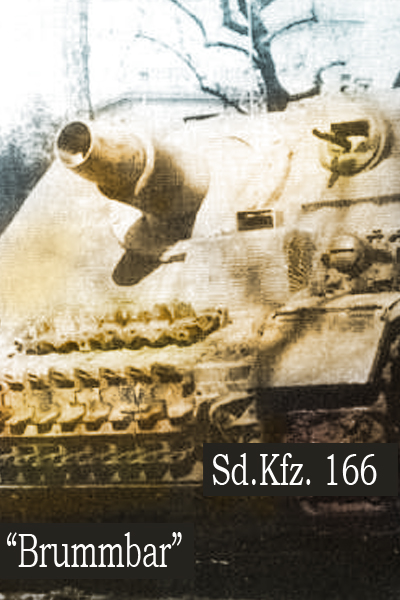
 Ah, the enjoyment of receiving a package from the Boys in Brown, especially when I know that it contains a Stu.Pz.IV “Brummbar”. During the course of one of our frequent email conversations, MMiR editorial assistant, modeler, and all around nice guy Jeff Kleinhenz mentioned that he was feeling short on time asked if I would be interested in doing the finish work on the Brummbar that he was working on. Let me get this straight; I get to jump ahead to the fun parts? No construction, just painting and weathering? Well, this is a nice change of pace. Oh yes, there was one thing, I would need to apply the Zimmerit.
![]()
Opening the box I was greeted by the mostly completed kit. The major portion had been constructed and left in sub-assemblies. Taking out the instructions and arranging the parts before me I made myself acquainted with the kit and Jeff’s progress. As this is a 2 in 1 kit I could see where Jeff had made notes in the margins as he followed a particular reference, in this case the Aberdeen example. In other areas Jeff had made comments regarding areas that required extra trimming or sections that had been skipped until after the Zimmerit. I was pleased by detail of the kit parts and I was particularly impressed by Jeff’s building skills. There wasn’t much left for me to do but get on with the Zimmerit.
This would be only my second project that I have applied the anti-magnetic paste, the other being a little1:48 StuG IV. As on the first project, once again I am using the Mori Mori putty. The putty is a 2-part process affair comprising of a tube of a toothpaste consistency paste and a second small bottle containing a yellow, liquid catalyst. Drying (working) time can be determined by the amount of catalyst that you mix into the paste. I squeezed a small dollop of the paste onto a piece of scrap plastic, then using the tip of a toothpick I add a small touch of the bright yellow catalyst – just a small hint of the catalyst results in a light, creamy yellow appearance.
Rough Around the Edges – Applying Zimmerit
Realizing that there are many techniques to creating the distinctive texture of Zimmerit, I chose to cast my texture using a set of Model Kasten Zimmerit tools. The tool set contains two handles and four different sized patterns; two stamps and two wheels. I also made handy a small sized screw driver in order to get to those hard to reach areas. Not being one to wait, I started straight away applying paste to one of the lesser exposed areas of the vehicle; the lower hull. Using a small scrap of plastic as a spatula I spread a thin layer of the paste onto the surface then let is set for approximately 1 minute. My preferred tool tended to be the small rollers as it makes very quick work of laying on the pattern. Simply roll vertical lines, one next to the other until a section is completed. The putty, if mixed to a light creamy yellow color, provides for a working time of about 3 minutes before becoming hardened. Until it has set it is possible to work, and rework an area until satisfied; a feature that I took full advantage of. Section by section I worked around the vehicle, usually one panel at a time allowing it to dry before moving onto the next. Every so often I had a little trouble with the putty sticking to the Zimmerit tools, but found that a light spray of WD40 onto the tools helped prevent this from occurring.
Where did Jeff Leave Off?
 With the Zimmerit completed I moved back to more familiar territory, plastic and liquid cement. Picking up where Jeff left off I added the numerous fittings, brackets and details to be found on the Strumpanzer. In the area of the instructions regarding the installation of the interior floor and firewall, Step 17, Jeff made note that this assembly (parts D11, D6, D7, D24-26) should be installed earlier in the build sequence. This step also concerns the installation of the gun which came to me already assembled, Jeff’s excellent work clearly on display. The margin notes stated “too tall” with a broad circle drawn around the diagram of the gun. Apparently dry fit had shown that the gun/mount is too tall to fit into the superstructure. This was confirmed by my tests as well. For a solution I simply sanded down the bottom of the mounting plate, thus lowering the gun until a proper fit was realized.
When it doubt, paint it like the box.

|

|

|

|

|

|

|

|

|

|

|

|

|

|

|

|

|

|
|
|
|
The painting of the Brummbar presents two interesting issues for me personally. First, I have extremely limited experience with Zimmerit coated surfaces. My concern is that that by the very nature of the surface texture, the finish could become irreversibly dark, very quickly, My second concern is my own personal issue; I find lighter base colored vehicles particularly difficult. A bit of a psychological block, I suppose, but I seem to always struggle with the definition and weathering over lighter colors.
I decided to tackle both of these concerns by using some of the principals of the Color Modulation Style. My hope was that by forcing extra highlights and shadows within the base color, providing an interesting, lively base that I hoped would require less need for darkening filters and washes. The base color is Tamiya Dark Yellow into which I add a good deal of Tamiya white, cut with Tamiya lacquer thinner. With this light color I applied an overall covering, paying particularly attention to be sure that I had complete coverage on the upper surfaces the shadow colors followed, consisting of Dark Yellow mixed with a few drops of Tamiya NATO Black. Between these two contrasting tones I blended the colors by spraying the area with a mid tone Tamiya Dark Yellow with only a few drops of White.
 Over the base color I applied the camouflage pattern as shown from the box art and instruction examples. The light brown color is mixed from Tamiya Red Brown mixed with a few drops of Tamiya Wooden Deck Tan. Next, using Vallejo acrylics I began initial weathering by applying light buff and yellow filters adding interest and individuality to the features. Then, still using Vallejo acrylics and with a new, fine brush I spent a relaxing afternoon adding the numerous light chips, scratches and scuffs to the surface. Over the scratches I applied yet another round of thin acrylic filters. These final filters not only serves to subtly alter the base color, but also act as an agent that shift the appearance of certain scratches and chips deeper into the surface, while making other marks more pronounced. Before proceeding any further I sprayed an overall coat of Future polish then applied the decals. I was a bit concerned to be applying decals over the Zimmerit surfaces, but with the use of Microscale Micro Sol they settled down completely.
Switching to artist’s oils I applied dot filters to the large surface areas of the vehicle. The color palate was primarily light shades of white, creams and ochre’s, though I also used red in certain places to add subtle warmth to the finish. After the filters had dried, oils work continued as I painted my way around the vehicle working MIG Productions Shadow Brown into all of the nooks and crannies to bring additional definition and weight to the finish. Working with oils is a slow process due to the drying time involved, but I believe well worth the wait as they bring a level of richness not available through other means. By this stage, the weathering process is such a back-n-forth affair, for me, that it is a little difficult for me to accurately describe the process. Suffice to say, it’s not a linear path and this project seemed to wander around more than usual.
Are We Done Yet?
 It is about this stage that I begin to make refinements with an eye toward the final composition. Pin washes of Raw Umber, Shadow Brown, and German Ochre are used to bring definition and crispness to the features. As with acrylics, I find that artist’s oils have certain limitations as well and there seems to be a certain point and I know that I am getting near the finish when I bring out my jars of pigments.
As usual for me I dissolve the pigments in mineral spirits before application. The lower hull and running gear first receive large, broad washes of pigments to begin the process of mud and dirt accumulations. To the upper surfaces I use more restraint by using a smaller brush to carefully place the pigments directly to the wanted areas. Again, working with dissolved pigments tends to slow the process, but I find the added control worth the extra time.
It was at this point where I was going to call this one finished. Matter of fact, I was in the process of taking the final “beauty” shots for this article when, while reviewing the photos, I felt that something was missing. At first I couldn’t quite place it, the Brummbar looked okay to my eyes, but the camera shots left something to be desired. Finally it struck me that it seemed to lack the lumbering sense of purpose that I was looking for. It needed more weight. The solution was to add mud in the form of plaster mixed with white glue, water, paint and pigments to the lower hull. Actually, quite a liberal application of mud, gun, and pigments was given to the hull, tracks and lower hull, but it seemed to give the vehicle the sense of weight and purpose that I was looking for. After adding the extra plaster and pigments I returned with pin washes and small brushes to “re-tighten” the finish. I completed the work using both Model Master Burnt Aluminum and silver Prismacolor pencils to add polished steel effects to the tracks.
Zimmerit, the final frontier?
Having the opportunity to finish this great project as begun by my friend Jeff Kleinhenz has really been a privilege. Although I only spent limited time in the construction of this kit, it is apparent that Dragon has presented the modeler with an excellent offering. This “Stupa” certainly makes a welcomed addition to my display case.
 Given the fact that many German subjects carry the anti-magnetic paste makes it almost inevitable that sooner or later you will have a project on the bench requiring Zimmerit. In fact, Zimmerit has created a thriving business for the aftermarket folks. Not to take anything away from these offerings as there are many very fine examples of resin or etched Zimmerit available. However, the option of doing the application yourself is relatively simple and very rewarding.